TTS AAR: Anglo-Normans versus Hittites

Time for the re-match: swapping sides so this time I would take the Anglo-Normans and Neil would play the Hittites.

As the game began, I made a bold move down the left flank: sending William the B, Bishop Odo and half my Milites thundering forward to curl round and take the Hittites in the rear.

The Hittites were obviously quick to react, threatening to flank my outflankers. No problem, I thought, it’s my turn and I’ll just move forward out of reach.

This was a bit annoying, to say the least, but the Norman knights are good troops, and I managed to extract them from the mess and even hurt the pesky Syrian light chariots who had tried to rear-end them in the process.

More chariot versus knights fighting followed, with disaster striking the Anglo-Normans as although we killed some more Hittite chariots, William the B was struck down in his prime.

This had serious consequences, as although Bishop Odo had broken through and was riding down the final unit of Hittite chariots on the left, being out-of-command meant that what would usually have been the best ‘pursuit’ card to draw ended up being a failure to move forward, and exposed the Bishop’s rear to more Hittite attacks.

Meanwhile, in the centre, the two infantry lines had come to together and a grinding melee developed.

The Hittites had more chariots, however, and they now burst round my right flank to threaten my camps, guarded only by light infantry - easy meat for the rampaging chariots.

Back to the centre, and the Norman and Anglo-Saxon infantry were gaining the advantage…and Bishop Odo was still alive and kicking!

The situation at the camp was critical (early losses meant that I couldn’t afford to lose it) so I threw everything I could into holding it against the Hittite chariot attack.

It was a close run thing, but eventually the situation was stabilised.

Meanwhile, the situation in the centre had taken an unusual turn, with the Hittite foot, at first looking as if they were going to be overwhelmed, managing to extricate themselves from the danger, leading to a situation that I don’t think I’ve ever seen before:

If you look closely, you will see that the Hittites have the advantage: they have managed to rush back chariots to gain the flank of one of my infantry units, and damage one of the Fyrd units almost to the point of destruction.

Both sides had been haemorrhaging victory medals at a rapid rate of knots, so as the melee resumed, it was a case of sudden death: whoever lost two units would lose the game.

Unfortunately, as luck would have it, it was the Hittites who drew the required blood first, with the Anglo-Normans carrying William the B’s body off with them as they retreated from the field!

So a narrow defeat for the Anglo-Normans, but a great game overall. Much excitement as the fortunes of war swung backwards and forwards, with many desperate moments for both sides!

TTS AAR: Hittites versus Anglo-Normans

Time for another bout of To The Strongest with friend Neil. I would field the Hittites, Neil would play the Anglo-Normans.

The game began with my ally Syrian light chariots storming up one side of the battlefield to outflank the anglo-Norman line.

They got themselves into a perfect position, but then the cards decided to punish me for some former infraction meaning that the Syrians unexpectedly halted until the moment of advantage had passed!

Meanwhile, on the other side of the table, a massive melee had broken out between the Anglo-Norman cavalry and Fyrd and the Hittite infantry and chariots.

In the last photo, below, you can also see the Syrian light cavalry attemtpign to take the Anglo-Norman camp.

The mass melee caused carnage on both sides, leading to a battlefield almost denuded of troops.

But unfortunately it was the Anglo-Normans who recovered first, sending Norman Milites crashing through a unit of Hittite chariots led by a general. With that my last victory medlas were gone, along with the game!

A great game that could have gone either way at many points during the battle.

Somewhat annoying that my light chariots hadn’t managed to get properly stuck in on the flank, and that I lost the central melee clash in a way that left my troops vulnerable in the clearing up exercise that followed, but a good lesson in how powerful Norman Milites are!

Now to fight it again with the sides swapped over…

Hittite City Gates from Red Copper/Baueda

I needed a camp for my Hittites so thought I would follow what I’ve been doing so far and use the Red Copper STL of a Hittite City Gate that looked pretty good to me.

The only problm is that I wanted the camp to fit on a 10cm x 10cm base and the size of the full tower-gate-tower of the original was just over 15cm in width. No problem: those nice people at Baueda scaled and printed the components for me so that they fit beautifully onto one of my camp bases.

The individual pieces linked together well, with only a very slight bit of shaving to get a tight fit. Note that I left the rear end open to facilitate using the camp to store tokens etc during a game.

I painted the main towers and walls with a sponge (one of the sponges that protects figures in a blister pack will do the trick), then re-painted the stonework at the base of the walls in grey, washed with a Contrast grey, then highlighted with a lighter colour.

I did try drybrushing the walls in a light colour, but just couldn’t get the effect I wanted, so had to re-paint the test area again. On reflection, the un-drybrushed walls are a good contrast to the heavily drybrushed base.

I then painted the roofs and beams in a warm brown, and the window frames in what I would call a biblical blue.

All in all, I’m very happy with this kit: highly recommended.

Ottoman Command from Khurasan

Friend Rob was kind enough to paint some Ottoman command figures for me.

These are the Khurasan specials from their Ottoman range that I will use as officers and heroes.

Exquisite paint jobs!

Gasgans join the Hittites

Battling Rob’s Siamese at 160 points made me realise that I needed a few more units for my Hittite army.

Not wanting to just get more of the same, I determined to get a couple of units of Khurasan Miniatures’ Gasgans to join them: the Gasgans were highlanders living in the mountains of Northwestern Anatolia at the time of the Hittite kingdom and empire who were both enemies of, and drafted into, the Hittite army.

The deciding factor was the snake priestess pictured on the right: a suitable Hero for my Hittites and available as part of the Gasgan chariot package!

Snake priestess aside, I now have a unit of Gasgan infantry and a unit of Gasgan chariots.

The infantry are nice sculpts. They are a little smaller than the Red Copper prints and the metal of the spears that some of them are carrying is quite thin, so bends very easily if accidentally bashed. They paint up very easily: only four colours of Contrast Paints (flesh, bone, wood, black) with bronze and a colour for the kilt edges to finish.

The chariots are okay sculpts: in that there was quite a lot of roughly finished areas on the chariot body sides.

As a positive, however, the main strut out from the body ends in the head of a snake, making them (if nothing else) very distinctive!

So a distinctive addition to the Hittites, making them all ready for the planned re-match with the Thais!

TTS AAR: Double Debut - Hittites vs Siamese

Regular visitors to the site will know that I have been building a 15mm Hittite army using Red Copper scultpts printed by Baueda. At the same time as I have been doing that, friend Rob has been building a 15mm Siamese (Thai) army using Khurasan figures (Rob reports that these are excellent, but that the spears are a bit flimsy and easily bend out of shape).

With both armies now 90% finished, it was time to get them onto the tabletop. Two newly-painted armies each making their debut? Given popular superstition, what could possibly go wrong!

As we both wanted to get as many of our figures onto the table as possible, we would play the game large at 160 points per side. This meant that I had to proxy in some Assyrians and Sumerians to face Rob’s Thai hordes!

The Siamese army could have been designed to fight Hittites. Elephants would disrupt my main chariot strike force, with their supporting spearmen proving equally tricky to beat when defending. Fortunately I won the scouting (thank you to the ally-Syrian light chariots, only varnished that morning!) so would be able see some of Rob’s units deploy before I had to set up myself.

Historically, Hittites fought with their chariots in front, infantry behind, but (given the above) that wouldn’t work here. I therefore determined to deploy in what I would call a more traditional manner atypical to the Hittites: infantry in the centre, chariots on the wings.

With Rob deploying all his cavalry on his right flank, a plan began to form: send one brigade of chariots forward to crush his cavalry (my lances should give me the advantage); then use the centre infantry and right chariots to pin the rest of his line whilst the ally-Syrians looped around the Thai far-left flank using their bows to take out the elephants there without actually making contact. Genius!

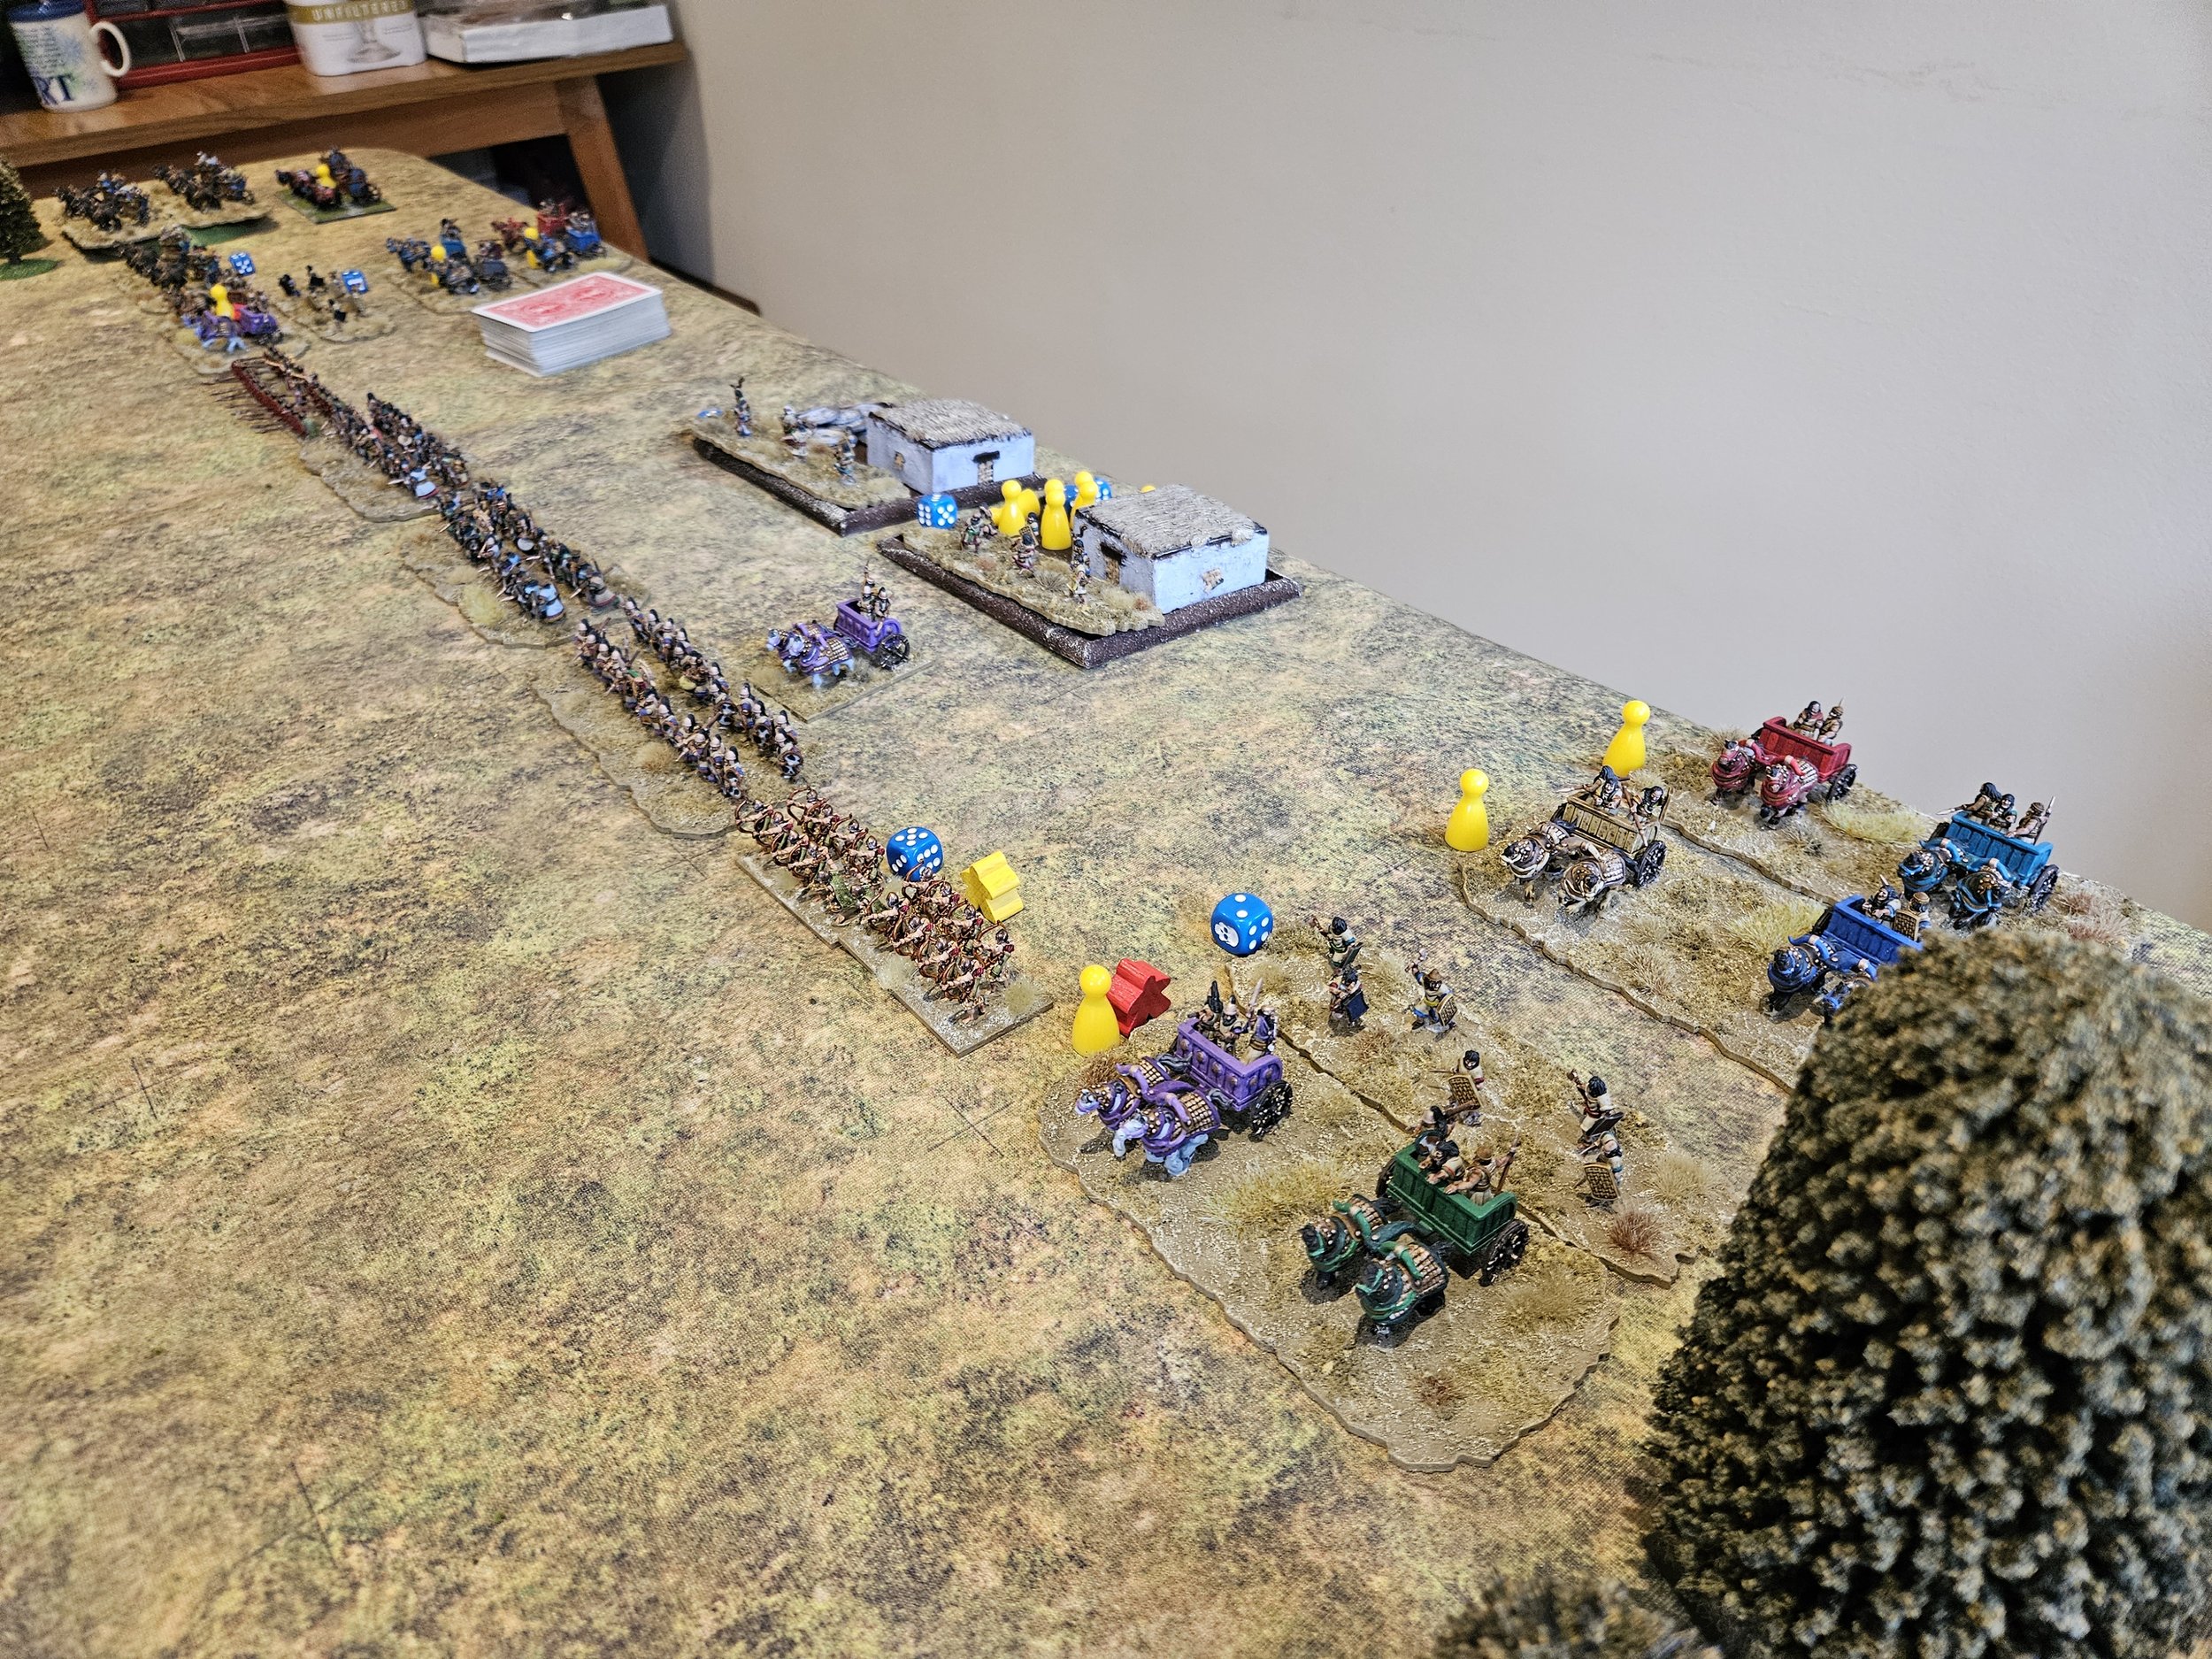
As the battle began, both sides advanced forward smartly, although the Siamese were plagued by a couple of Aces in their initial group moves. Here’s a picture of the action just before we closed. Hopefully you can see that my plan is beginning to get underway!

The battle then divided into three parts: the left, the centre and the right.

On the right hand side of the field, the ally-Syrian light chariots and half my heavy chariots tried to keep his elephants and infantry occupied without actually closing to what would surely be an unfortunate combat.

This they largely achieved: the lights evading away from pachyderm charges, even sometimes being knocked temporarily off table; the heavies by dint of refusing to charge and even edging backwards as the nellies came forward. I was happy to be charged by spearmen, but wouldn’t initiate any charges into a set line of men carrying nasty, pointy sticks!

In the centre, things did not go so well. Hordes of enemy spearmen, with archers behind, came forward and routed my line infantry. By the final stages of the battle, only one unit of line infantry remained standing, and I was forced to re-deploy some of the heavy chariots as a reserve.

I was a bit surprised that the victorious Siamese infantry didn’t rush forward in an attempt to sack my two camps, defended only by some petty scummy light troops, but Rob said afterwards that he felt at that stage that the infantry needed to turn back and help out the flanks.

Whatever he chose to do, it was very unnerving to see six enemy units (half spearmen, half bow) with nothing in front of them except my regret that my infantry hadn’t stopped them!

Which meant that the battle would, as planned, need to be won on my left.

There, my chariots charged the Siamese cavalry as soon as they could, with fairly disappointing results. Rather than smash them from the field, the chariots got locked into a bitter combat in which neither side had the advantage.

This meant I had to divert the archers and Royal Guard from the centre onto this wing - part of the reason why the centre collapsed! The bowmen moved up to support the chariot runners who had engaged the enemy elephants, keeping them from interfering with the chariots vs cavalry combat. The Royal Guard also charged the elephants, promptly becoming disordered!

Fortunately my overall commander was on hand to rally them, as I was going to need them as although one unit of chariots had broken through, they had become disordered in the process, and another unit of enemy horse was moving up to engage them. My other chariots were still locked into a mutually-disordering combat with the cavalry.

I needed something special to swing things my way and, with Lady Luck supporting me for a change, the Royal Guard showed what they could do.

The enemy elephants were disposed of and then the Guard turned left and rolled up not one but both cavalry units: in the picture below you can see that their last two activation cards were a couple of 10’s. In effect, in one activation, they had dealt with the elephants and two units of Siamese horse: definitely a battle honour coming their way!

The Siamese weren’t broken yet though, and their centre was swinging round towards my left flank.

The Royal Guard neatly reversed direction and headed back into the fray. I even had a reserve chariot unit, headed by a General, that could jump in as well.

This was a good thing, particularly as my right was now coming under considerable pressure (the first picture in the gallery, below).

With his centre’s expansion contained, a unti of chariot runners were able to take an enemy camp, and a unit of chariots postion themselves to charge the rear of the main Siamese line.

This, however, proved unnecessary as, again, the Royal Guard charegd forward and smashed a unit of enemy spearmen from the table (they’d been softened up by the archers). That cost the Siamese their last two coins, and the victory was mine.

I had definitely been lucky to survive that one!

Things were looking extremely dicey before the Royal Guard went turbo and mullered three units in one turn. I was also lucky with the cards when I needed my left flank to about face and head into the centre/the enemy’s rear.

A great game, played in excellent spirit, and nice to finally get the Hittites (and the Siamese) onto the table.

Last of the Red Copper Hittites

As the Hittites were due to make their debut on the battlefield this weekend just gone, last week was spent frantically painting the last of them.

First up was a final chariot base:

I’ve tried to make all the heavy, three-man chariots a different colour and, actually, the grey one on the right came out quite well.

Next up are the slingers: two units of light infantry. These are amazing sculpts: both realistic and dynamic in equal measure. I just love the poses: look at the chap squatting on his haunches looking for possible targets, and all the different varieties of figures actually discharging their slings. Fantastic.

I’ve also sneaked a single ally-Syrian archer onto the left-hand picture, above. A bit of variety and a lesson in always making sure you order enough figures!

Keeping to a Syrian theme, here are three ally-Syrian light chariots. These are once again fantastic sculpts that are really full of life and movement. I decided to paint them in a way that contrasted with the brightly coloured Hittite chariots, so these use all the same colour bay/brown horses and a combination of dark browns and yellows for the chariot bodies.

So that’s the Red Copper Hittites done, although I am going to add some Gashkan (Anatolian mountain men) allies with figures bought from Khurasan.

Hittite Chariots and Chariot Runners

The Hittites are coming along nicely now with the addition of another bases of chariots and two bases of light infantry chariot runners.

As with all the Hittites so far, these are 15mm Red Copper miniatures 3D printed by Baueda in Italy. Yes, the lead time is slightly extended, but I have found the Baueda prints very high quality and as there’s a set postage fee of €12.50 however much you order and wherever it’s going to, buying in volume makes the whole process very cost-effective indeed. Recommended as a source of the Red Copper range.

First up are another two heavy three-man chariots. It looks like the chariot on the left is only manned by two crew, but that’s because there’s a chap taking a breather sitting on the back of the chariot, presumably regularly asking “are we there yet?” to his two comrades!

I can’t emphasise how nice these models look in real life. They’re a pleasure to paint too, with the relief so clear that getting the ‘plank’ effect on the chariot bodies is easy (you just have to stay within the lines!) and the horse-armour just about paints itself (dry-brushed bronze over a Snakebite Leather base if you’re interested).

Then I’ve finished a couple of bases of light infantry chariot runners. In To The Strongest, these are light infantry with javelins, but I quite like the light axemen look of the Red Copper figures:

Again, very easy to paint and highly recommended.

Now onto the rest of the light infantry, the ally-Syrian light chariots, and more chariots…

More Hittites

Here are the next few units for my 15mm Hittite army using Red Copper Miniatures, once again ordered from Baueda in Italy as there seems to be a distinct shortage of UK 3D printers doing the Red Copper range and I have always found Baueda very reliable and fairly priced.

First up is another unit of Spearmen, meaning that I now have all the regular infantry I need.

Hittite Spearmen from Red Copper Miniatures

And then we have two sets of Hittite chariots, meaning that I only have one set of Hittite chariots to go, although there are three bases worth of lighter Syrian chariots needed as well.

The second chariot in from the left is a command chariot.

Lovely figures all, and easy to paint up and base. Highly recommended.

So now a little wait until the next batch arrive for painting!

More Hittites

A couple more units for my 15mm Hittite army using Red Copper miniatures printed by Baueda.

First up is the first of the command bases: a unit of 3-man chariots with attached General:

Next is the first unti of line spearmen: quite a chore to paint with all their different robe and shield colours:

Very nice figures: very easy to paint and enough variety to make the units look good.

Now to paint the same again for the next batch!

First of the Hittites

I mentioned in a previous post that I was so happy with the 3D printed Red Copper New Kingdom Egyptians that I had printed by Baueda to fill in the gaps of my newly-rebased NKE army that I decided to do what I’ve been wanting to do for some time and get a 15mm Hittite army for them to fight.

I duly ordered the figures, again getting Red Copper 3D sculpts printed by Baueda (under a week to print the figures, only four days in the post from Italy) and went to work, starting with a base of Hittite chariotry and a base of the Royal Guard.

The chariots are, again, fantastic sculpts. The chariot bodies come with very clearly defined panels, making it very easy to get the striped effect you can see above. These were painted all over in a dark colour, then highlighted in a lighter version of the same colour, standard acrylics.

The crew are as easy to paint as the NKE infantry were, and are, as you can hopefully see, full of character. The three charioteers actually fit into the chariot body without being too crowded: snug but not rush-hour tube, and have plenty of variants to make the base look unique.

The horses are the most fun to paint. Again, clear relief and detail to show you exactly where to put the paint. I used Contrast Snakebite Leather highlighted with Bronze for the armoured coats, and a combination of the same colours I’d used on the chariot body for the tack.

The Royal Guard came out really well too. I decided to make them uniform to suggest they were regulars, intending to dress the Spearman units, when I come to do them, in different coloured robes and without the same uniformity in shield colours.

There are plenty of poses, they are easy to paint, and ther was only a minimal amount of 3D flash on them.

Both the chariots and the Guard are highly recommended.