"Lust for Glory" Playtest

Lust for Glory (or Lust for short) is the latest set of rules due from Big Red Bat publishing. Chronologically it covers the period 1650+ to around 1760, so could be said to follow on directly from For King & Parliament.

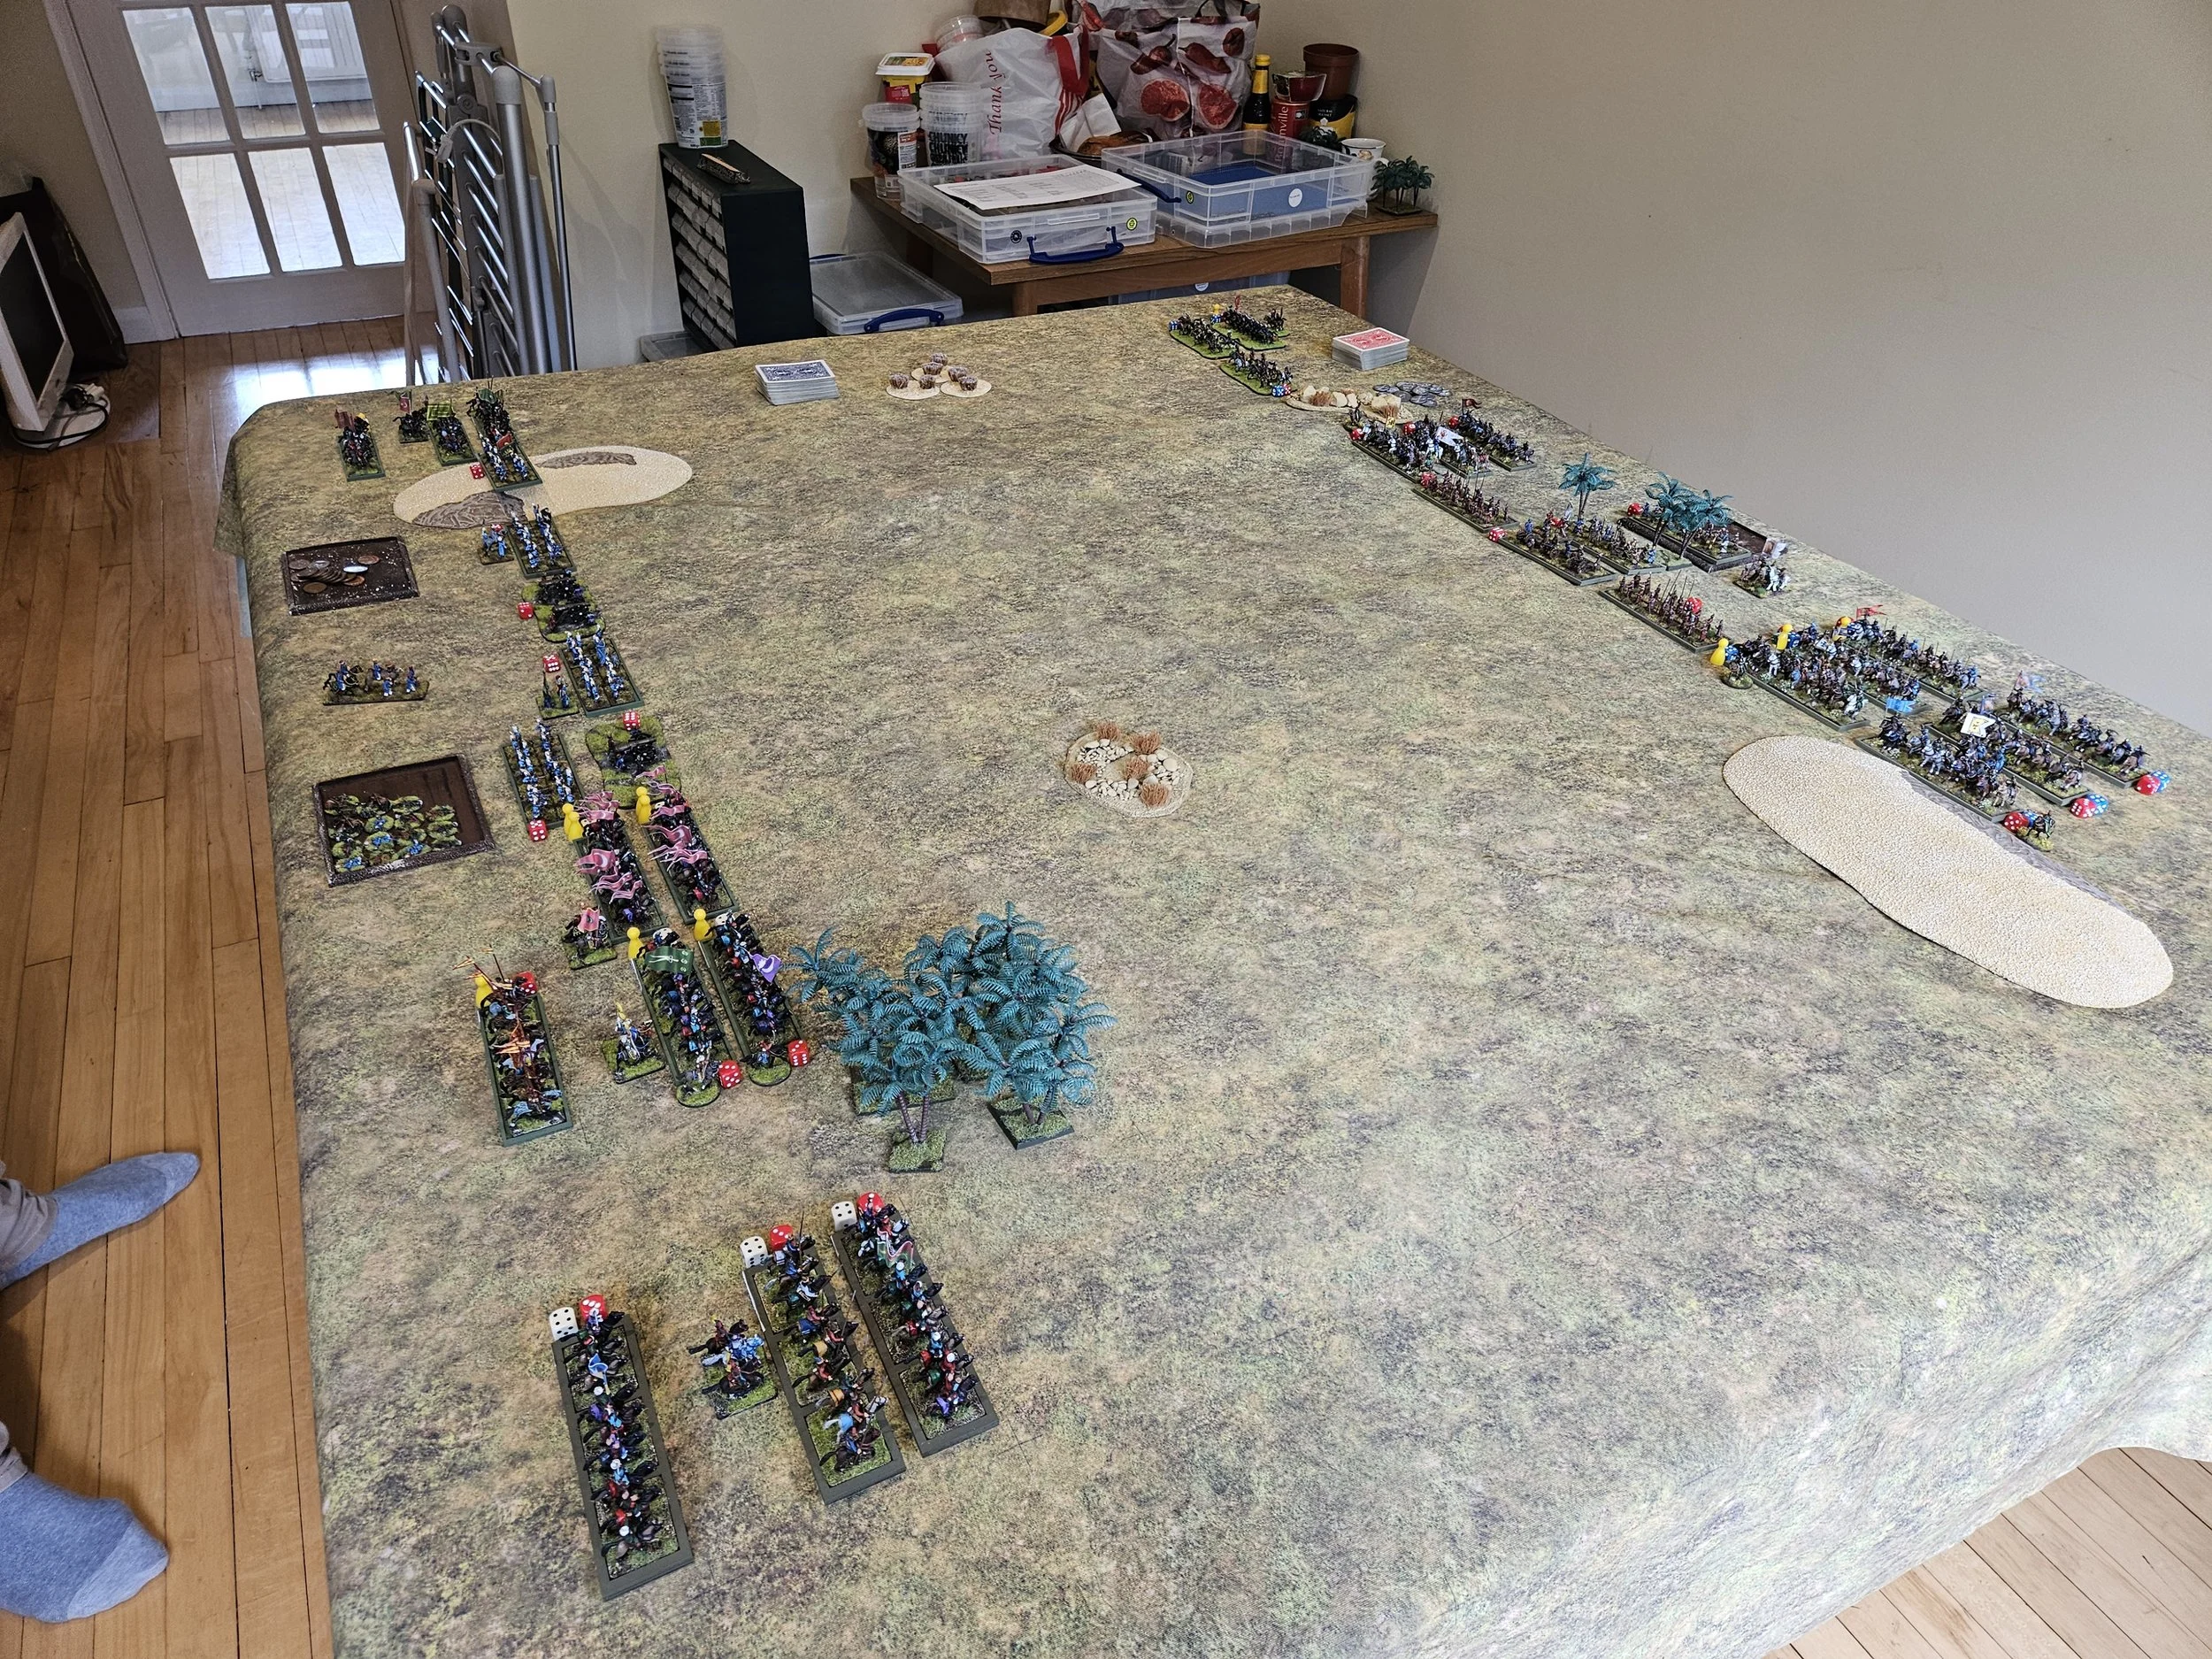
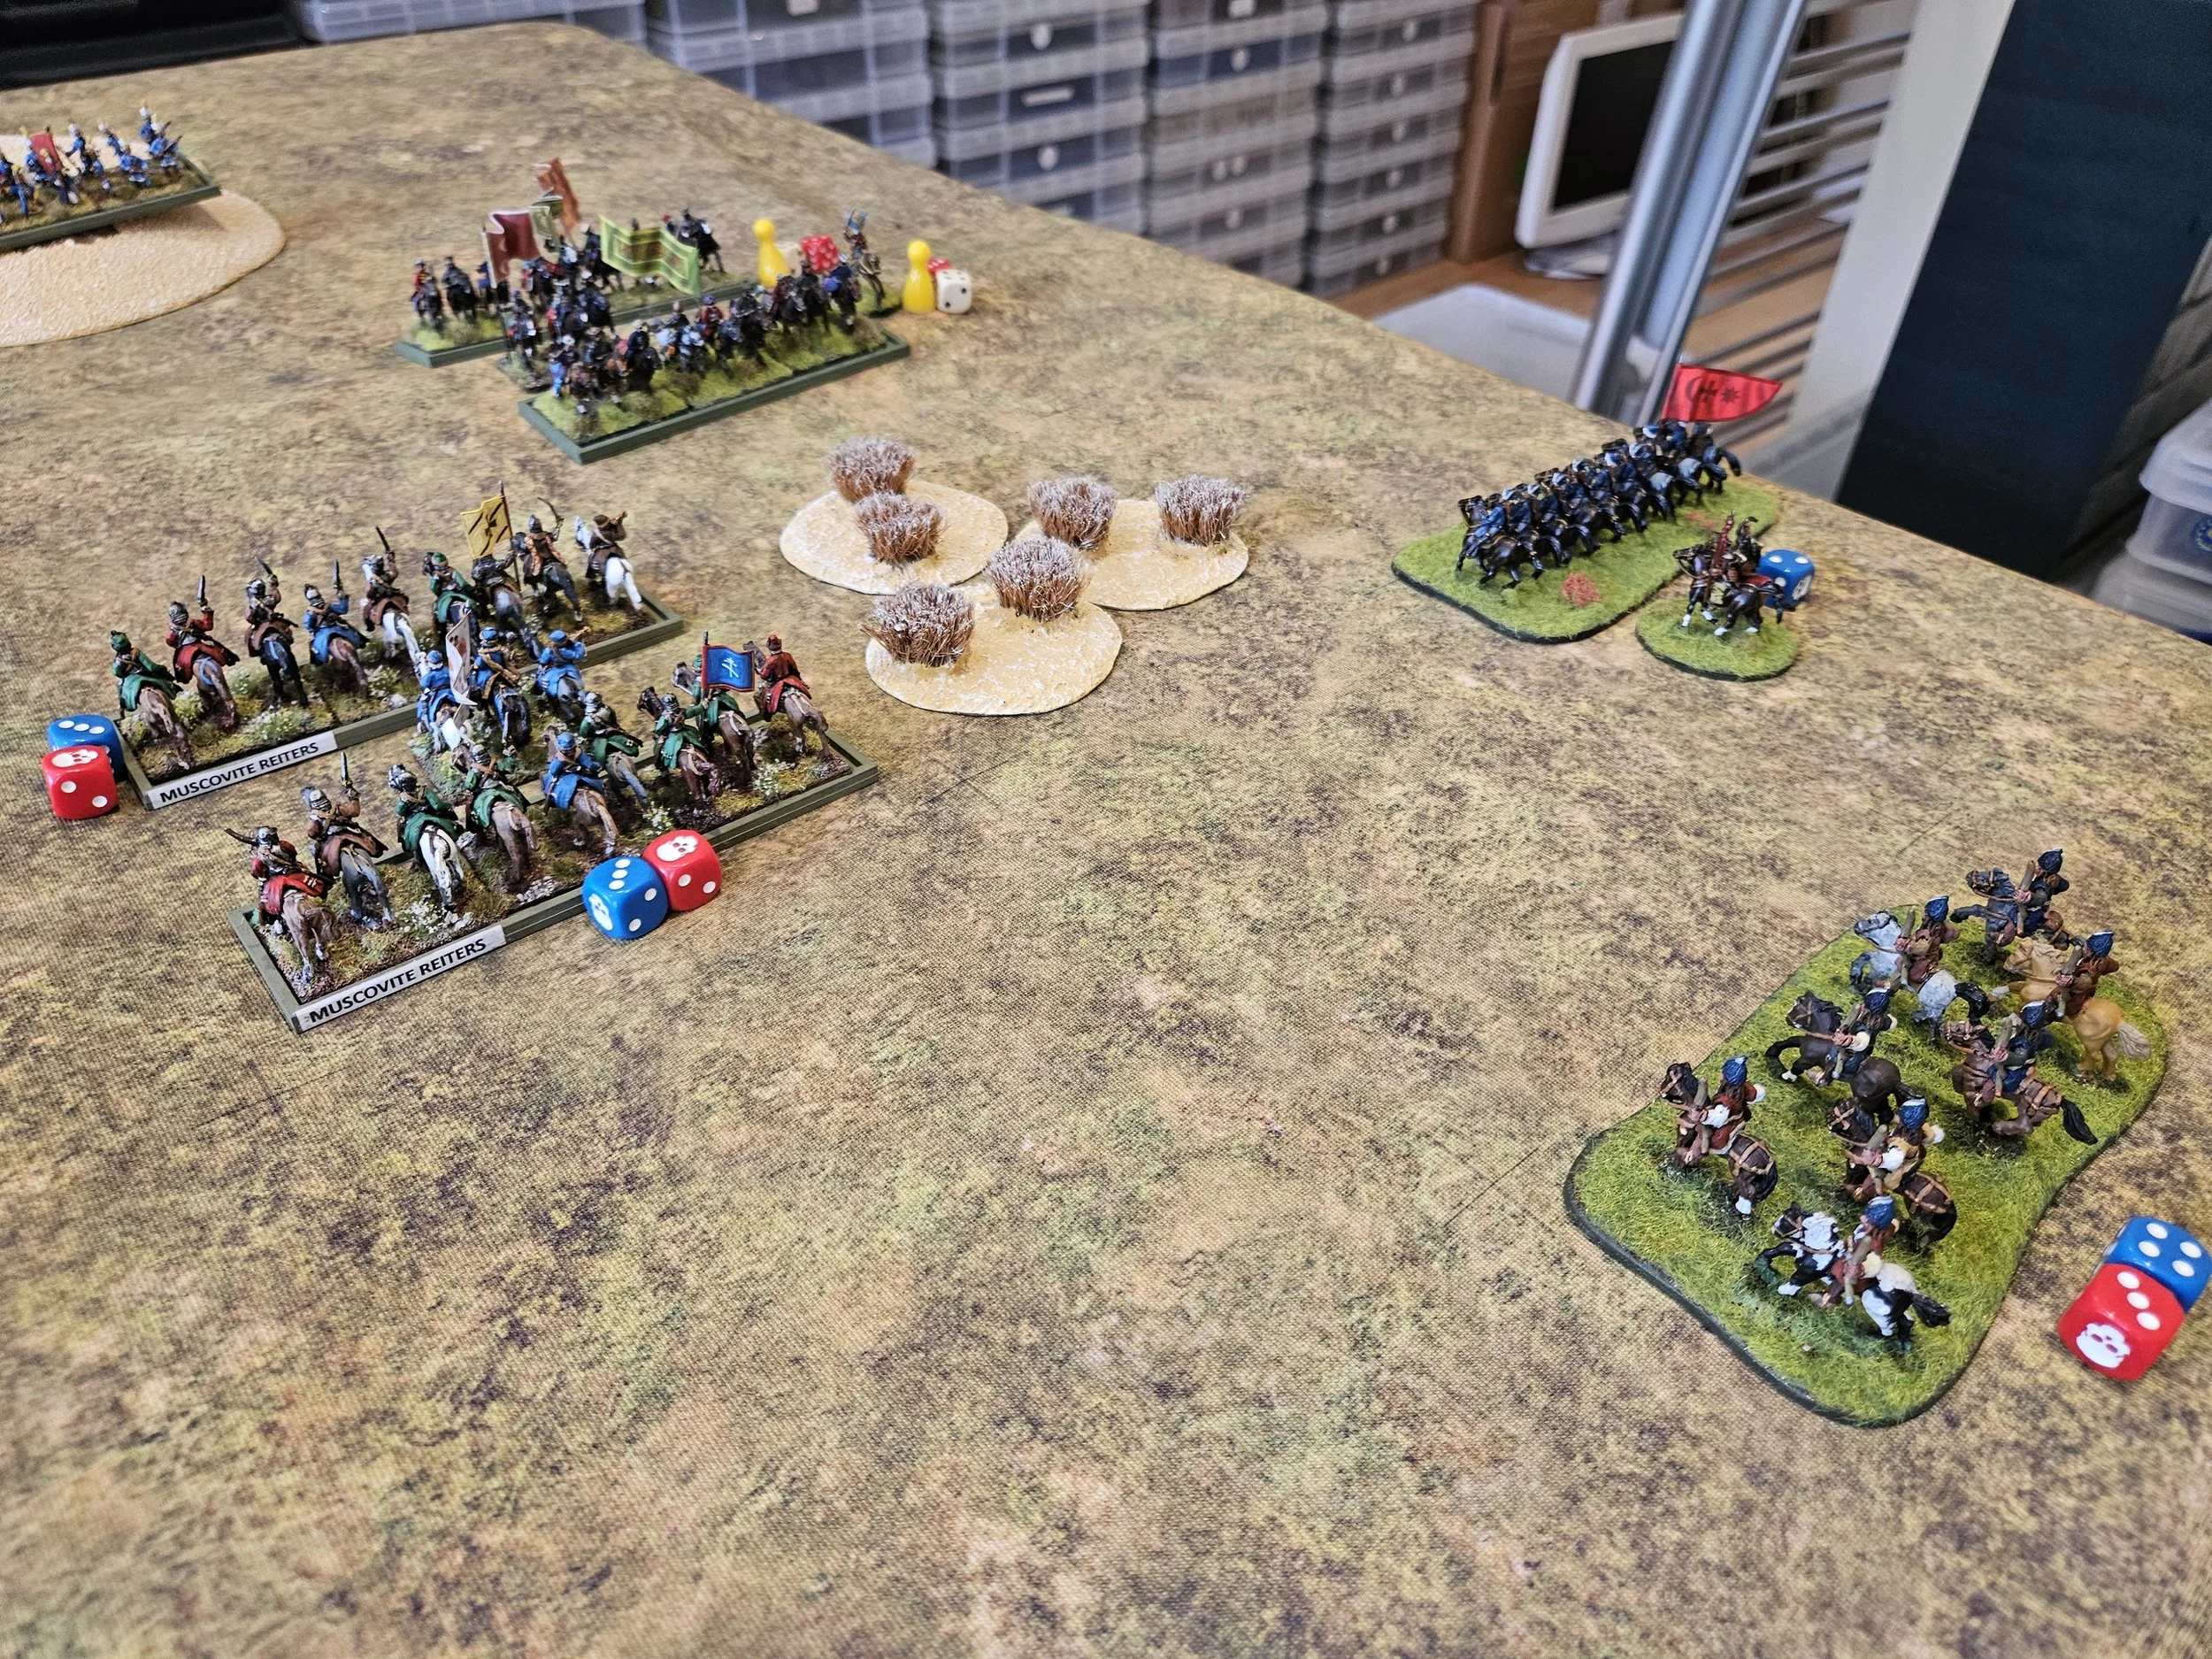
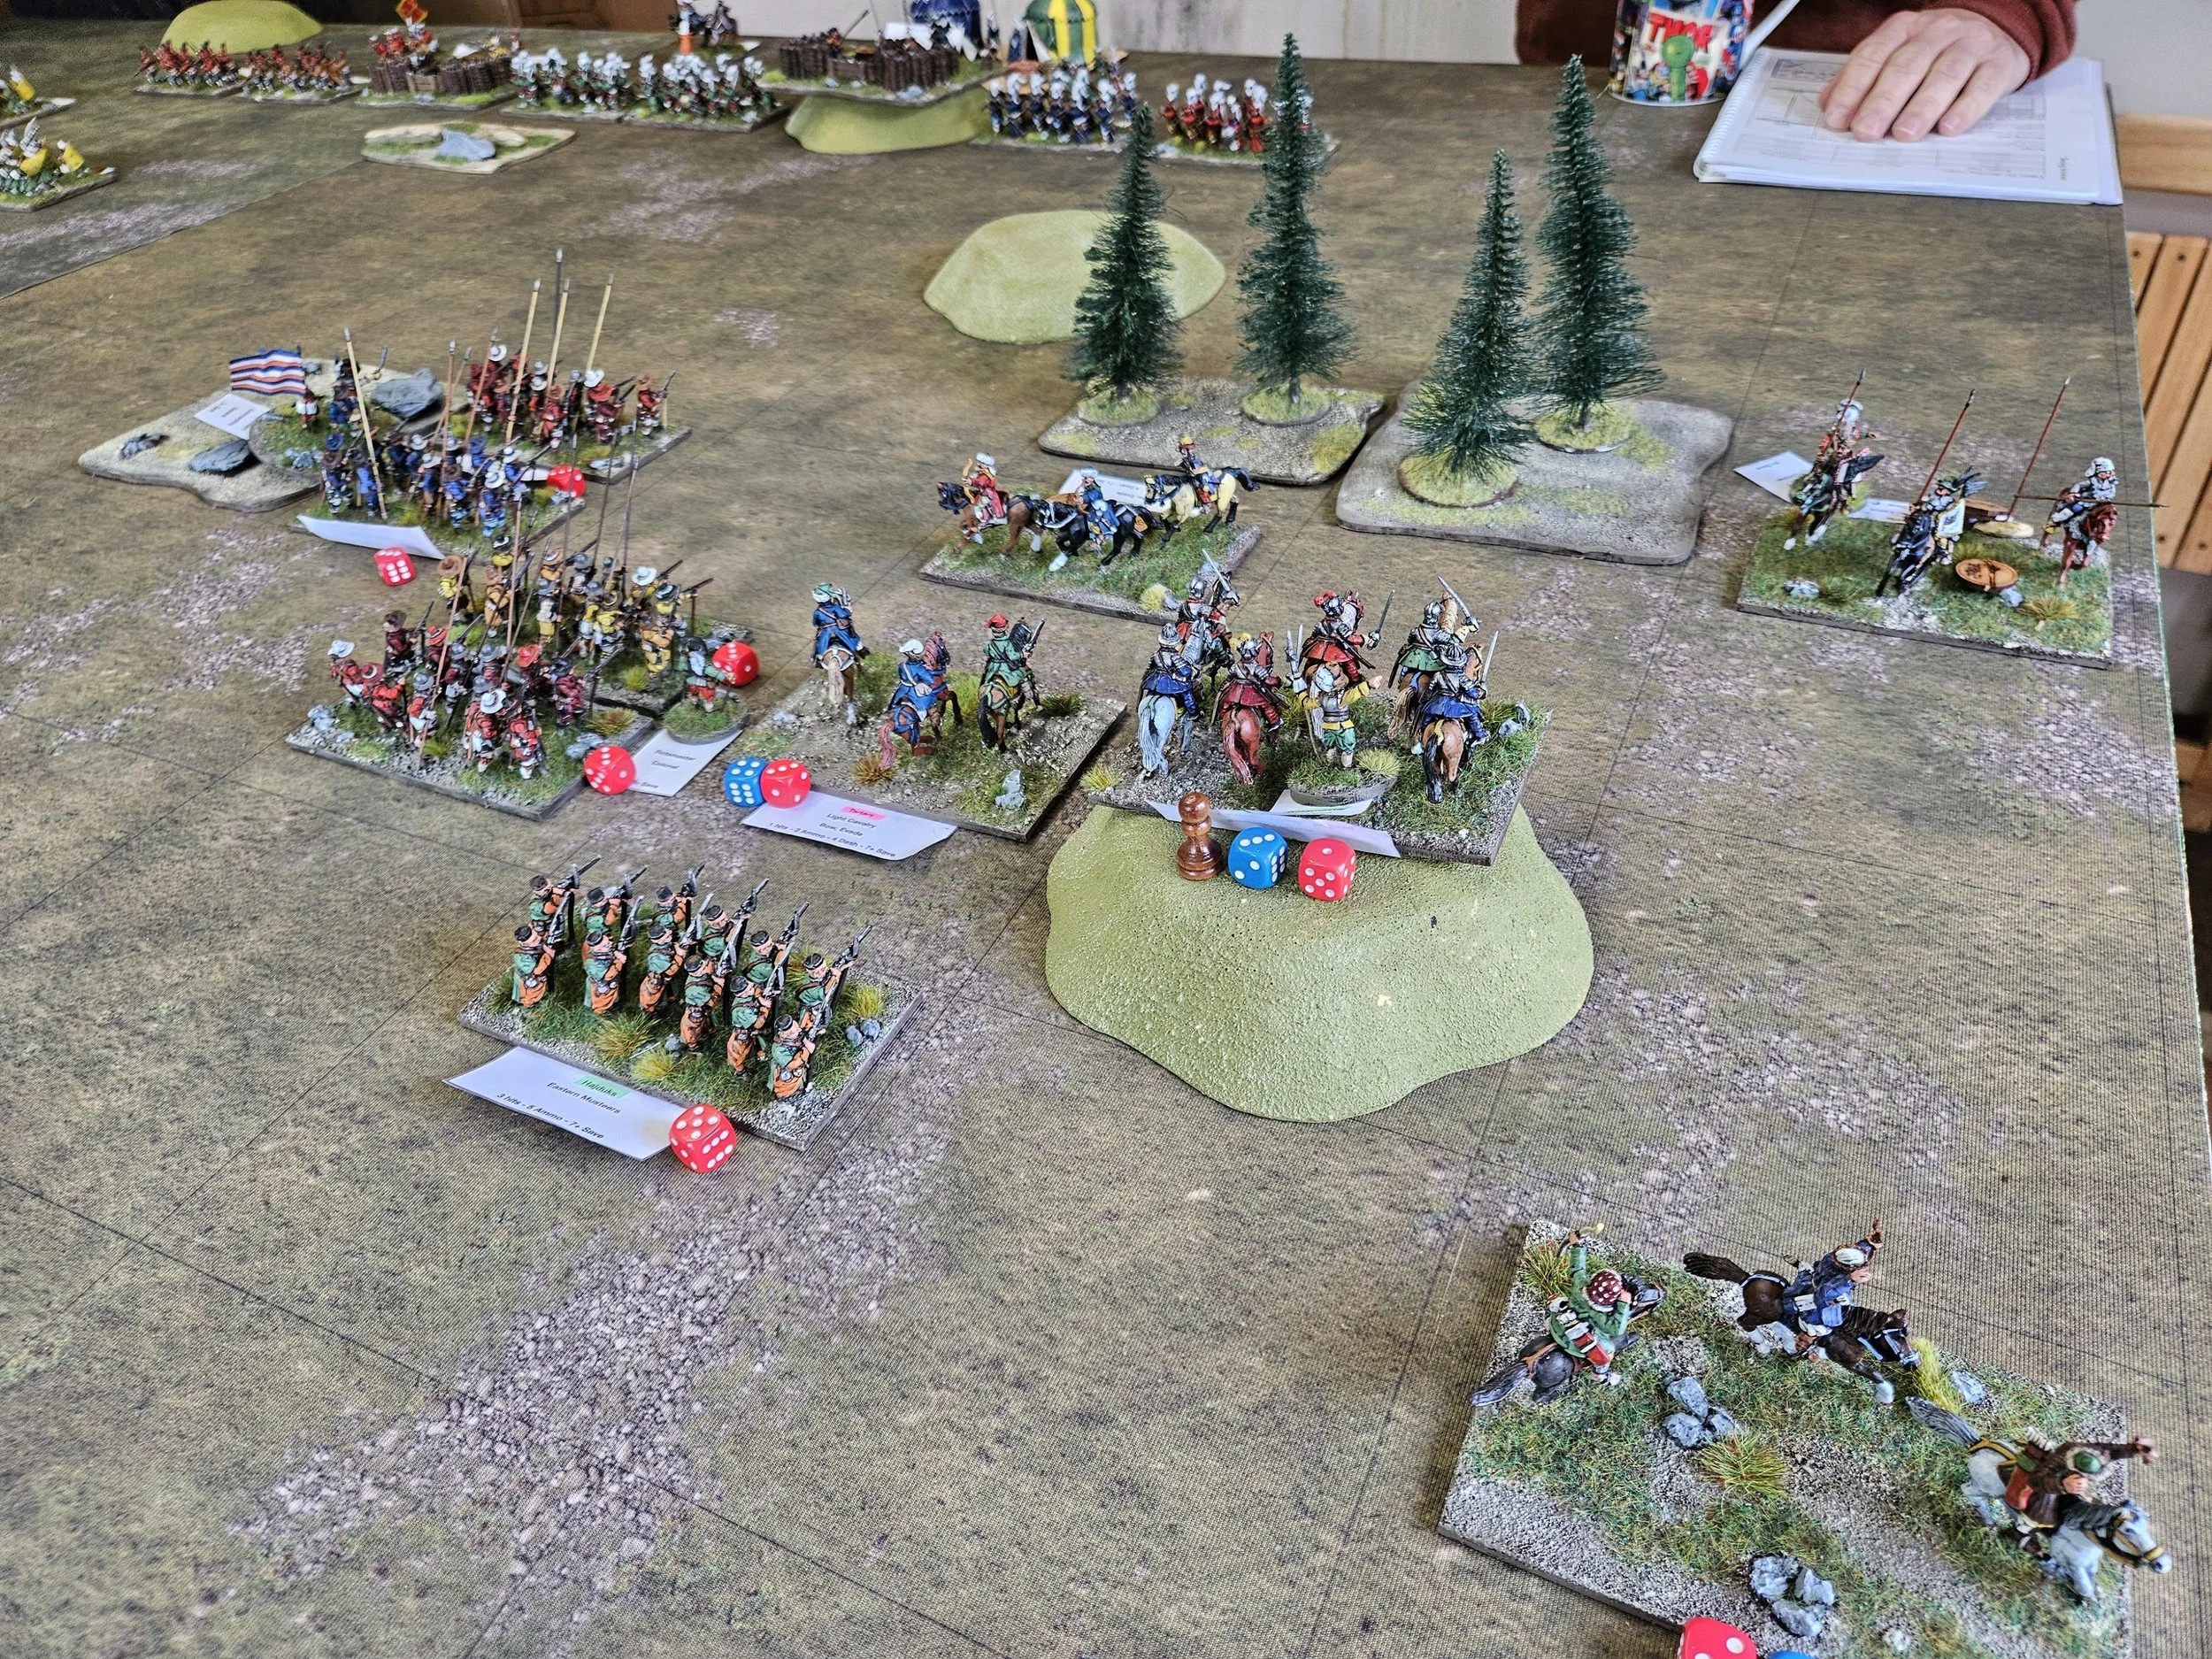
We playtested the rules with a clash between the Polish-Lithuanians and Ottomans with a quite large 200 points a side game.

The pre-game activity was a little more involved than with TTS or FK&P, including both the usual Scouting phase and an interesting Bombardment phase when you get to try and soften the enemy up with your artillery before the action proper begins.

I played the Polish-Lithuanians and, nervous of the hordes of Turkish cavalry in front of me, forced all the horse onto one side of the battlefield, with the infantry lurking along in their wake on the other.

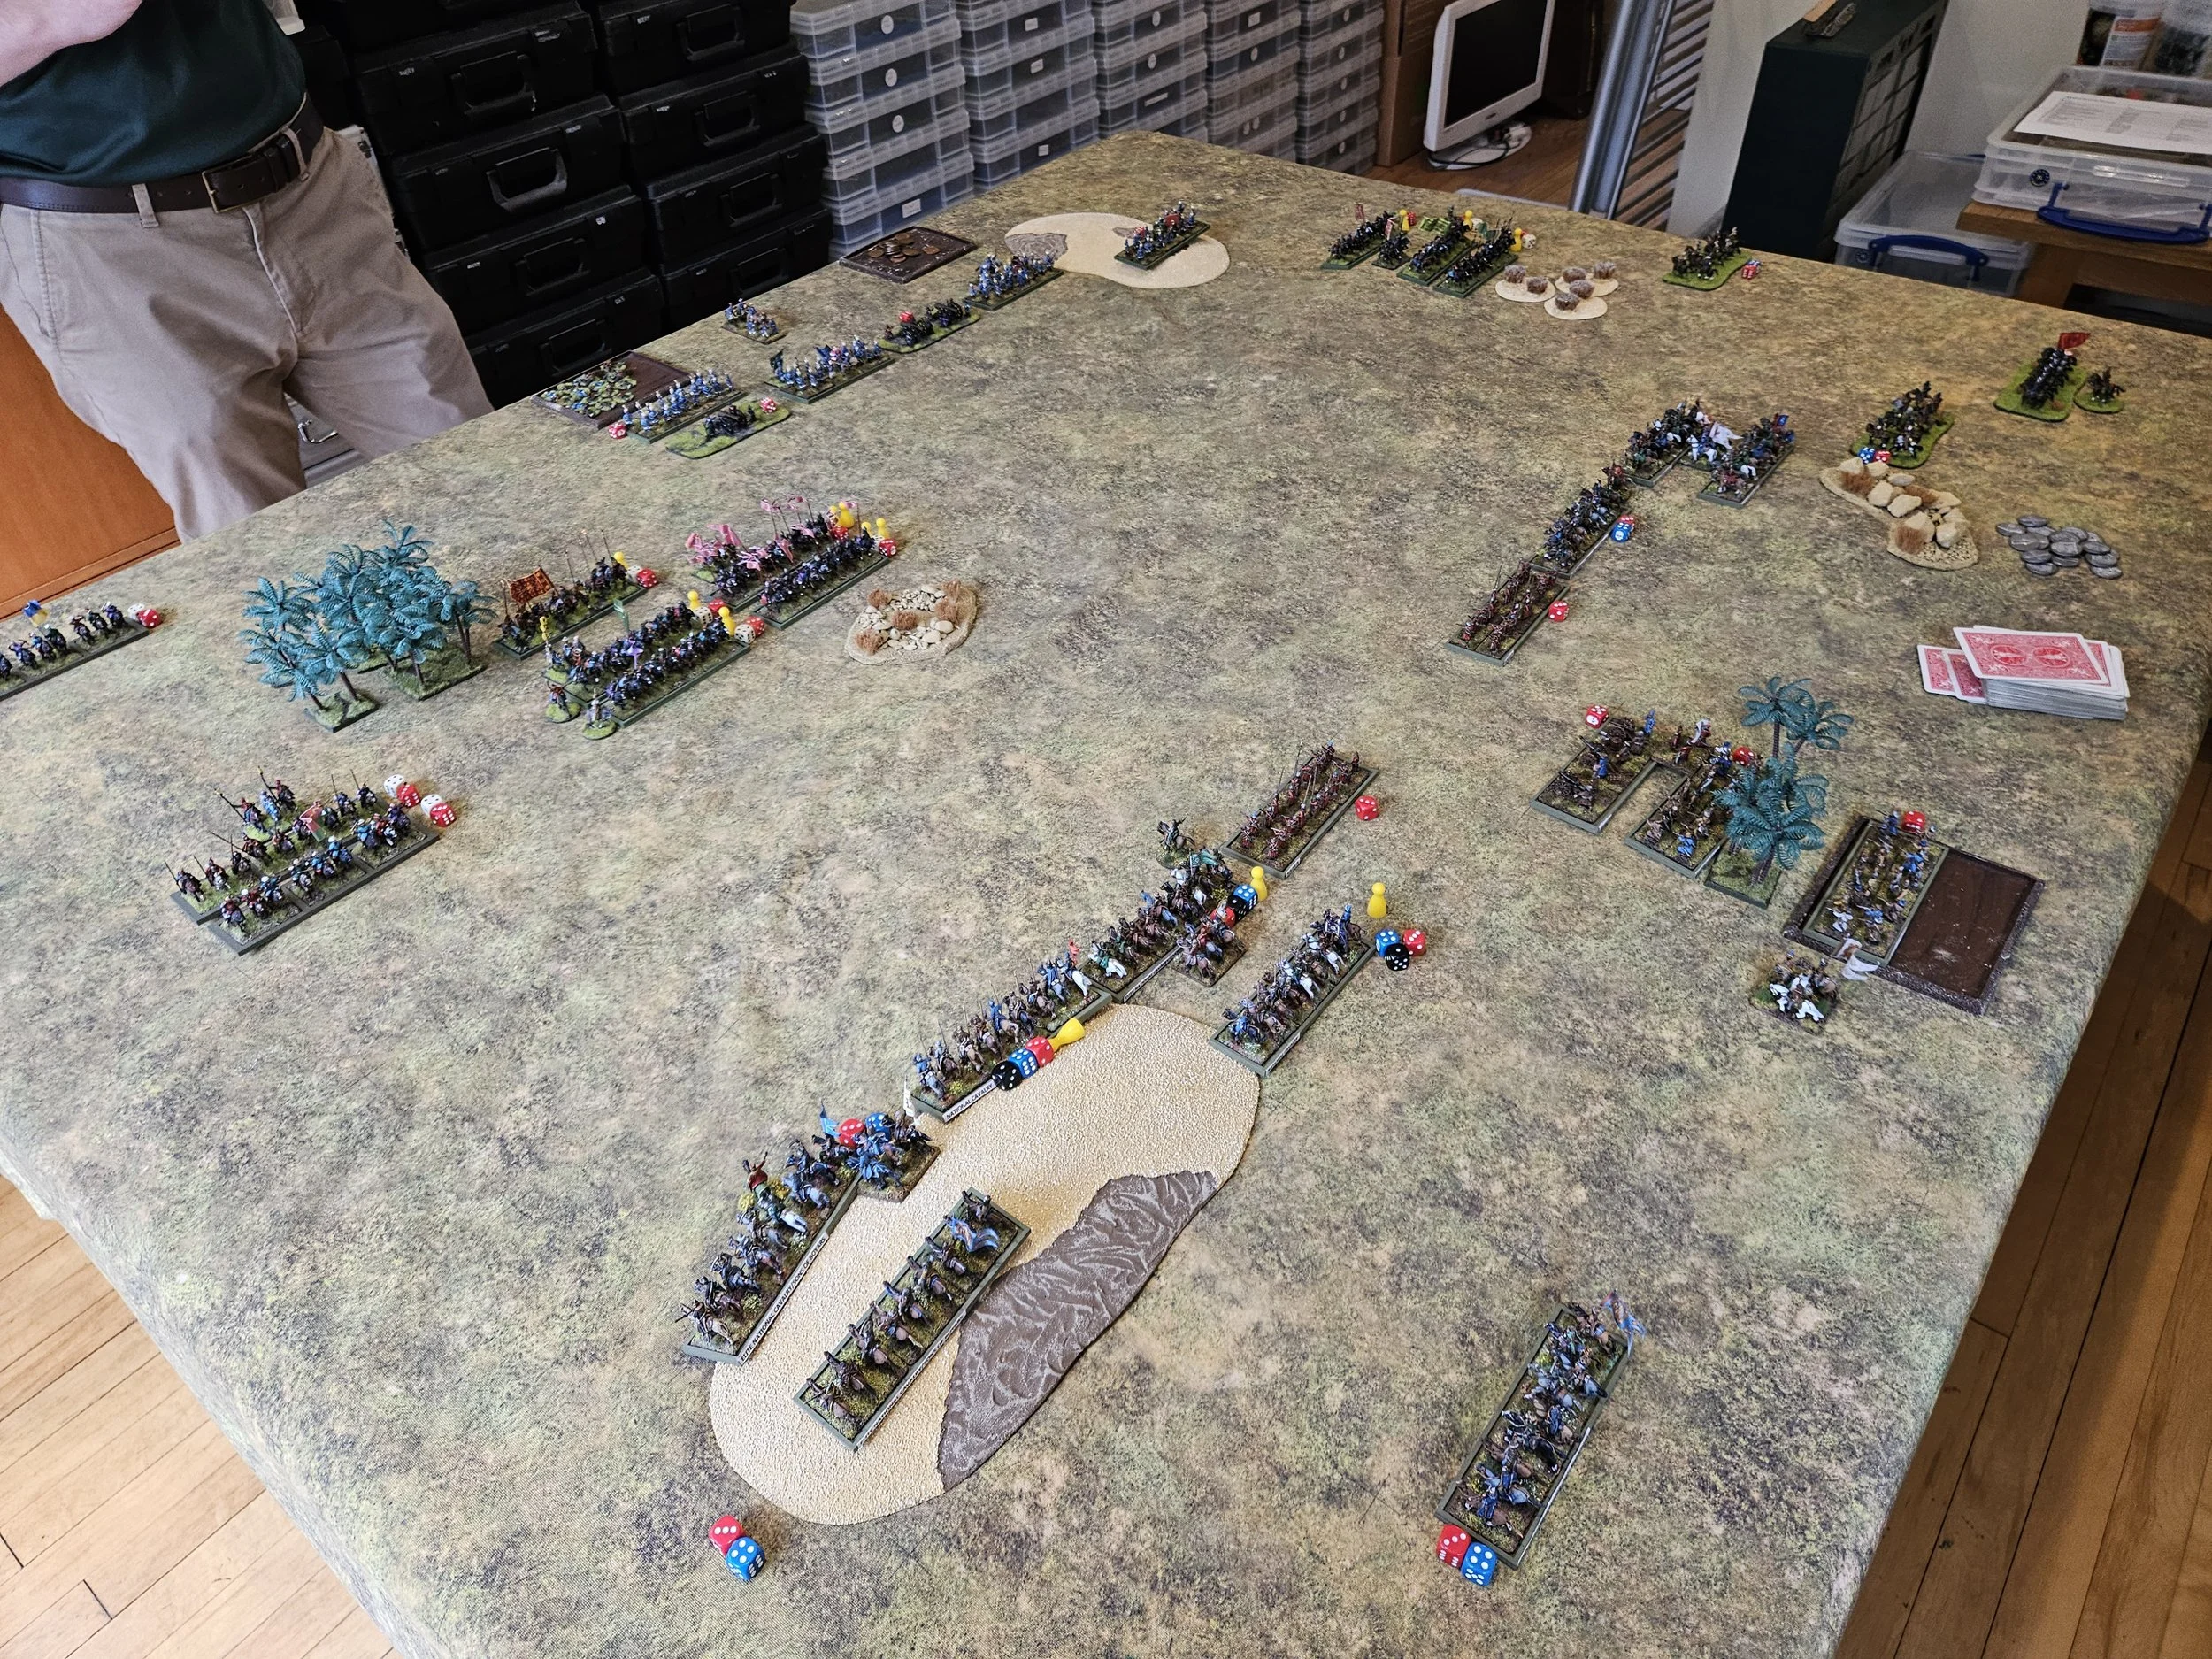
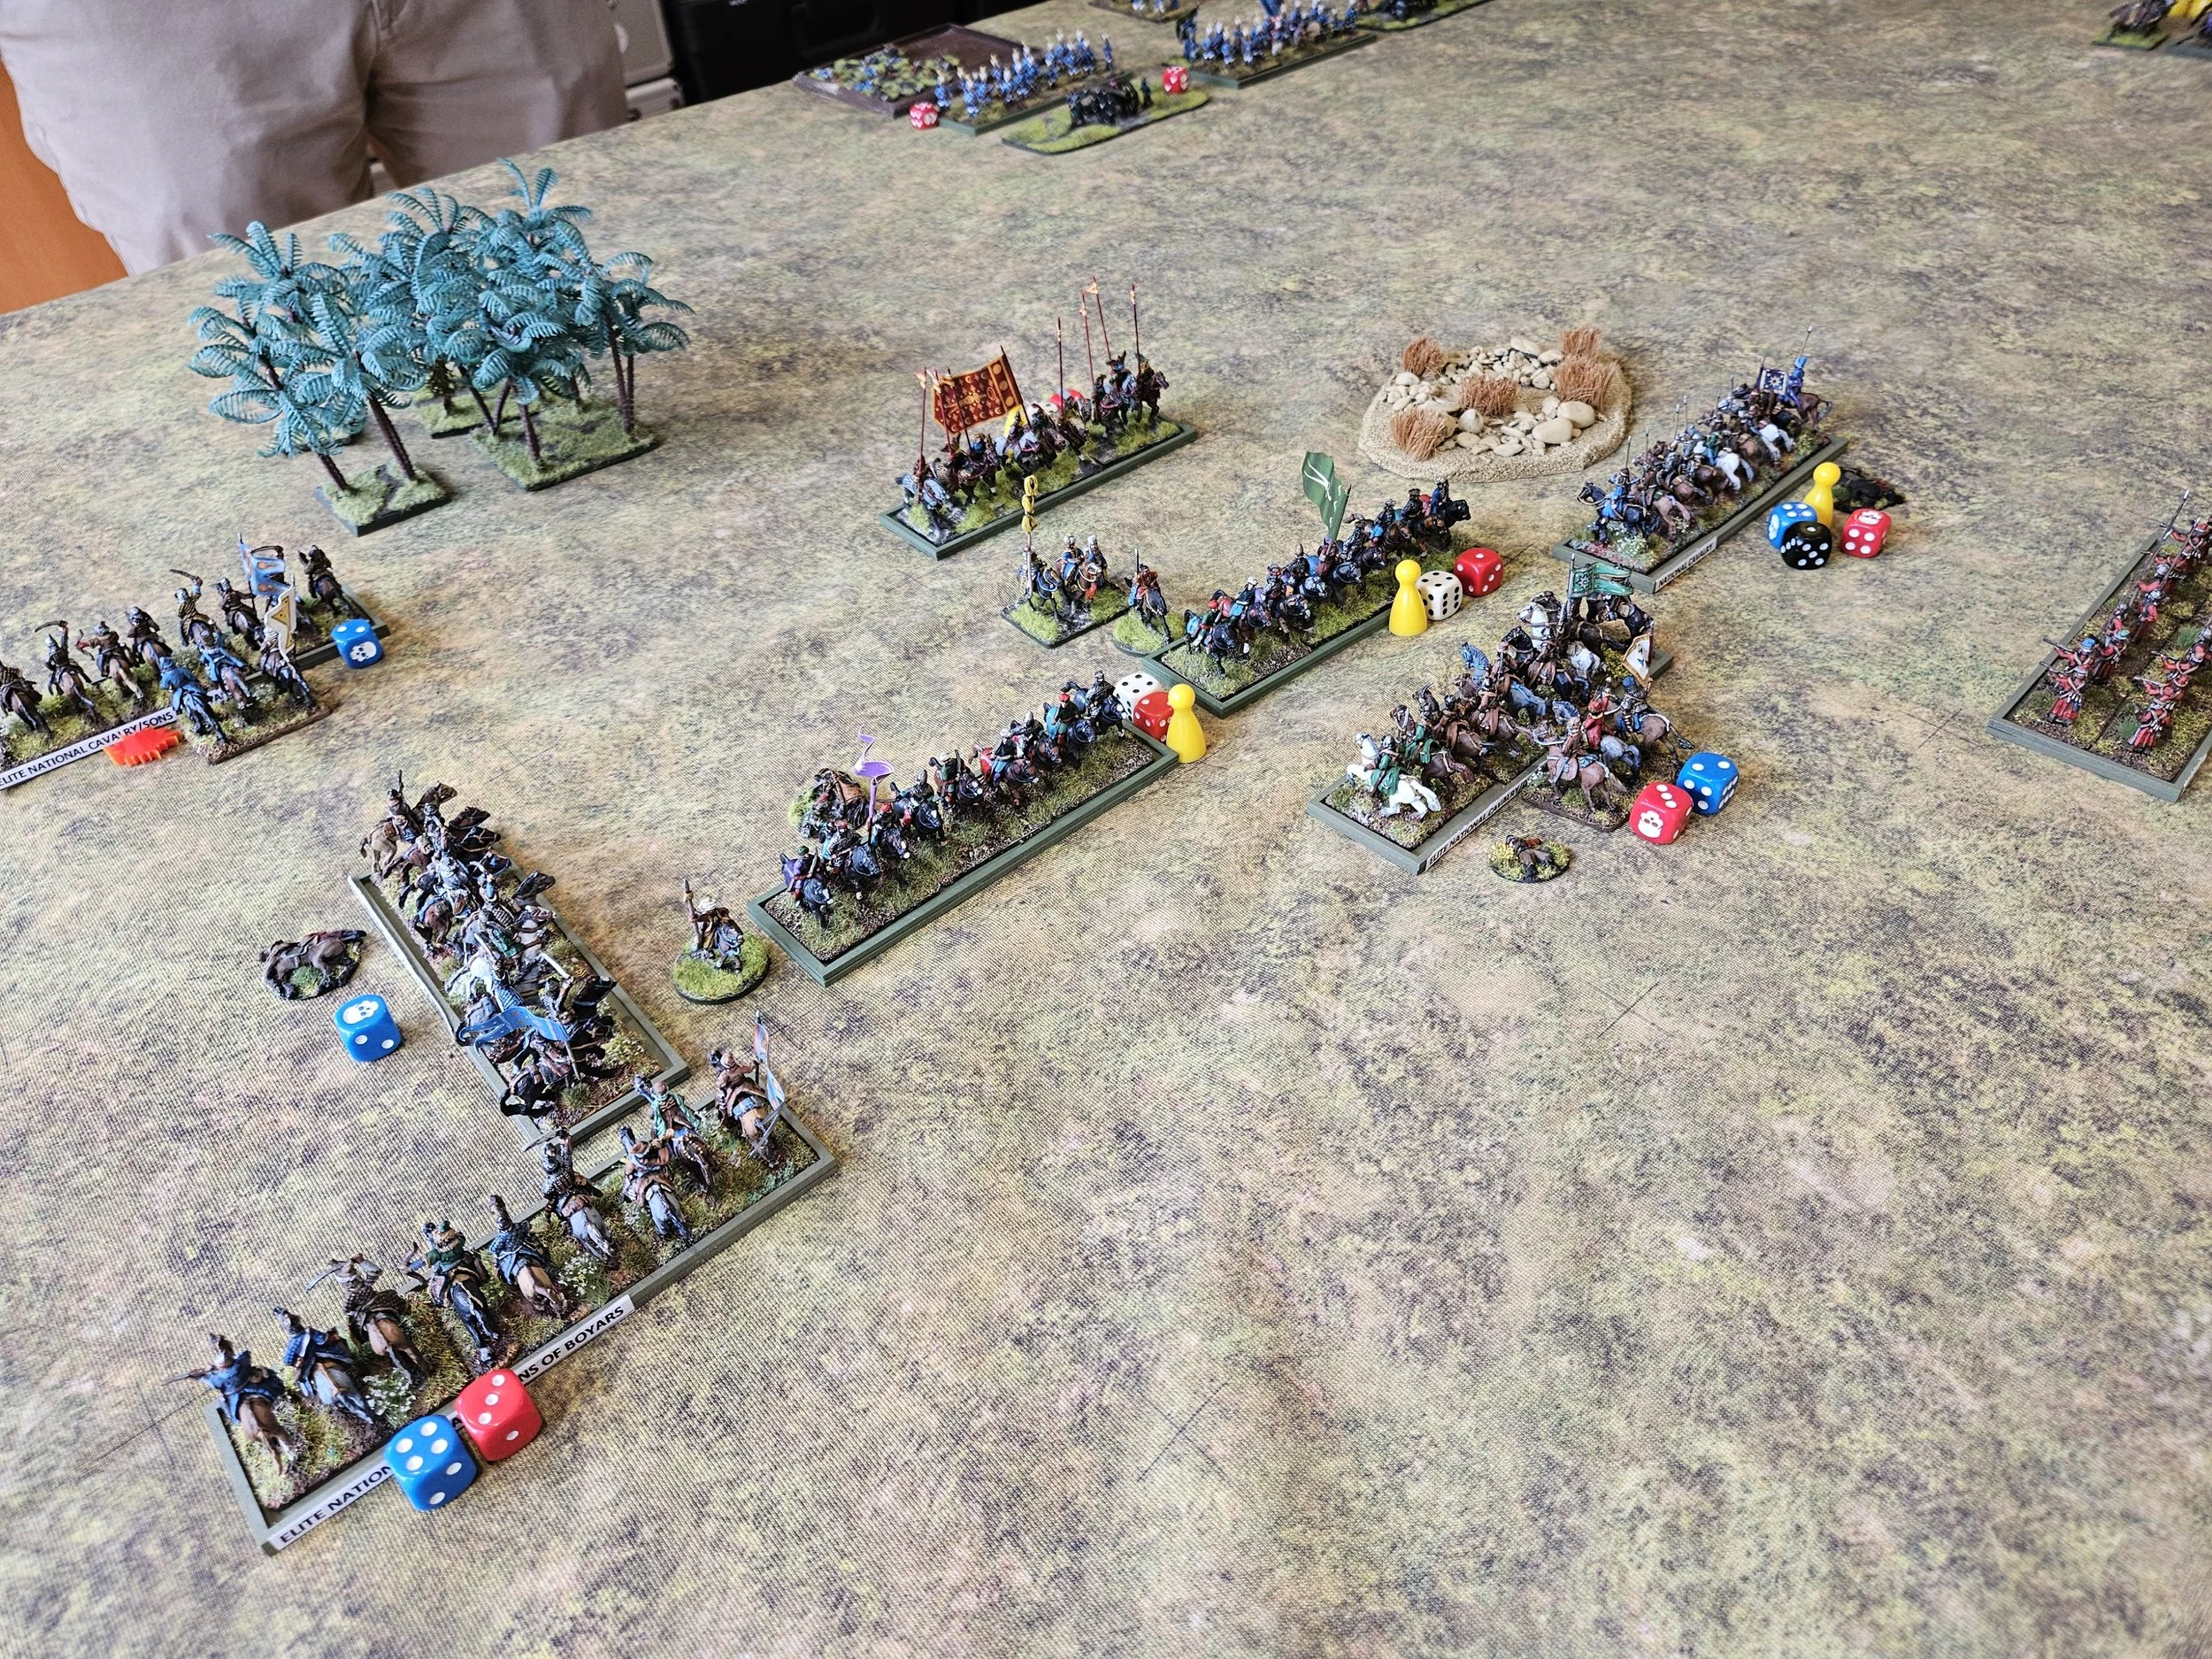
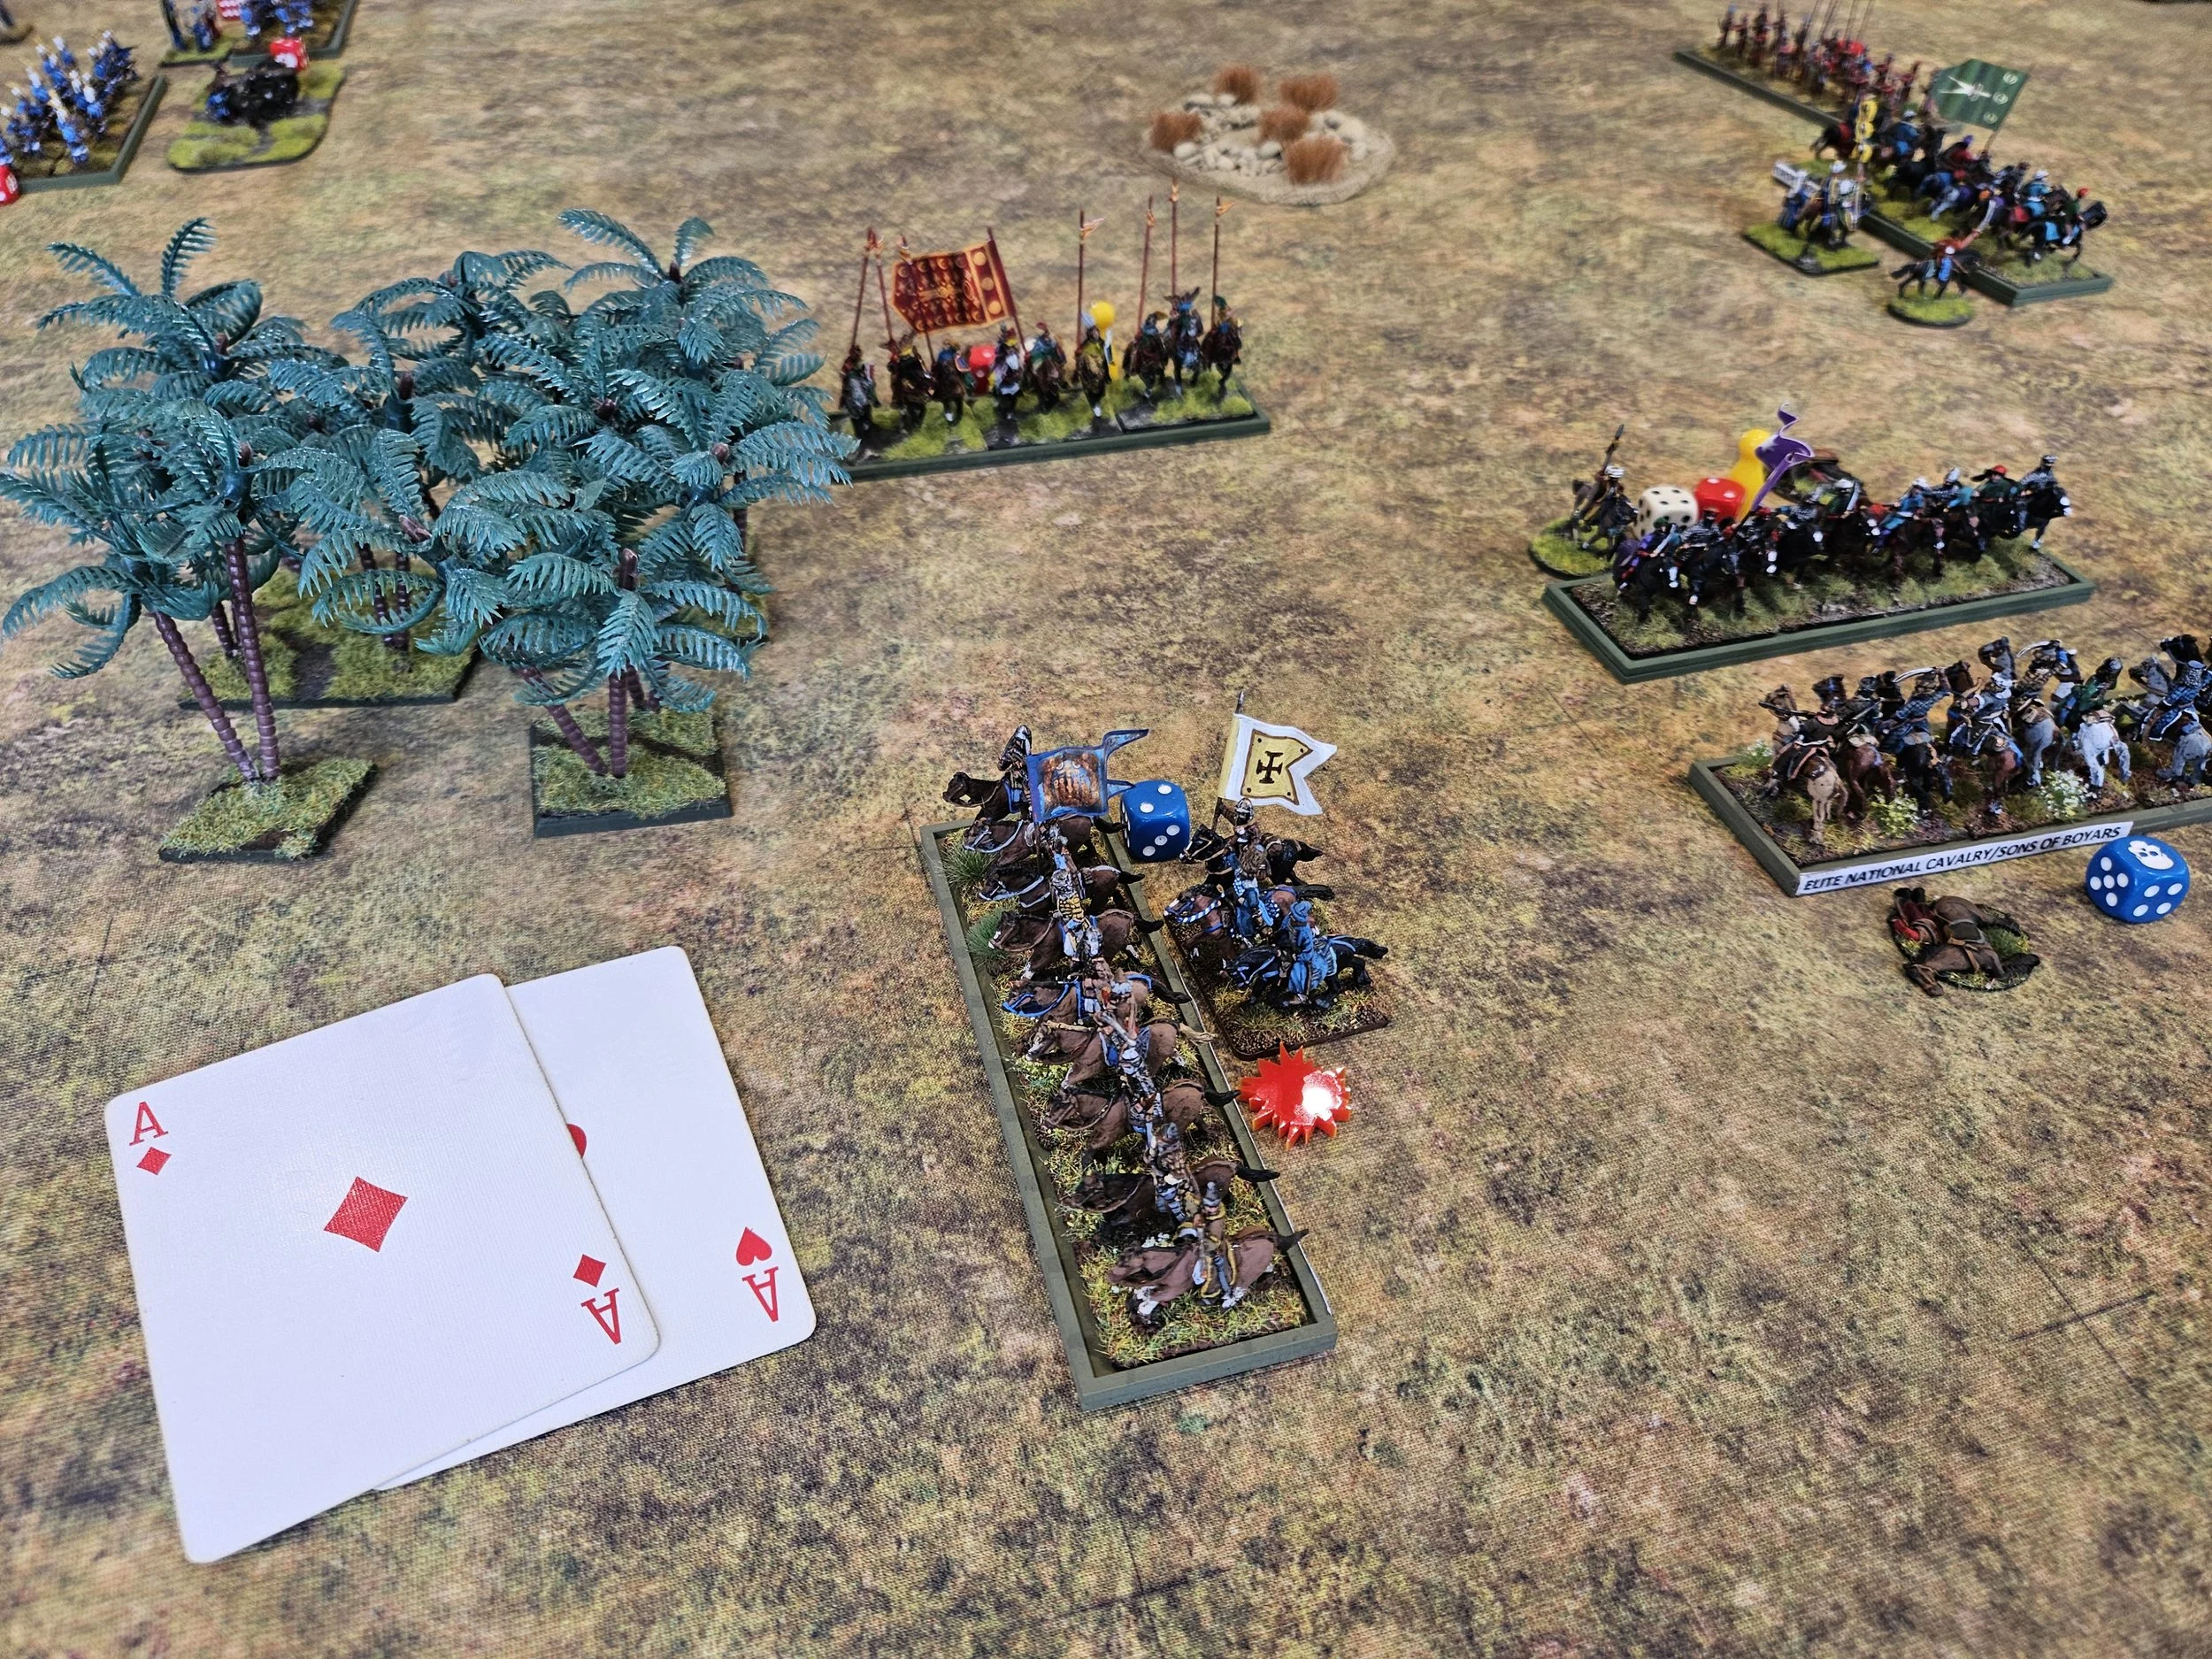
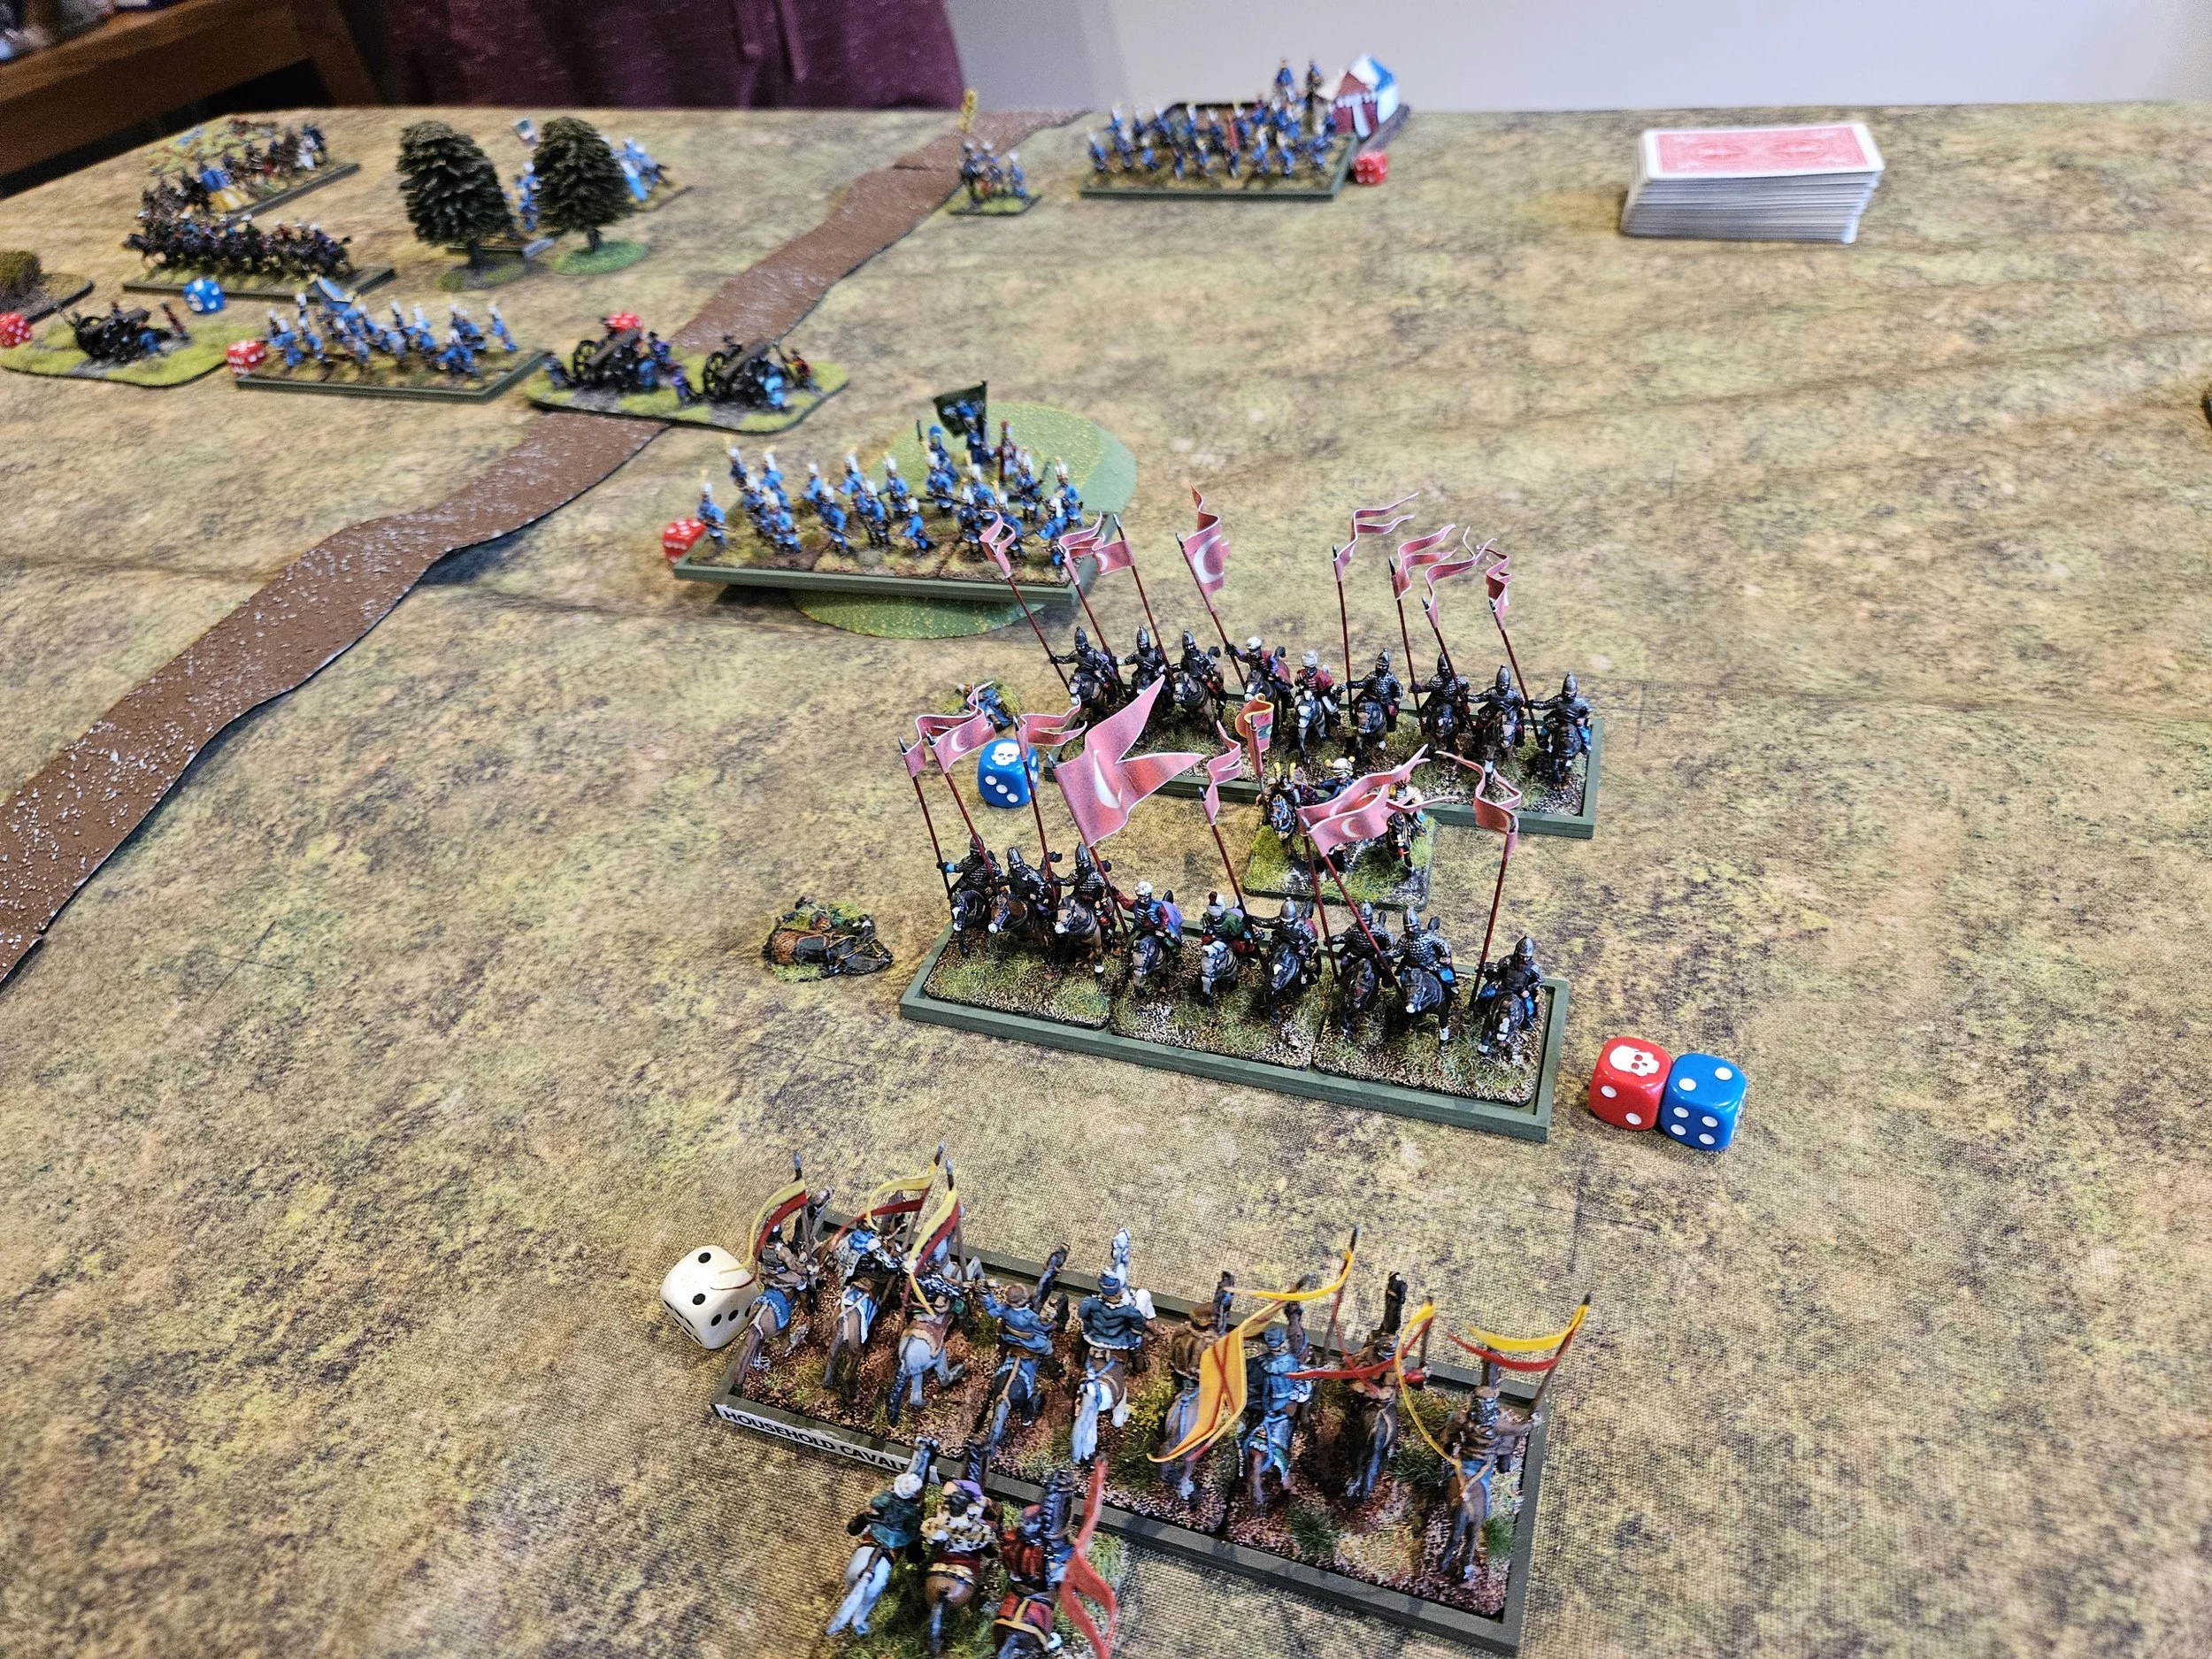
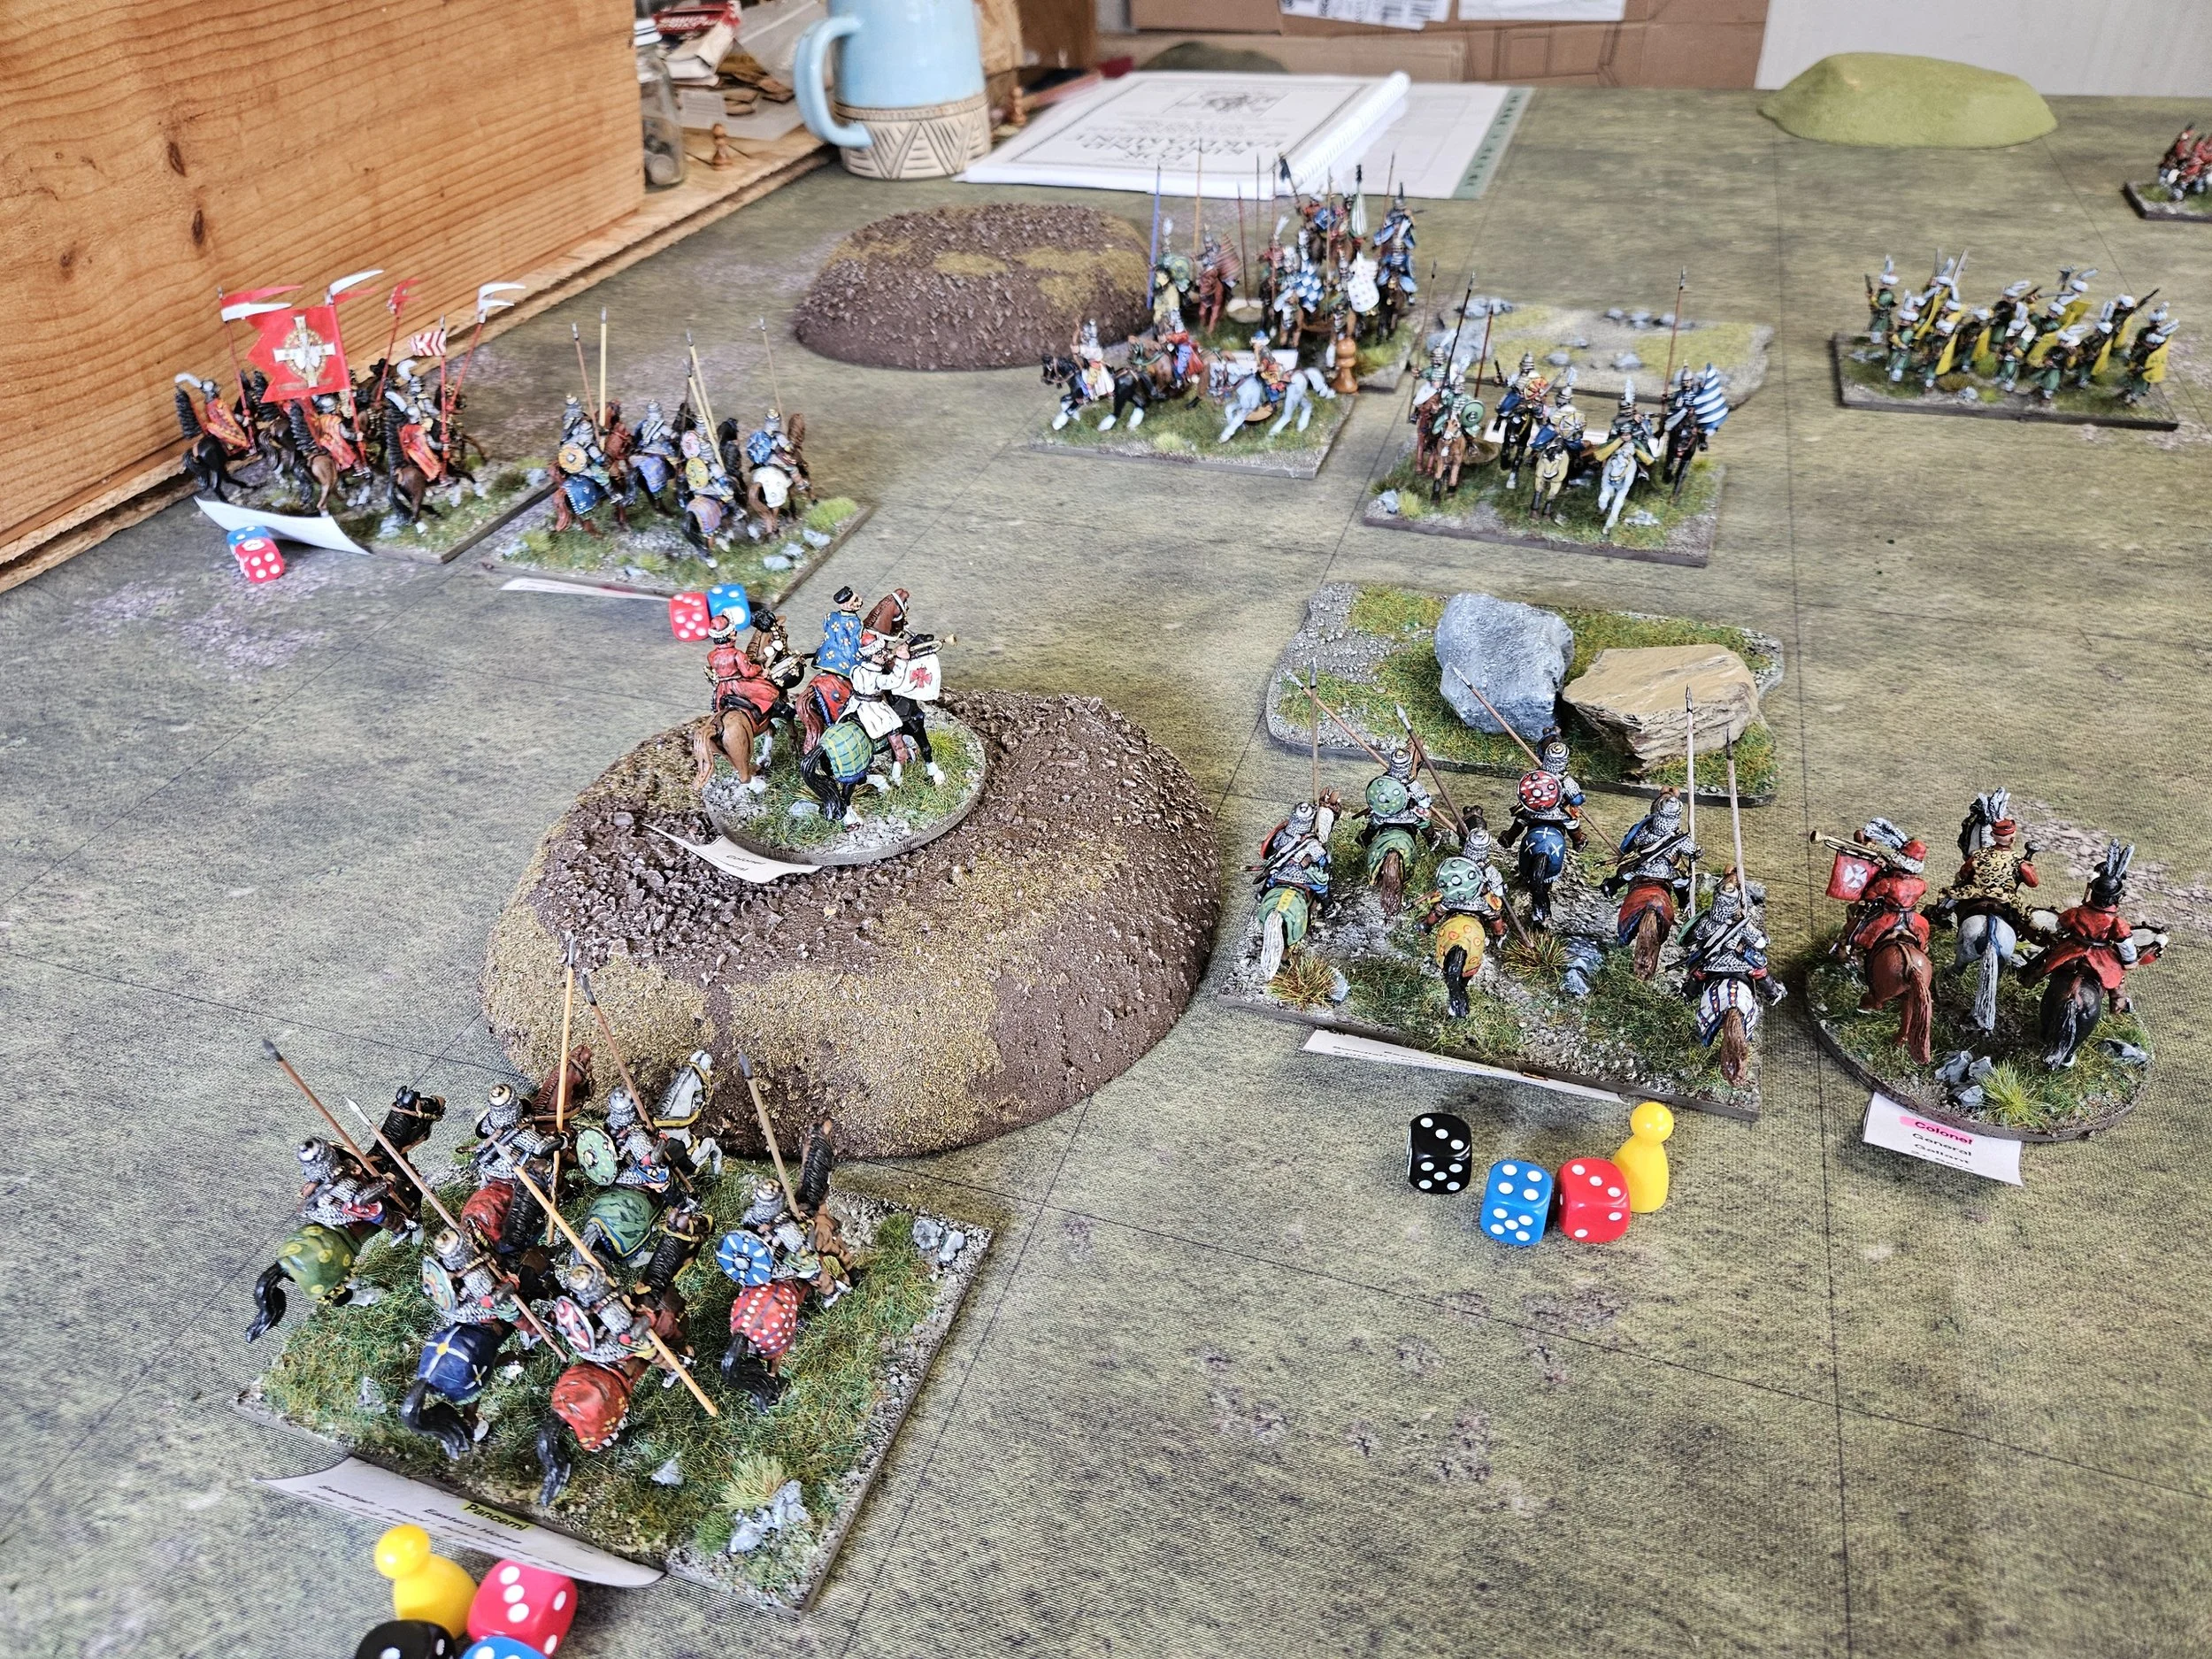
With two sets of shock cavalry desperate to stick their lances into each other, it was not long before the mounted troops met approximately in the middle of the table, with the appropriate and evenly matched amount of carnage ensuing.

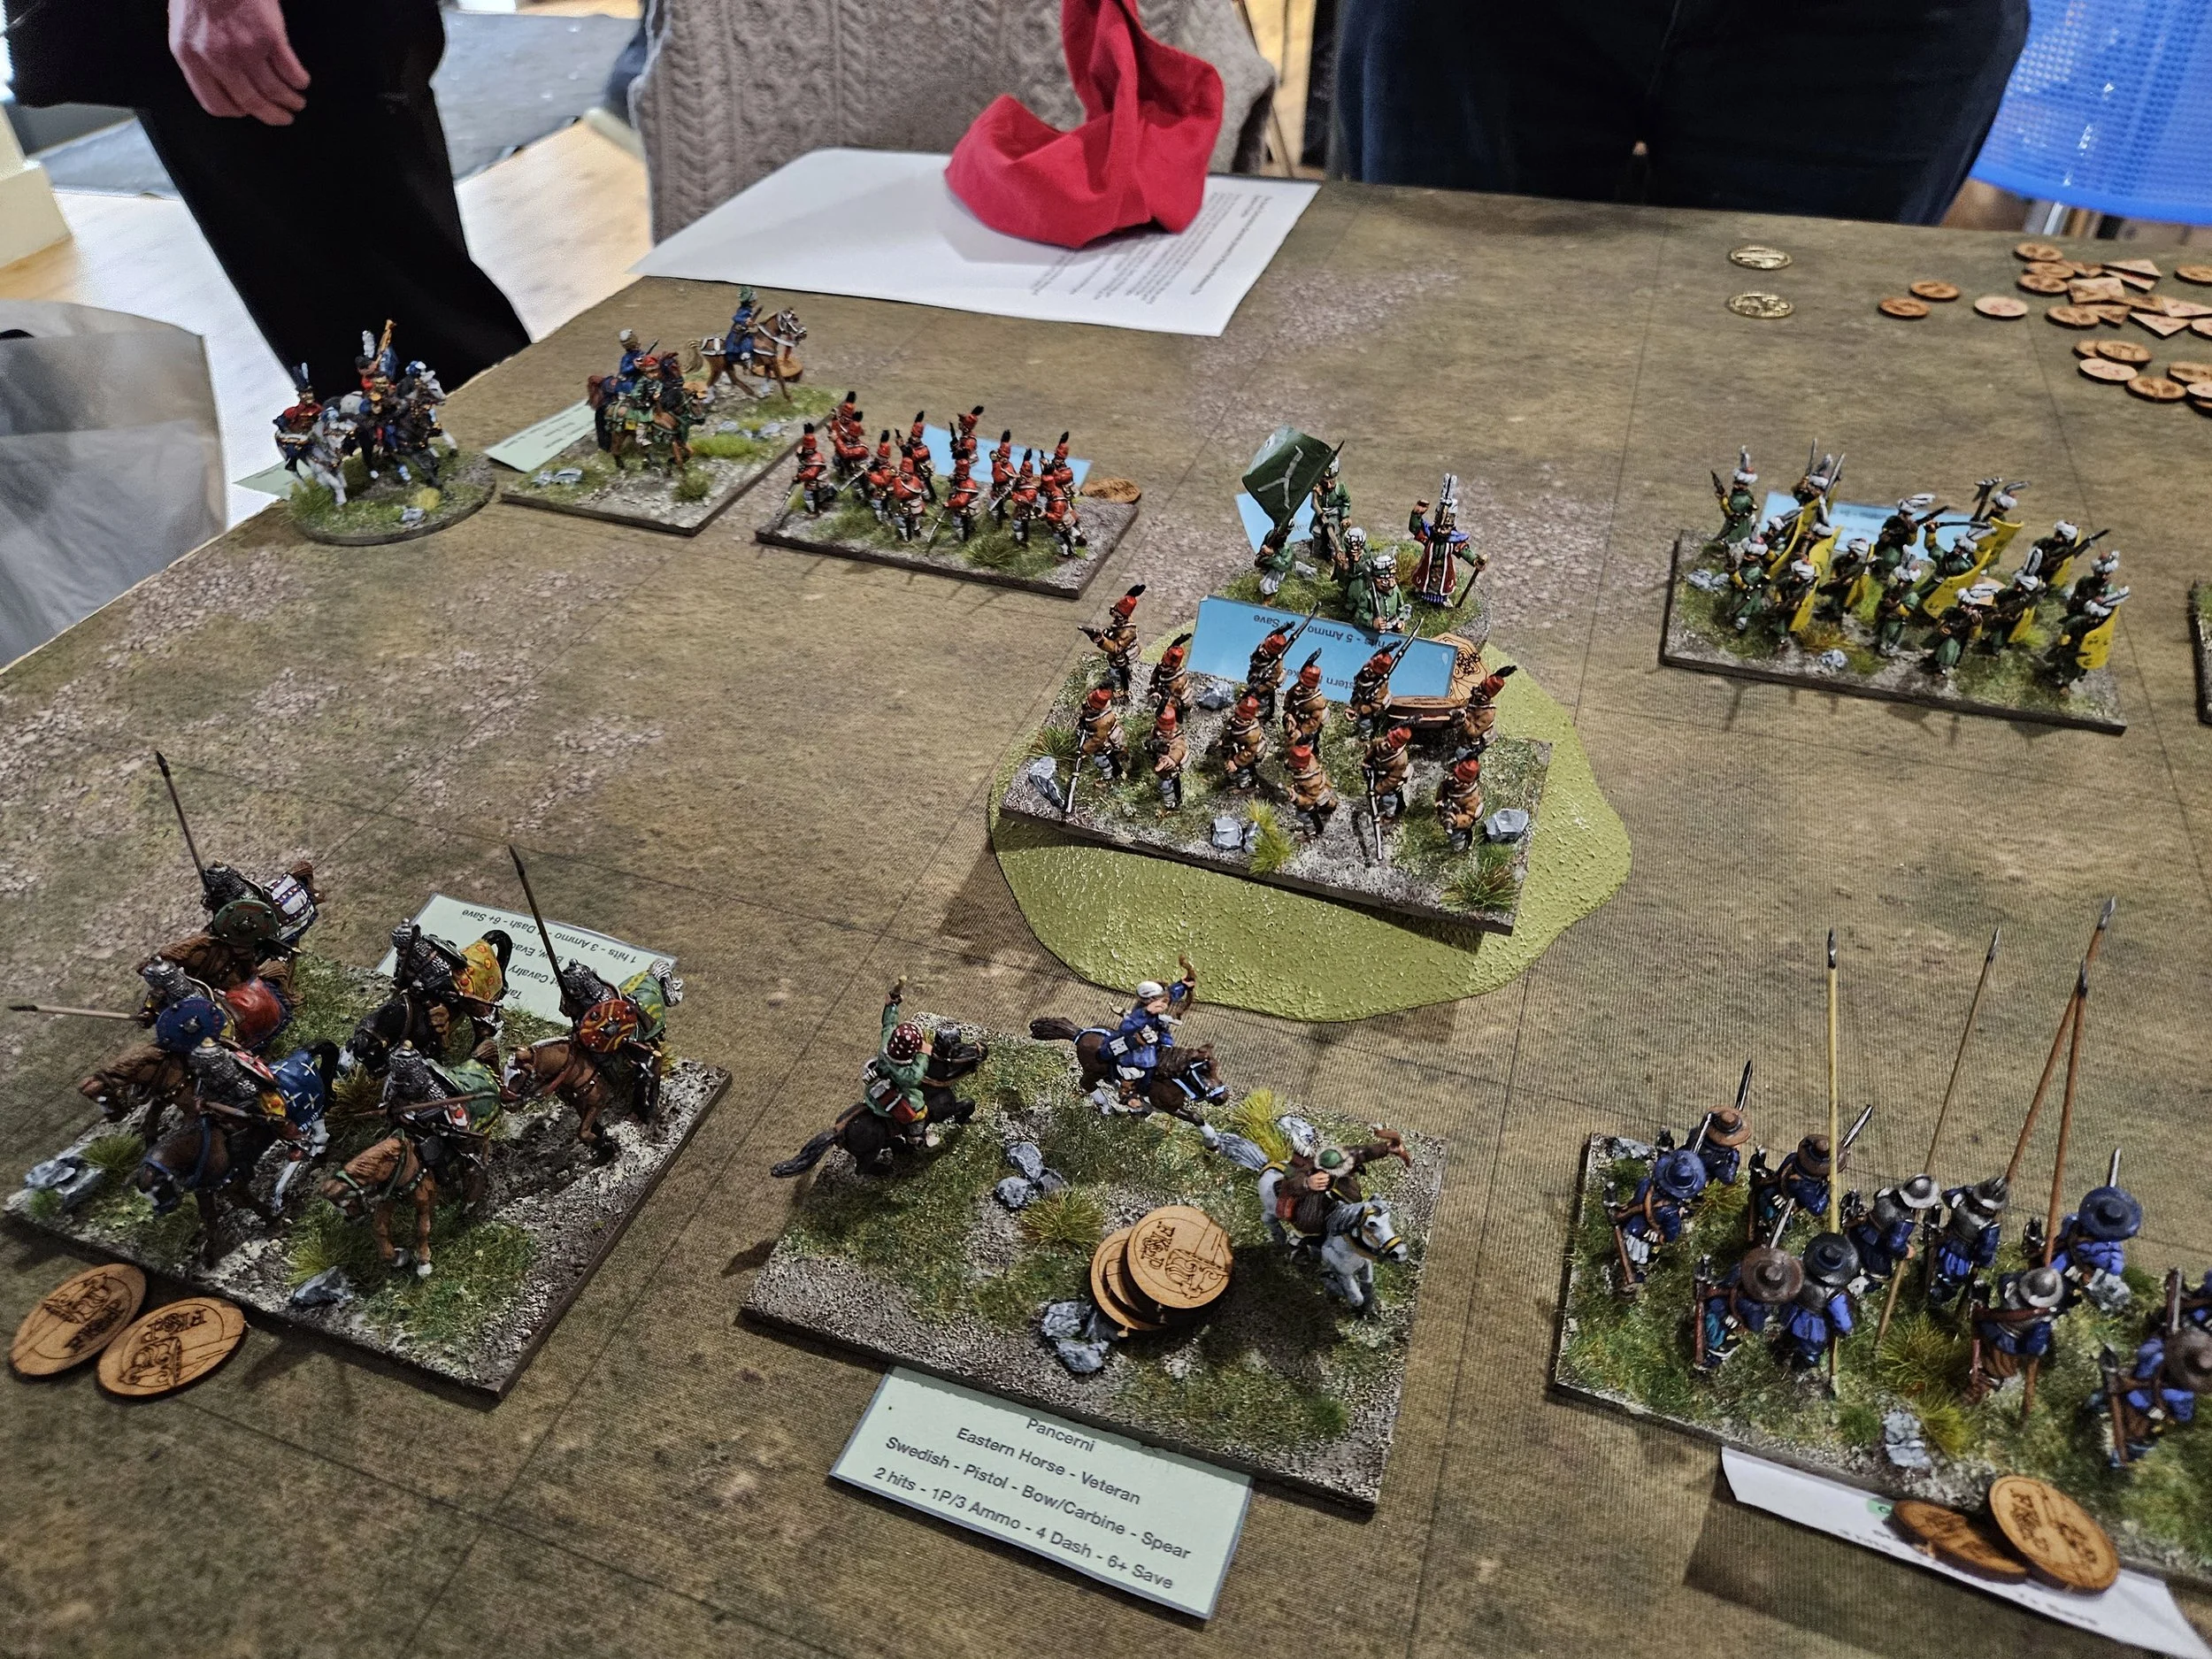
Meanwhile, my German infantry on the left attempted to outflank the Ottoman Azabs, with the Haiduks also advancing to bring the Janisseries under fire.

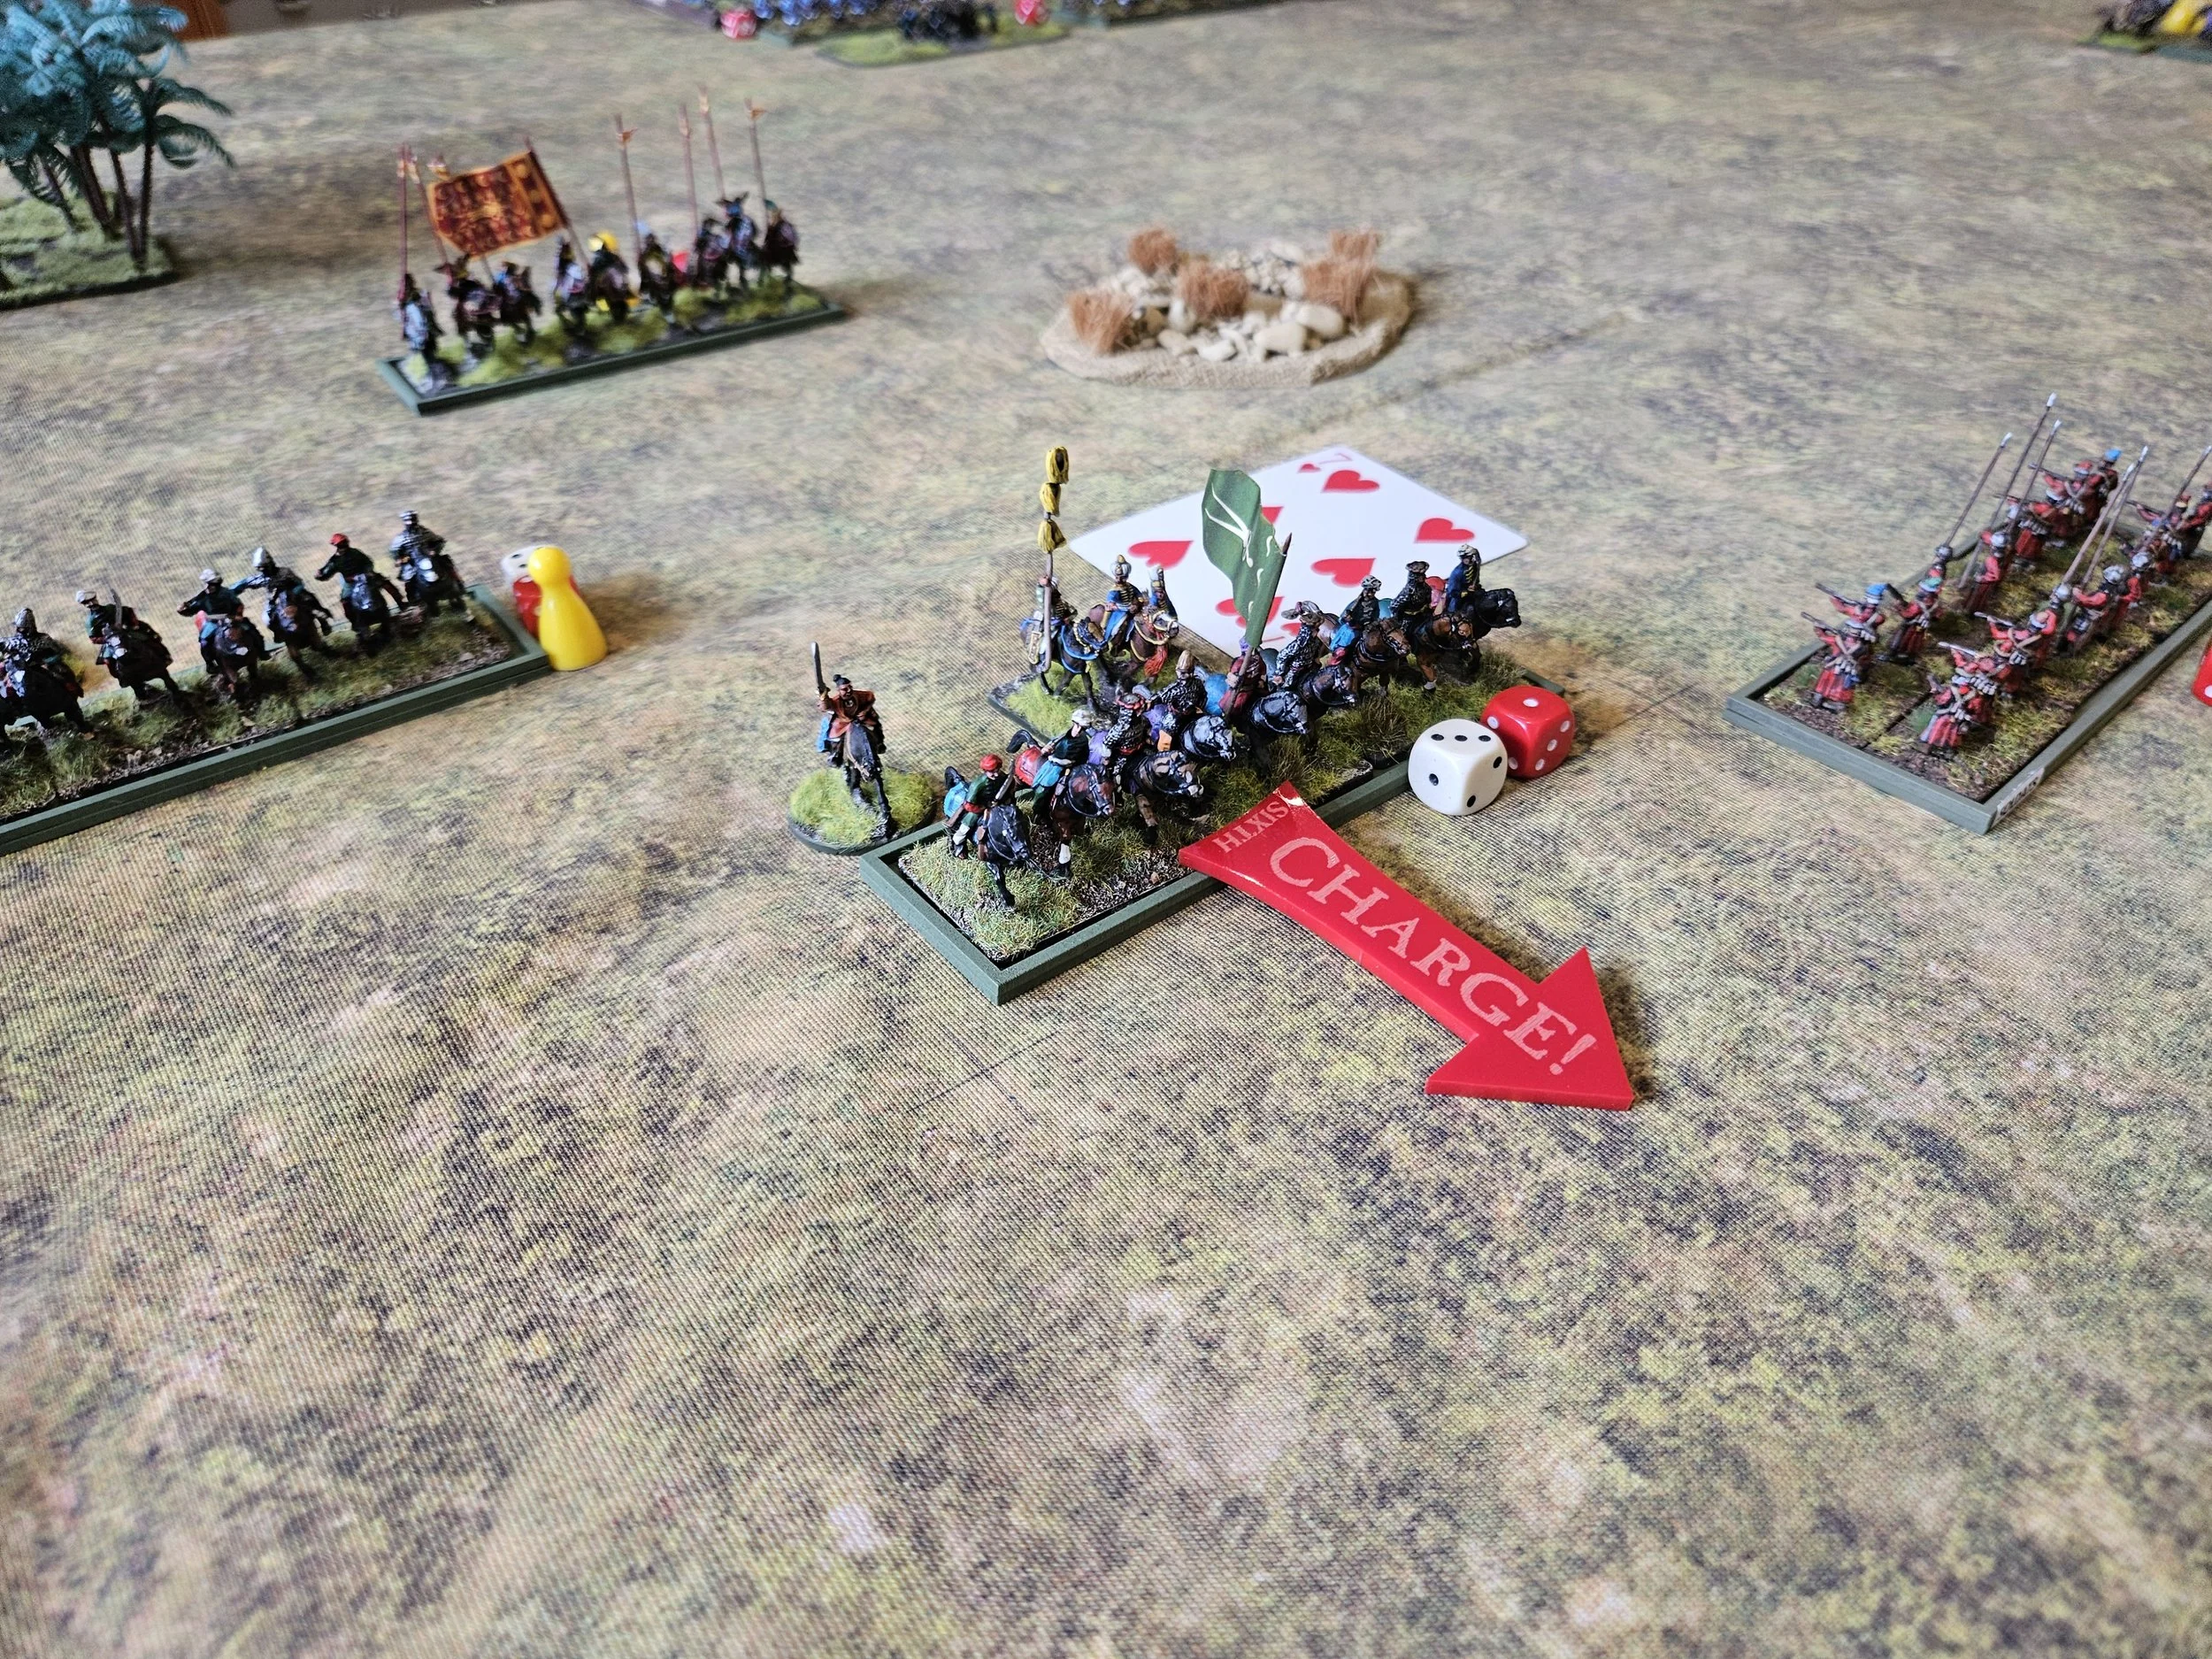
Although the main cavalry clash was still continuing, the good news was that in the centre some Winged Hussars had smashed through a unit of Janisseries, and was now in a threatening position just about behind the Ottoman line.

At this point I had to abandon my command, but handed over the baton to friend Mark with instructions not to throw away the obviously hugely advantageous position I was gifting him!

Fortunately, Mark was able to complete my work successfully, although I was informed that the infantry action proved a stalemate, and winning the game became a very close run thing, with the Polish-Lithuanians having only two coins remaining when the Ottomans finally fled the field.

Anyhoo…a great game, and what looks like a great set of rules on its way.

FK&P AAR: Cossacks versus Ottomans

Rob and I fancied a game of For King & Parliament - Eastern Front variant. I wanted to get my newly-painted Azabs onto the table, so Rob would play the Ottomans, and I took the Zaporogian Cossacks as (a) they hadn’t been on the tabletop for some time and (b) they would be a historical match-up for the Turks.

This could also be an interesting game as, rather than being cavalry versus cavalry like many of our recent games, this would be cavalry versus war wagons! It would also be fairly epic, as we were playing at 160 points per side: a large game even for FK&P.

The Ottomans had committed the majority of their cavalry to the left flank, facing the rather motley Cossack horse and their Tatar allies. I wasn’t going to win this clash, so my horsemen sallied forward aiming to do as much damage as they could before dying gloriously!

One unit of Tatar lancers, four bow-armed lights, and two units of raw Cossack horse versus the pride of the ottoman empire!

Now if you’re going to go, you might as well go in style, so one unit of Cossack horse charged the Ottoman guns that had, perhaps unwisely, strayed too close to the front line.

Much to my surprise, the Cossacks ran right over the unfortunate Turkish artillerymen and announced their intention to charge the Janisseries behind them…before realising how stupid that would be and skidding to an abrupt, Ace-inspired halt!

This did leave the Cossacks a little exposed, but the Sultan’s elite Sipahi’s of the Guard were so stunned by the action that they just stood there watching as their motley opponents charged by!

Meanwhile, the other Sipahis had been clearing the Tatar light cavalry from the table, the unfortunate horse-archers’ attempts to evade failing dismally.

The Tatars weren’t done yet, however: forward went their single unit of noble lancers and, although disordered by the process, they smashed one of the remaining Turkish Sipahi units from the table.

Even better, after pursuing the survivors for a bit, the Tatar nobles then spotted the Ottoman camp, pulled themselves together and, executing a smart right turn, went on to do what Tatars do best and sacked the camp, stopping only to gather in the spoils!

Back to the Cossack horsemen…who’s blood was obviously up!

Those of you who know the history of my Cossack army will know that I bought the box-set in ignorance thinking Taras Bulba like waves of elite light horse riding down all in front of them, only to be somewhat surprised that the army was almost all foot, and foot in wagons no less, with the only cavalry available being little and raw!

Well, no-one had told the Cossack horse that they were little and raw. The so-far-unengaged unit leapt forward and ran over a unit of Janisseries, only to be followed by the other unit, still disordered from running over the guns, then crashing into the Janisseries that they had pulled up to avoid, and sending them flying from the field too, despite the disadvantage of their disorder!

Meanwhile, the Cossack tabor (war wagons) had been slowly advancing forward in the centre of the field, looking for the right spot to stop and form an impenetrable wall of wood from behind which to fight the advancing Ottomans…except that the Ottomans weren’t advancing!

Although a couple of their cavalry units had bashed through the Tatar light horse and were ready to turn inwards and attack the Cossack left flank, the rest of their cavalry and half the Janisseries had either been destroyed or were worrying about the Cossack horse who had got through behind them.

The tabor were therefore bunched together firing sideways at the enemy cavalry that had beaten the Tatar lights, with some Cossack moloitsy (literally “lads”) moving to protect the rear left flank.

And what of the Azabs, the reason for the Ottoman presence?

They had been kept back on the Ottoman left along with a couple of units of light horse. They finally got moving forward as the Turks became a bit desperate, having been hemorrhaging coins for most of the battle so far.

The Cossack right, however, was ready for them: three units of infantry (admittedly two more Raw “lads” units) would be enough to hold them up at least until the battle was won elsewhere.

The end of the battle came not with a “huzzah” but with a bit of a damp squib.

The tabor opened up of whatever they could see, and one of the casualties caused was a Turkish officer, which was enough to remove the final Ottoman victory coin. Defeated, the invaders slunk off the field back to Istanbul, leaving the victorious Cossacks to both celebrate and to wonder what the Cossack horsemen had been drinking!

It had been a cracking battle from the Cossack point of view: some very good cards meaning that their raw Cossack horse had rather surprisingly swept all before them rather than acting merely as speedbumps as anticipated.

Add in the Tatar noble cavalry doing what they were supposed to, and some lucky sniping from the tabor, and everything had gone rather extraordinarily well!

I just hope I haven’t used up all my good luck: I’ve got Britcon next weekend!

FK&P AAR: Muscovites vs Ottomans

One of the great things about the To The Strongest system is that you can fight a decent sized battle in a couple of hours and still get a definitive result.

Thus it was that after our game featuring Ayyubids and Crusaders, Rob and I still had time for a game of For King & Parliament/Eastern Front variation. Rob would take the Ottomans, I would play the Muscovite.

The game began with strong advances on both sides, in particular with the Turkish horse seeking to break through on the Muscovite right flank.

The fighting opened on the left flank, with a massive cavalry clash between ten units of cavalry: five Turkish, five Russian.

The Muscovites had managed to get a tactical advantage: getting into position to be able to charge into the flank of the Ottoman line. Unfortunately, the Turkish horse proved extraordinarily resilient, failing to take any damage even when attacked from front and flank!

Not a bad set of saves!

Despite this resilience, the initial clash went to the Muscovites, who now still had five units of cavalry versus the three remaining to the Turks.

This advantage was, however, an illusion: the Muscovite horse had been badly disordered in the initial clash and, as the two lines closed again, it was the Ottomans who burst through the Russian line, evening up the scores to three remaining cavalry units each.

Meanwhile, on the right flank, the Ottomans were definitely dominating the situation after the Muscovite Cossack and Tatar allies had suffered a ‘mare on first contact, leaving the Turks utterly dominant in that sector of the battlefield.

Meanwhile, in the centre, the Ottoman Janisseries watched the action, unmoved…

Back to the left flank, and the Turks saw an opportunity to wipe another Muscovite cavalry unit off the field with a flank charge stymied by the cards.

This gave me the opportunity to move their targets to safety, but in one of those quirks of fate that makes FK&P so exciting, the Sons of Boyars decided that they would rather be flank-charged after all!

The Turks were keen to oblige, de-Boyarising the table with ease. At the same time, the rest of the Ottoman cavalry on that flank charged forwards and that, combined with the losses on the right flank, was enough to send the remainder of the Russian army fleeing back towards Moscow!

Well that had been an epic game, well won by the Ottomans: their cavalry had proved unstoppable even by the usually super tough Muscovites!

Another great game!

FK&P AAR: Vanquished at Vanquish!

I visited the Vanquish wargaming show in Bourne End a couple of weeks ago. It’s a great little event and conveniently close to home, so I always enjoy attending. This year, I had an extra reason to go — the South Oxford Generals (SOGS) were running their Pavia game using the For King & Parliament: Eastern Front variant.

I ended up playing the Ottomans against a combination of friend Gary and a young lad who was at the show with his father…who was helping him, as was everyone else in the room…an important fact to remember when we look at what happened in the game. Very important!

Now the Poles, my opponents, have vast amounts of very, very good cavalry, including the dread Winged Hussars (veteran horsemen armed with lance, pistol, carbine, bow, spear, warhammer, phased plasma rifle in the 40-watt range etc) so I decided to see what I could do against the Polish infantry: after all, I had the Janisseries and they’re supposed to be pretty good. So forward went my foot…

First, however, the Poles, understandably keen to get their cavalry into action, advanced their right wing, and soon a massive cavalry melee broke out in the centre of the field.

My chaps didn’t actually do too badly here. In fact they did rather well in that rather than being wiped out to a man, they held their own, gave as good as they got, and soon the left hand side of the battlefield was looking rather empty of formed units.

This shifted the action into the centre where the two sides went at each other again.

Much to my surprise, I was definitely winning the cavalry battle, but just couldn’t quite finish the Poles off.

Meanwhile, on the other side of the field, the two infantry lines had closed and were sending shot after shot at each other, but to no great conclusion.

By this stage the game had attracted quite some attention with, as I said, the whole room siding with the young lad against me: somewhere along the line I had apparentlly turned into a combination of Dick Dasterdly and a pantomime villain! We won’t talk about who was Mutley, Si…

Anyhoo, we were now neck and neck on the coins front, as my initial gains on the left had been offset by my opponent’s gains in the centre and on the right.

The young lad’s father wanted to go. I agreed: he needed to take his child away before the young scallywag (not what I had originally written!) beat me!

It was all coming down to one final turn. I had cavalry to spare in the centre, but just couldn’t quite get them into the action in time…and the Poles still presented a danger from their last few horsemen.

In the end, I had a turn where I failed to get the last coin I needed to win; then the young lad went through most of his turn equally failing to get the last coin that he needed to win before commiting his last remaining unit of light horse in a desperate charge at a unit of my light horse.

With the crowd cheering them on, the Polish light horse smashed into my chaps and sent them routing from the field! I had lost!

What a cracking game of FK&P and a real example of what wargames shows are all about: not just the shopping but beautifully displayed demo games played with plenty of crowd participation.

My thanks to Si and the rest of the SOGS for putting on such a great game.

Postscript

Afterwards someone came up to me and said how much they had enjoyed watching and that it had been one of the best demo games they’d ever seen. They also wanted to know how difficult it had been to make sure that I lost, and by just one coin. I must, they said, be a very skilled player to manufacture such a close result and yet make sure the young lad won.

Make sure the young lad won? Make sure the young lad won? I was trying everything I could to beat the little…young scallywag!


FK&P AAR: Overlord!

Off to Overlord, Abingdon Wargames society’s annual show, to play a game of For King & Parliament - Eastern Front variant pit on as a demonstration game by friends Si and Mark.

I would play the Polish-Lithuanians versus Gary and Si playing the Ottomans.

The set up was an approximate version of the end of a very important battle in the Vienna campaign (they’ll never know that I can’t remember which one!) in which the Polish-Lithuanian cavalry, headed by the Winged Hussars, destroyed the Ottoman cavalry and won the day.

I had set up hoping that history would repeat itself, with the Hussars and Pancieri heavy cavalry on the right of the line facing the Ottoman horse, and with my lighter cavalry and Haiduk levy infantry on the left. The Ottomans had their guns and Janissery veteran infantry in the centre, but only their Azabs on the right, so I was hoping that even if the Hussars didn’t do the business, my infantry could defeat the far right of the Ottoman line and then loop in to roll up the fiendish Turk.

The battle began with the Poles pushing forward strongly across the whole front except the far right, where the cavalry command there stubbornly refused to move forward.

Confident in the quality of the Hussars, my tactics on the right were just “get stuck in”…which seemed to work very well as before long the Ottoman cavalry had melted away in front of me.

At the other end of the table, the Janisseries unwittingly played into my plan by not coming forward but choosing to exchange inconclusive long range fire with my Haiduks.

This meant that I could then, as planned, try to get around the left-hand end of his line…which sort of worked in that I did manage to get into a decent flanking position, but just couldn’t deliver a coup de grace that would let me start rolling it up.

Meanwhile, the Polish-Lithuanian cavalry, having defeated their Ottoman equivalents, turned in (well, those who weren’t pursuing did) and started to roll up the enemy line from the other end.

This culminated in a flank charge into the Guard Janisseries plus “marching band army standard” that should have swept them off the board but unfortunately just bounced off!

There was still nothing much happening at the other end of the table. My flanking manoeuvre was still sort of working, the Janisseries were still hanging back…

…which gave me the opportunity to hit the pesky Guard Janisseries with another unit, and this time the extraordinary chits I pulled from the bag did the damage and destroyed them.

This actually won me the game as I think I took five medals from that one unit (two for the unit, two for an officer and one from the marching band standard) which was quite lucky as the rest of the Ottoman line had finally realised that they needed to do something and had moved forward in a threatening manner!

But they were too late. As mentioned above, the game was already mine not, I hasten to add, as a result of any great tactical manoeuvring on my part: it was the Winged Hussars crashing through the Ottoman horse that did the trick. I was having a good day on the chits as well: saving far more often than I should have, and getting some cracking attack chits in as well.

All in all it was a most enjoyable game and a great chance to play with Si’s beautifully painted toys. The Overlord show was good as well: heartily recommended for a visit and definitely on the list for next year.

FK&P AAR: Transylvanians vs Ottomans - Take Two

Plenty of time left after game number one, so Neil and I decided to play again: same sides, same terrain.

Given the above, both sides set up in largely a similar fashion as well.

but this time the Ottoman infantry also come forward strongly (last time they held back).

But the Transylvanian light horse have been at it again, and manage to sneak around the left side of the Ottoman line and take the Ottoman camp!

In the centre, one lot of Ottoman artillery prove a tempting target for the Hungarian Seimeni, but I’m not sure how long they’ll last now they have taken the guns!

Here’s an overview of the battle at this point:

The Transylvanians commit their Household Cavalry in the centre. It’s very successful, but every time it destroys an enemy unit, it pursues them off table and is lost!

That’s a very expensive way to figth a battle!

I have the Ottomans on the ropes, but just can’t quite seem to polish them off. Neil saves a couple of match points on the right…

…and the Janisseries are starting to chew through the Transylvanian infantry!

It is now sudden death: whoever loses the next unit loses the game…unless, that it, I can get one of my three units that have pursued off table back into the action.

It’s still Neil’s turn, but he’s just about out of unist to play. On a whim he decides to try and re-take his camp, lost to the Transylvanian Lights earlier in the game, with some of his Sipahis.

With a couple of good activation cards, the Sipahis hit home…and my Lights die…which is enough to cost me my last on-table victory medal! The Transylvanians lose heart and retreat!

I’m still not sure quite how I lost that game, but I did! The Transylvanians just couldn’t quite finish off the units they Disordered, and the Ottomans proved very successful in saving match points.

A great game of For King & Parliament/Eastern Front!

FK&P AAR: Transylvanians vs Ottomans

With the help of friend Rob, I had finally managed to get my 17th Century Ottoman force ready for combat. t had been a long haul: the initial Janisseries painted by Rob, the cavalry painted by Matt Slade of Glenbrook Games, then the odds and sods needed to finally fill the force out finished by Rob and I. Their first outing would have friend Neil commanding them as they faced off against the Transylvanians commanded by Yours Truly.

I was a tad concerned about the prospects for the Transylvanians: my infantry were decidedly inferior to the Ottoman Janisseries, and unless I could get my light cavalry dancing around the field, the Turkish Sipahis were going to run right over my horse!

Accordingly, I placed my lights on the wings, sent my infantry into the small village just in front of my start position, and hoped for the best in the centre where my Household Cavalry were facing the Ottoman elite cavalry.

One advantage that I did have was that although Neil is a veteran wargamer and familar with To The StrongestI, this was his first game of For King & Parliament.

The game opened with me taking the fight to the enemy and advancing forward strongly across the whole front except where my Haiduks had occupied the village.

On the right flank, my superiority in light horse enabled me to get a unit around the side of the Ottoman main line, meaning that they could turn and assualt the Turks from front and side.

I also managed to do the same on the right hand side of the field, where my light cavalry effectively managed hold off the Ottoman light cavalry there and counter any Ottoman movement against my weak infantry.

Back to the right flank, where my lights had now effectively cleared the enemy cavalry away, and could think about heading into the center to help.

That left the centre, where my Household and Enlisted Cavalry faced up to the Ottoman Sipahis.

This looked quite serious, as the Sipahis are seriously good troops, but the success of my lights out on the right meant that Neil had to divert some of his cavalry to cover his flanks.

It was a brutal melee, with the Sipahis initially having the upper hand, but dealing with my lights on the right kept siphoning off both their attention and resources: first one squadron was sent left to shore things up, then another etc

All this meant that my Household and Enlisted cavalry were able to recover from the inital clash and then fight back hard. The Sipahis began to give way, with a trickle to the rear becoming a flood, and the battle was mine!

It had been a great game. The Transylvanians, for a change, managed to use their light horse with great success, totally blocking the left wing and allowing the centre to be won by draining Ottoman resource onto the right wing.

Even better, there was time for a re-match…but that’s another story!

Hittite City Gates from Red Copper/Baueda

I needed a camp for my Hittites so thought I would follow what I’ve been doing so far and use the Red Copper STL of a Hittite City Gate that looked pretty good to me.

The only problm is that I wanted the camp to fit on a 10cm x 10cm base and the size of the full tower-gate-tower of the original was just over 15cm in width. No problem: those nice people at Baueda scaled and printed the components for me so that they fit beautifully onto one of my camp bases.

The individual pieces linked together well, with only a very slight bit of shaving to get a tight fit. Note that I left the rear end open to facilitate using the camp to store tokens etc during a game.

I painted the main towers and walls with a sponge (one of the sponges that protects figures in a blister pack will do the trick), then re-painted the stonework at the base of the walls in grey, washed with a Contrast grey, then highlighted with a lighter colour.

I did try drybrushing the walls in a light colour, but just couldn’t get the effect I wanted, so had to re-paint the test area again. On reflection, the un-drybrushed walls are a good contrast to the heavily drybrushed base.

I then painted the roofs and beams in a warm brown, and the window frames in what I would call a biblical blue.

All in all, I’m very happy with this kit: highly recommended.

Ottoman Command from Khurasan

Friend Rob was kind enough to paint some Ottoman command figures for me.

These are the Khurasan specials from their Ottoman range that I will use as officers and heroes.

Exquisite paint jobs!

Deli for the Ottomans

I’m still building my 15mm 17th Century Ottoman army: the Sipahis and Janisseries are done, not it’s just a matter of adding some of the more irregular troops.

About as irregular as you can get, the Deli are technically a light cavalry unit consisting of fanatical warriors and known as The Mad. They would dress themselves and their mounts in animal skins, decorating everything with feathers, fur or hide.

Altough my Sipahis are painted using traditional acrylics, I went back to Contrast paints for these mainly because Contrast really suits the depiction of fur and feathers.

When you get these (mine are from By Fire & Sword, some of the last of the v1 models before the v2 ranges are released hopefully later this year) you get a packet of stiff wire lances which come with a lot of little metal balls.

I puzzled over what these were for before managing to find a picture of the models from the BF&S website that showed them in place: they fit on the lance and rest just on top of the hand holding it as, I suppose, a sort of hilt. Might have been nice to have that on the box somewhere as I almost discarded them in ignorance.

For some reason, I also found the flag and epnnants difficult to do this time. Usually I’m fine with them, but the flag is a second attempt after I ruined the first one, and you can see that some of the pennants suffer from the dreaded “edges don’t match white edges”! They still make the unit really pop though, so worth doing.

The Deli were certainly light cavalry, but you don’t give horsemen a lance and call them fanatic and mad unless you expect them to charge people. As most rules don’t allow lights to charge formed units, I’ve therefore classed the Deli as fanatical formed cavalry, but might have to review my decision in light of the various whinges I have heard about this. I think I might add the option of fielding them as light or standard: people can then make their own minds up!

So just a few light cavalry units to go now, although to tell the truth I have many units of lights in my other armies that would pass as Ottoman lights. They were, after all, largely the same peoples…but it’s just I like a full roster for each of my armies rather than operating some kind of central pool. Any excuse to buy more minis!

FK&P-E AAR: Polish Lithuanians vs Ottomans

Friends Mark and Si have been collecting Polish-Lithuanian and Ottoman armies in 28mm to use with my “eastern front” variant of For King & Parliament.

As I currently have neither army in my collection finished, and play in 15mm, I was keen to have go. I would play the Polish-Lithuanians (hereafter known as ‘the Poles’) and John and Si would play the Ottomans (hereafter known as the Ottomans or the Turks!).

The Poles won the scouting, so I deployed my Winged Hussars and veteran Pancerni cavalry on the left, my guns in the centre, and some German foot supported by Reiters and Turkoman light cavalry on the right.

The Ottomans had their Janissery infantry and artillery on my right, their Azab levy foot in the middle, and their Sipahi cavalry (including some guard) on my left.

The game opened with each side moving their cavalry forward as rapidly as possible, and soon a collosal melee broke out, horse swirling back and forth amongst the confusion of the battle.

Meanwhile, my plan on the right had been to use my ‘German’ horse and accompanying lights to disperse the enemy horse in front of me, then advance to threaten the flank of the enemy infantry and guns as my ‘German’ foot advanced to contact from the front. Unfortunately the cards had other ideas, and my men refused to move more than a token distance towards the enemy.

The Ottoman cavalry command opposite my ‘Germans’ had exactly the same plan, and did manage to advance forward into bow range.

Fortunately their attempts to do unto me what I had intended to do unto them failed miserably and, with a new turn beginning, I was able to clear the enemt horse away and start my ‘Germans’ forward.

This left the game progressing nicely: I reckoned my four units of foot with cavalry support hitting the enemy flank could take care of the Janiserries, and my cavalry on the left were all veteran versus merely a mixed bag of Turks, so provided Si couldn’t get the Azabs in on my guns and more ‘German’ foot in the centre, I should be okay.

And so it came to pass: my cavalry on the right proved unstoppable, and soon Ottoman horse were fleeing the table in great numbers.

In fact, the battle was won on the left by the cavalry before my poor infantry and flanking cavalry had time to get stuck in at all:

So a solid win for the Poles…doubtless helped by my secret weapon lurking in her crate under the table: a fierce Pomeranian* mascot to inspire my troops to the heights they achieved!

*Pomerania being part of Polish Lithuania at the time!

Location of the Pomeranian Voivodeship within the Polish–Lithuanian Commonwealth

Painting Ottomans

I have about half a 17th Century Ottoman army ready for the tabletop: the infantry bought from a friend, the cavalry painted by Glenbrook Painting Services (recommended).

Half an army is no good to man nor beast, so Time to get started on the other half. First up were some more European Sipahi and, as I had the figures handy, another infantry command base.

As the rest of the cavalry is painted acrylics-on-a-black-undercoat, I followed suit with the two horse units shown above rather than using my beloved Contrast Paints.

This was a bit of a shock to the system, especially with the horses, but they didn’t seem to turn out too badly. The By Fire & Sword figures are above-average castings but one unusual trait is that, with cavalry, the horse provided is plastic versus a metal figure.

This has two effects: firstly a base is a bit top heavy, and secondly the horses are sometimes bent out of shape and can’t easily be straightened. Fortunately not a problem with this batch, although I did have to remember to be careful when taking them off their painting-bases.

The Janissary command base, on the other hand, uses Essex figures and is done using Contrast Paints. Comparing the two (i.e. command base versus the two cavalry units) shows the difference between the two painting styles. In this case, for this colour scheme, I prefer the Contrast look, although I accept that for some colour schemes nothing beats the layered (base coat, top coat, highlight) acrylic treatment.

Rainy Day Painting

It’s raining again, and no-one is around, so a trip to the painting table to see what we can find to work on.

First up are a couple of large artillery bases for my 17th Century Ottomans:

I wanted some big guns for the Ottomans and, as you can see, I found them!

The guns themselves are from the English Heritage: a recent trip around Framlington Castle (recommended, even in the rain) gave me access to the gift shop and to said guns. They’re great for a huge artillery pieces and it’s only the wheels that need painting. Add on some Ottoman crewmen from Essex and away you go.

The Ottoman artillery didn’t take very long, so it was what else I could find in the lead mountain to fill the time. With all the news being about the situation in Palestine, it seemed grimly inevitable that my eye eventually fell on a small bag of figures that turned out to be Khurasan’s Egyptian crewed weapons for the Yom Kippur War 1973.

In the packet you get one HMG team, one 81mm PM-41 medium mortar team, and two Malyutka or “Sagger” anti-tank guided missile teams. All nice figures that paint up nicely: the only problem was remembering what combination of paints I’d used for the crews’ uniforms…but fortunately I keep a record of that sort of thing so was able to quickly find the info I needed.