Where the Flock?

Missing!

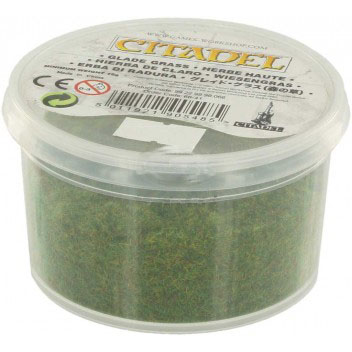
Is it me, or is it impossible to get Citadel/Games Workshop grass flock any more?

None of the three GW shops I’ve been into have any (“we don’t stock it any more: people only want to buy tufts”); the GW online store has none; my order from Element Games is on back order…where the flock has all the flock gone?

I can’t even buy the Gale Force 9 stuff from their store, as the speed checkout that the link to the Battlefront shopping cart sends you to is faulty.

Why does this matter?

Well, I’ve been using the stuff for thirty years or so. I have literally thousands of figures based with the stuff, and would rather like any new ones I get to match!

Meanwhile the painted and partly-based minis mount up on my painting table!

Q13: Salute Bargain Finally Finished

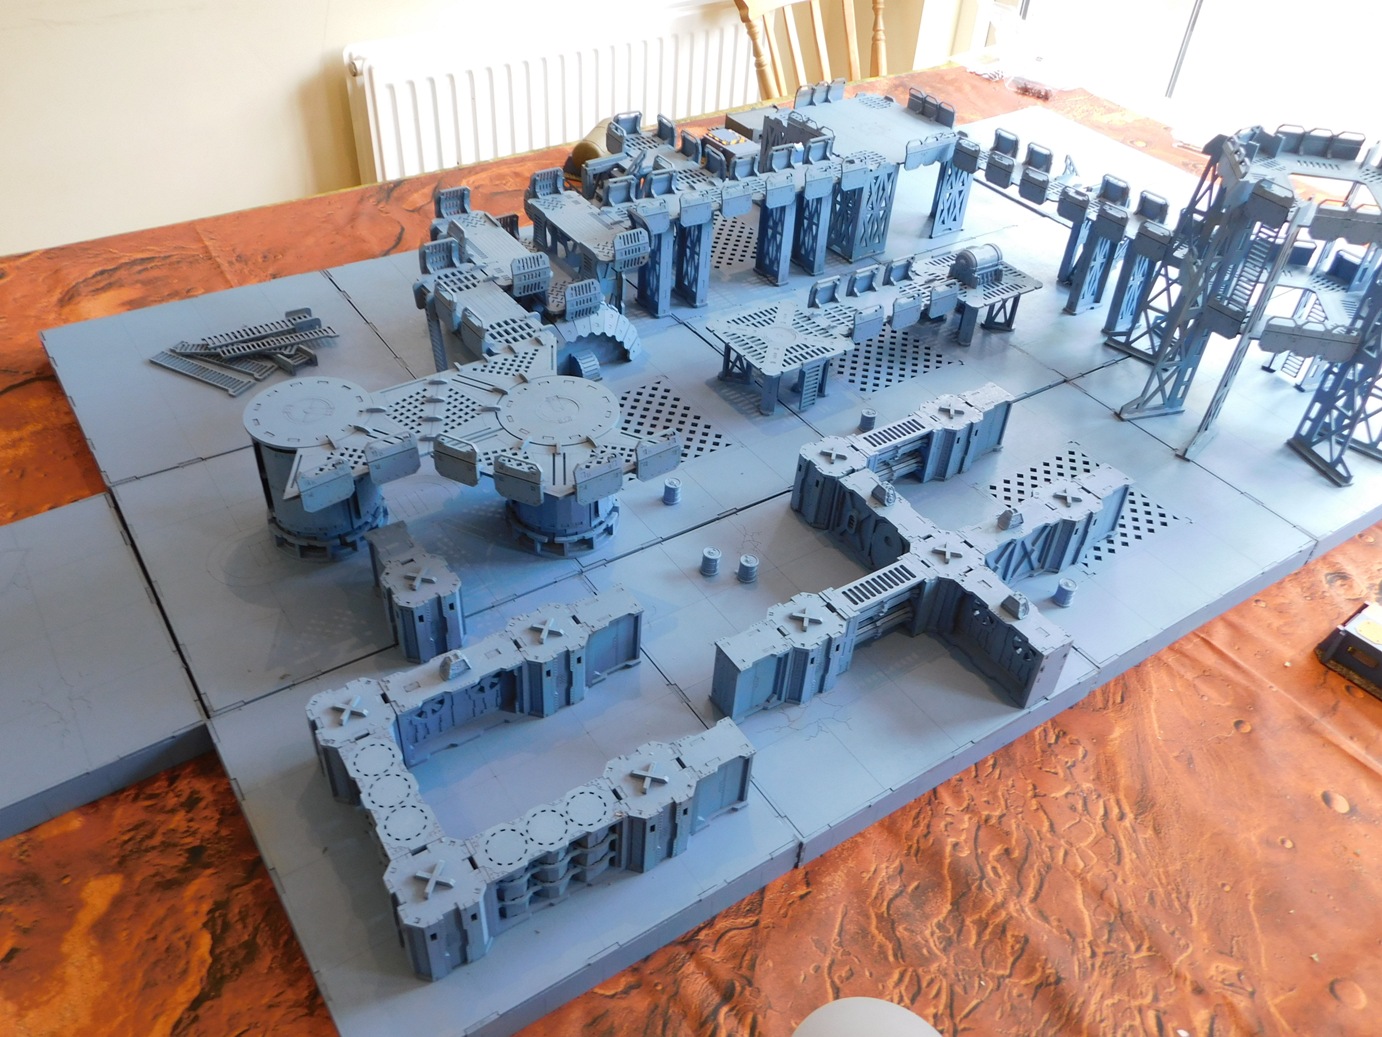
Some of you may recall that at Salute I splashed out on a laser cut mdf industrial set up on special offer from Troll Trader. This was a huge layout for the bargain price of only £100 including p&p. I’ve been gradually building it over the last six weeks and have finally finished it.

This is a legendary set up, meant for 28mm troops, but absolutely ideal for sci-fi “15mm” figures which, as we all know, tend to be more 18-20mm.

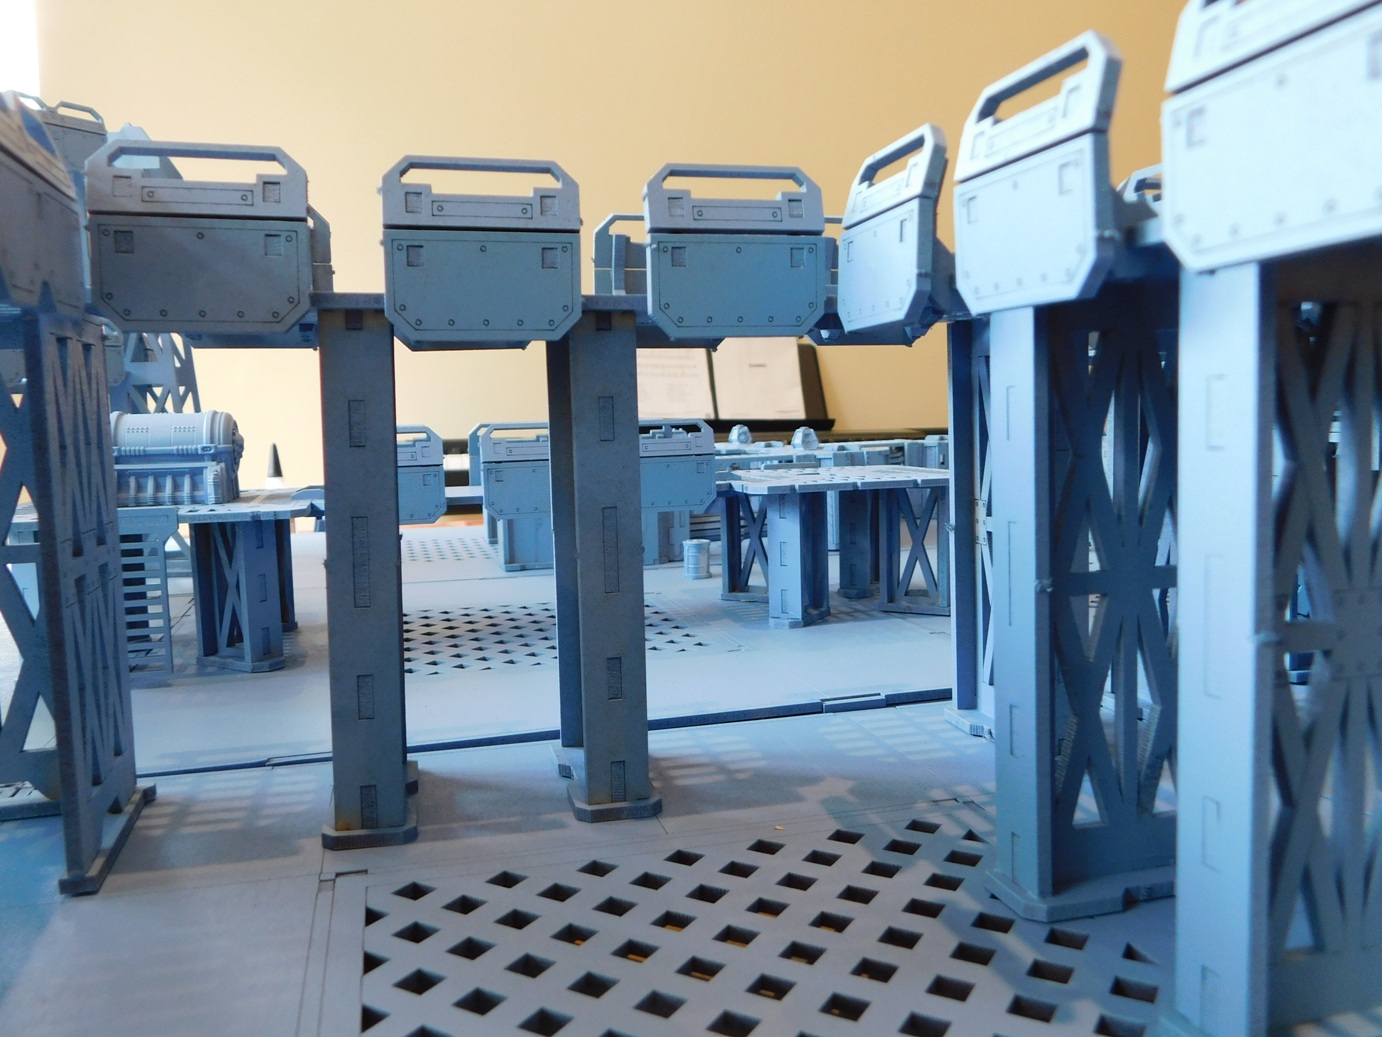
I’ve always wanted to play an industrial hive battle kind of game, and now I can. In total, I now have the sixteen base boards (that alone used up about a can and a half of spray paint); a couple of small platforms connected by a walkway; the huge platform that looks like the outside of an oil well; a powerplant piece; a couple of big, cylindrical tanks connected by a top walkway; a landing pad; two staircases; two sets of corridor connectors; twenty-four individual bits that join together to form the “iron labyrinth”; and a pile of spare ladders.

The build was arduous: not just because of the sheer volume of things to be built, but also because some of the components were, simply, difficult to build. I’m not really a terrain-building person, so often don’t take the proper time and trouble to prepare and get everything just right: so checking and sanding every slot to make sure its component slides in smoothly just isn’t my cup of tea. Smash the two bits together and use a bit of strength to pop the slots into place doesn’t work with every bit of this complex, especially not the industrial labyrinth sections that caused me more grief than anything else.

Having built the thing, I was going to leave it as plain mdf, but a simple spray of grey paint does make it look more, well, industrial, and will make a beautiful backdrop to my brightly coloured sci-fi figures. I suppose I should take the trouble to dry-brush it all now, to give it some variety and depth but, tbh, that seems like a lot of hard work for something that already looks very acceptable. I might have a game, take some piccies, see how they turn out, and then decide on the dry-brushing then. Or wash then dry-brush if I really want to go to town.

Here’s a gallery of the entire thing: very good value for £100, so Troll Trader (from whom I’ve always had good, if not incredible, bargains at Salute) go straight to the top of my Christmas card list.

Next step is to dress the table with the rest of my sci-fi terrain, buildings etc

One More House from MiniWarfare

When I ordered my bamboo houses from Frank at MiniWarfare in China, he kindly added in a freebie Chinese brick house to my order, which I have finally had a chance to make up.

Nice little model that I’m actually going to use, I think, as part of a Soviet factory complex. It will be the offices or a foreman’s house or something.

Anyway: easy to put together and paints up well.

Highly recommended, and you can find the rest of the range here.

15mm Bamboo Houses from MiniWarfare

About a month ago, I saw an ad. or a post or something from miniwarfare.com talking about their new range of 15mm mdf buildings for the Vietnam War.

Now I already have five or six large 15mm far east-type buildings from Sarissa Precision, but one can never have too much of a good thing, so e-mailed ‘Frank’ in China and placed an order, paying by PayPal. This may seem like a somewhat foolish thing to do, but the prices were very good, and I like to encourage new traders even if there’s the possibility that I was going to be conned!

Frank was very easy to deal with, very prompt in his replies, and, about a month after payment, in through the letterbox came my huts…and very nice they are too.

Stilted Bamboo House $9.50

They are also incredibly easy to build: each wall and its stilts come in one piece and slot through the base giving the hut an automatic stability lacking from separate-stilt versions. The detailing is lovely, and although the roofs are perhaps a bit artificial looking, I can always cover them with my patent green fur technique that makes my Sarissa huts stand out from…well, everywhere really!

Large bamboo house $7.50

I particularly like the way that the large and small bamboo houses have windows that you can prop open on a stick. I thought that these would be a nightmare to glue into place, but one end of the stick comes with a little wedge-y bit that hooks it onto the window sill beautifully enough to make a dab of superglue take hold without any problems at all. The shutter then glues to the side of the house and the top of the stick. Much to my surprise, I had no problems whatsoever with doing this.

Small bamboo house $5.00

The matting inside the doors and open windows are just a bit of hemp cut and glued onto the inside of the huts, again something very easy to do.

So miniwarfare.com gets a highly recommended from me, and I wish Frank every success in the future. I wonder if he’s planning to do a 15mm Russian church yet…

PS Do feel free to mention Vis Lardica if you do buy anything from them. Oh, in case you are wondering, I have no connection to Frank at all: this is just a genuine glowing review!

It's Another Russian Church

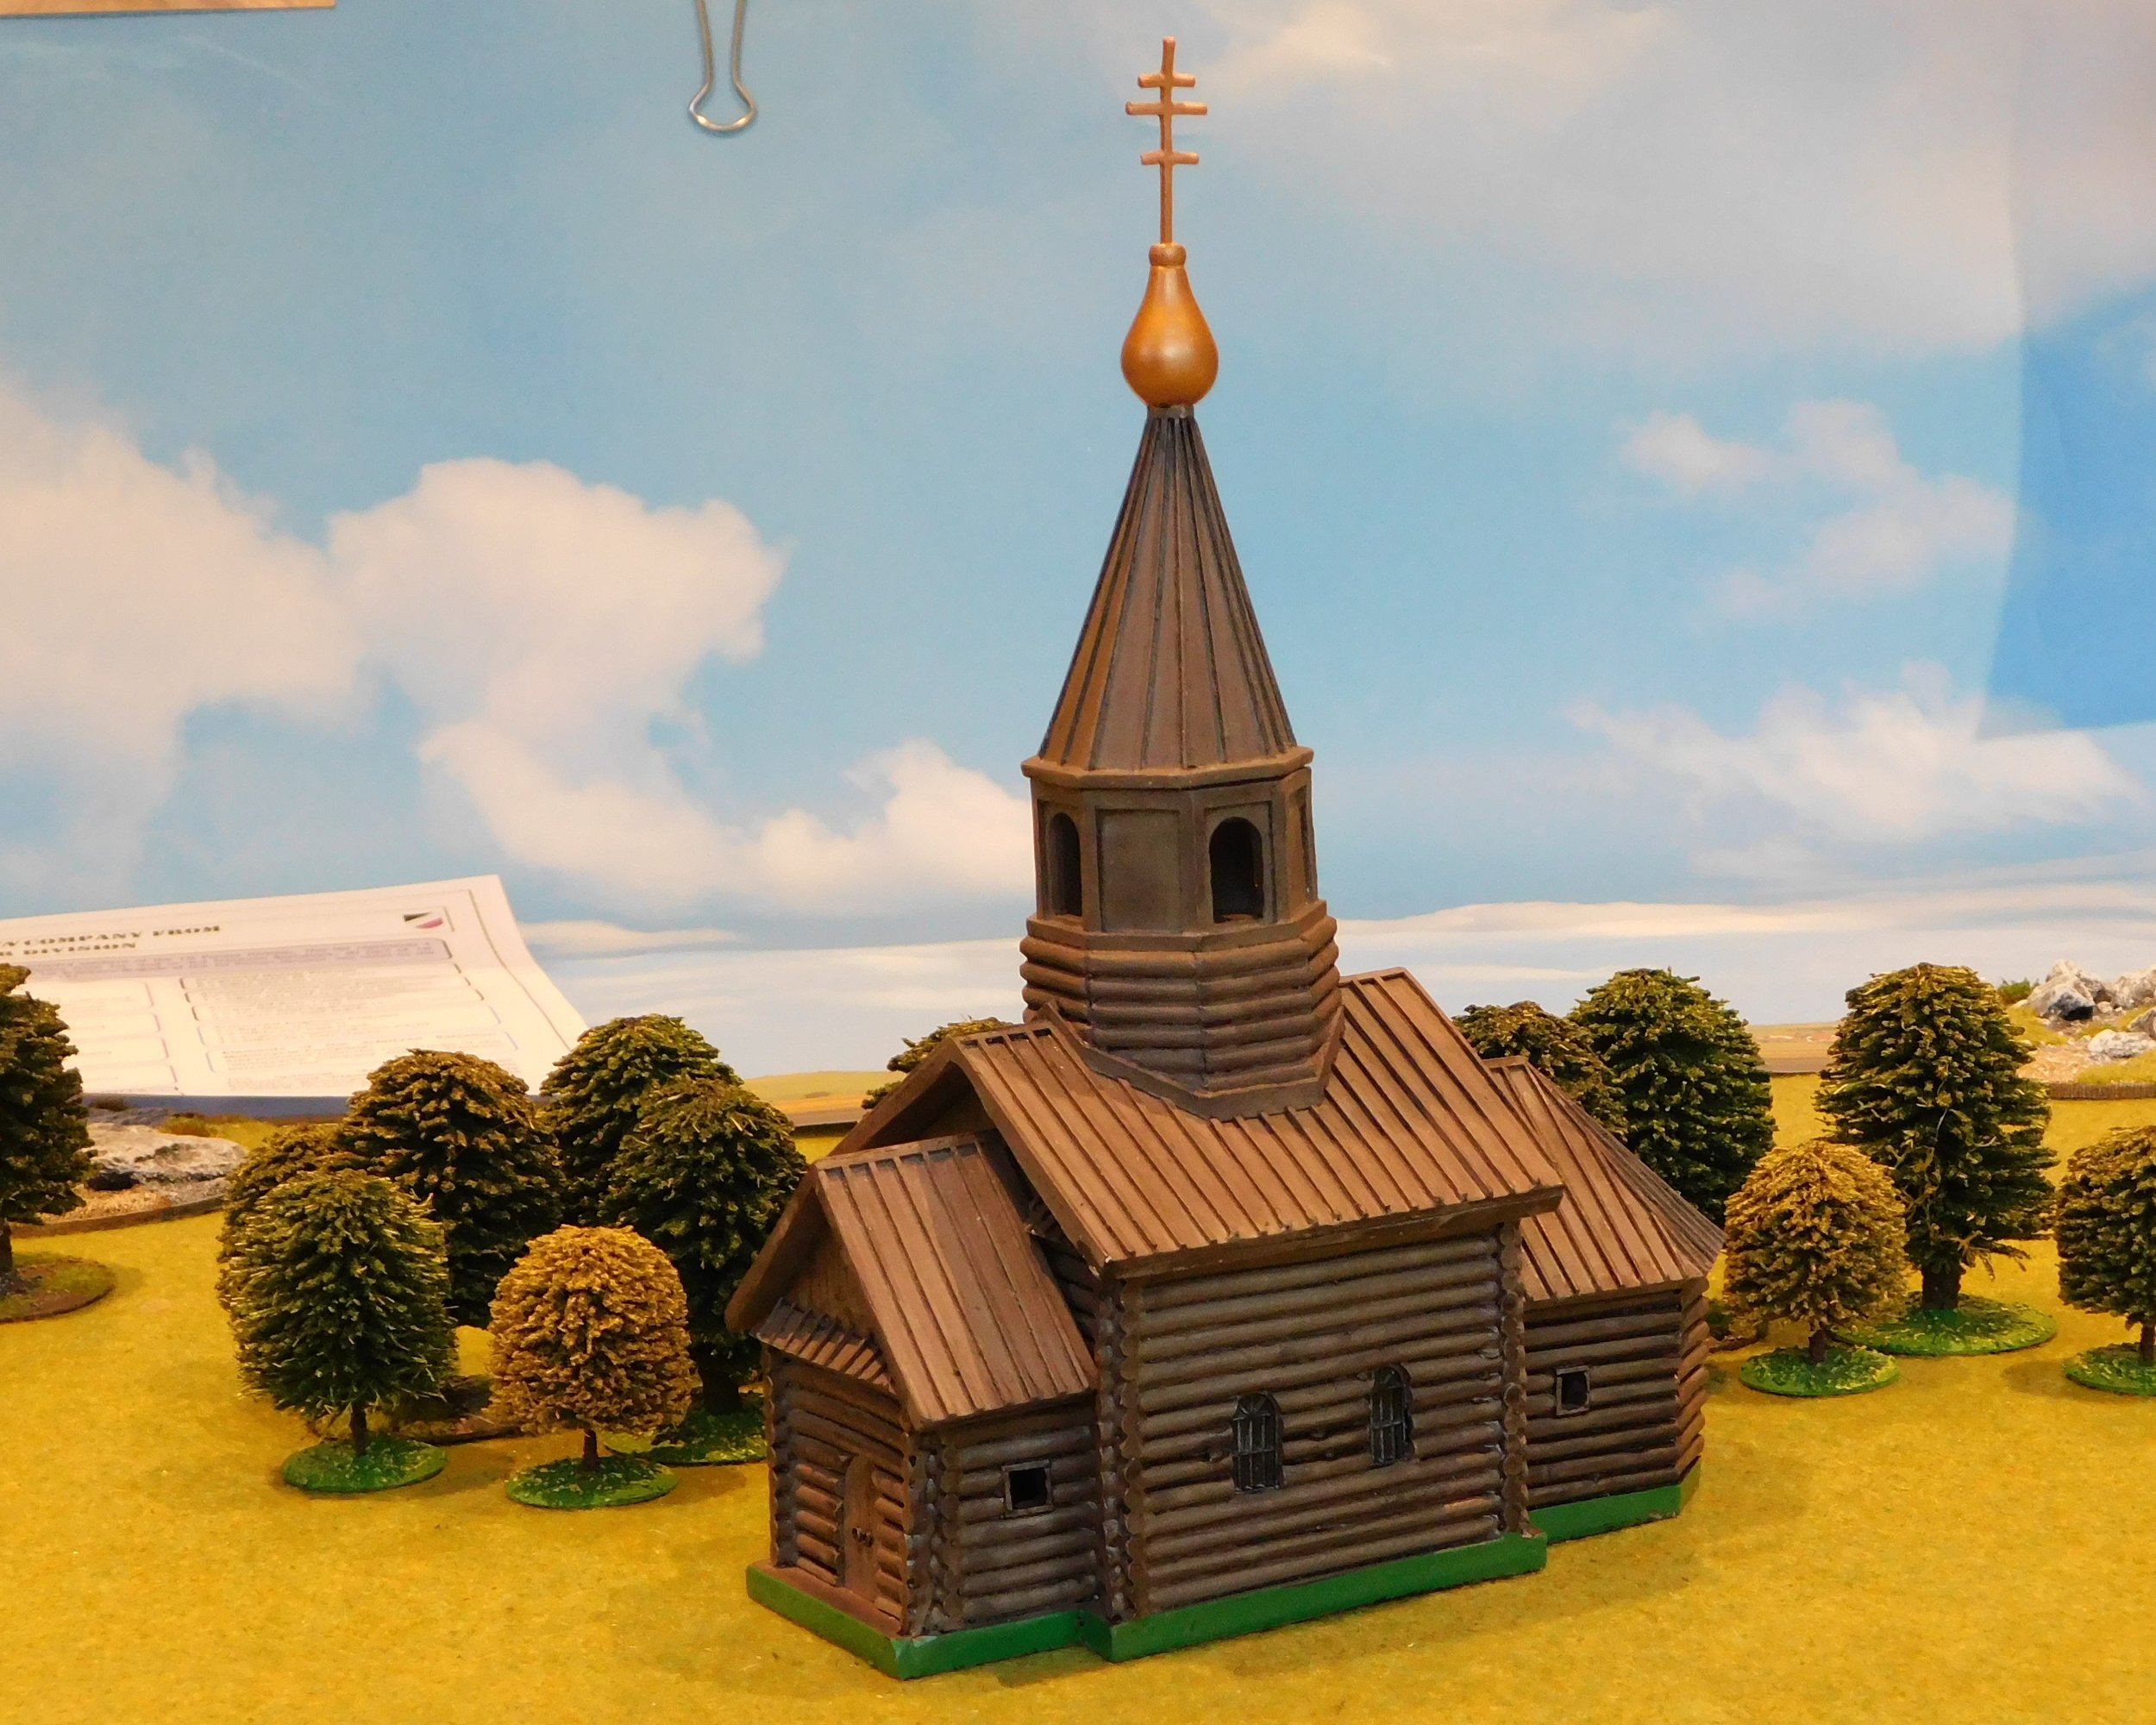
Yes, it’s another Russian church: the eighth in my collection.

This one comes from Mark IV Miniatures’ Fury on the Steppes range, and is quite lovely.

The church is in three bits. The base, up to the height of the thatch, the smaller roof, and the larger roof with spire. There’s plenty of room for figures in the base: I reckon you could easily fit a platoon of infantry in there.

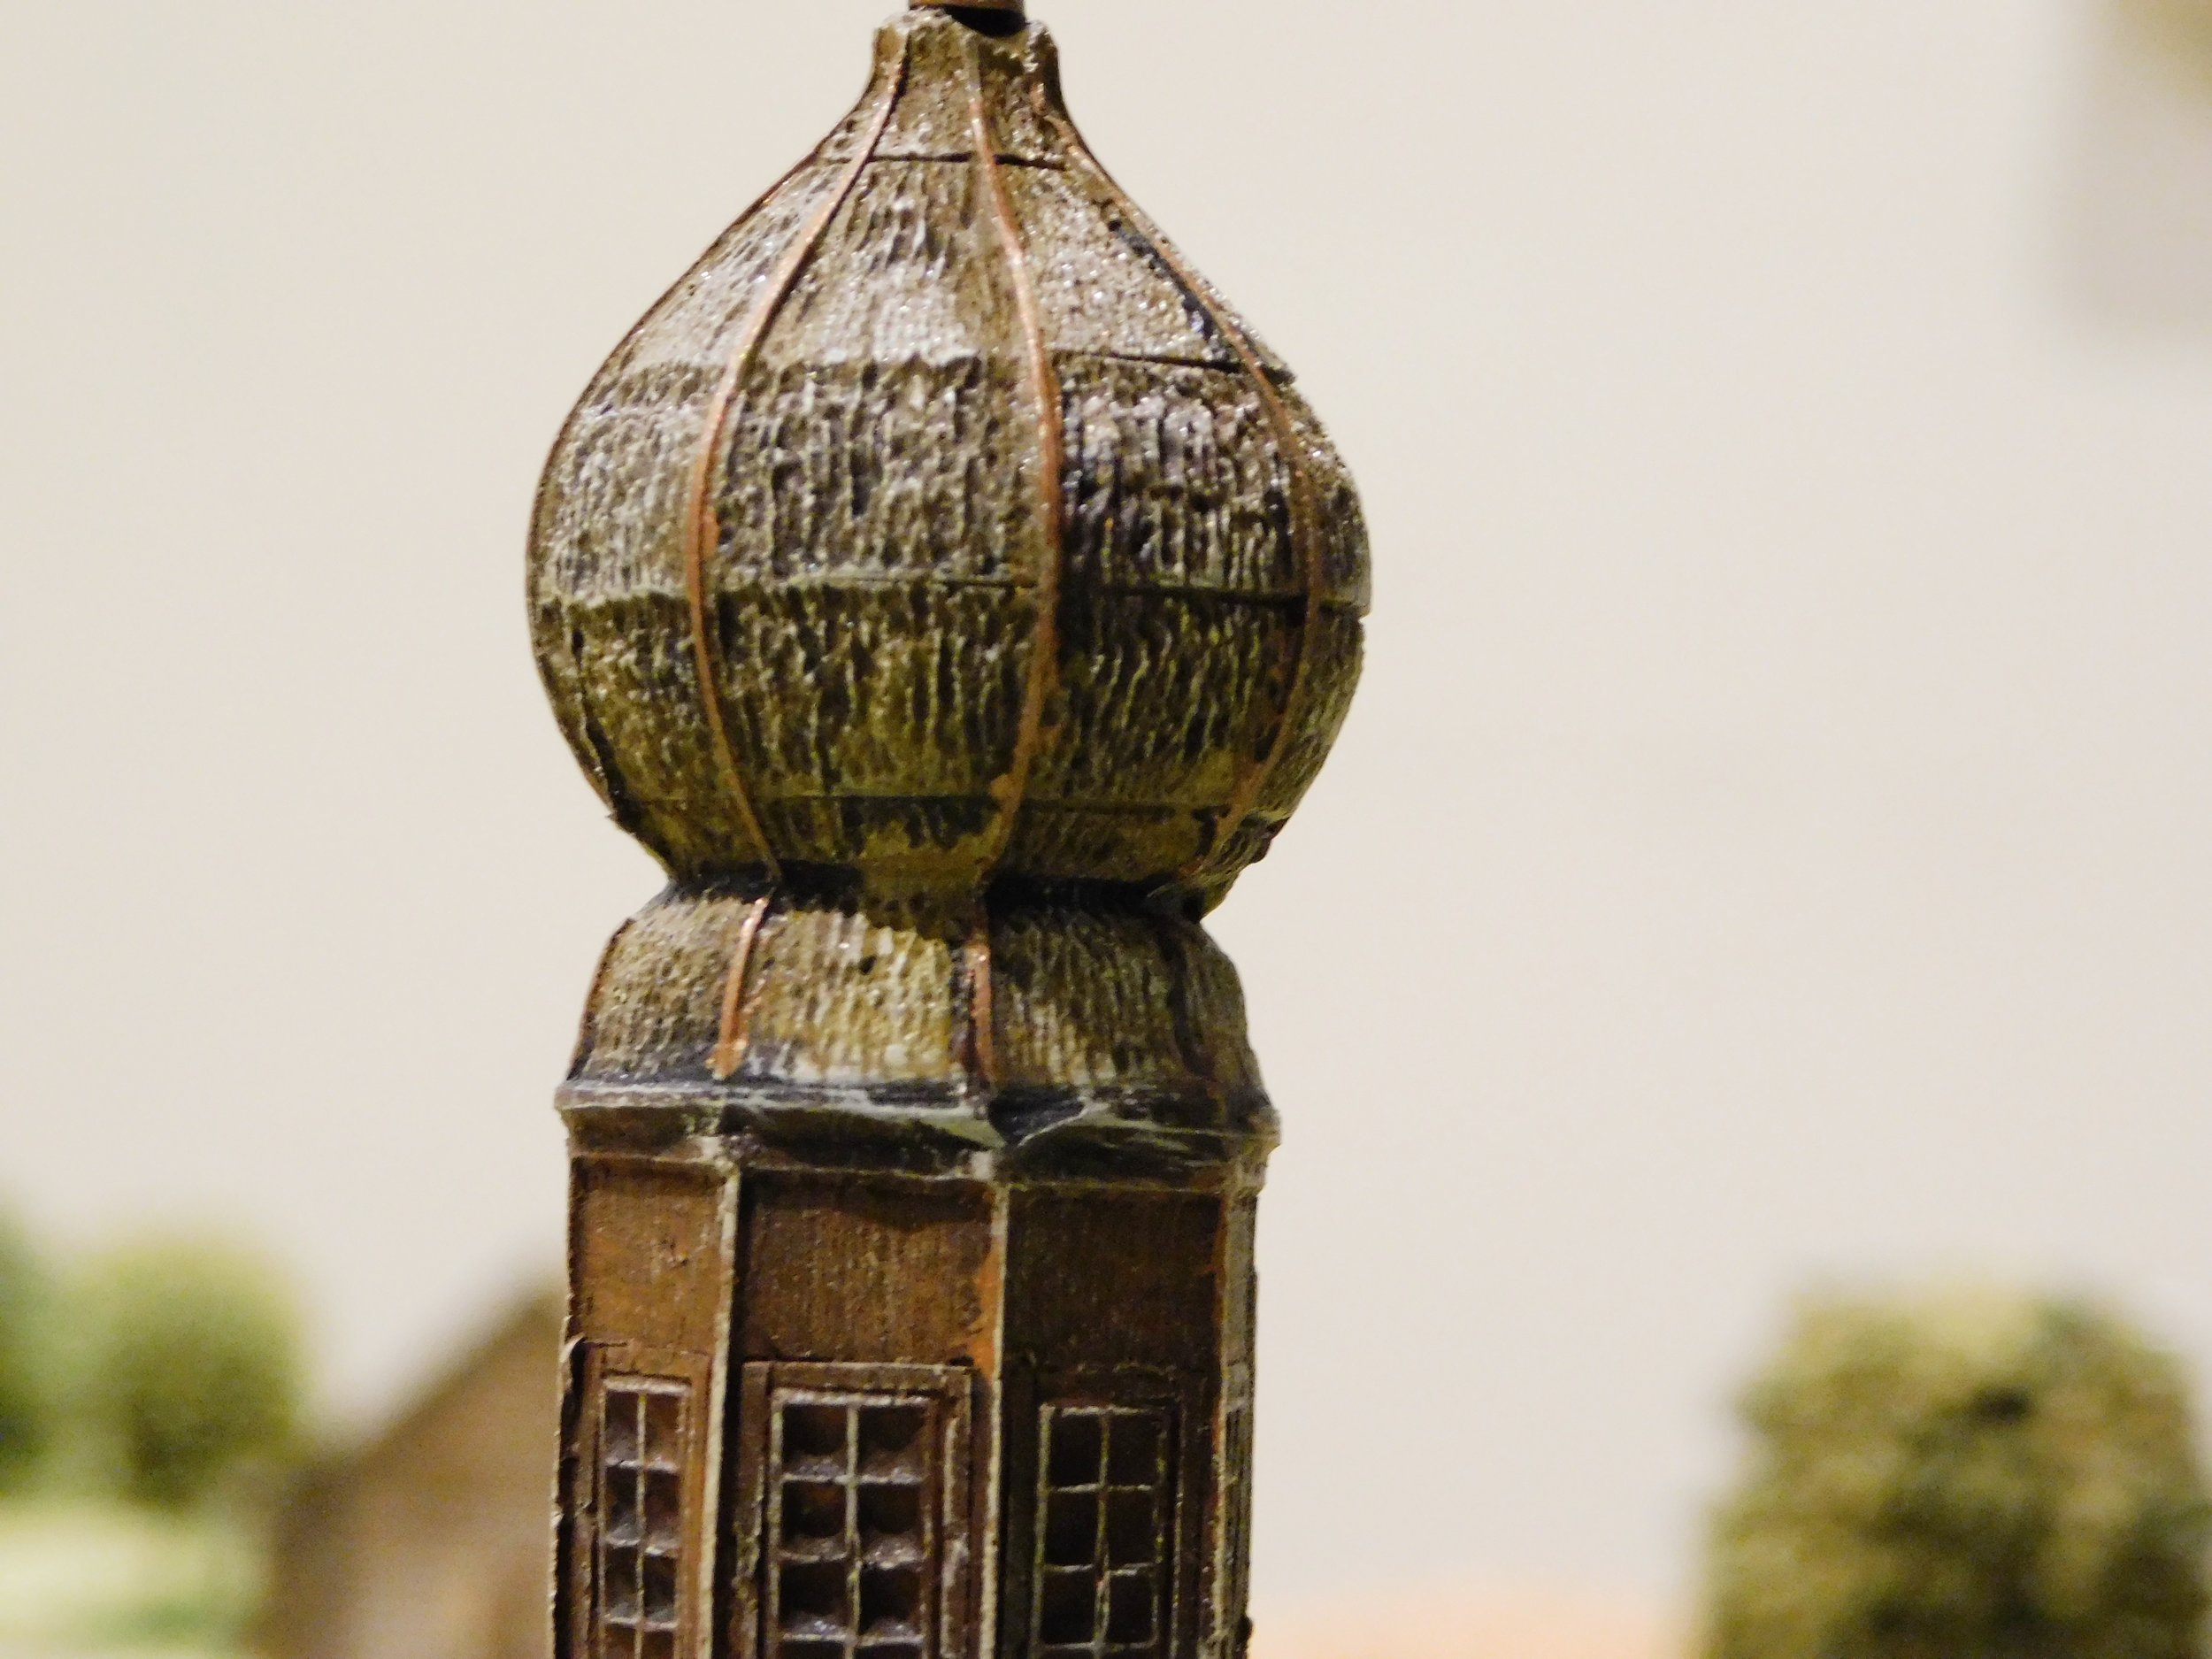
What I particularly like is the detail:

You can see that the “onion” is thatch held in place by strips of what I’ve painted as metal; and that the roof, tower and ornamental woodwork really enhance its look.

Recommended.

How Big Is This Church!

Regular visitors will know that I have a thing for 15mm Russian churches.

I have six already, and when I posted pictures of them all (see post here) claiming to have all that are available, several people were kind enough to point out the ones missing from my collection.

The first of these is a truly enormous building from Total Battle Miniatures. It’s not so much that it has a big footprint, but more the height of the thing. It goes up for ever! That’s a BA-64 armoured car for comparison.

It is a nice model, though, and very easy to paint. Spray brown, drybrush in a lighter brown, wash, highlight with Screaming Skull, wash again, and then paint in the bits you want: I did the windows, window frames, door frame and the “onions”!

The piece actually comes in three parts. A base, the bit that goes on top of that, and then the roof of the tower with the “onions”. Each is made to take figures, so you can pop your FOO in position without difficulty.

Recommended.

More Little Houses

Sorry for the lack of posts this week: man flu (fatal in 110% of all cases) took hold, and I’ve been really busy at my new job.

However, here’s a bit of painting I managed to finish: another village set from the Forged in Battle Empire range that I will use as a Greek Hoplite camp for To The Strongest.

£24 again, but you do get a goodly number of houses, and they do paint up well: a nice bit of stippling!

Here’s how I will actually use them: although it obviously won’t be a Sherman tank guarding the camp…but that’s all I had handy when I was taking the pics!

Huts for the Ancient Brits

With the game To The Strongest, each army really needs at least one, and usually three, camps. Obviously, one can cobble something together, but it’s nice to have some specific pieces for each force.

Forged in Battle’s Empire range has recently added a whole series of 10-15mm buildings that, when combined with a flat base, make rather nice camps. I’ve bought a few, with the first off the production line being these six Ancient British huts:

Loving these. Easy to paint up: spray white; paint the roofs straw colour and the doors brown; wash with GW Agrax Earthshade; leave to properly dry and then highlight the thatch and doors; finally, take a stippling brush to the walls.

They are perhaps a bit pricey at £24, but well worth it. Recommended.

A Glut of Eastern Churches

It’s one thing to collect figures - you need all sorts of different sorts to represent different armies, units etc - but to collect models of eastern European churches as well?

That’s what I seem to gave done over the last few years, in that I seem incapable of not buying any model that could vaguely be described as a “religious building, eastern”!

I once joked that I would like to have enough churches to have a different one for each of the maps in my Bashnya of Bust! scenario pack for I Ain’t Been Shot, Mum! That would take seven, eight or nine, dependent on whether you assumed one of the buildings in some of the smaller villages were houses of worship or not. Whichever it is, I seem to be well on the way. Below is a gallery (in ascending order of size) of my church collection so far:

I’m pretty sure I don’t actually need any more eastern churches now, but if anyone should know of any others that are available…just add their details as a Comment and you can bet your bottom dollar that I’ll be spending my bottom dollar on another house of God!

First Painting of the New Year

These have been sitting on my painting table for a few months: ever since the TimeCast sale in fact.

Here we have the Village Church, a Small Barn, and the Village Accessory pack from TimeCast’s 15mm Eastern Europe range. IIRC these are the re-mastered models, and very nice they are too.

The resin is smooth and takes the paint well. I’d question whether the Barn is small or not, but I like the church and accessory pack very much. That’s my Painting Challenge started for 2019.

Scenery for To The Strongest

Now that the camps are sorted out, time to get a bit of scenery to dress the table and provide me with more of the sort of “traffic jam” problems that I encountered in my first game of To The Strongest.

I’ve got some desert style bits, but need to prepare for when my Hoplites eventually take the field. They are based in a sort of rocky outcrop style, so I need some sort of rocky outcrops to match.

A quick wander round Warfare and I came across The Scene. They had four rocky outcrop style bases about 120mm in diameter which I purchased immediately. Sorted!

As you can see, each fits neatly in one of the boxes on my mat.

Camps for To The Strongest

In addition to the extra figures I need for To The Strongest, my current war game of choice, I also need some camps: about six i.e. three a side. They need to be big enough to take a guardian unit (so at least 120mm wide) and deep enough to carry a bit of “dressing”.

The components for these I picked up at Warfare on Sunday, still one of my favourite shows, and quickly painted up as follows:

I’m not sure where the bases came from, but the pyramids, huts and Sphinx all came from The Square, an excellent place to find all sorts of useful bits of resin. I always make my way there at the end of the day and spend whatever I have left in my pockets!

They paint up easily as well. The huts are undercoated in light brown, then very heavily dry-brushed white with the roofs dry-brushed in a variety of yellowy-brown colours. What makes the difference is that I have filled in the doorways and windows with a bit of woven hemp: giving a bit of depth and texture.

The Sphink and pyramids are simply painted sand yellow, washed with GW Agrax Earthshade, and then dry-brushed with GW Screaming Skull. Whole lot took me about half an hour.

Another 15mm Russian Village Set

Those of you who follow the site will know that I already have loads of 4Ground 15mm Russian village buildings to which I recently added a few extras from the Minibits/RedVectors range (click here to see post, opens in a new window).

Now Things From The Basement, the US based 'manufacturer of dollhouse and wargaming miniatures' has also released a 15mm Russian village set of buildings, based on their 25mm range.

They have:

  • Two Log Cabins
  • Two different 'fancy' houses
  • A Farm Buildings set (a basic farmhouse, a barn, a well and an outdoor privy)
  • A Blacksmith Shop & Tool Shed
  • An Orthodox Church

I, of course, bought these immediately, and have just spent a very pleasant evening and morning, sat at my workbench in front of the open French windows, building them.

So are they any good?

The log cabins are fairly standard . I like the way they do the windows (cardboard sills that stick on the outside of the HDF) but I found it very difficult to build them in way that the roofs came off easily. My advice: buy one pack if you want a bit of variety in an existing village, but don't base your entire village on several packs of this set, stick to the 4Ground stuff.

The fancy houses (House 1 and House 2) are both good. I didn't much like the roofs, but they do come made to come off so you can put figures inside. What is really nice is the level of detail on the outside. The really fancy one has some lovely decorative woodwork that looks really nice when built, and the other one has a little porch that is exactly like the one I saw on that Russian TV show about the WW2 pilots "The Attackers". I would definitely buy both of these if you want a Headman's hut or two.

The farmhouse and barn from the Farm Buildings set is a bit like the log cabins: alright but nothing special (although the roofs do come off in these ones). What makes this set an absolute must-buy is the well and outdoor privy. Cracking models that I would buy again if available separately. Recommended.

The Blacksmith Shop and Tool Shed is another excellent bit of variety for your village. I can take or leave the tool shed, but the blacksmith shop, with it's open sides, roof vents, forge and anvil is another must-buy. Recommended.

Finally we come to the Orthodox Church. Come on, Robert, I hear you cry, you can't need yet another Russian church (I already have five...or is it six?) but actually, yes I can. This is a beautiful model that I really, really love. The build is intricate but not particularly difficult:  to get the spires and the roof you end up building an internal framework that I just felt so proud of having managed! There's a real sense of achievement when you've built this little baby! Did I mention that it looks really good too?

So there you have it: a solid recommendation to buy from me. There is just one teensy-tiny little problem: the shipping from the States is quite pricey. The shop on the TFTB website won't let you buy outside of the US: you have to e-mail Joerg and ask for a PayPal invoice. The set is $55 for one of each of the above, but shipping is $23 on top of that...so that's £56 to get it to our front door if in the UK. No problems with the ordering and delivery, I hasten to add, my set arrived very promptly, but perhaps a bit pricey.

How was the build? About the same as a Sarissa build actually: so slightly more difficult that a 4Ground or Minibits build, but still nothing very problematic. I would, however, strongly advise downloading the instructions from the TFTB website (free to do) and build them with PVA glue not Superglue: there's quite a lot of finickity moving about of parts to do to get them to fit together just right. Nothing too difficult, but not something that Superglue will let you do.

So overall, a hearty recommendation from me, despite the price, and if you do order from Joerg, do mention Vis Lardica when you do so please.

Wyevale Winter Trees Bargain

For those of you who hadn't noticed, many garden centres are selling off their winter model Christmas trees.

I had heard about this wondrously cheap way of acquiring snowy terrain for the wargaming table, but hadn't actually seen the proof of the (presumably Christmas) pudding.

Until now.

The wife of a friend picked up the above Battle of the Bulge, winter wonderland forest for me for a mere £13.50: and that's for sixty-one trees! A bargain, and they look to be good quality as well.

For me, unfortunately, this was a false economy, as I now need to buy myself a snow-scene mat for the top of my gaming table...

Helicopter Landing Pad from Ironclad Miniatures

A couple of weeks ago I mentioned that I'd been to Vanquish, the small wargames show that takes place in May each year in Bourne End, Bucks. I didn't spend much there, but one thing I did buy was the helicopter landing pad from Ironclad Miniatures

As a new purchase, the pad went straight to the front of the painting queue (!) and despite my current bout of painter's block, was soon ready for the tabletop:

Not a very good picture, but a great piece of terrain

I've chosen to put a cross in the centre of the pad as I want to use it for Q13 as well as for Charlie Don't Surf!, but you can see in the smaller picture (from the Ironclad site) how good it looks if you can do a decent 'H'!

One thing to note, the pad is actually listed in their 20mm terrain section rather than their 15mm section but, to be honest, works really well with a 15mm helicopter.

New Battlemats Arrive

One of my impulse purchases at Salute this year was a couple of battlemats from Tiny Wargames. As my tables are 6'x5', I custom  ordered one of the South Pacific coastal mats and one of the planet Mars mats, both cloth only, paying £150 for the two, including p&p.

Arriving home yesterday, well within the 21-day custom order time given by Tiny Wargames, I was greeted by a good sized package containing the two mats...and they are cracking!

First up, the coastal mat. Okay, so I could have got a slightly bigger one made (that's my fault!) but the mat looks fantastic and I cannot wait to try it out.

Here's a few pictures without any other terrain on board, just a couple of Japanese landing craft:

And here's the Mars mat: again looks great...and it makes me almost sorry that I've homogenised all my sci-fi troopers onto grass bases.

So a couple of recommended purchases there, and I shall be treating myself to a winter mat once the finances have recovered.

www.tinywargames.co.uk

Ironclad Miniatures: Both Factories Now Finished

A bit of spare time this weekend gave me the opportunity to finish the Ironclad Miniatures factories I've been working on.

First up were the second and third sections of the large factory:

These two bits then combined with the first section, finished last week, to give a very nice looking and impressively large ruined factory. Here is the whole thing with a motorcycle combo to give you an idea of size:

Then I discovered that those nice people at Ironclad had also sent me a bag full of true ruins: cornerpieces and wall sections etc. These ended up painted in the same way as the main factories:

Finally I realised that I hadn't painted all of the small factory: it has a loading bay that comes separately. So here's another view of the small factory (see previous post) but with the loading bay tacked on:

All in all, some excellent terrain from Ironclad.

Now to start the Poles...

Ironclad Miniatures: Small Factory Finished

Here's the finished small ruined factory from Ironclad Miniatures.

Very easy to paint. After washing the resin model in soapy water, prime in a brick red colour. I used a can from my local art shop.

Then, once fully dry, paint all the non-brick wreckage in the main building. I used a bright green for bits of corrugated iron roof; bright orange for thick pipework; steel for smaller pipes; and a wood brown for bits of plank. 

I then painted the tile floor and stairs in the ante-room in a pale grey. Finally, where the brick of the inner walls are covered by plaster, I used a bleached bone colour to convey the sense of institution.

Again once fully dry (make sure it really is fully dry before this bit) wash the entire model in a slightly watered down black ink. Really splash it on to make sure you get good coverage.

Leave the model for a day so all the excess fluid evaporates away, and then lightly dry brush the brick wreckage in a pale brick colour. Finally, a light dry brush of the bleached bone colour again to really bring out the detail and, after a light coat of matt varnish, finished.

Each stage should only take about fifteen minutes: it's the drying that takes the time! I painted the factory by doing one stage a night after work.

Although you can't see it properly below, the bit of the factory with the tile floor had a removable roof made up of a smashed in second floor.

Here's another pic showing the factory from the other angle. 

Highly recommended.

Click here to go to the Ironclad Miniatures site.

Ironclad Miniatures: Ruined Factory #1

You may remember my posts about the Ironclad Miniatures 15mm windmill and eastern front church:  nice looking buildings, paint up well, not too pricey etc.

Well I was at a wargames show the other day and noticed the Ironclad stall, wandered over and ended up buying their collection of ruined factories. These come in two sizes: a small ruined factory and a large ruined factory. As they didn't have stock in, I paid and gave them my address.

I then promptly forgot all about having done the above, so had a very pleasant surprise a couple of days ago when a large box dropped through the door. In it were several pieces of terrain: five in fact. Oh goody, I thought: five ruined factory bases. What I had also forgotten was that the five bits also fit together to make...yes, you guessed it, one small ruined factory and one large ruined factory.

Fortunately I have realised this after having decided and started to paint them all the same way anyway, so now have well underway either five separate ruined factory bases, or the little 'n' large sets they are supposed to comprise.

Here's the first off the production line: a very nice ruined factory base aka the left hand segment of the large ruined factory set.

Cost for the whole set was £30, so this is £10 of stand alone factory. As you can see, very nice.

I'll post the other bits as I finish them, and talk about how they were painted.

Ironclad Miniatures:

http://www.ironcladminiatures.co.uk/

If you gotta go, then you need somewhere to go...

I was in Twyford the other day, and passed a model shop selling dolls houses and model railways. Obviously I couldn't pass up a shopping opportunity like that, so wandered in to see what I could find.

Well, I found some brushes and some bits of scenery (including some lavender field effects, but more on that in a future post). Most of it was the wrong scale (whatever model railway builders call 1/72nd scale...the Hornby scale, if you like) but I did manage to find a plastic kit to build a walk-in men's toilet. 

So despite the fact that it's the wrong scale (it doesn't look too out of place, though: I've got it sitting at the back of Pegasus bridge at the moment - more on that later, too) here's a little pissoir or whatever you call the UK equivalent.

Apologies for the slight over-varnishing (I may have to give it another coat with a new can) but in this close-up you can see the detail.

Nice detail. Very grimey!