FK&P AAR: McCleod's Odyssey

With my Rabble bases now painted, it was time to have go at scenario #10 from the Marlowe to Maidenhythe scenario pack: McCleod’s Odyssey.

In summary, the Scots who have featured as mercenaries in previous scenarios in the campaign are making their way home, but run into a force of Militia backed up by locals who want a word, shall we say, about the Scots’ behaviour as they went south.

It’s a standard encounter battle, with both sides directed to get stuck in as soon as possible.

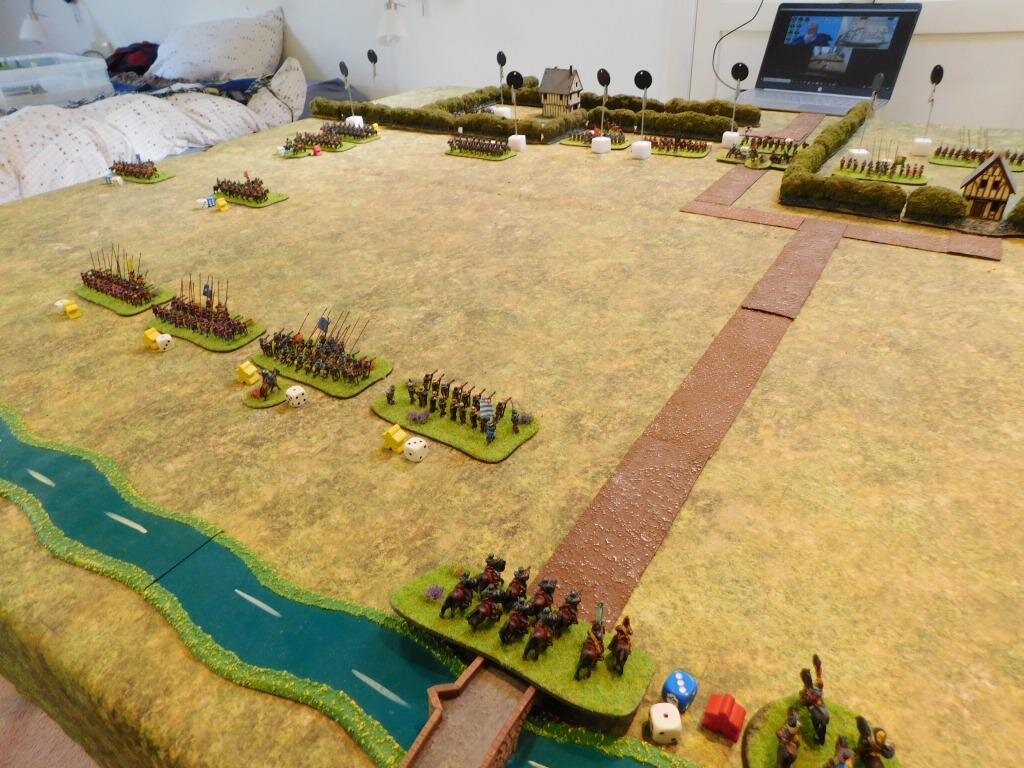
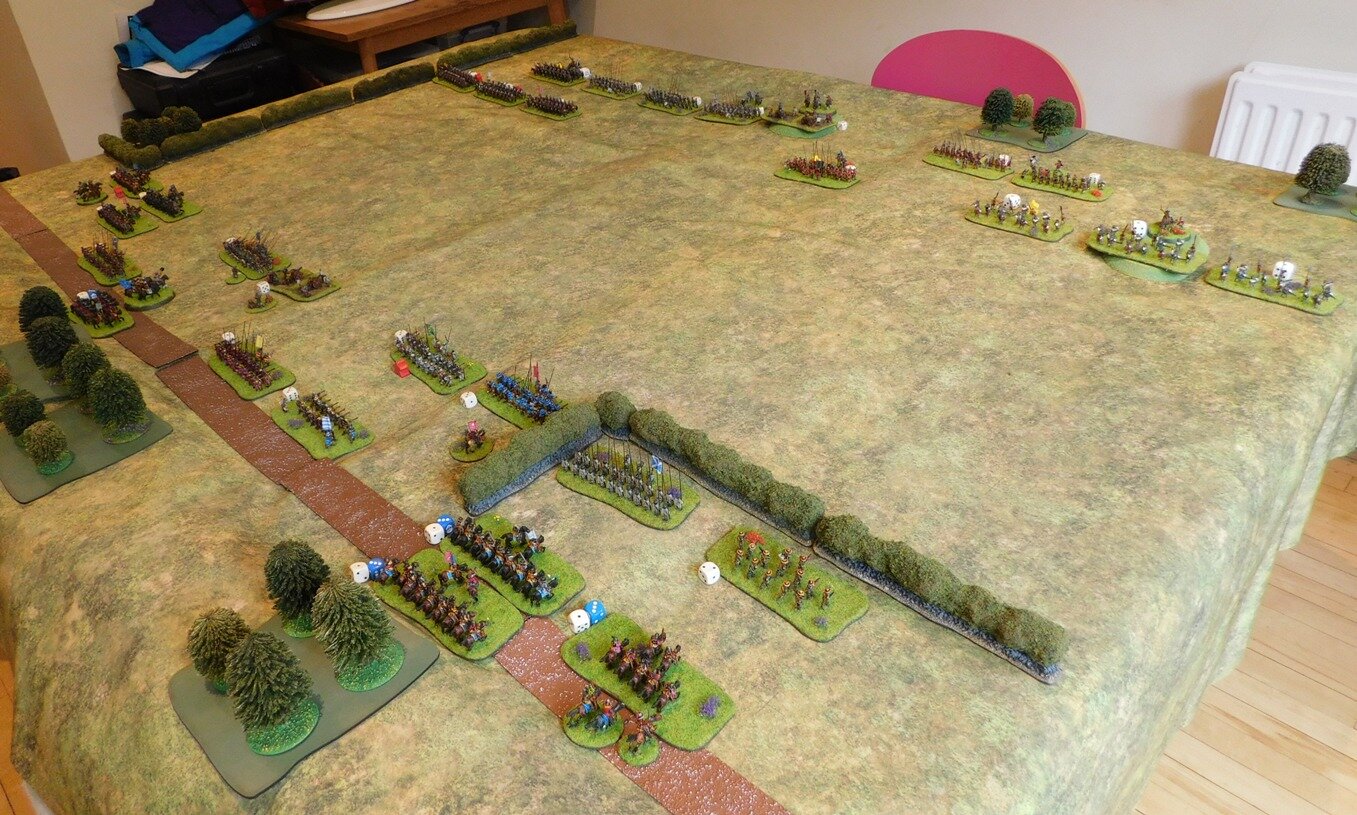
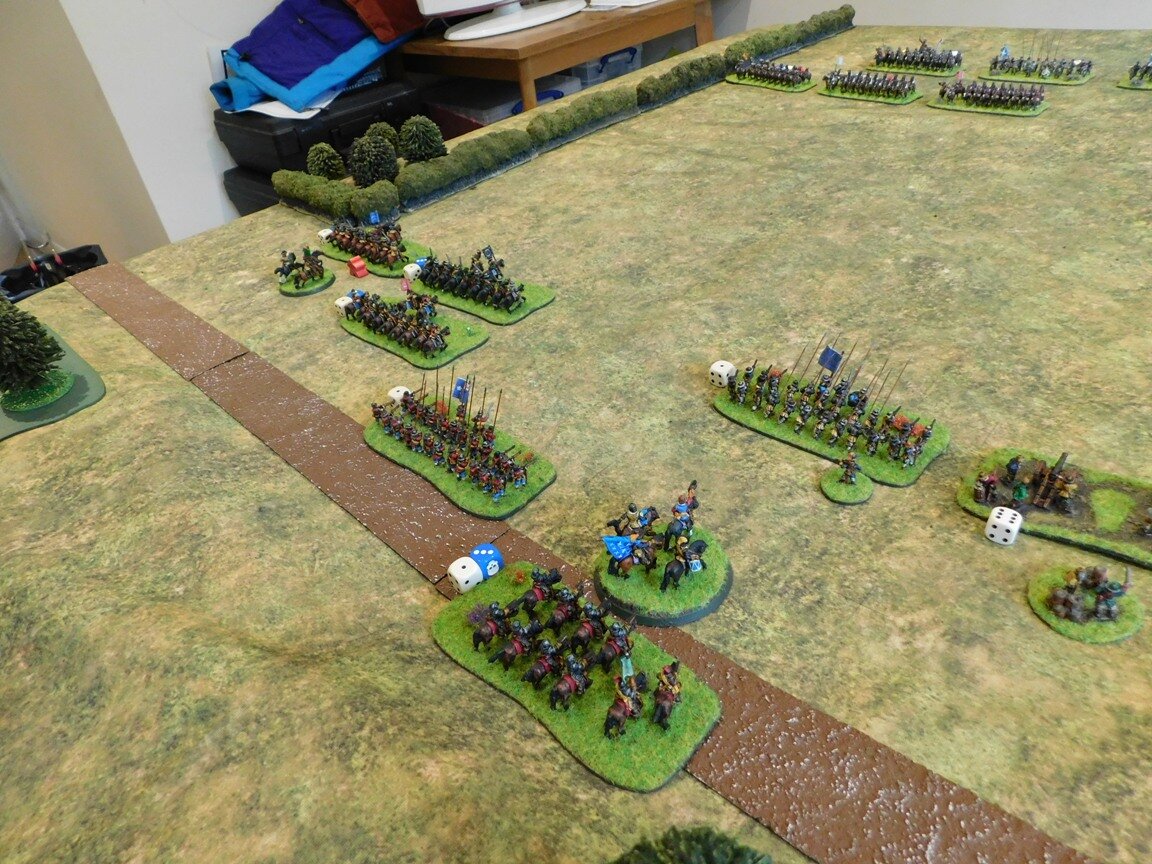
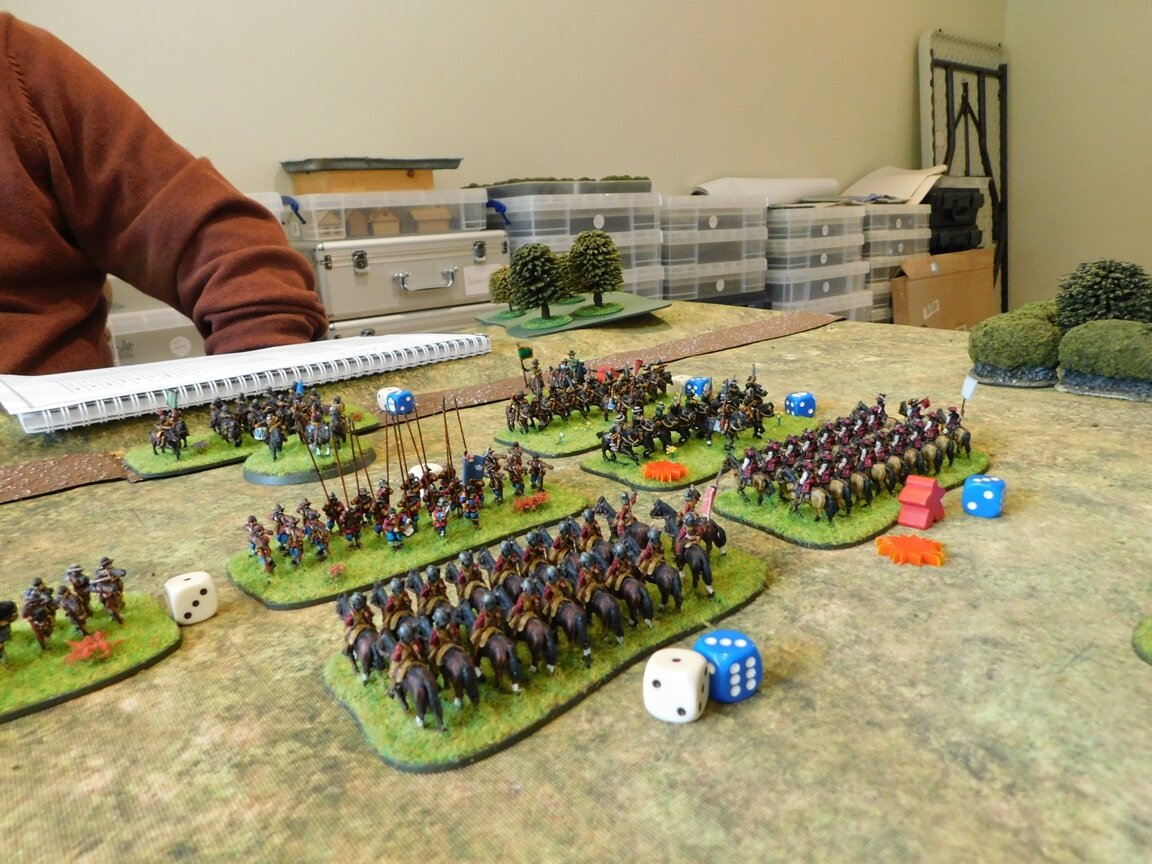
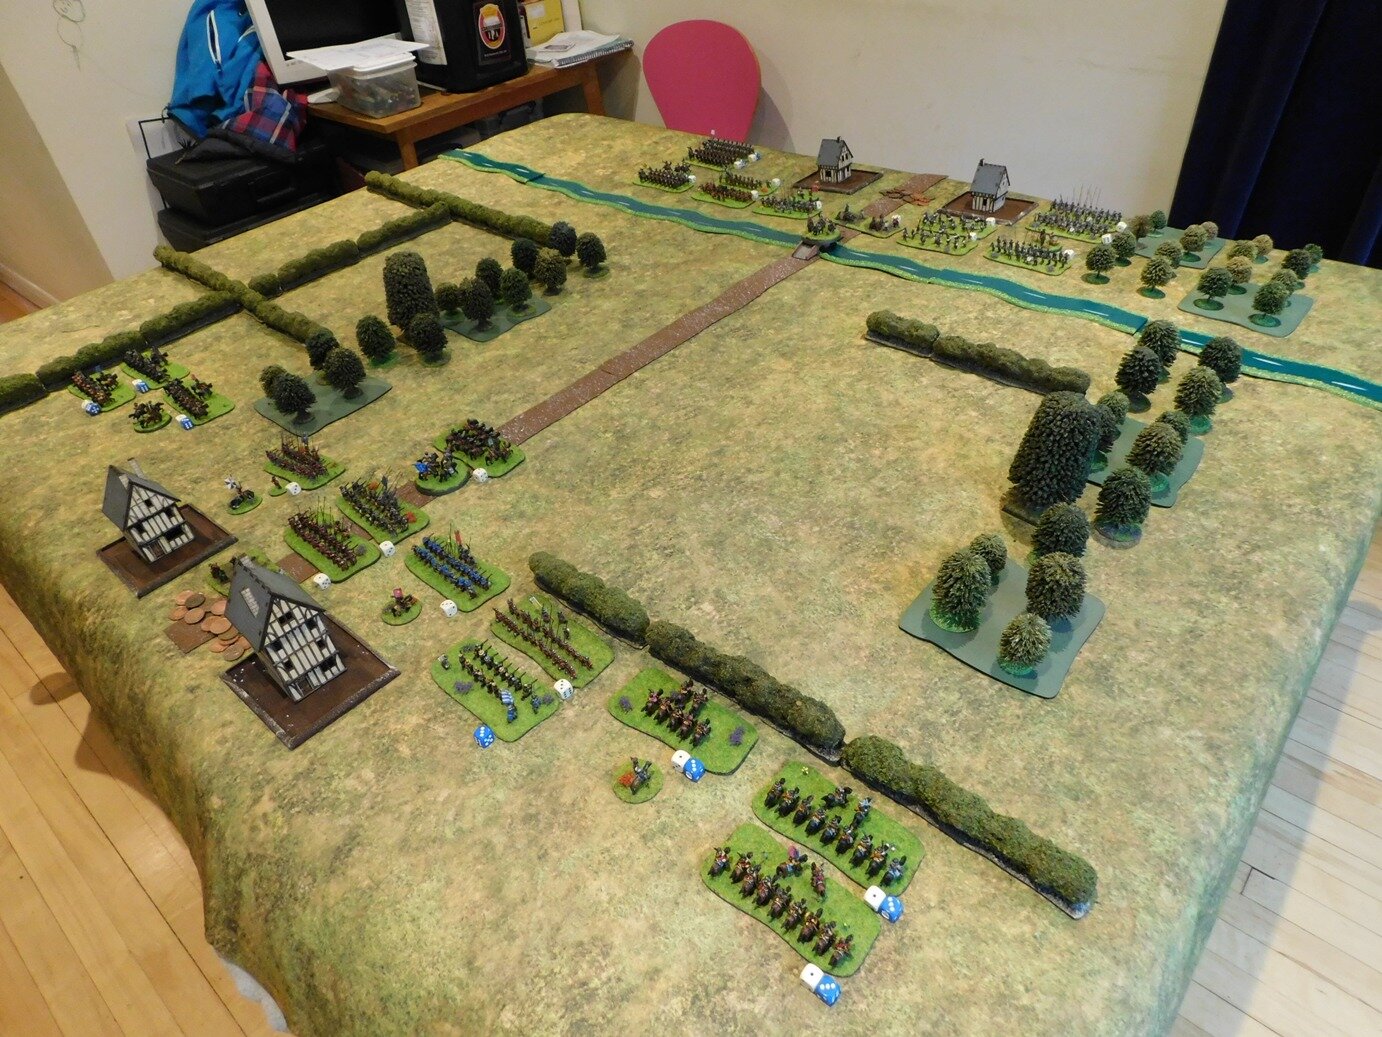
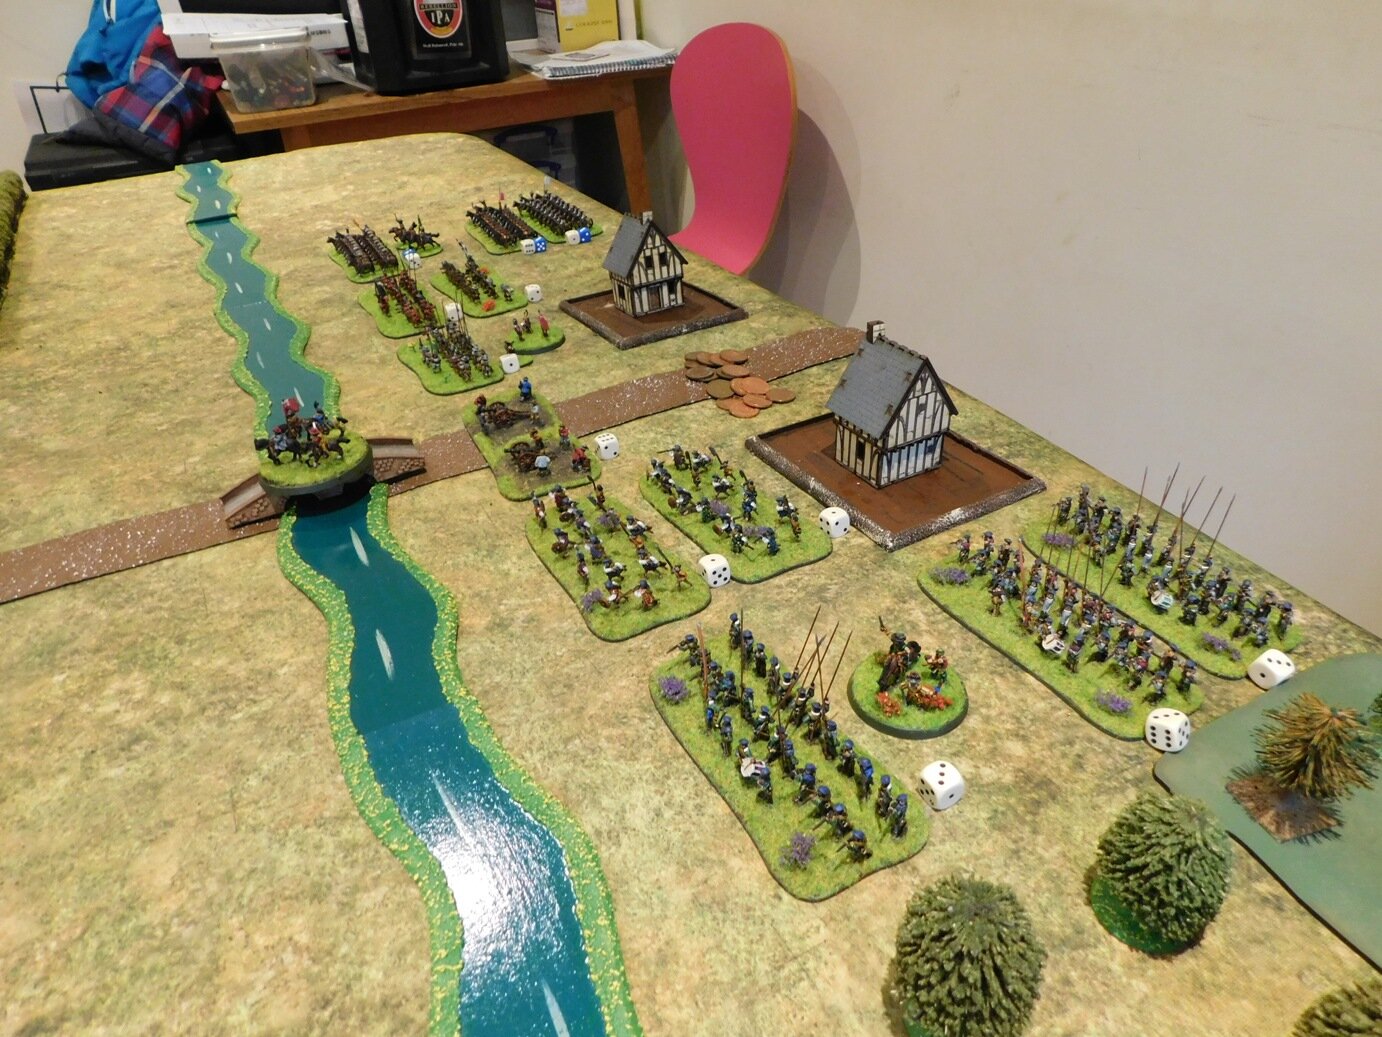
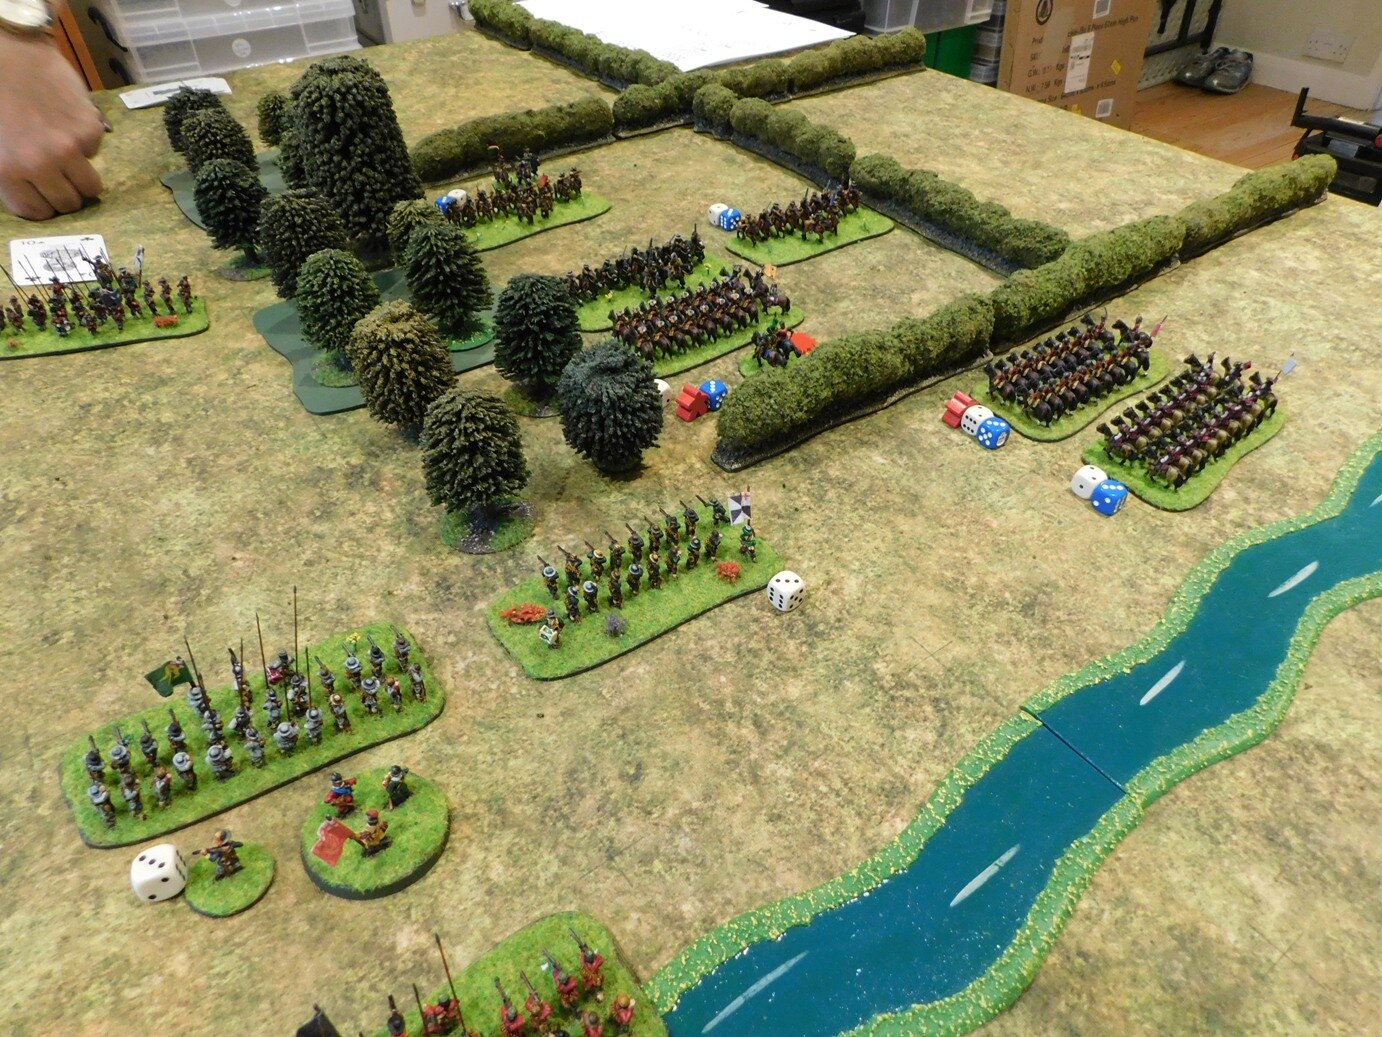
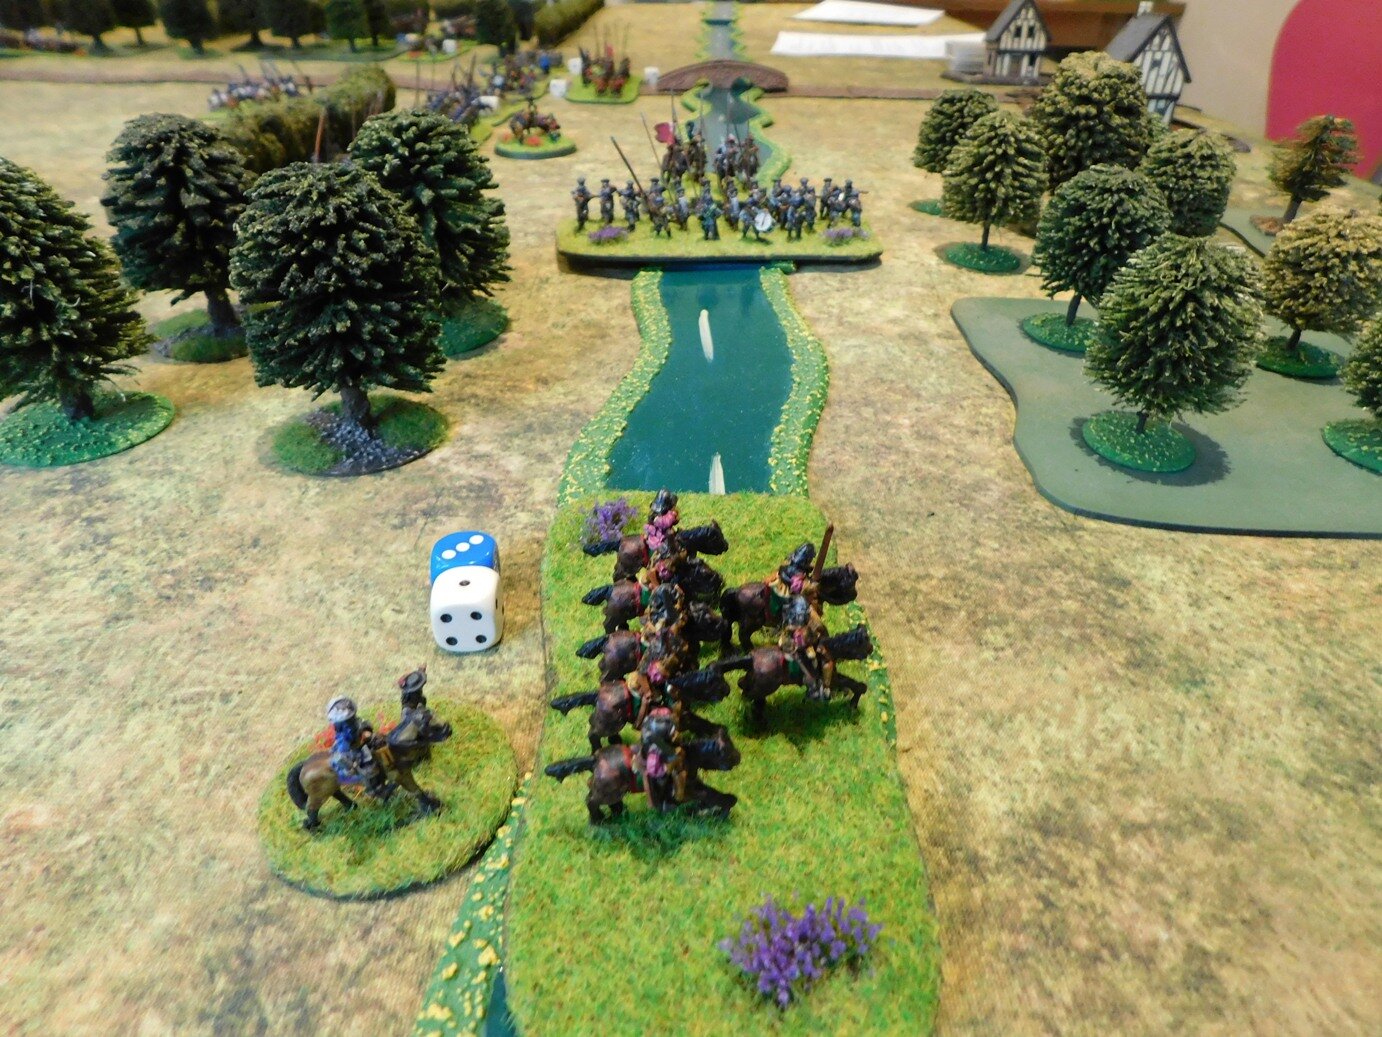
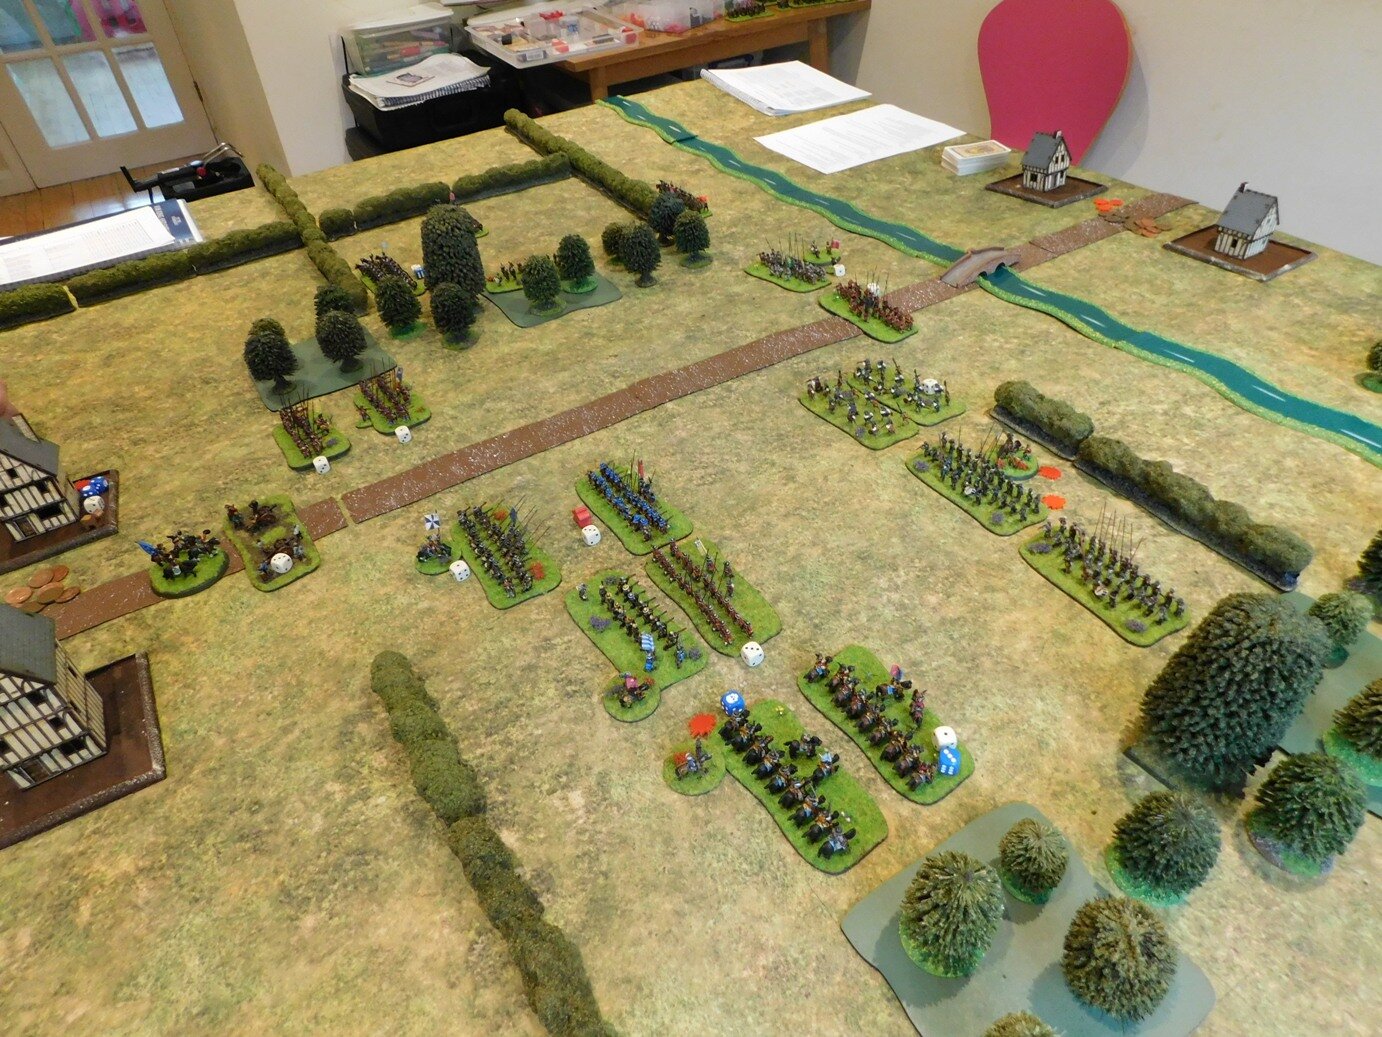
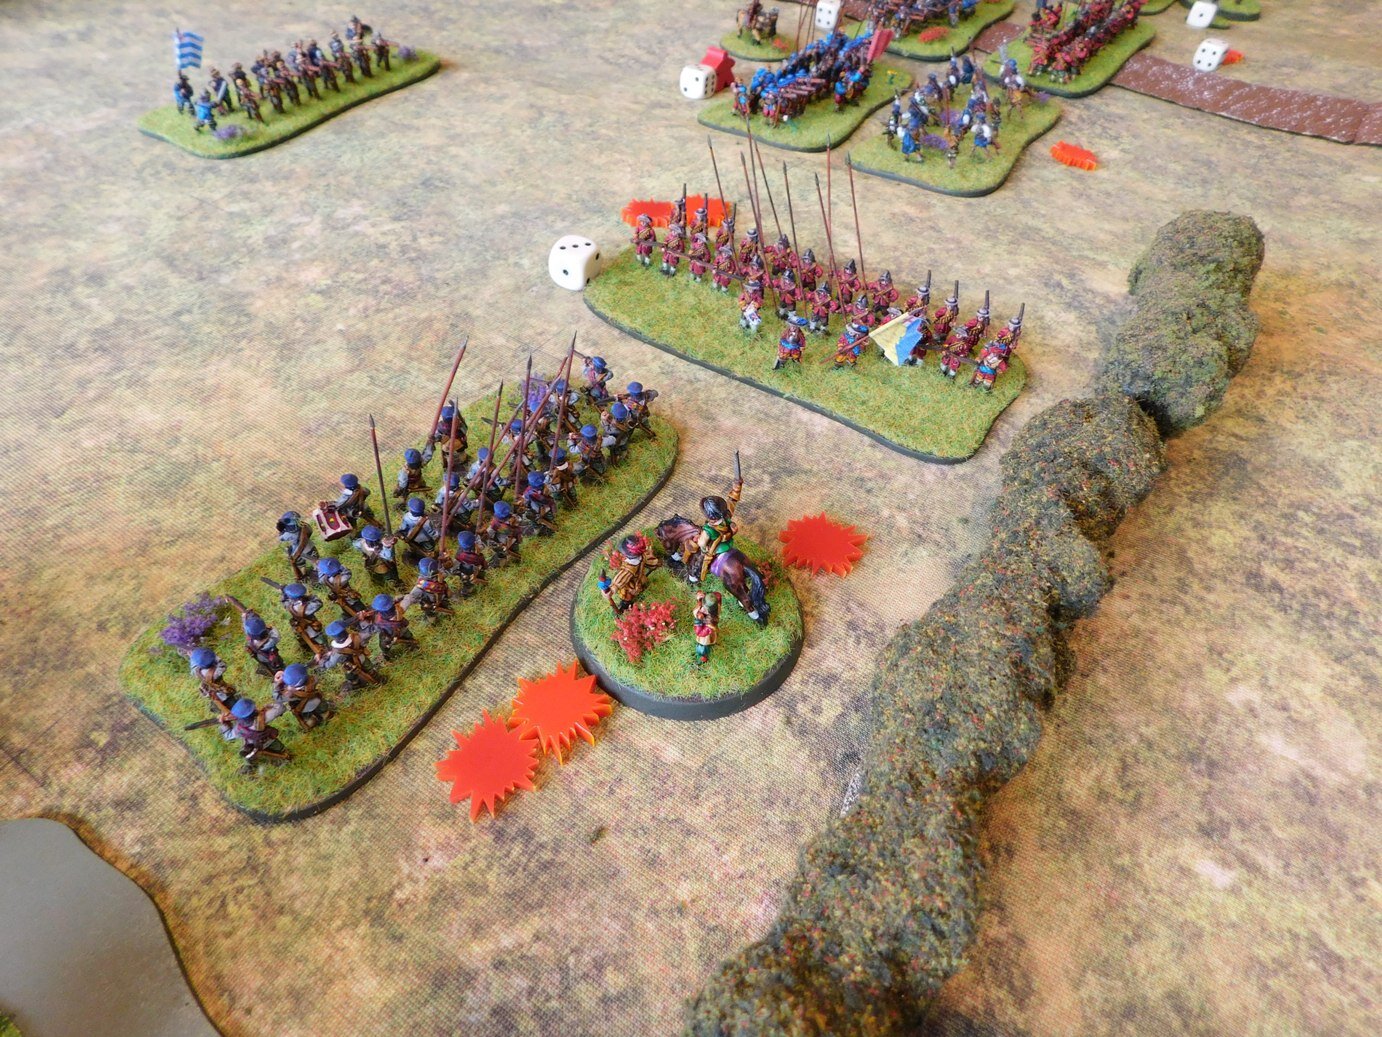
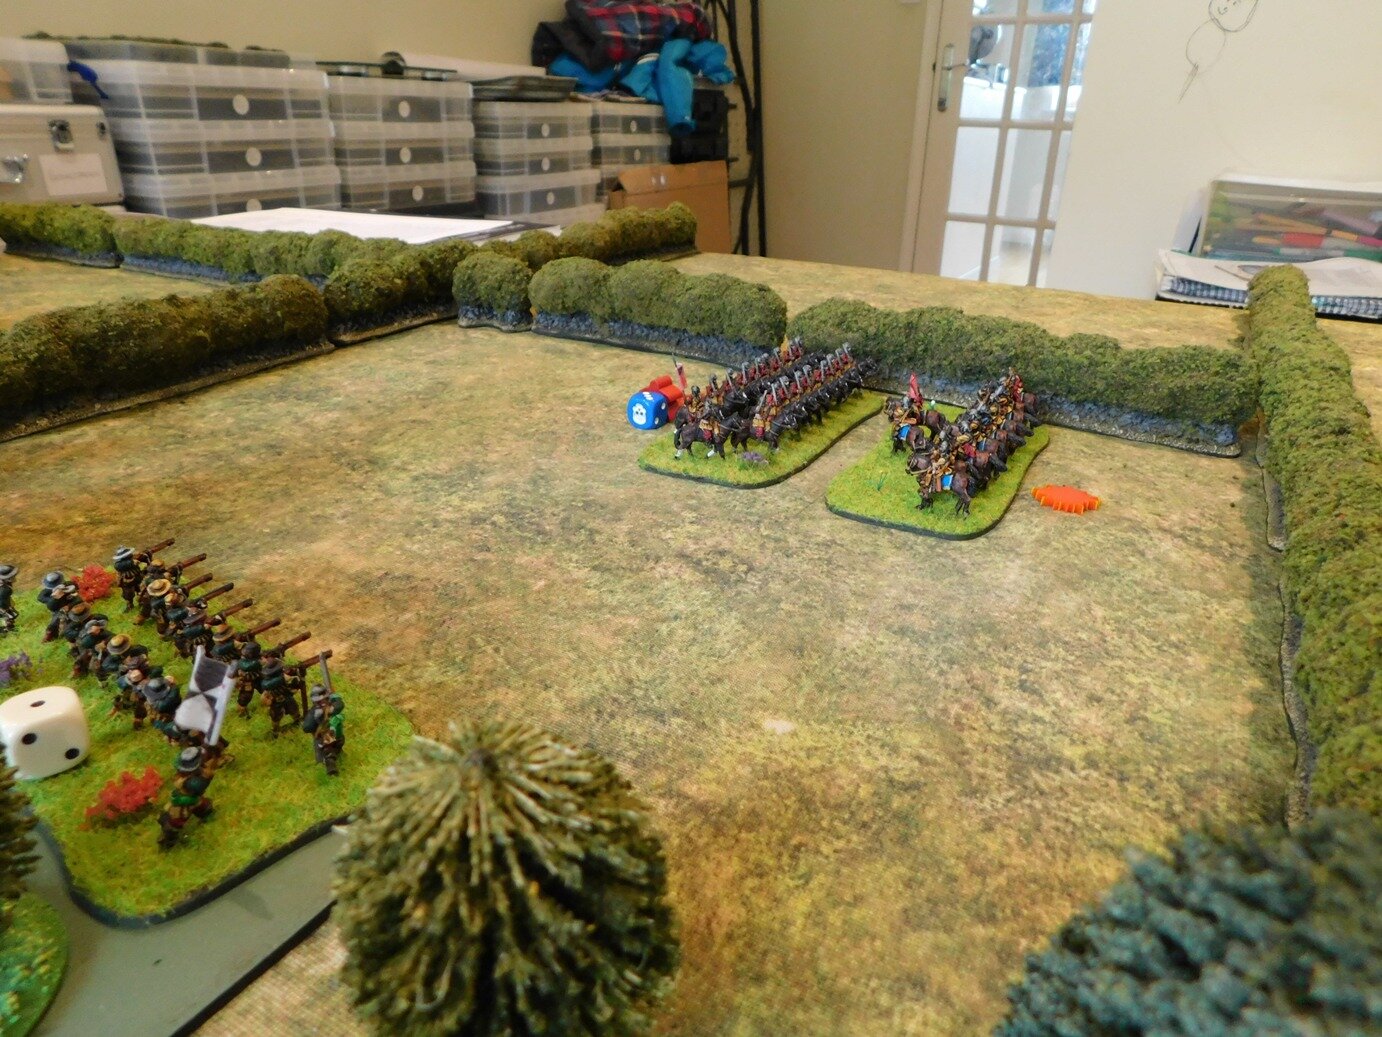
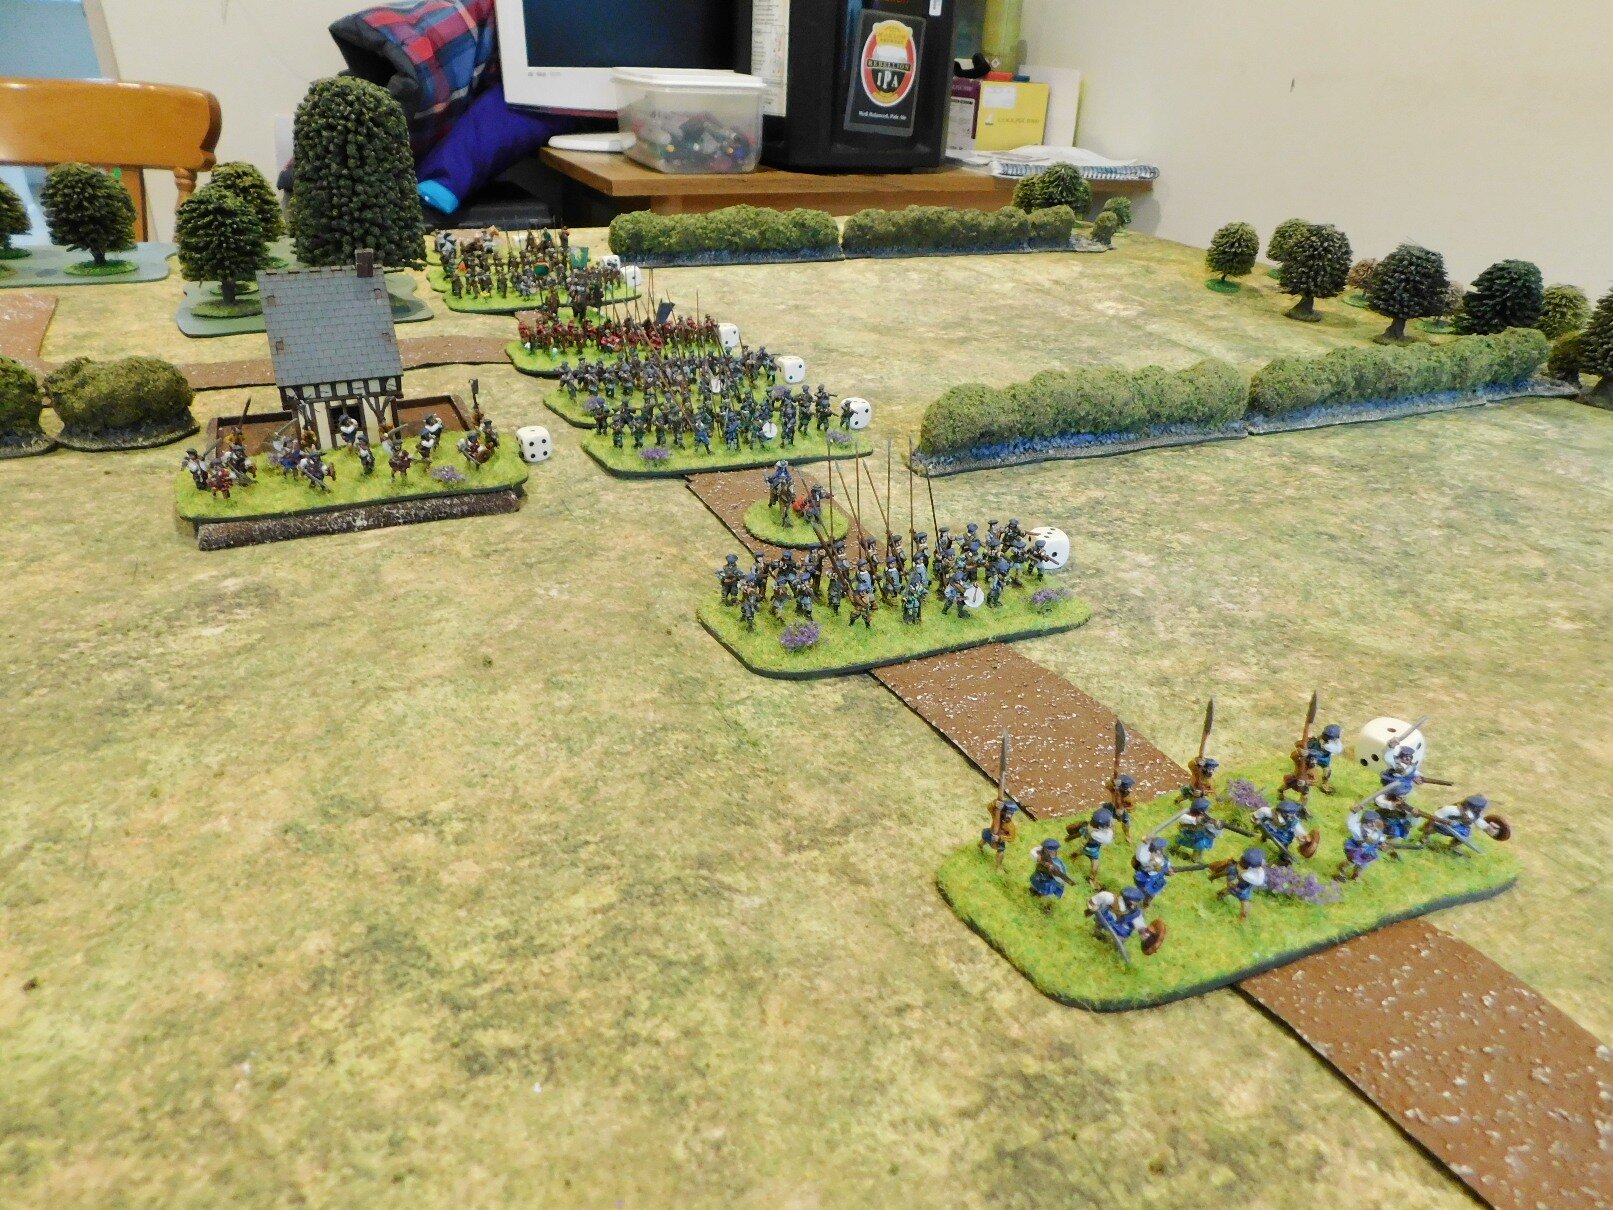
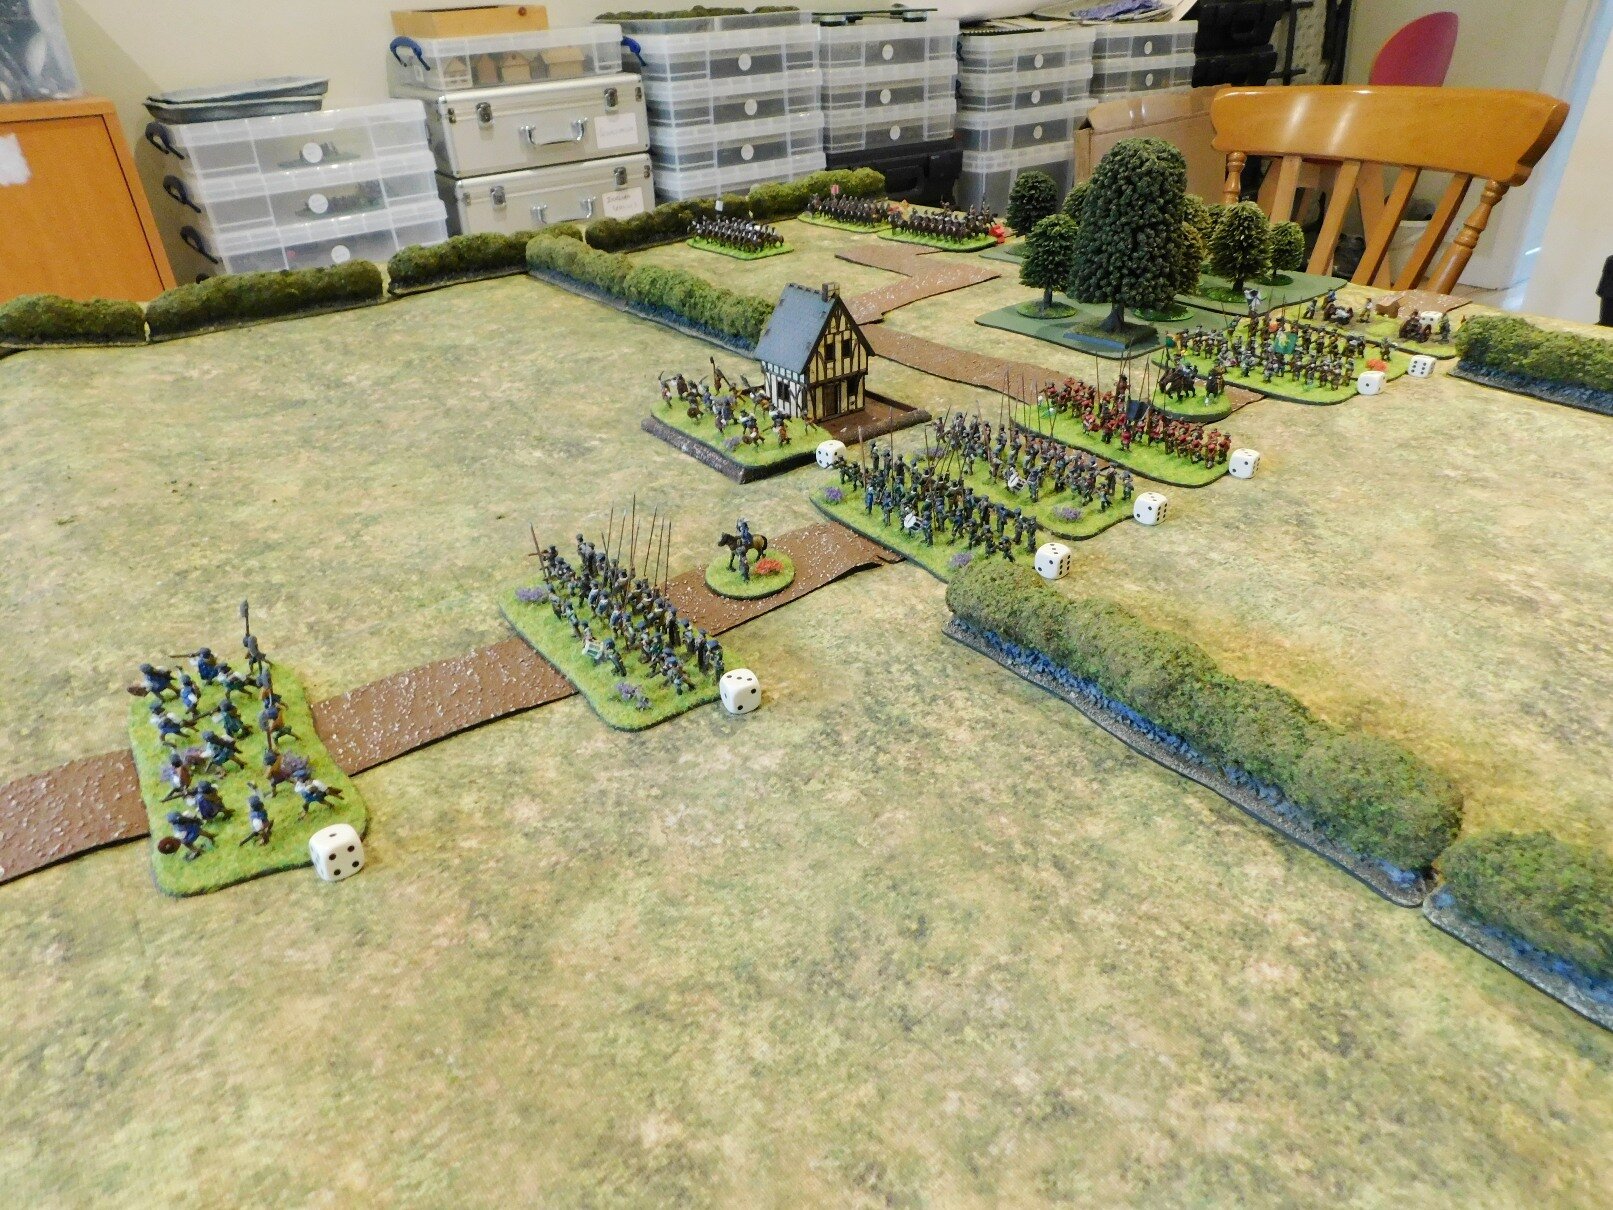
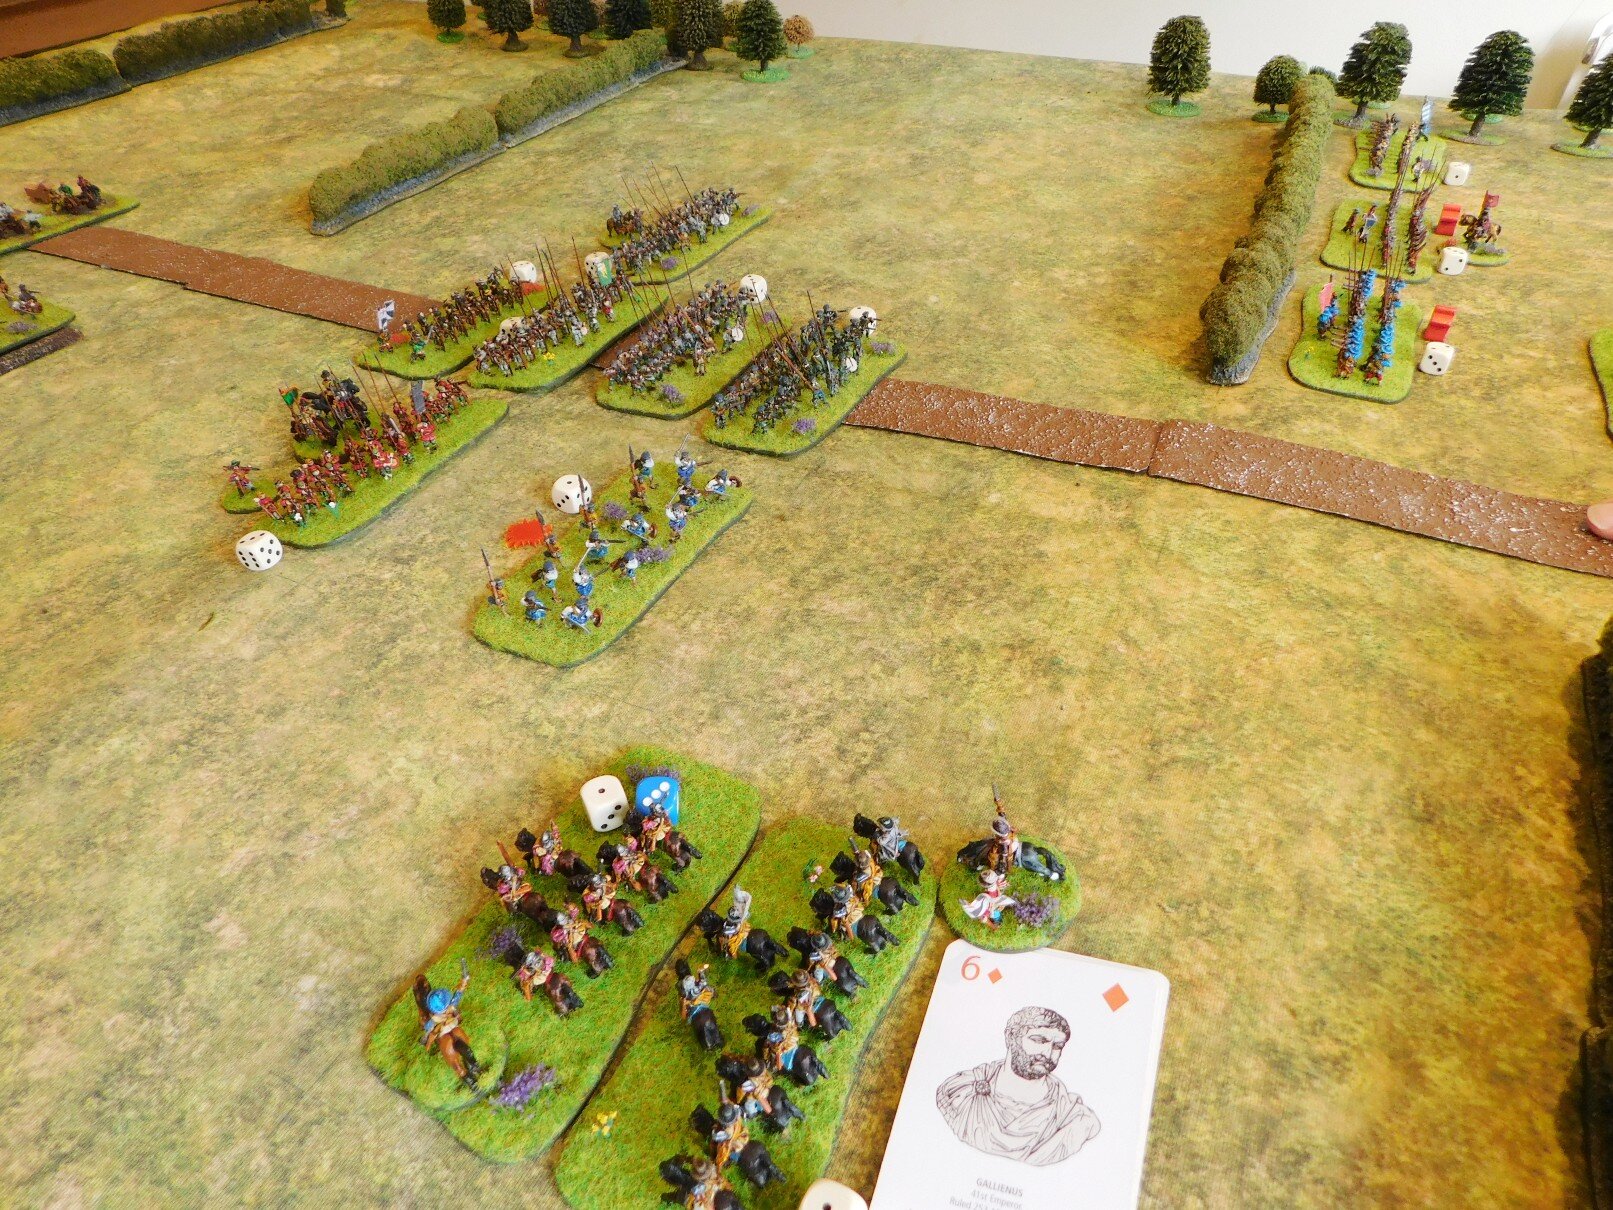
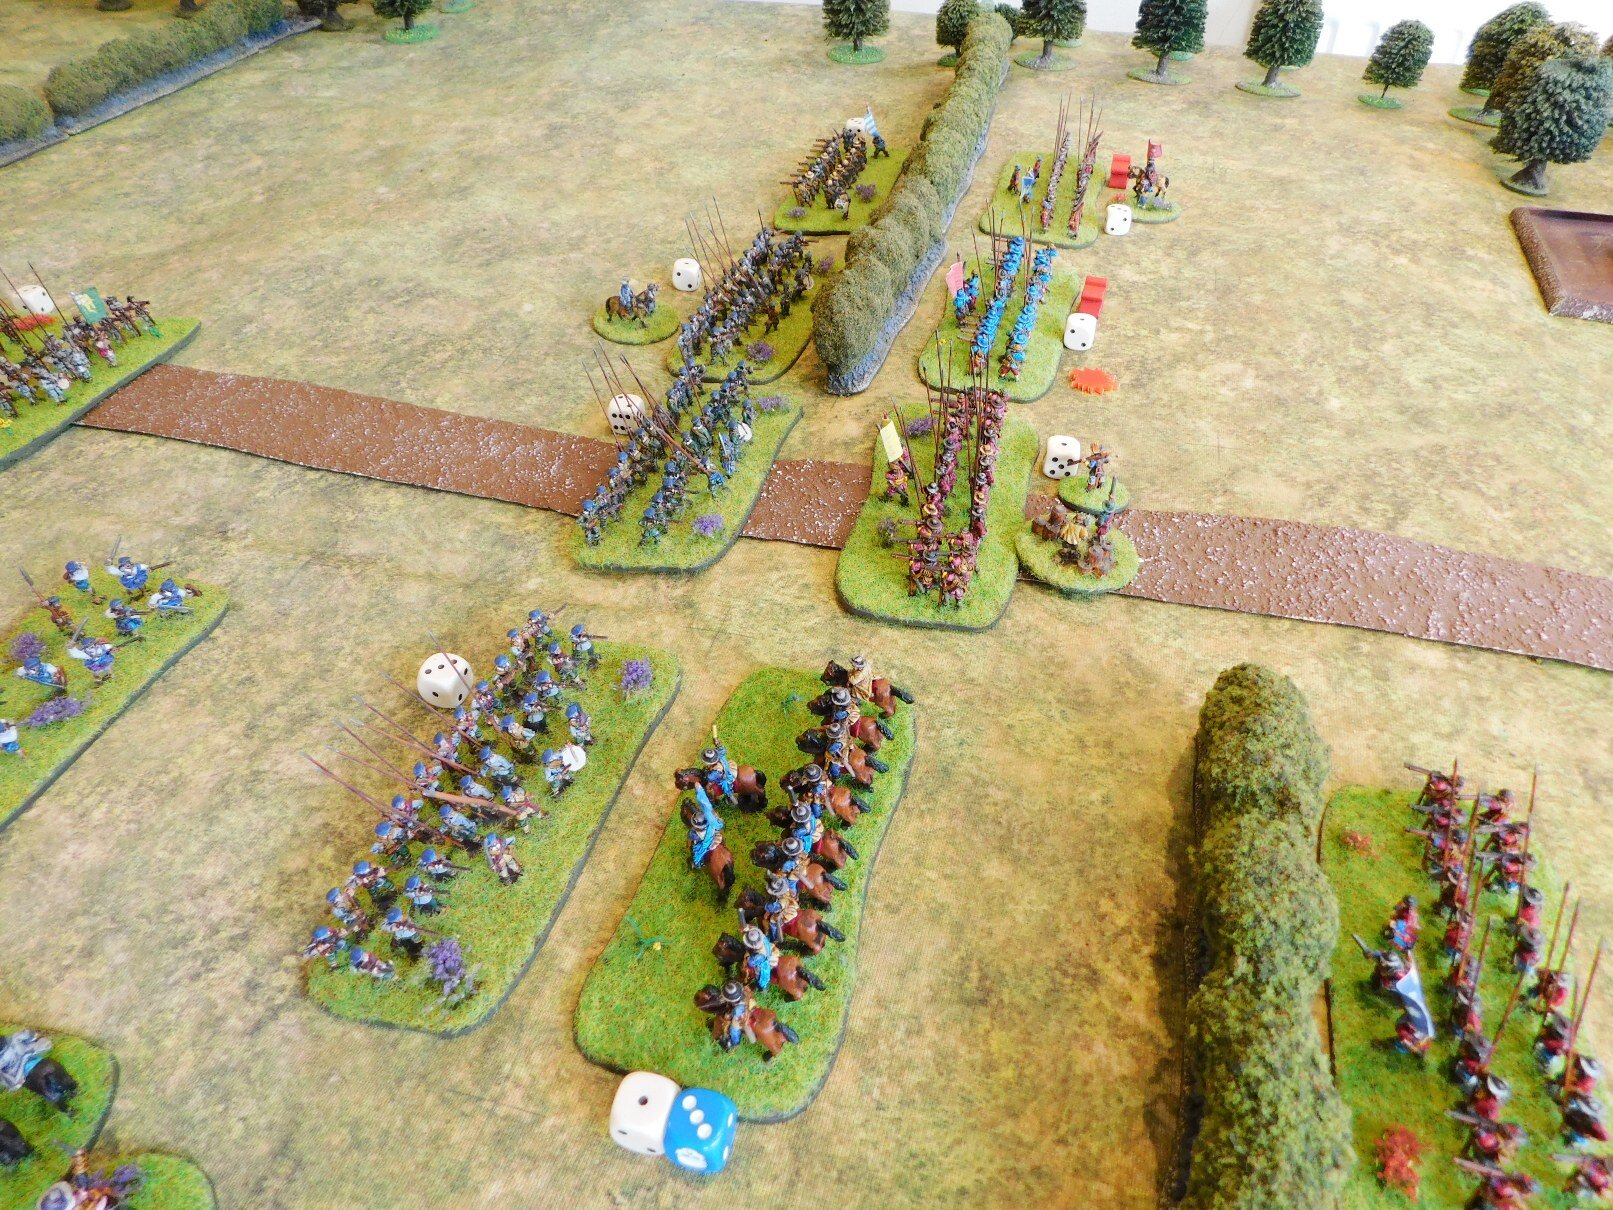
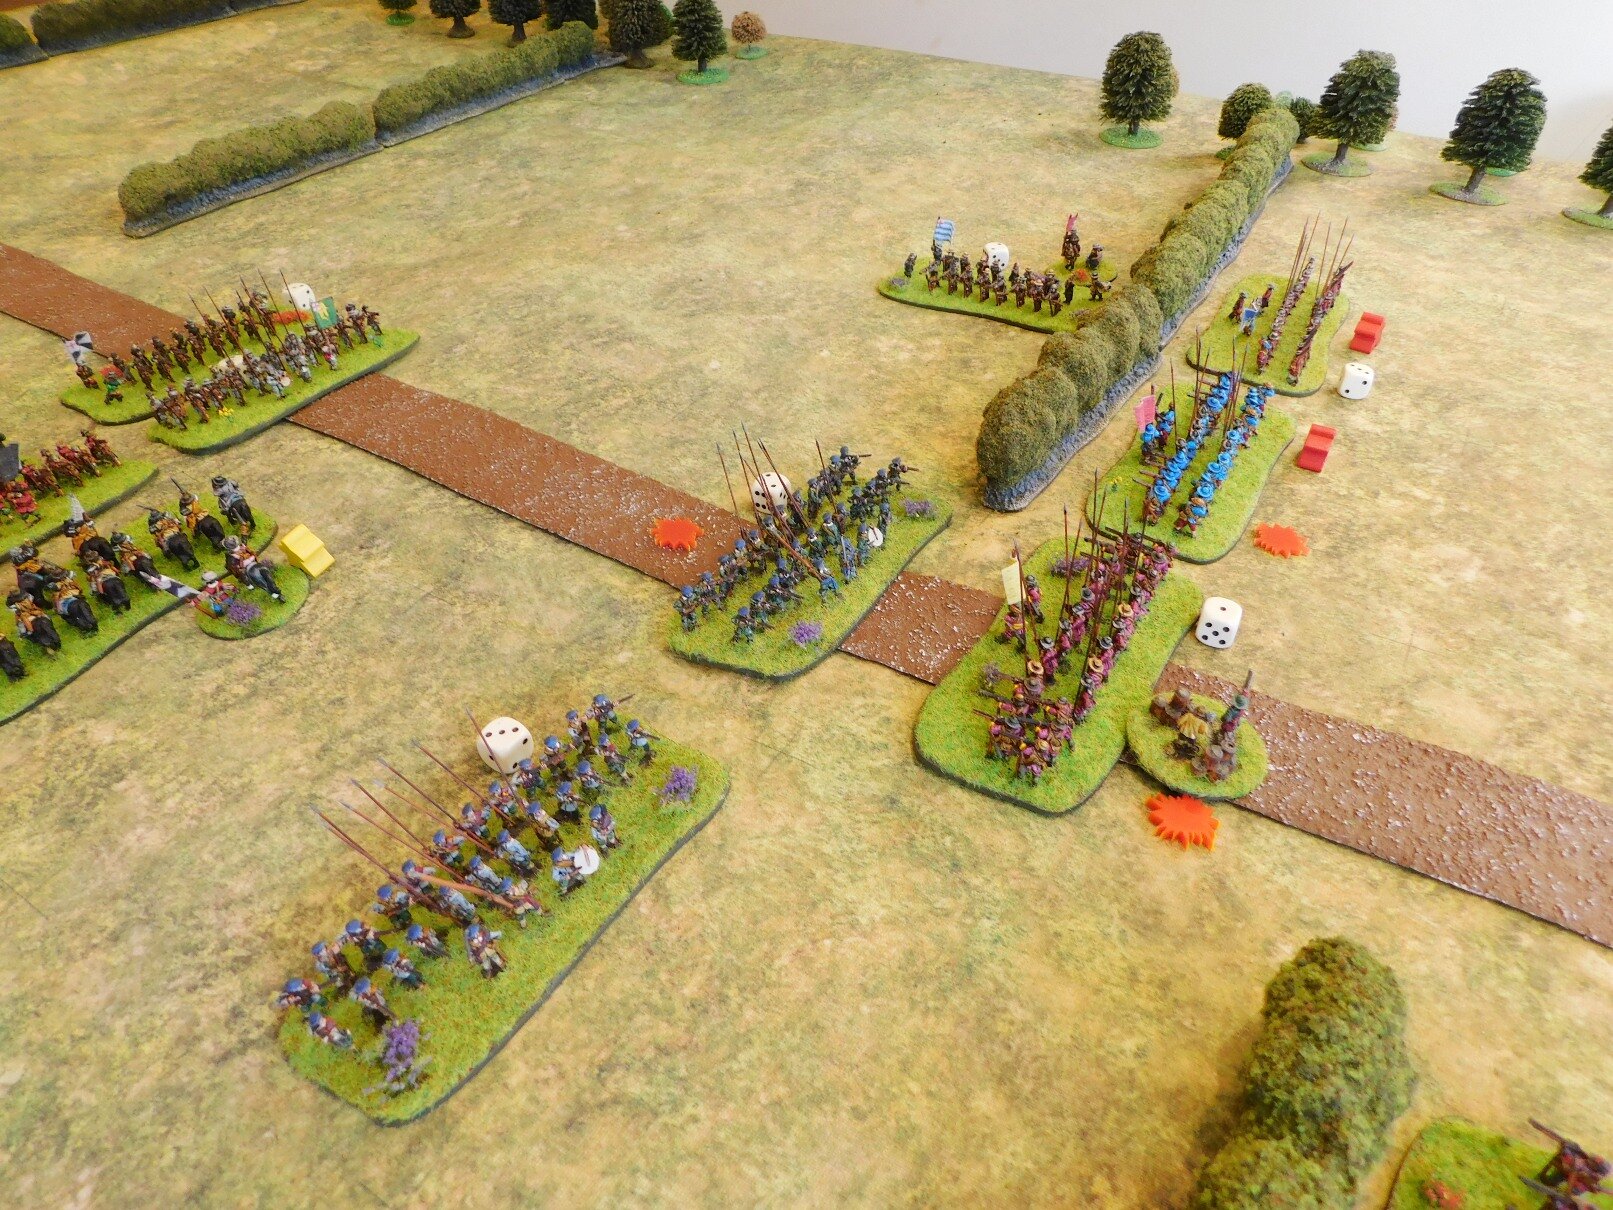
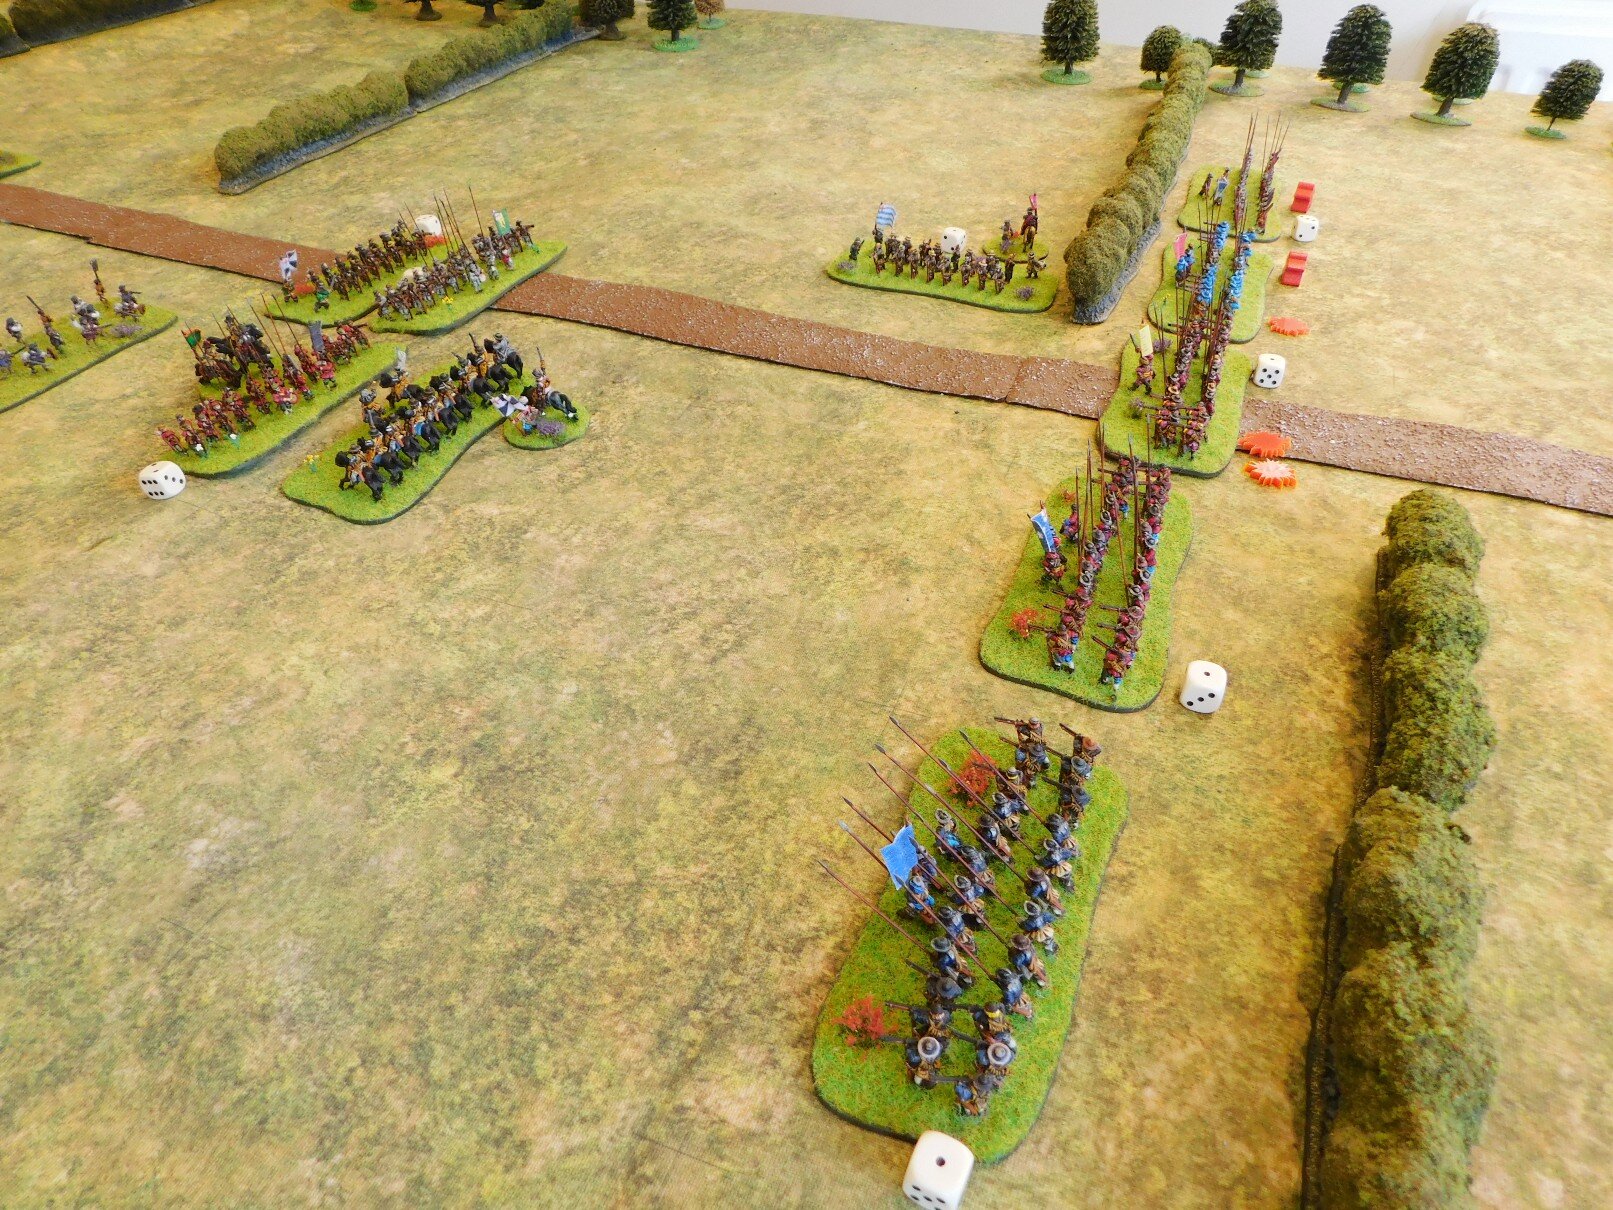
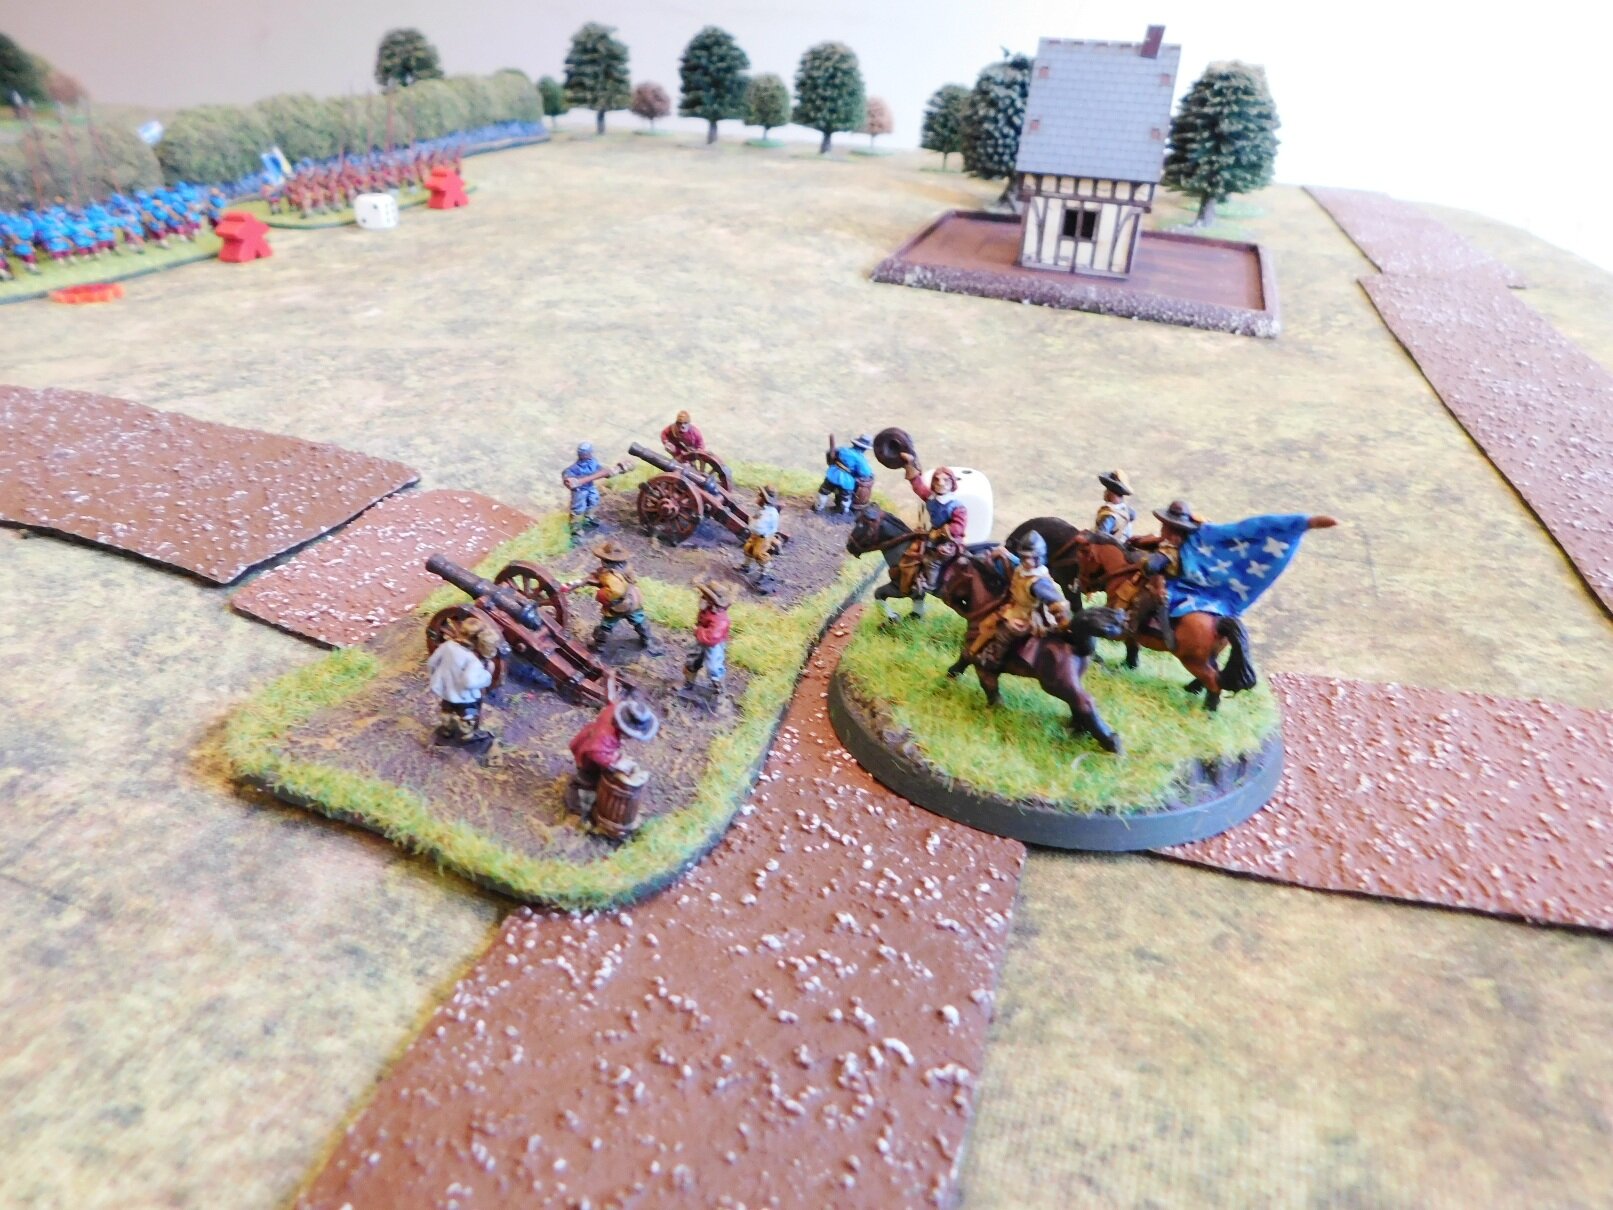
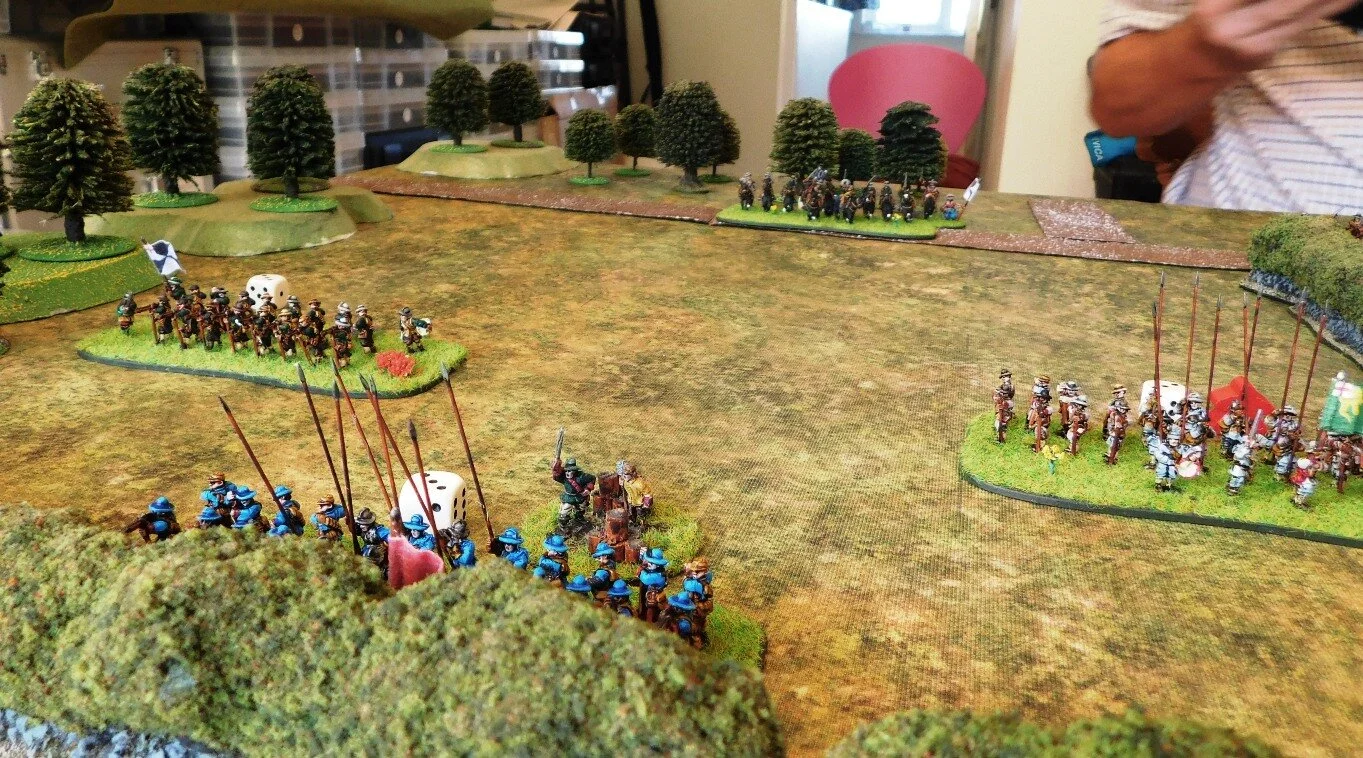
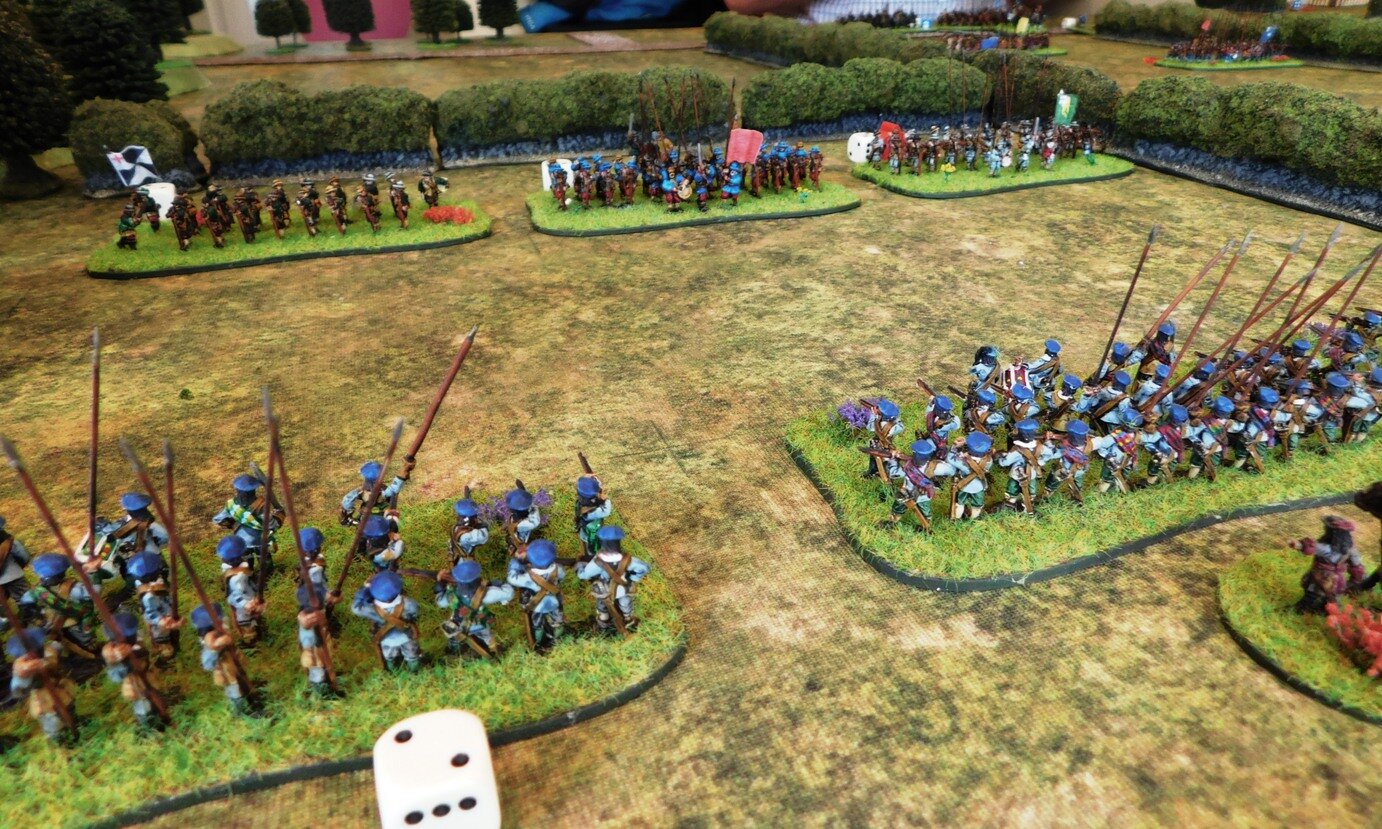
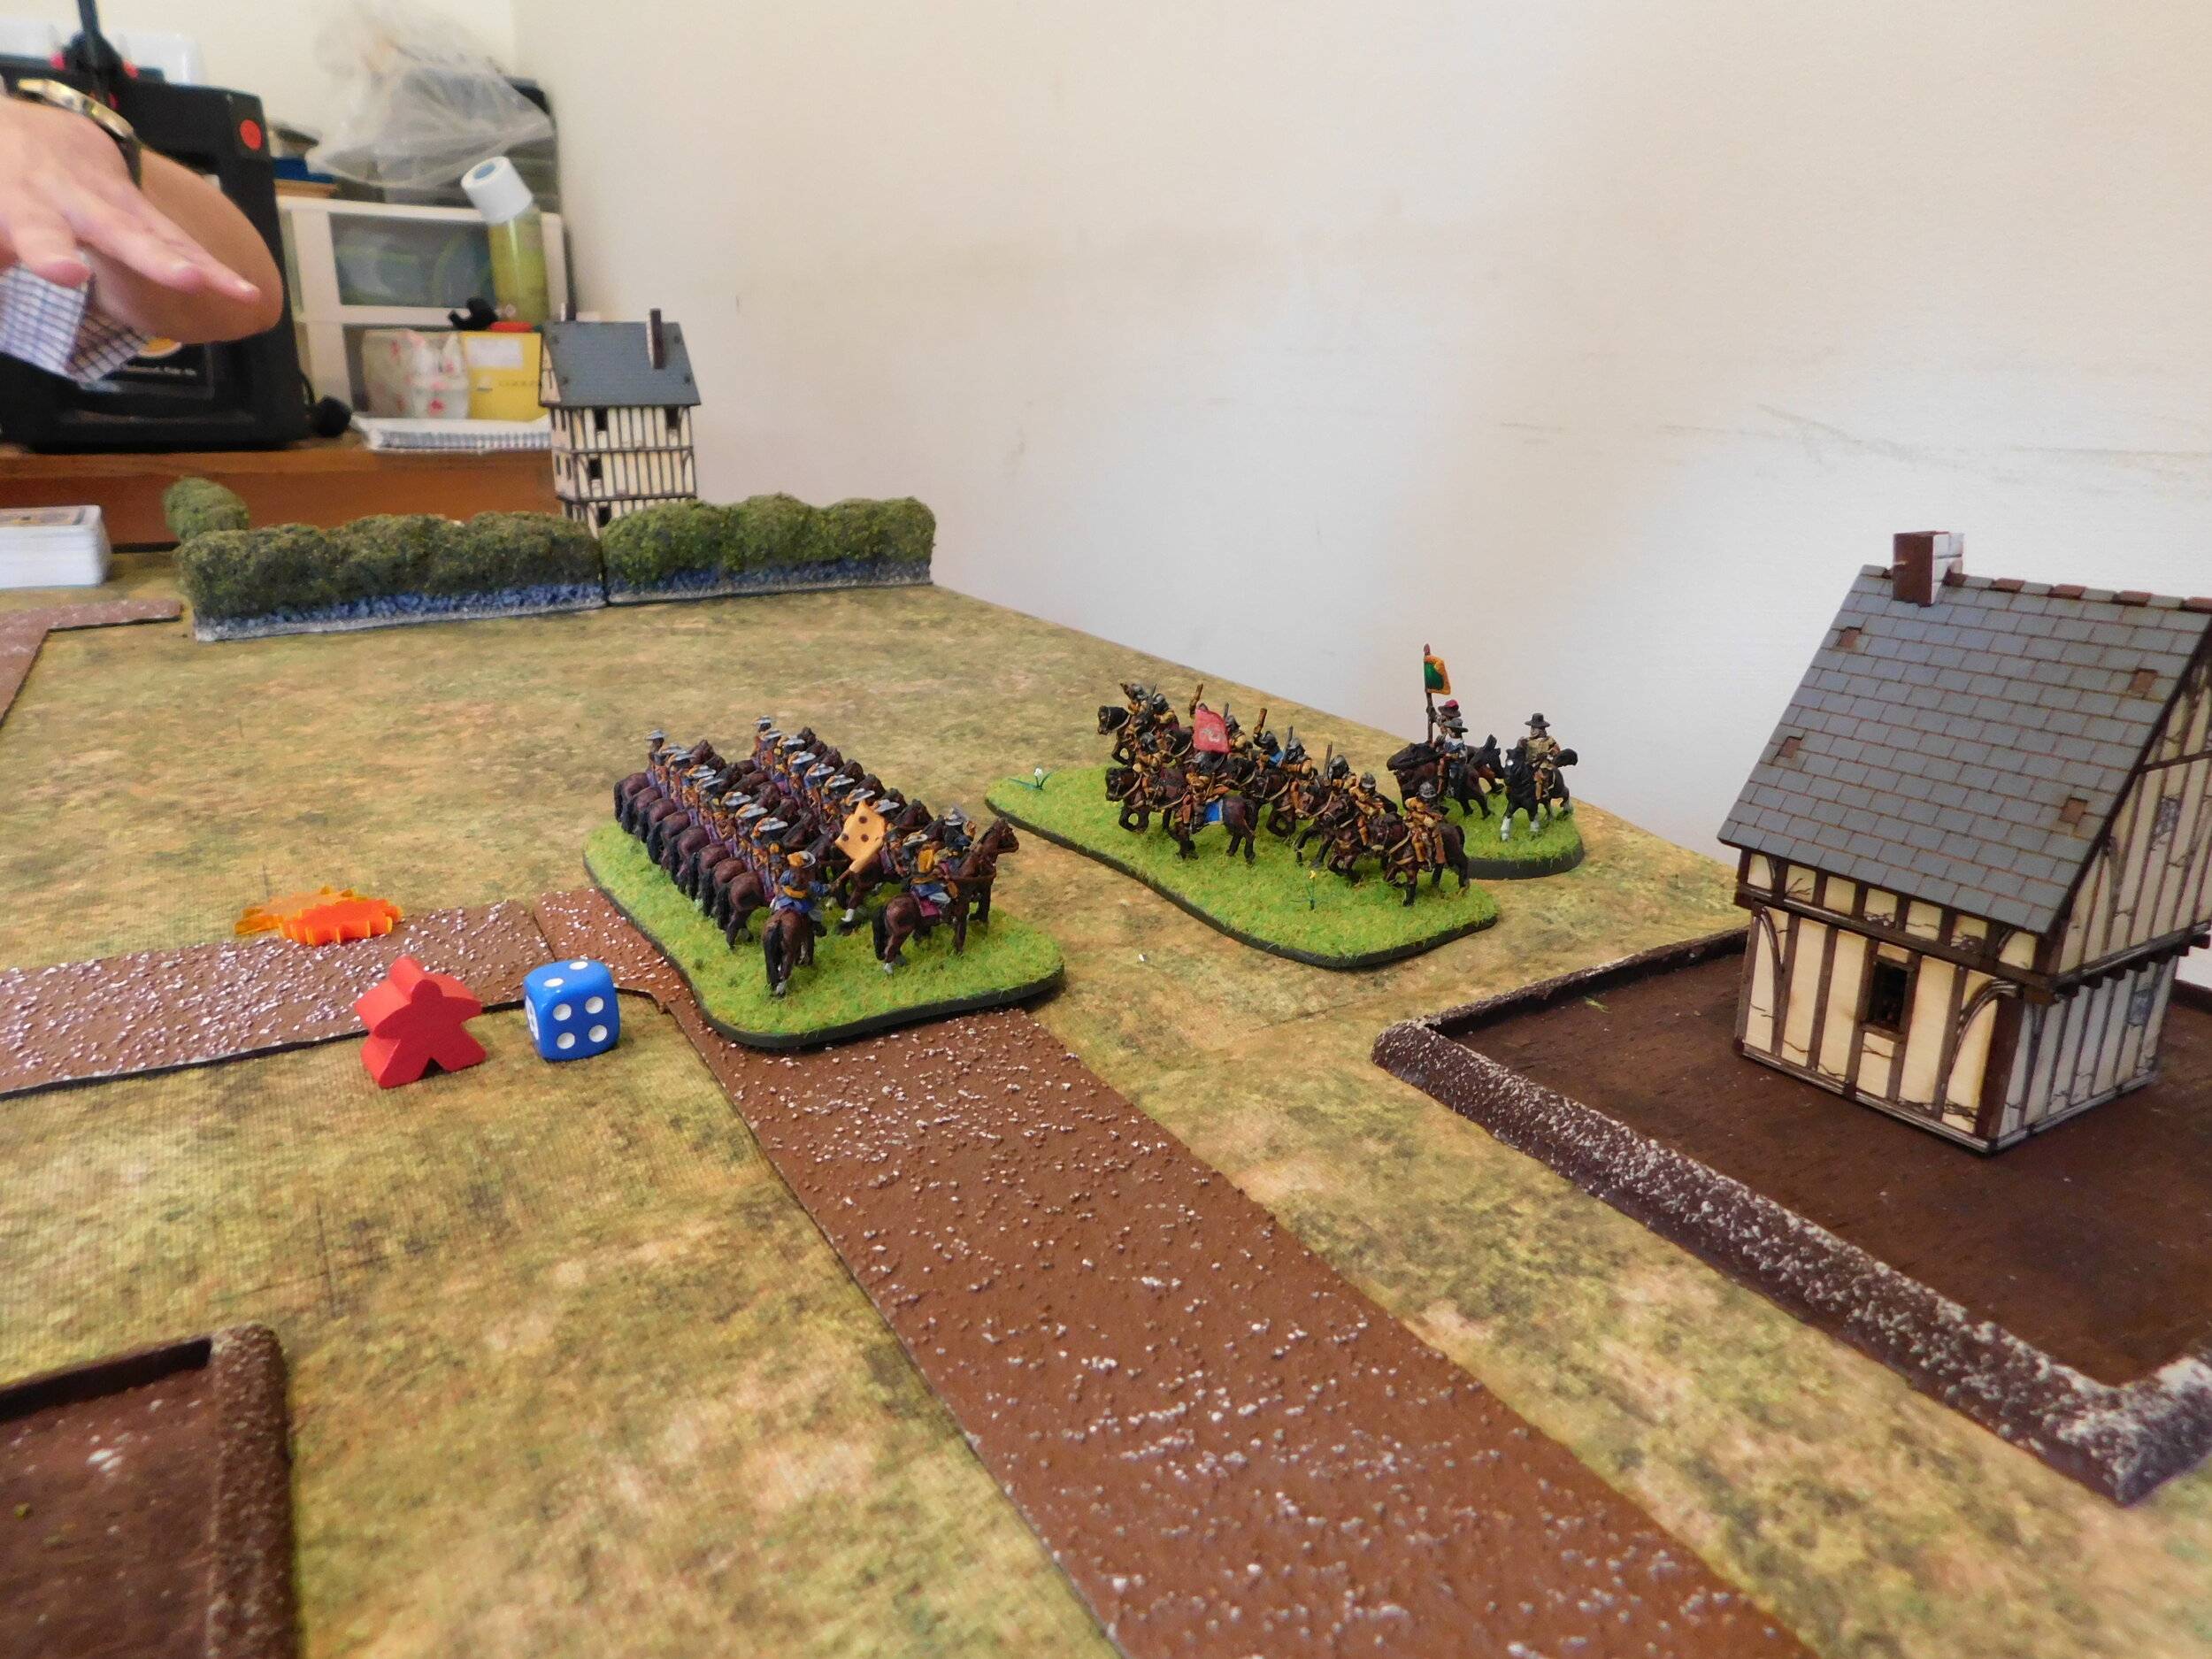
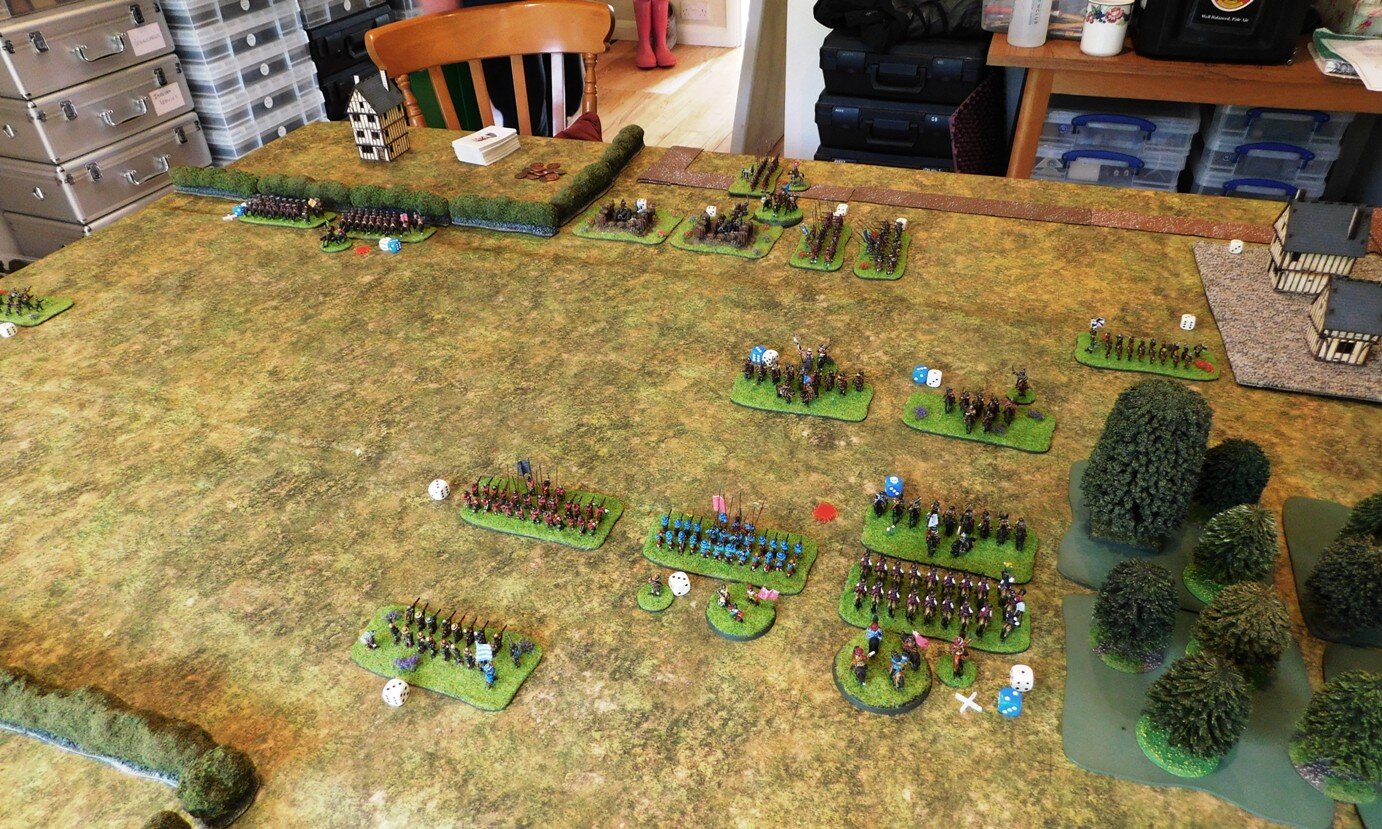
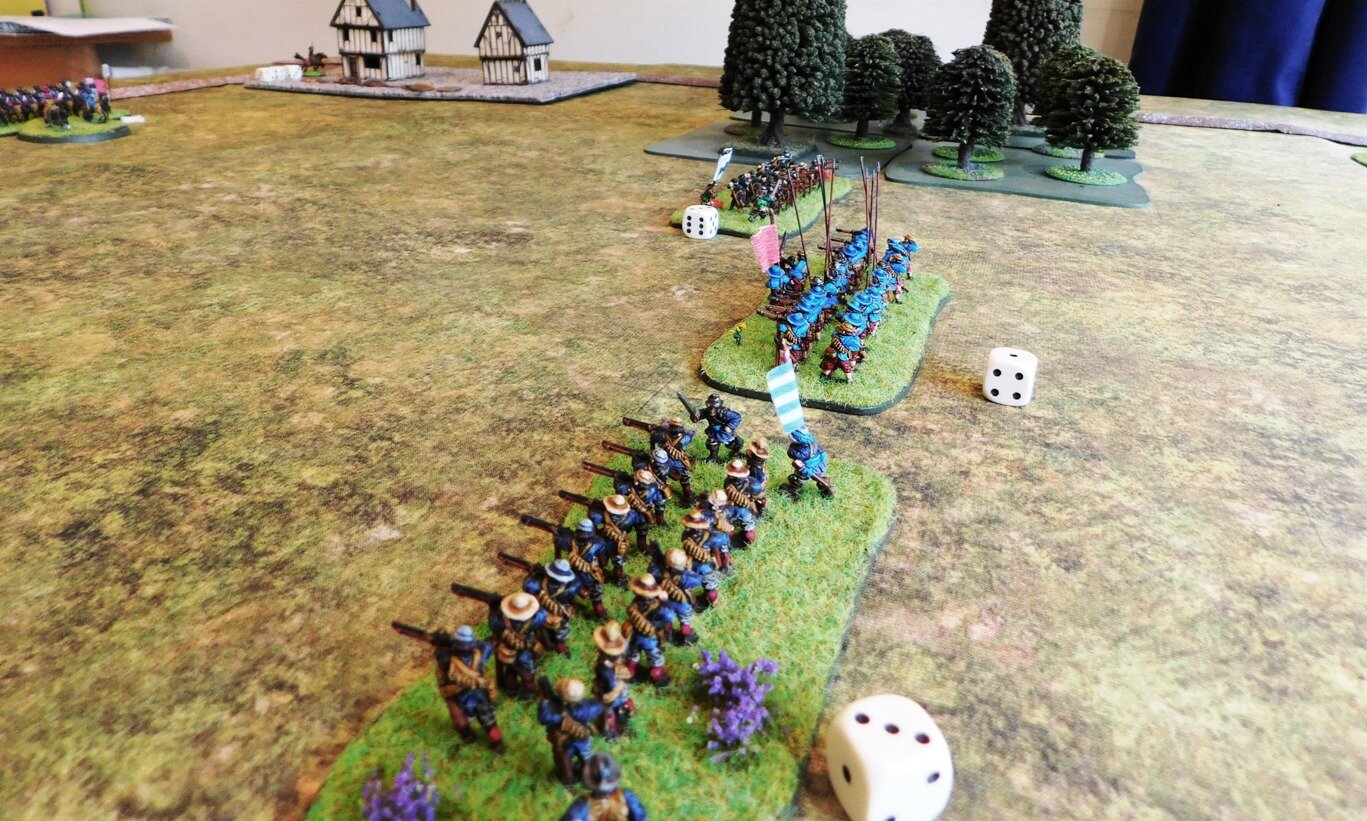
The Scots, to the right, approach the village of the Gappe, held by the Militia and local folk
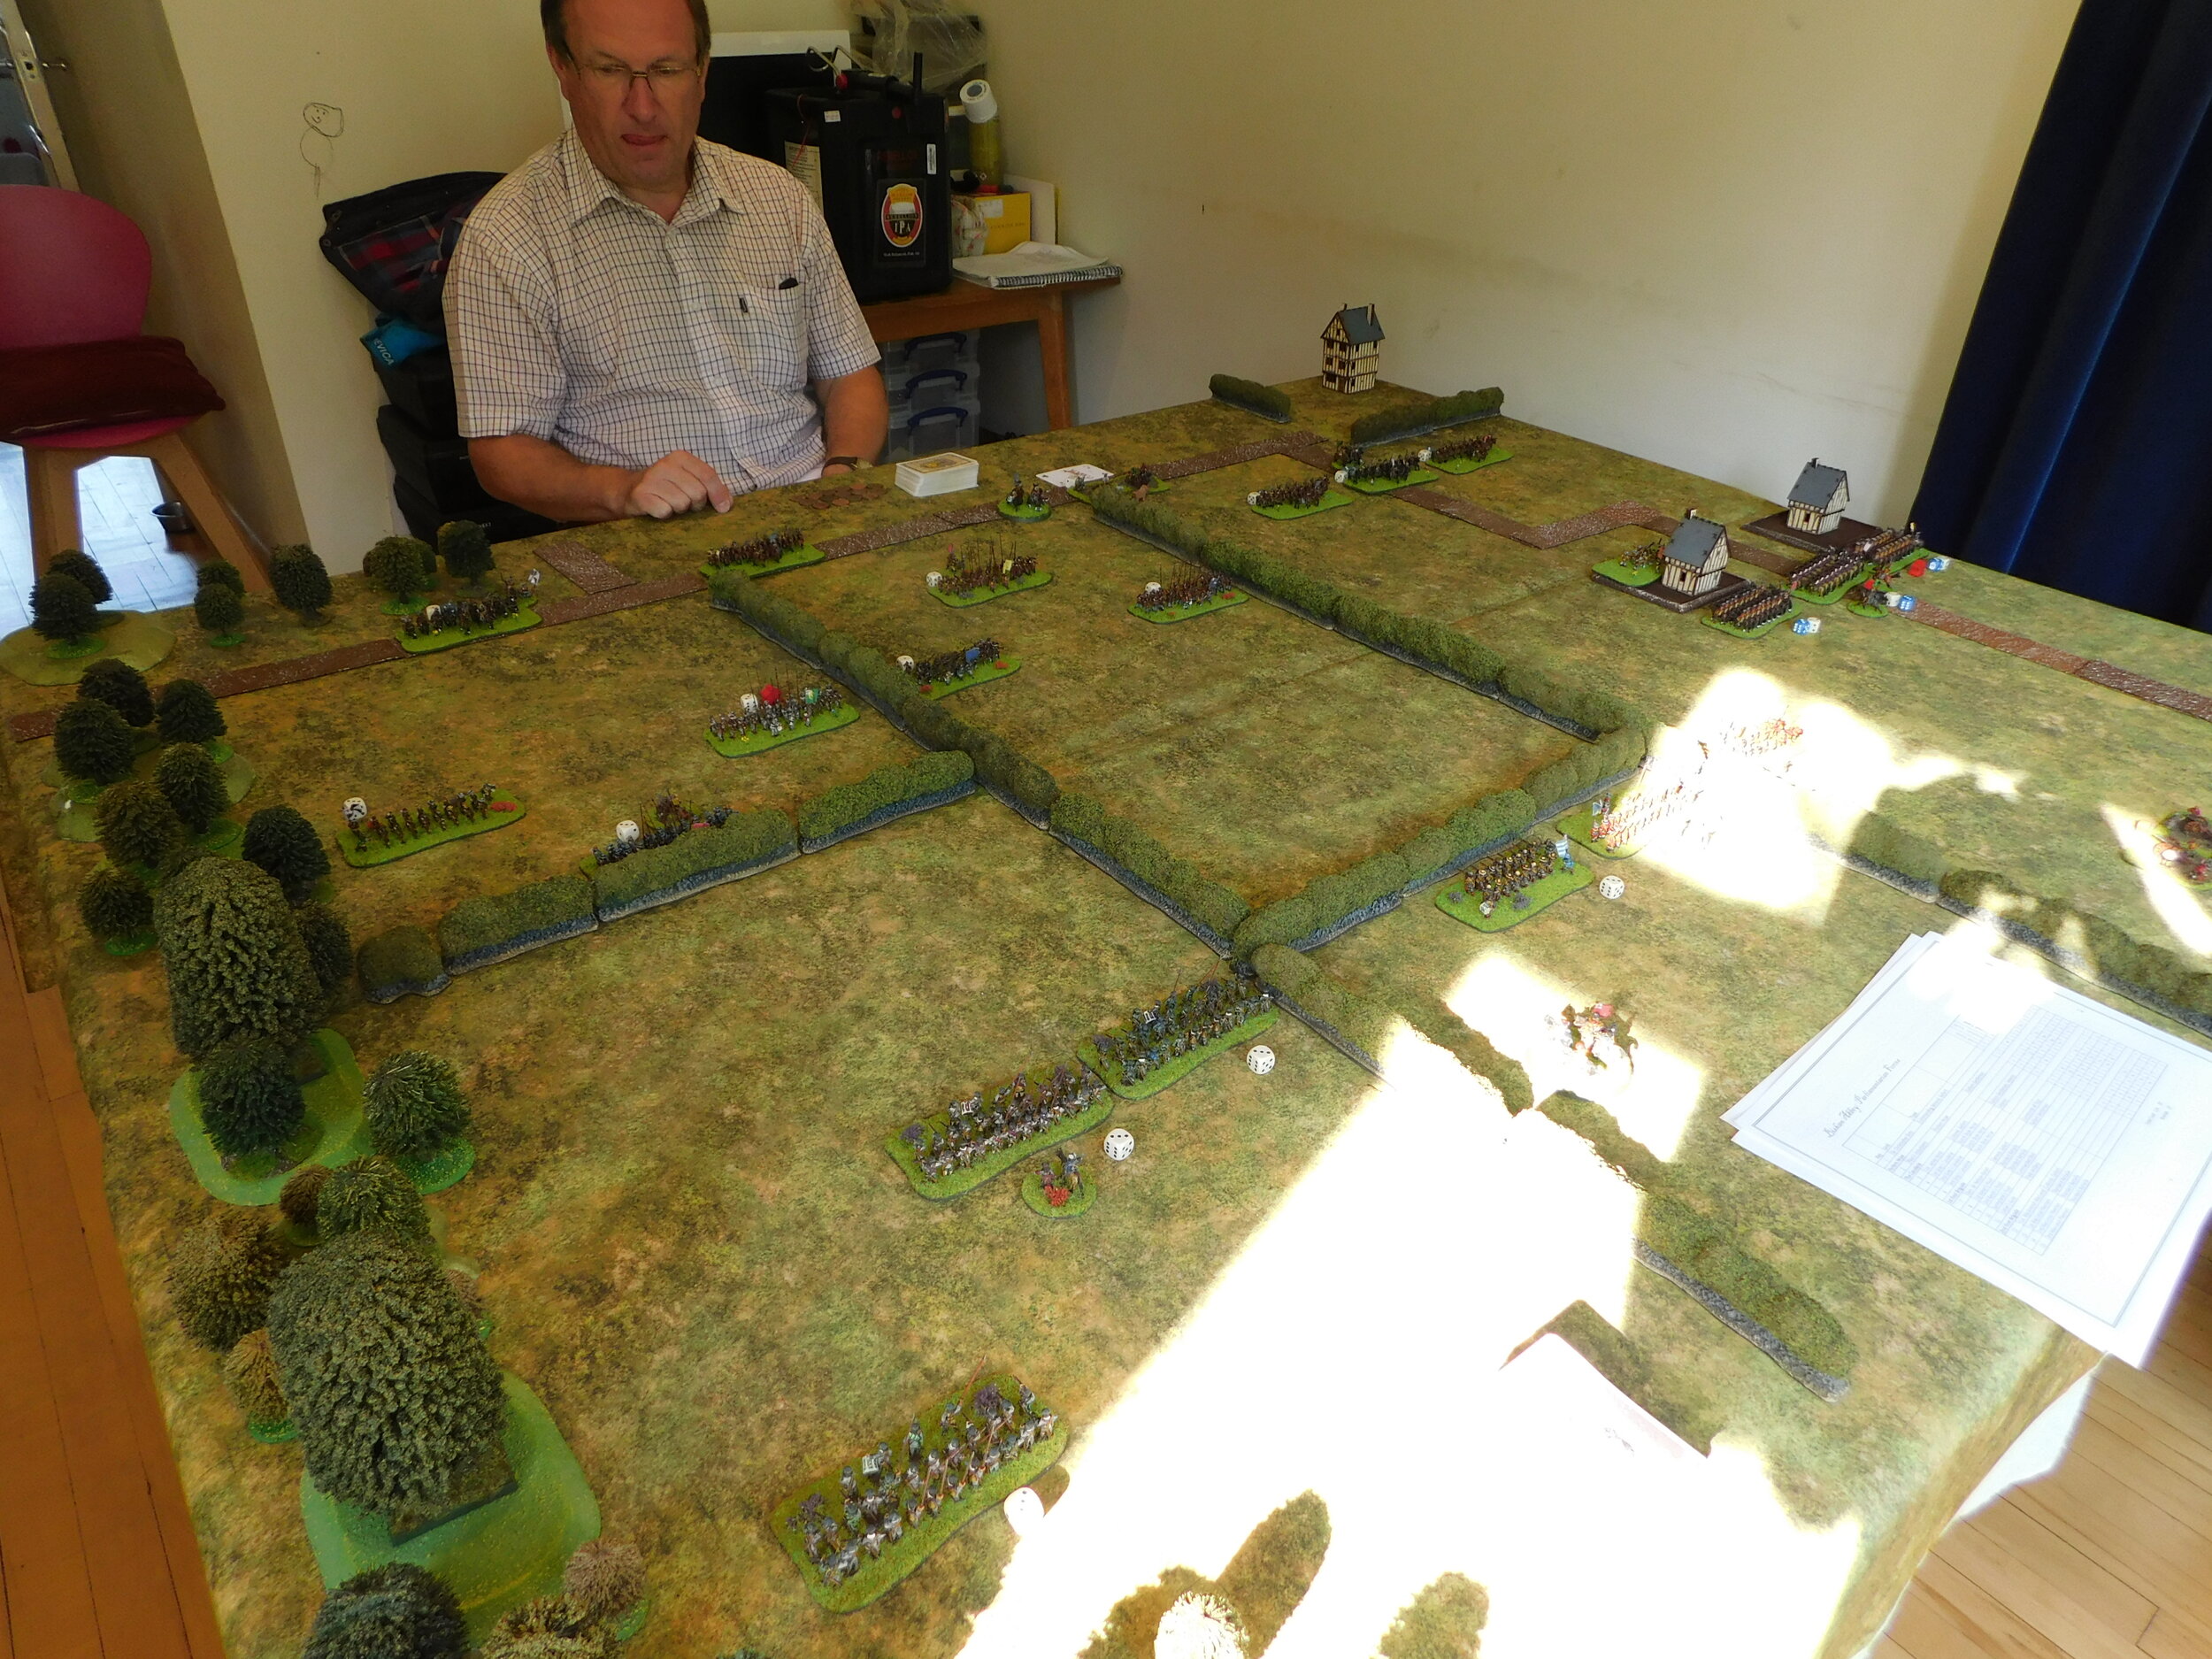
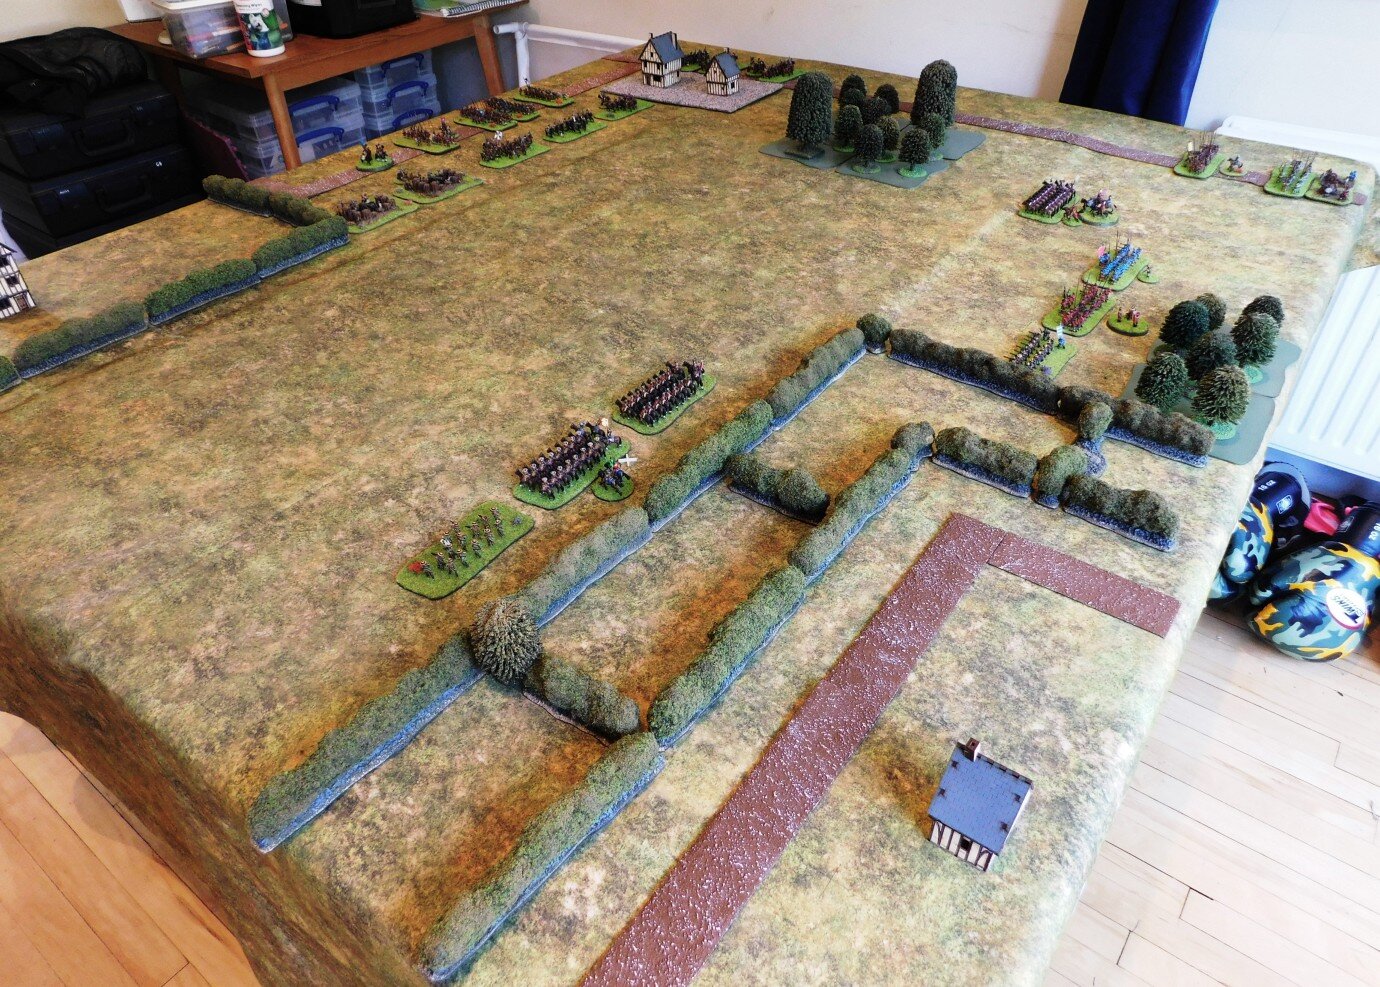
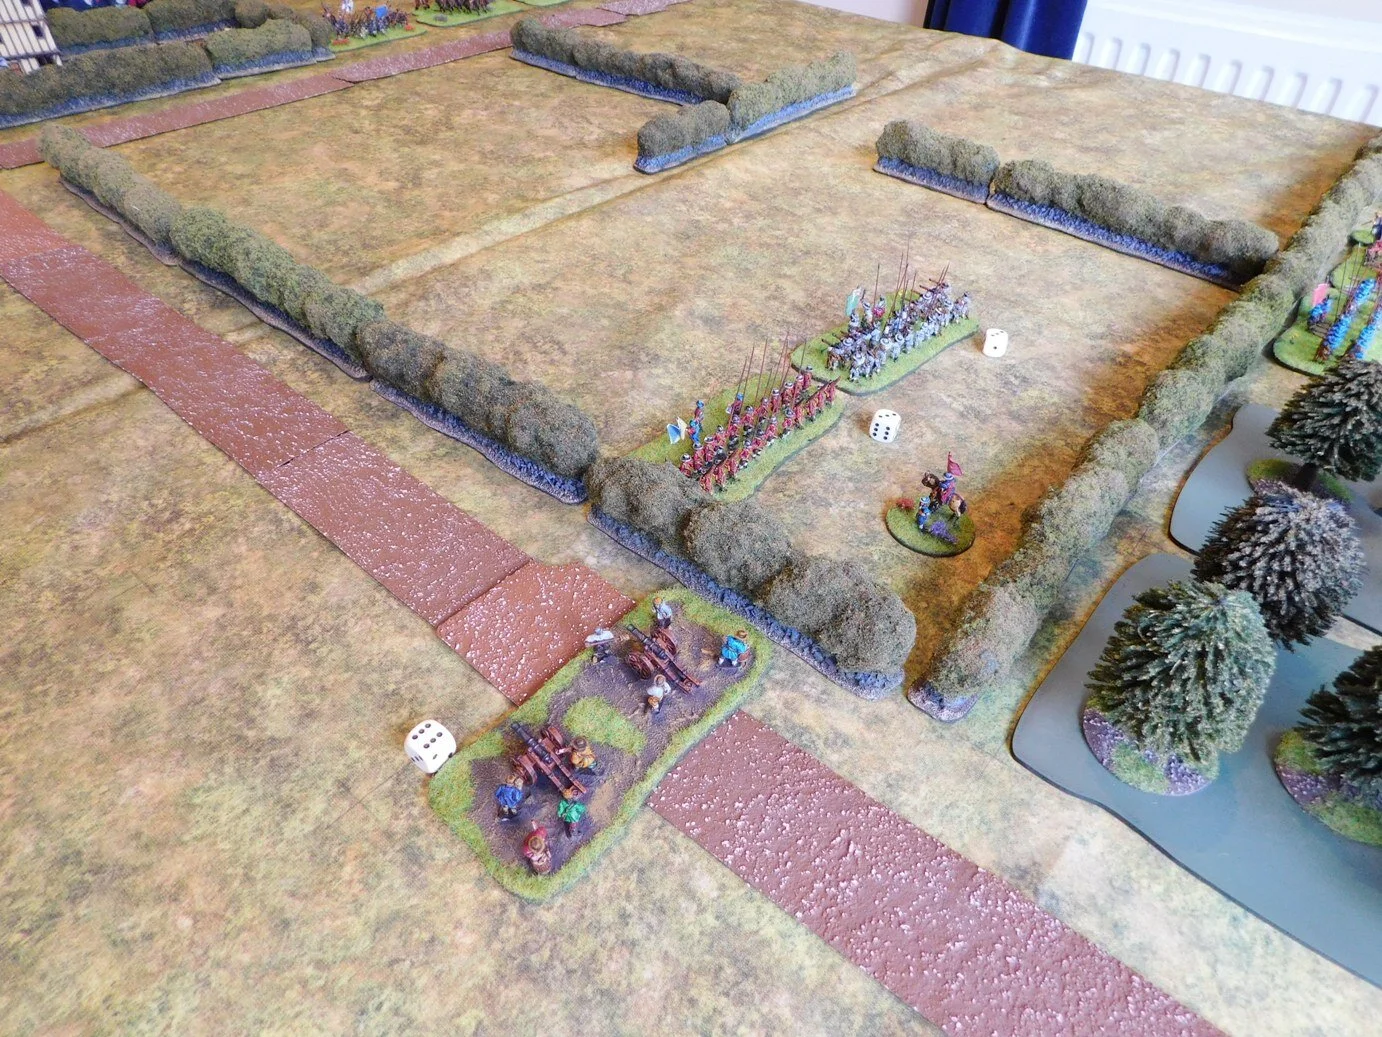
Deployment

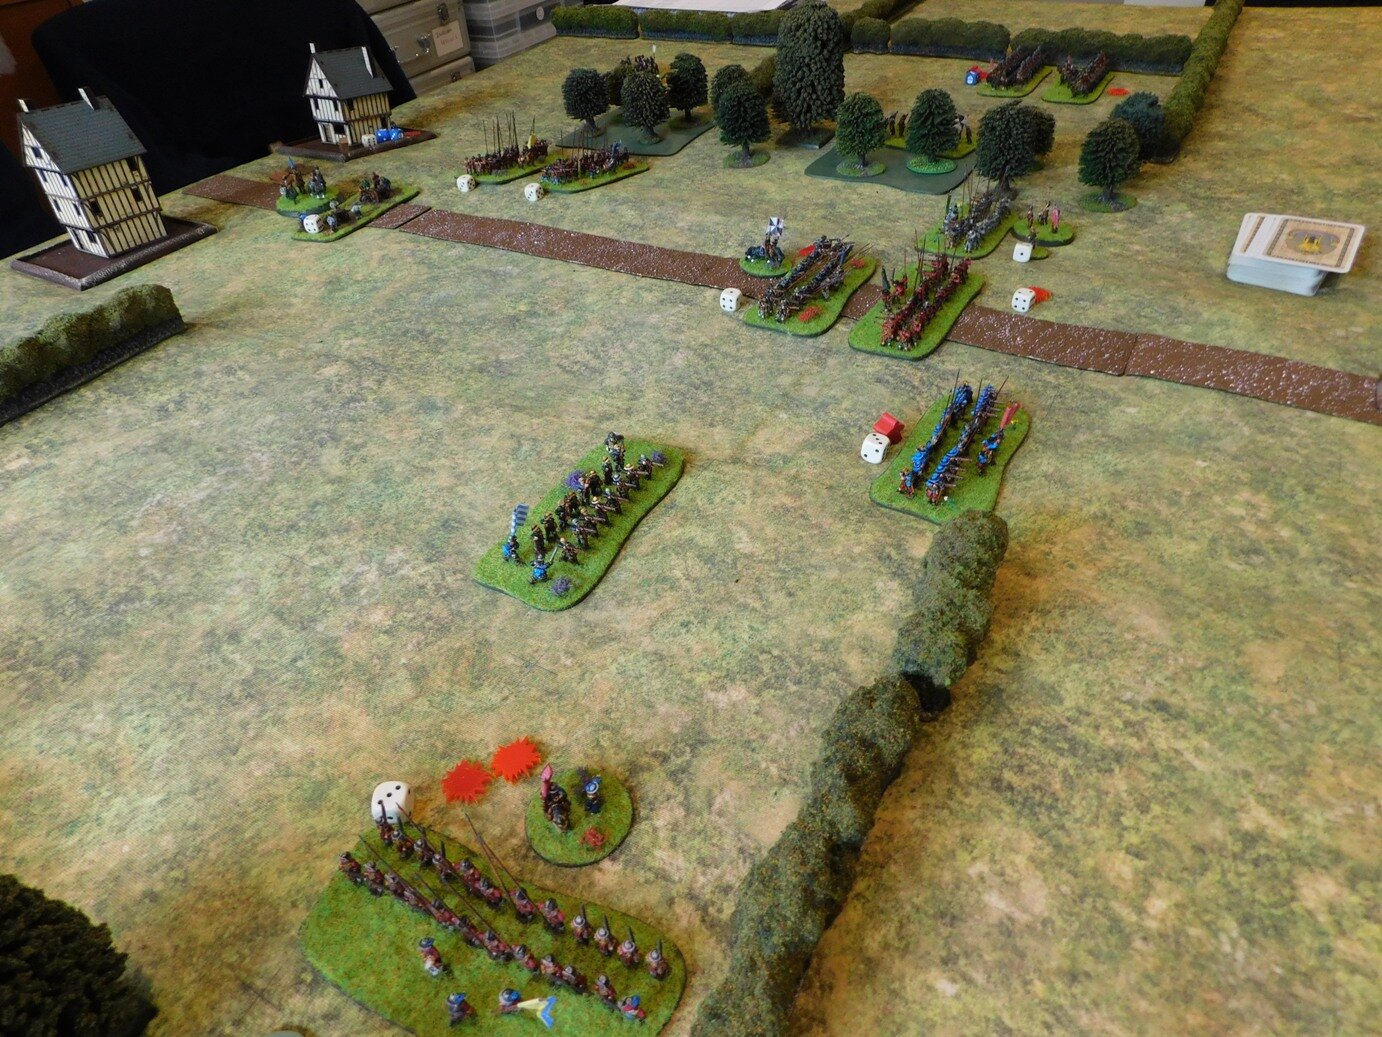
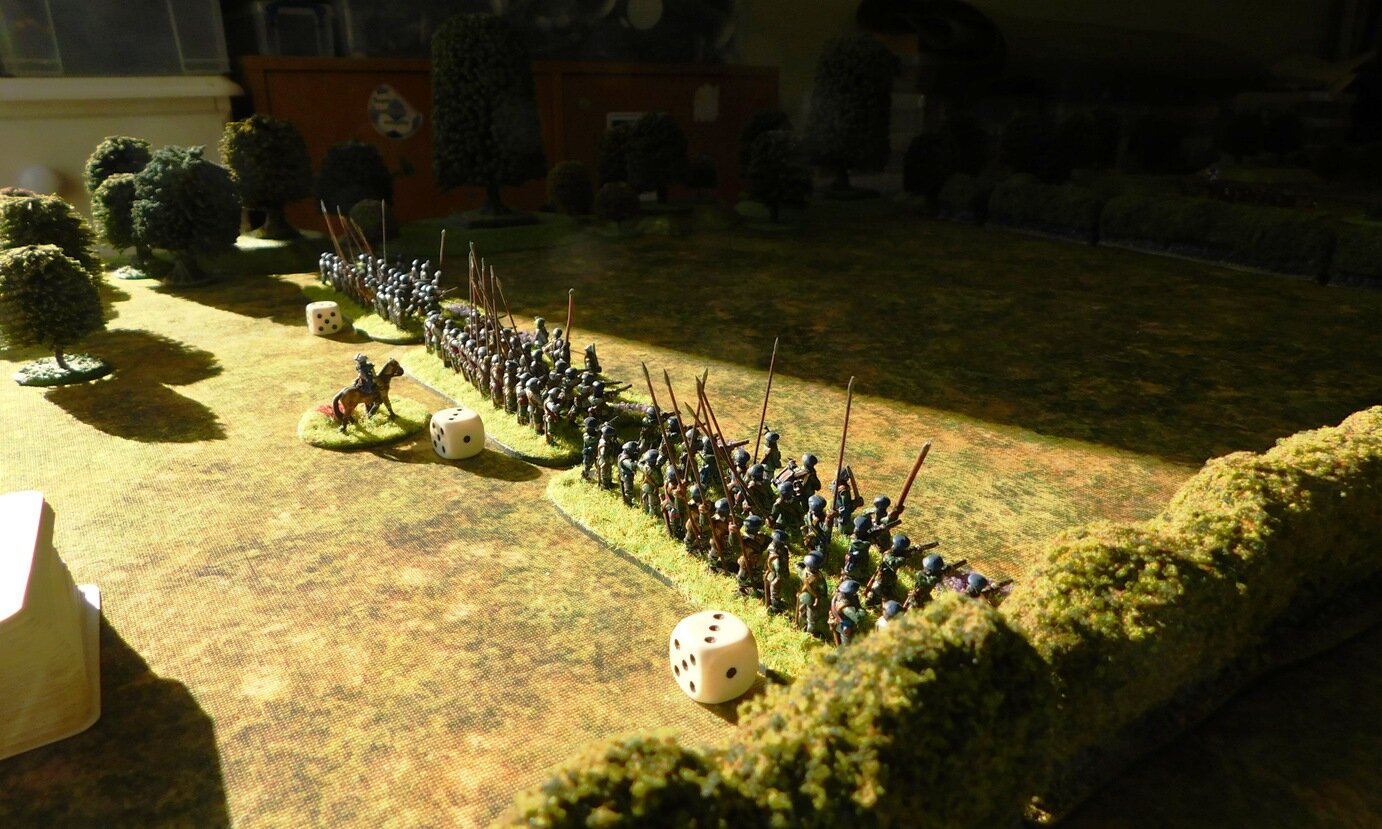
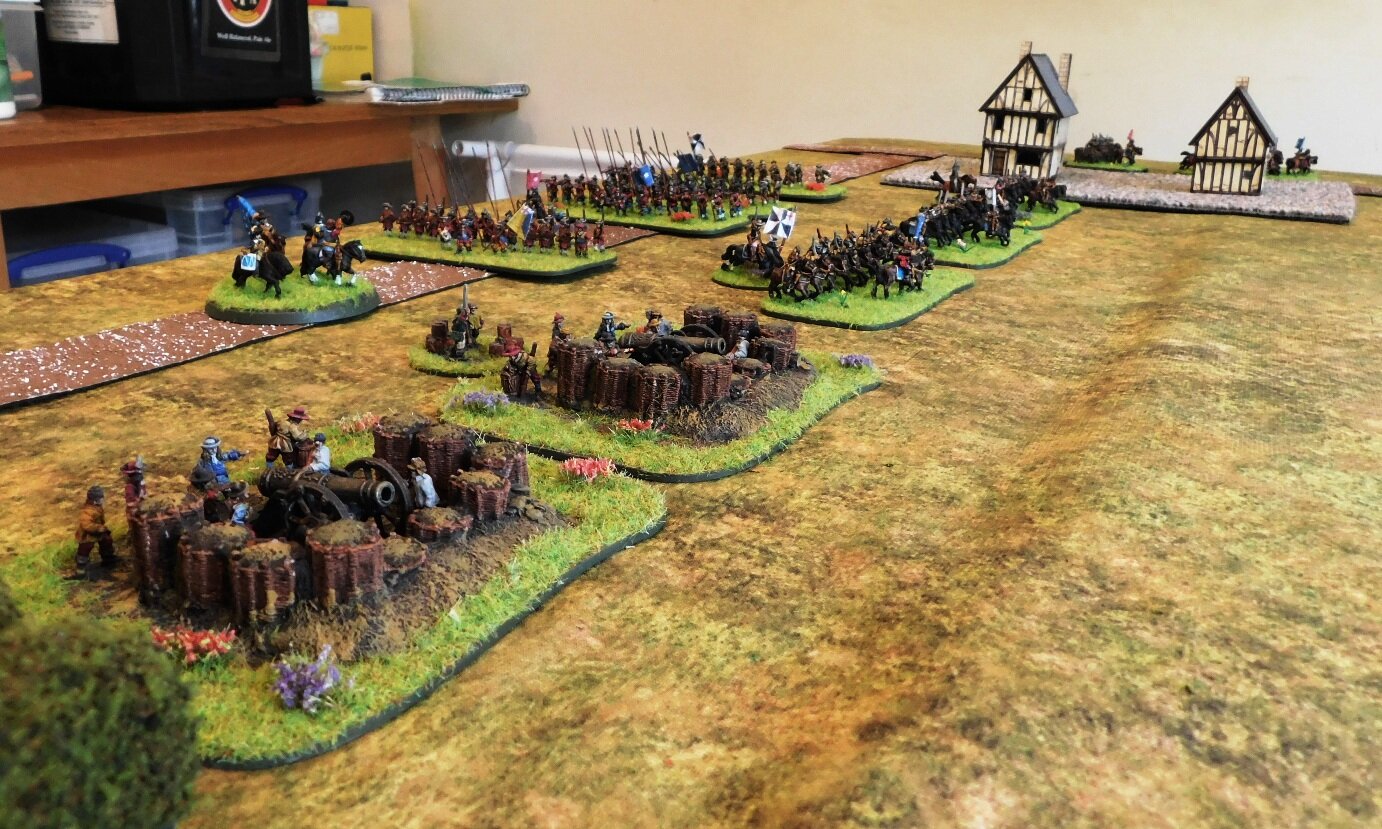
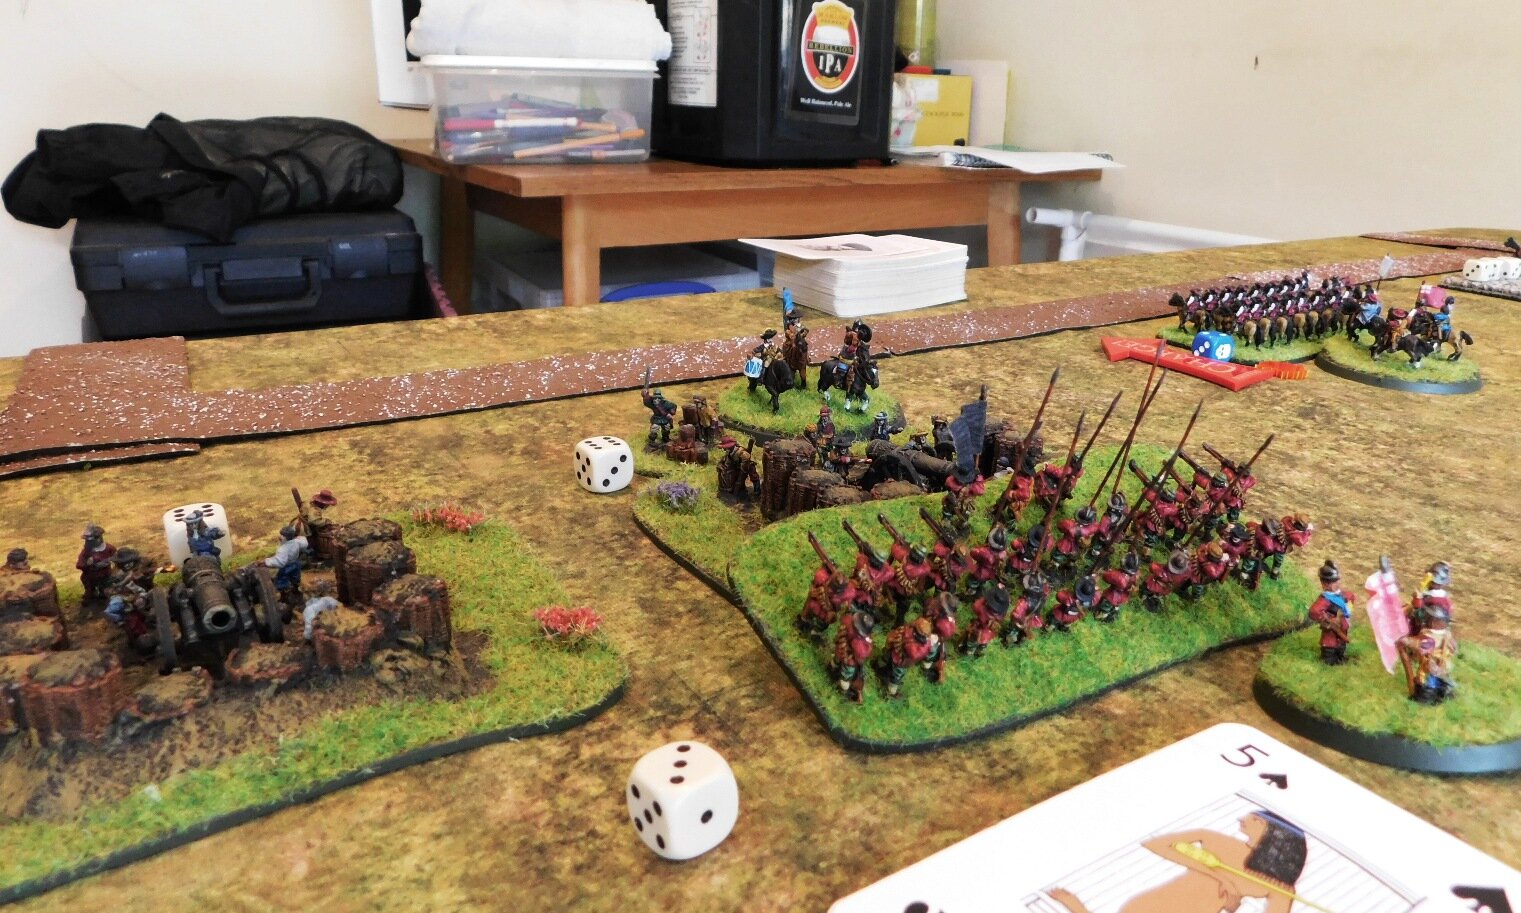
The Scots placed their Highlanders on the left, opposite the rough and more enclosed terrain, their artillery and pike only units in the centre, and their standard battalia on the right. In reserve were their horse: a unit of poorly mounted pistoliers and a unit of poorly mounted lancers.

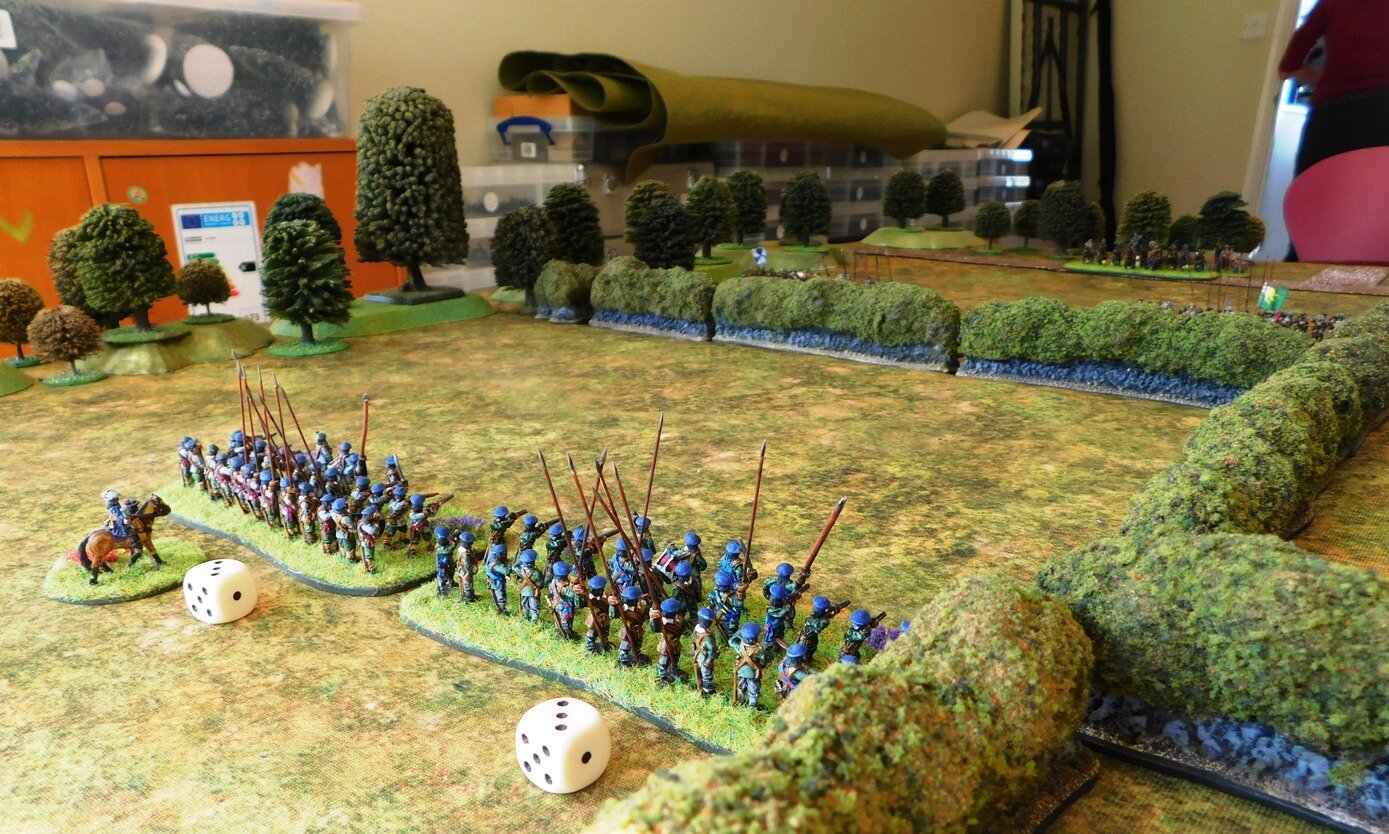
The Militia occupied the Gappe: infantry battalia in the centre, Swedish horse on the left and Dutch horse on the right. The three units of Rabble were on the far right, facing the Highlanders.
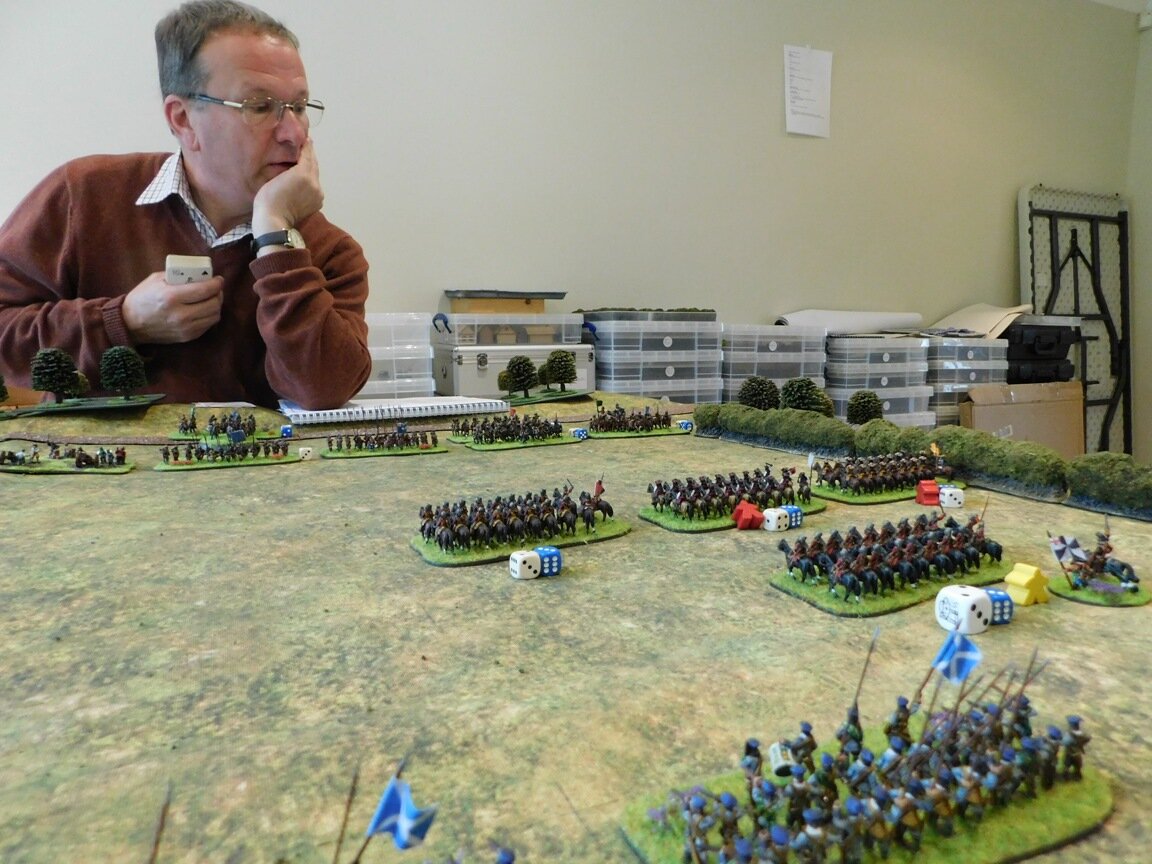
The Battle Begins

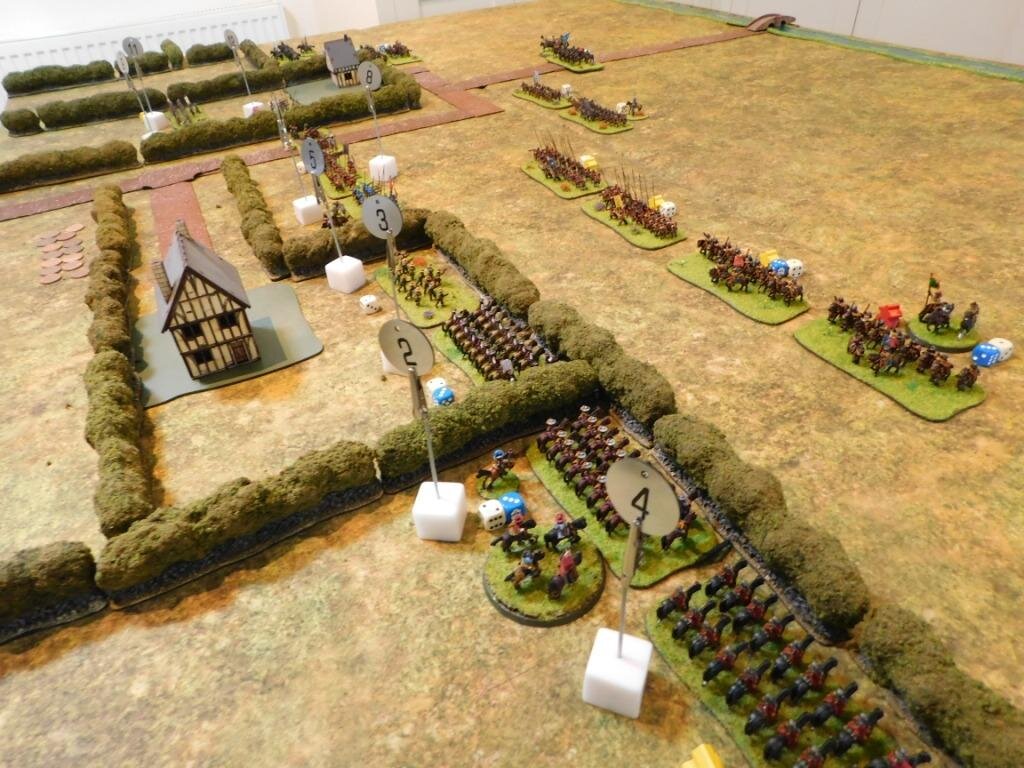
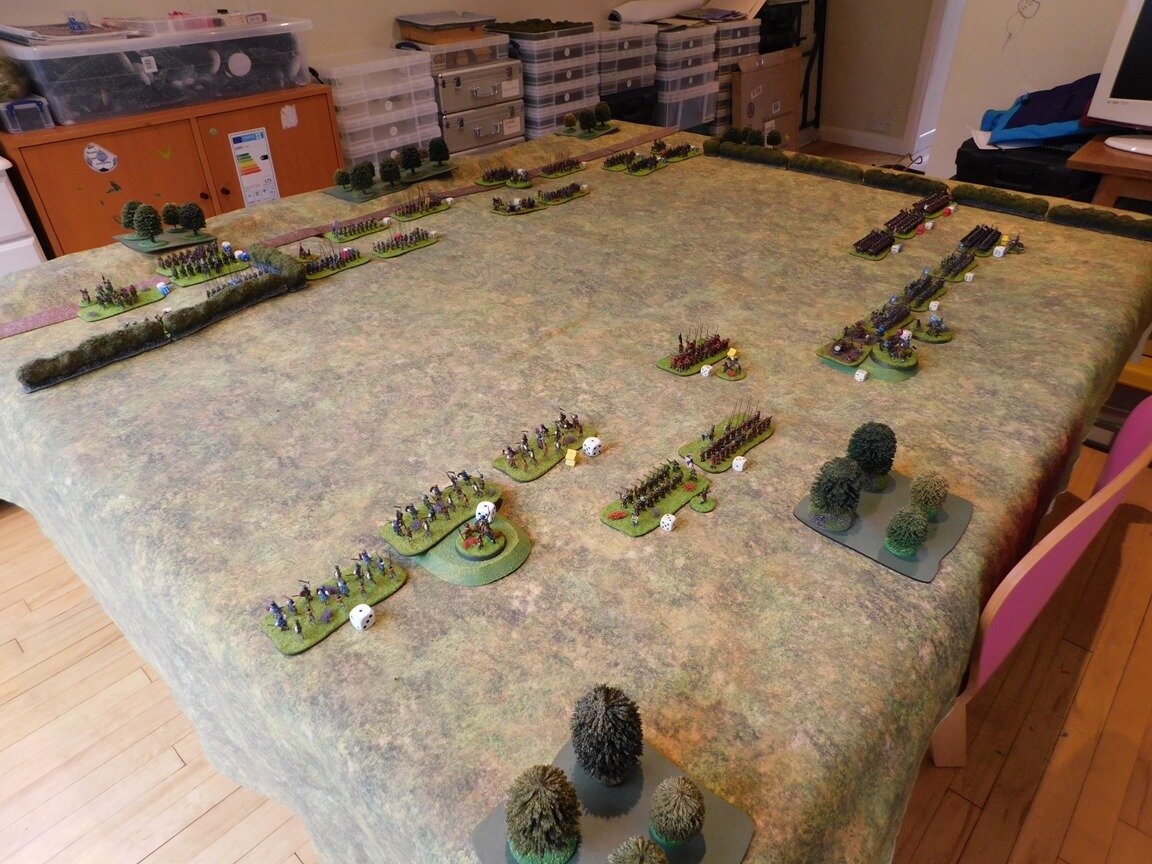
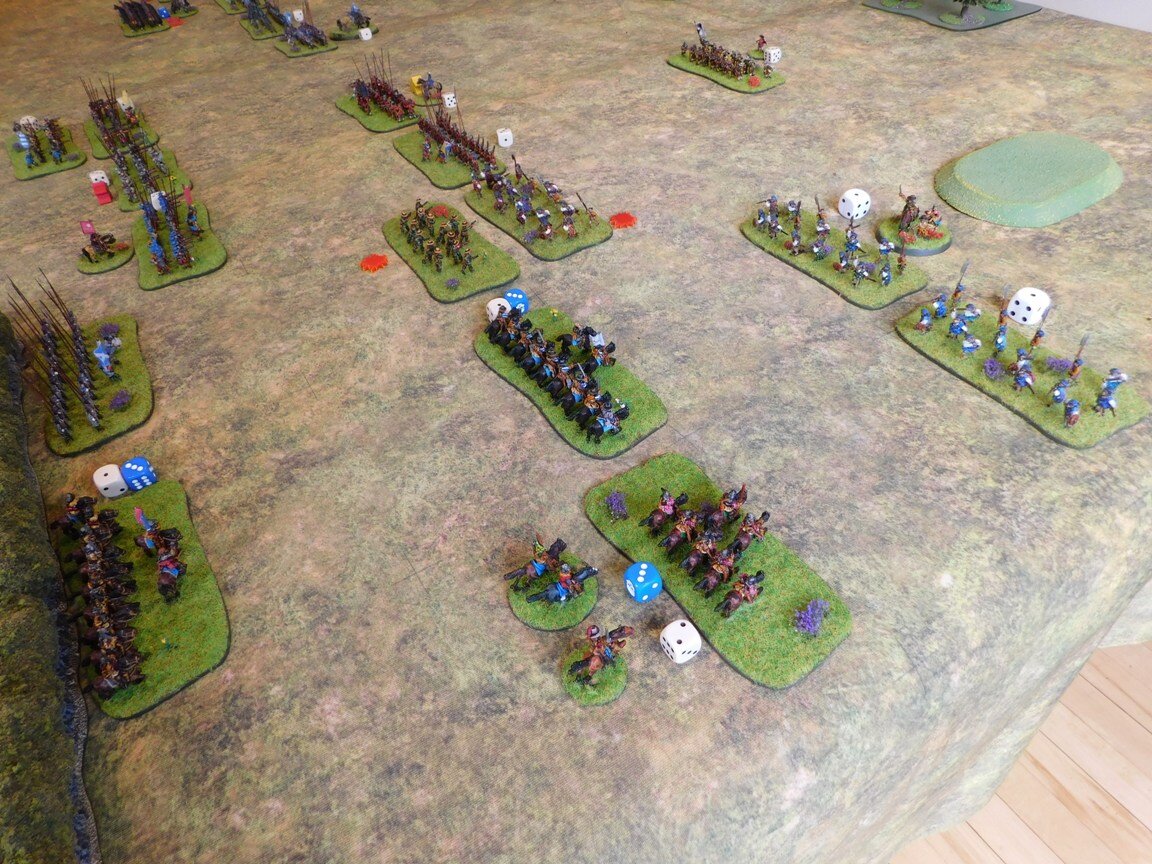
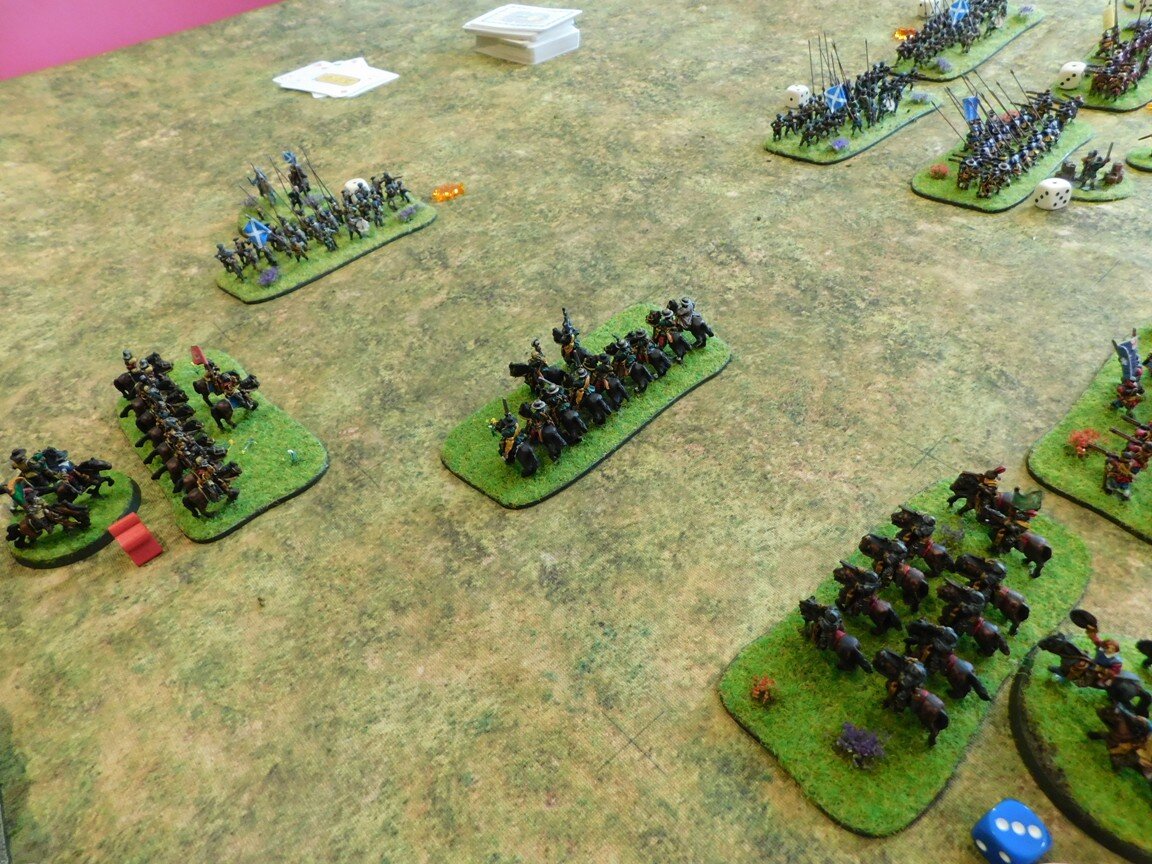
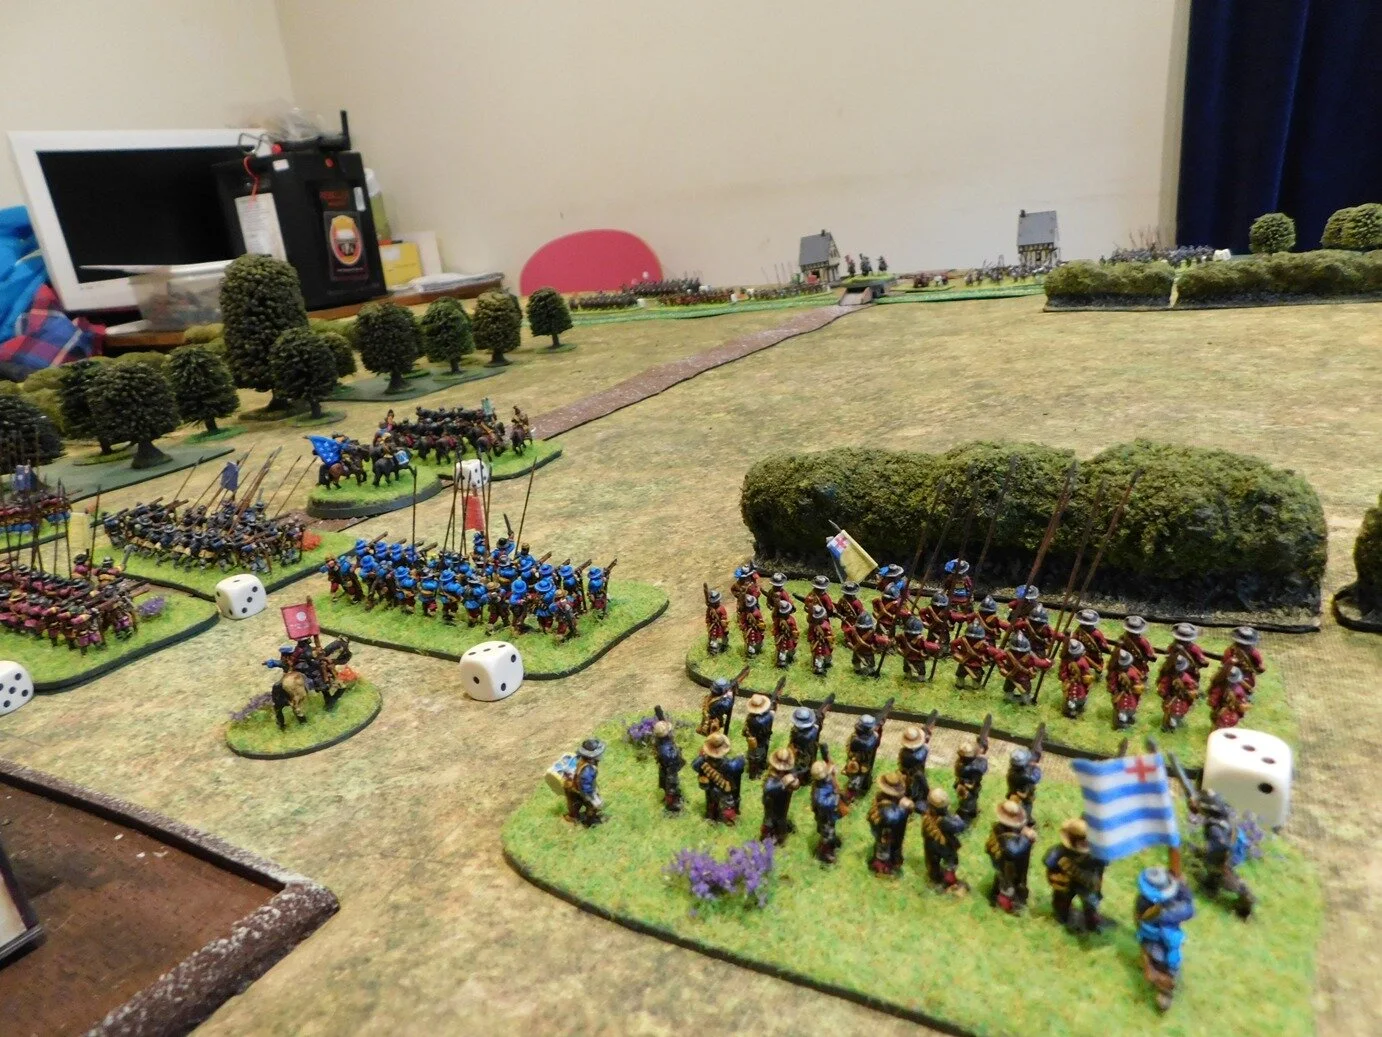
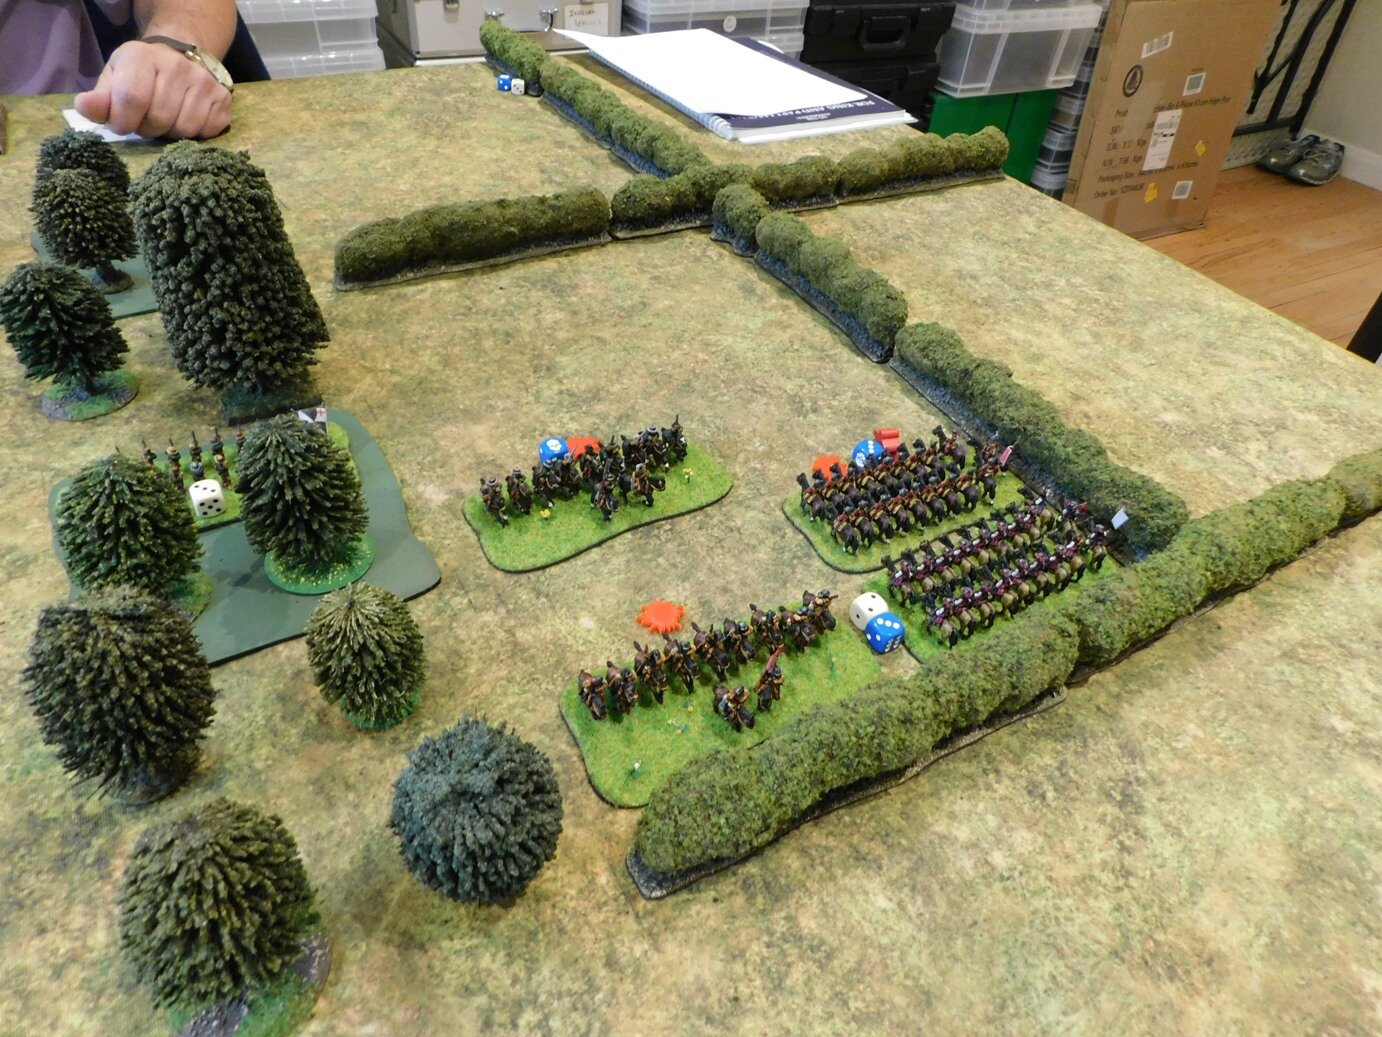
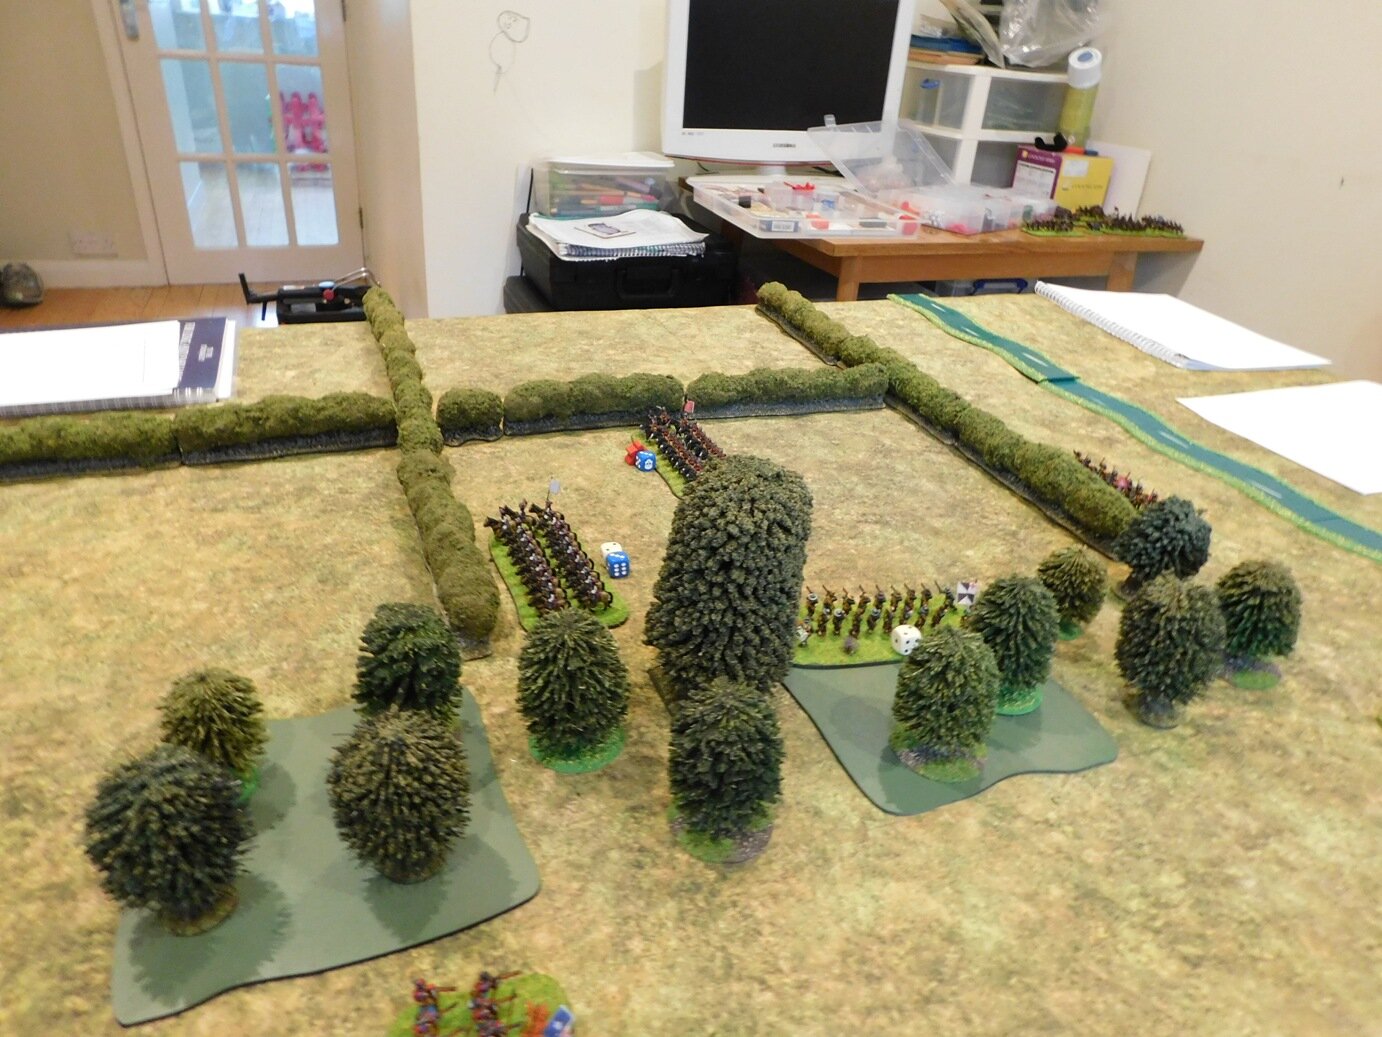
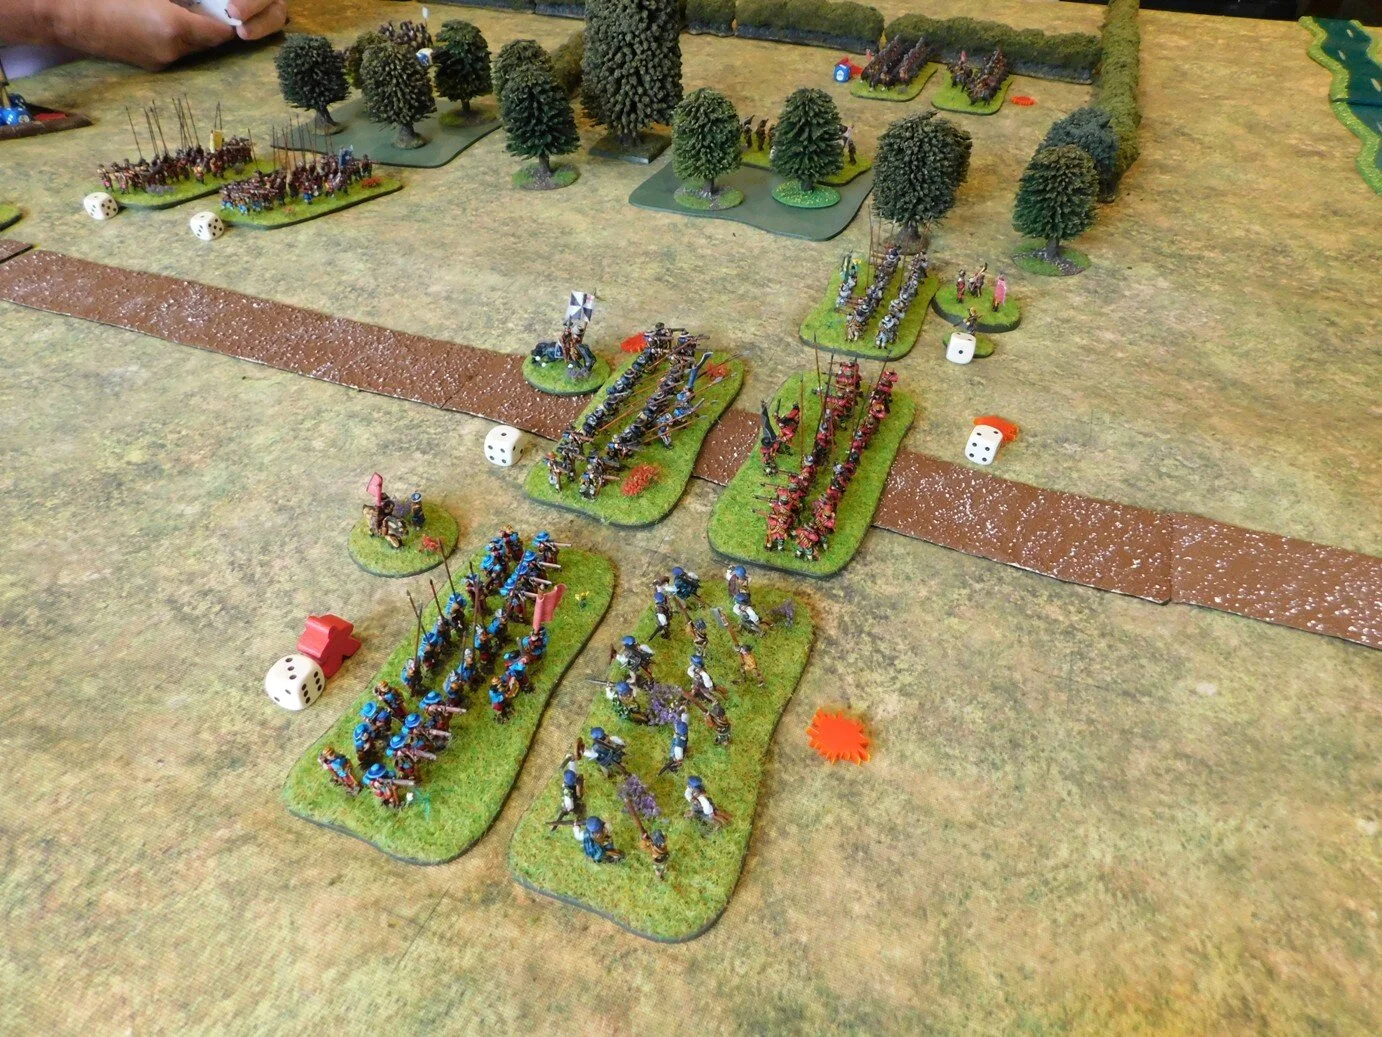
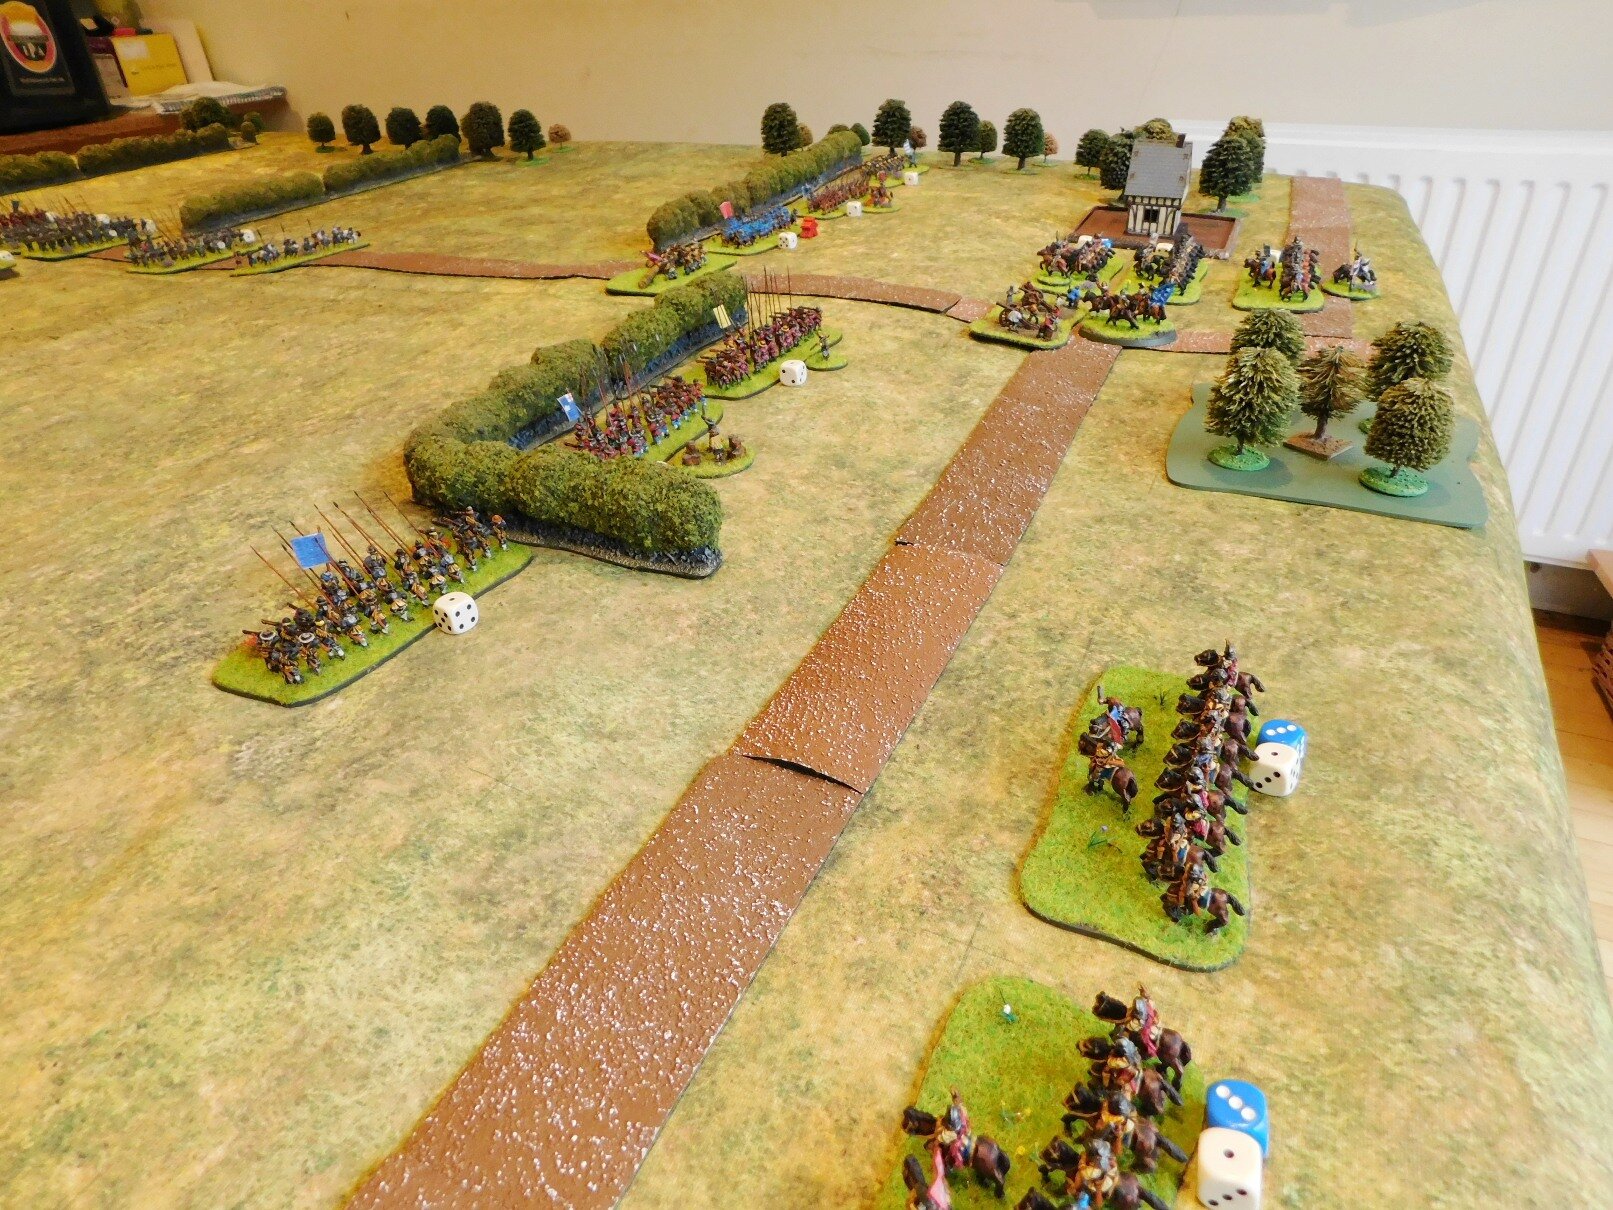
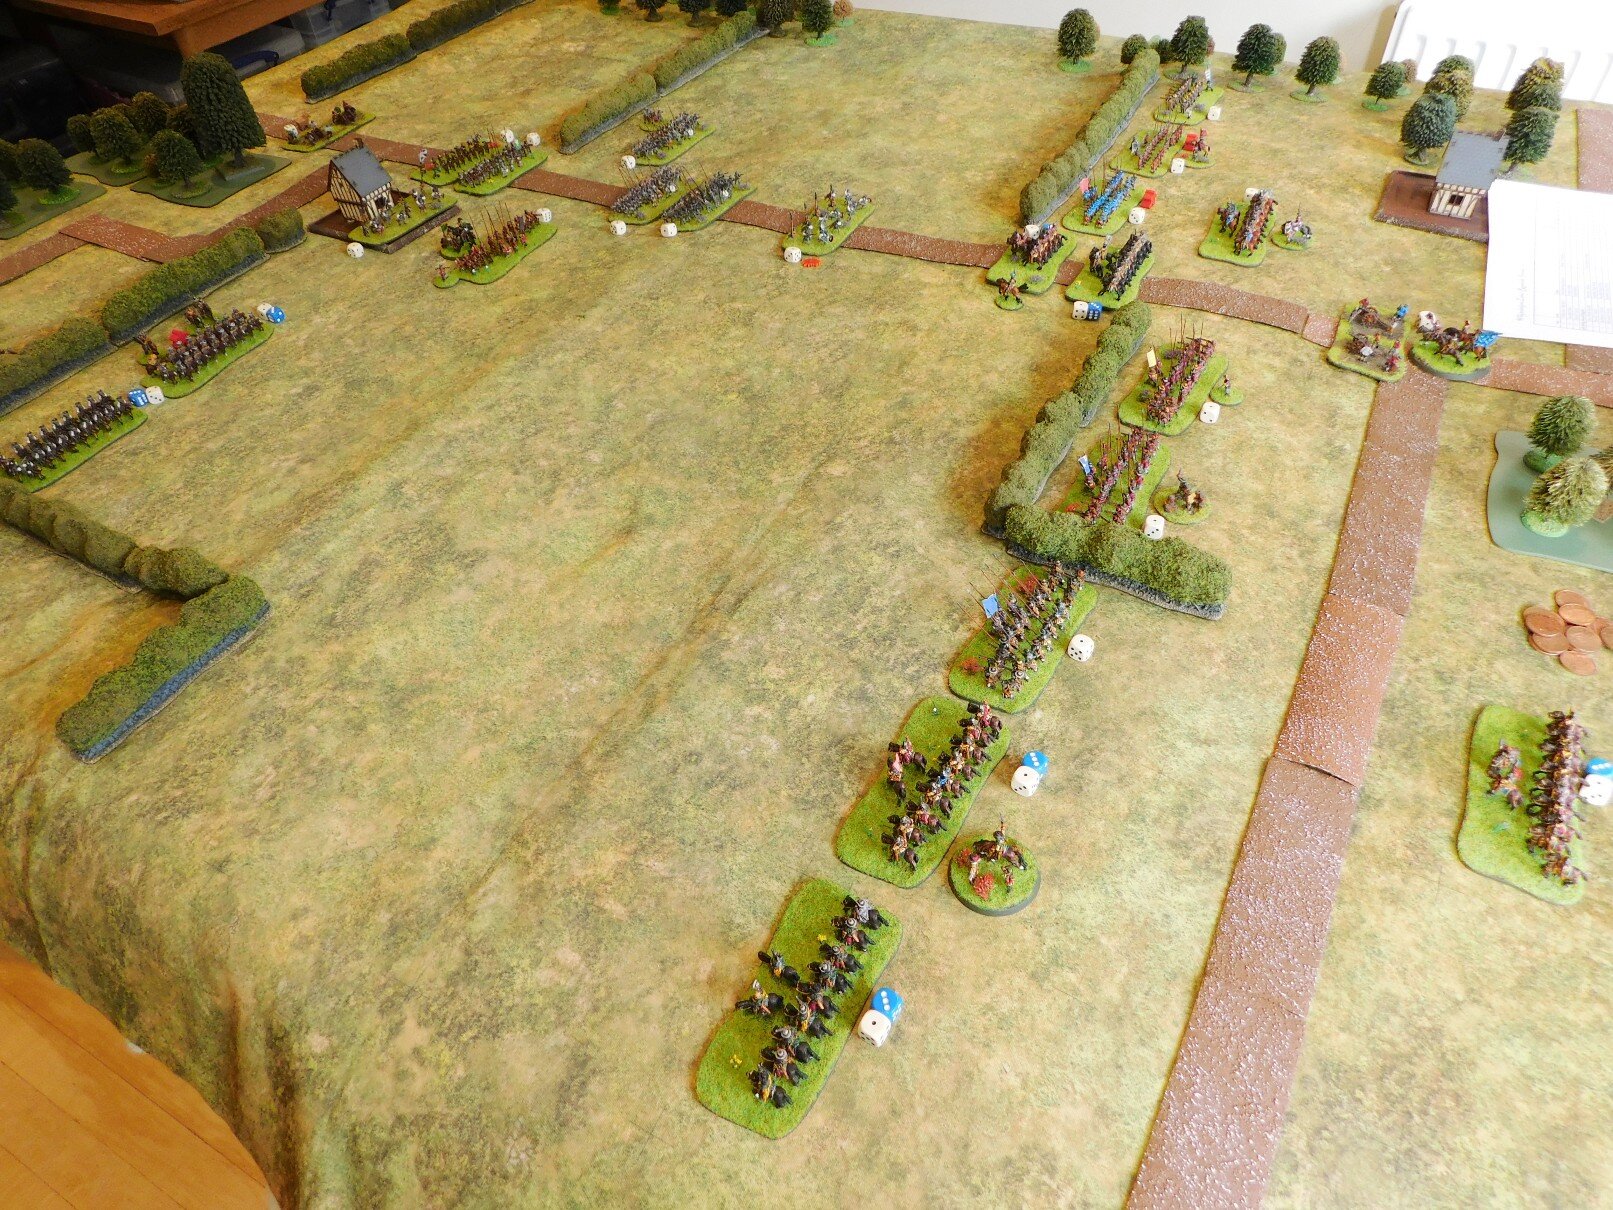
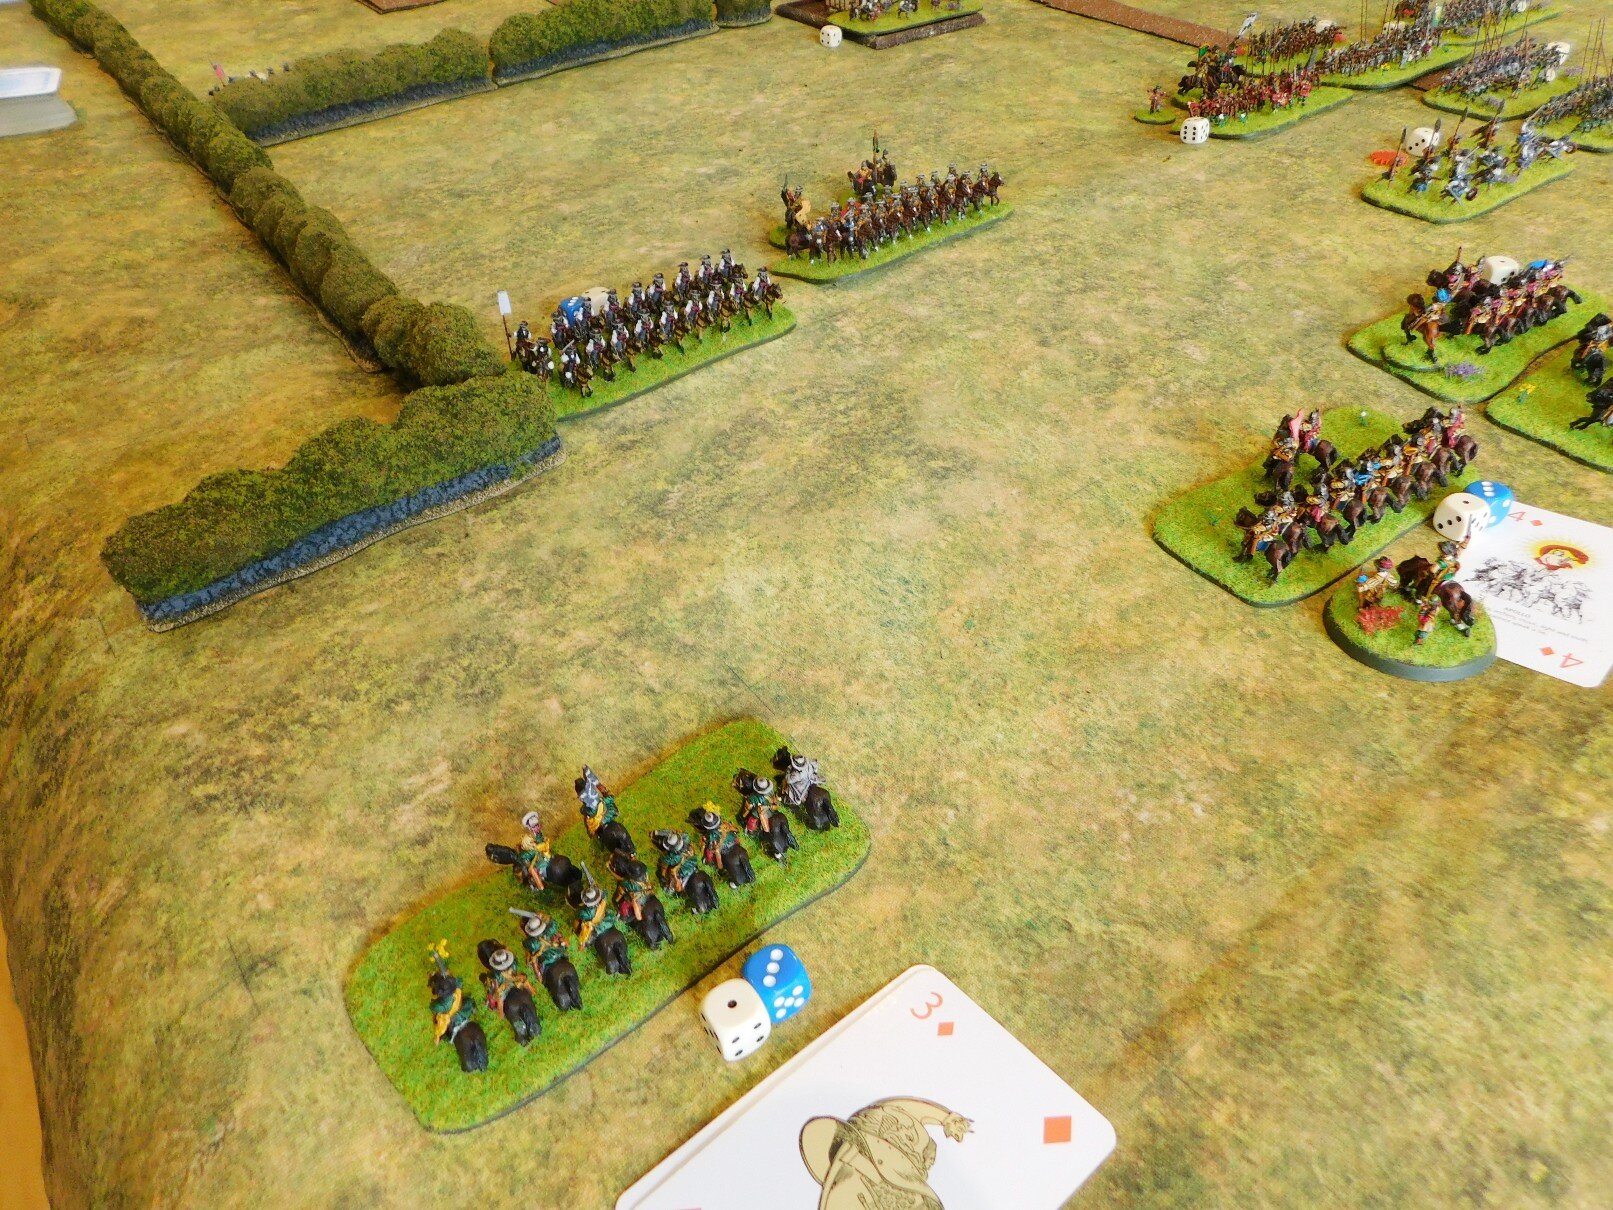
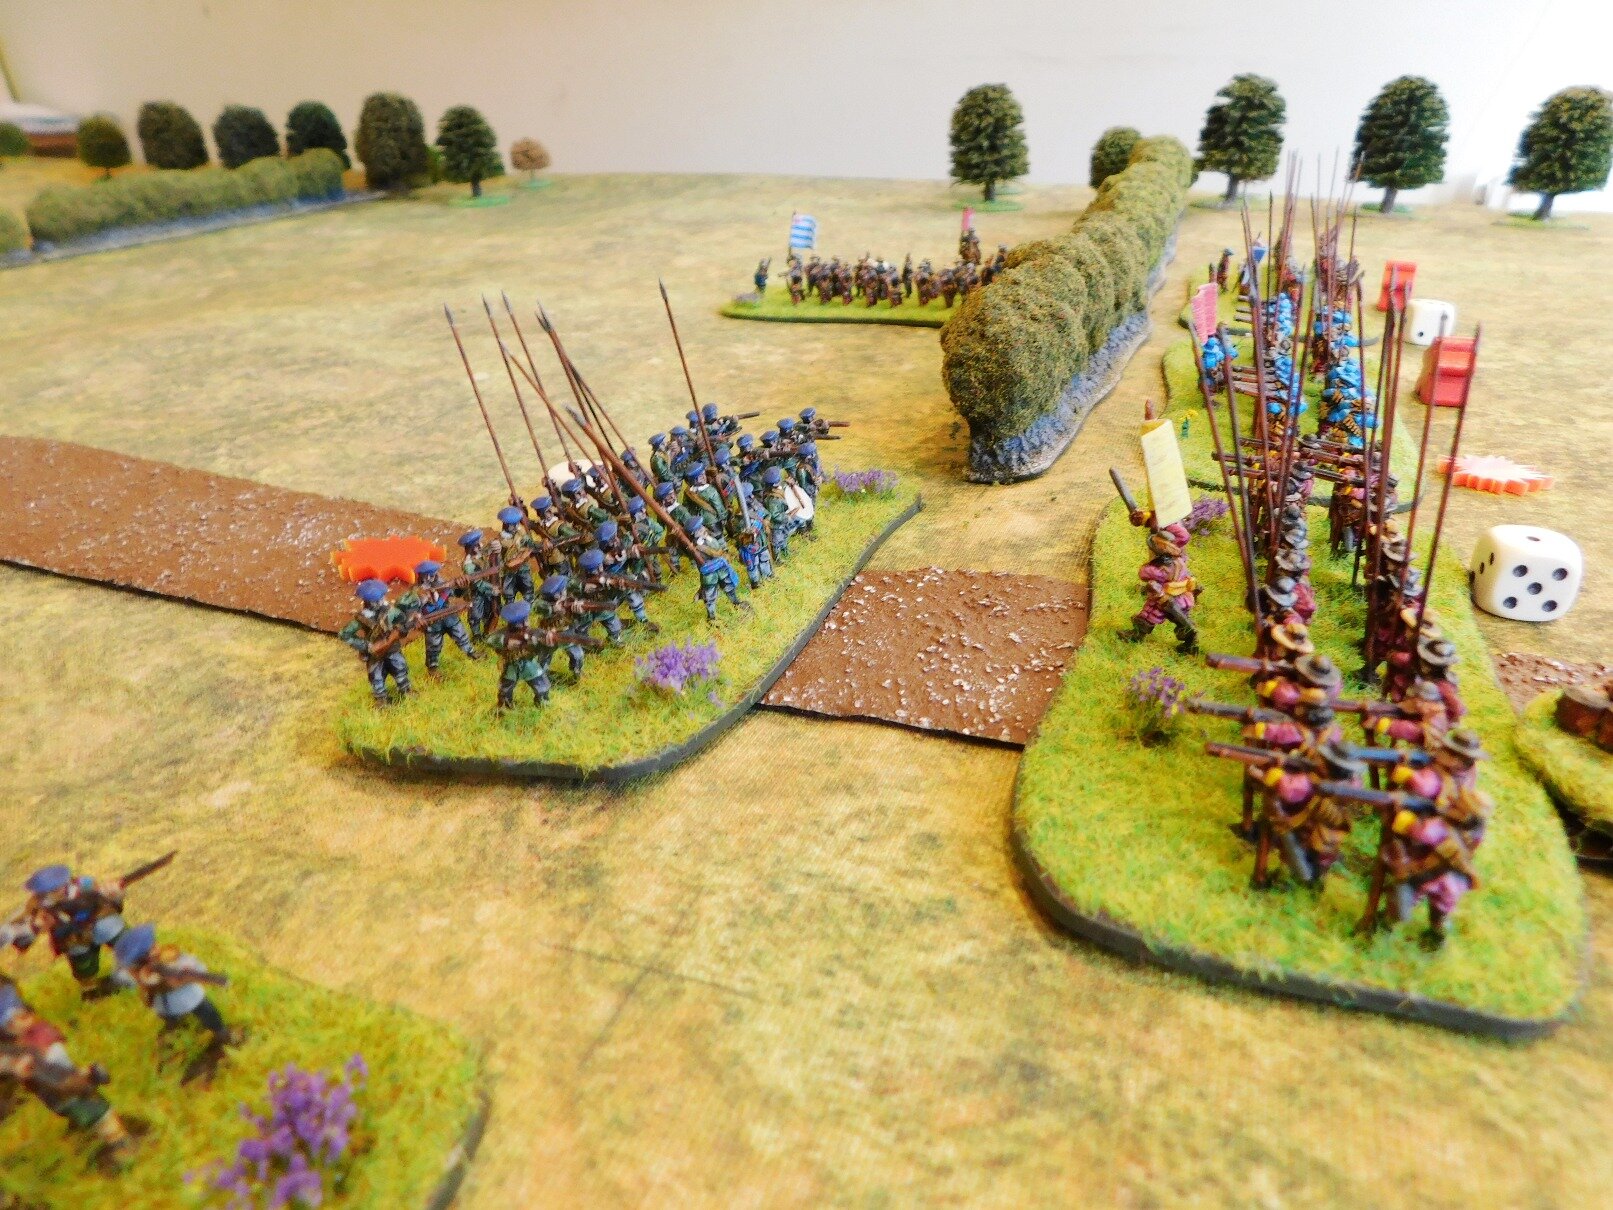
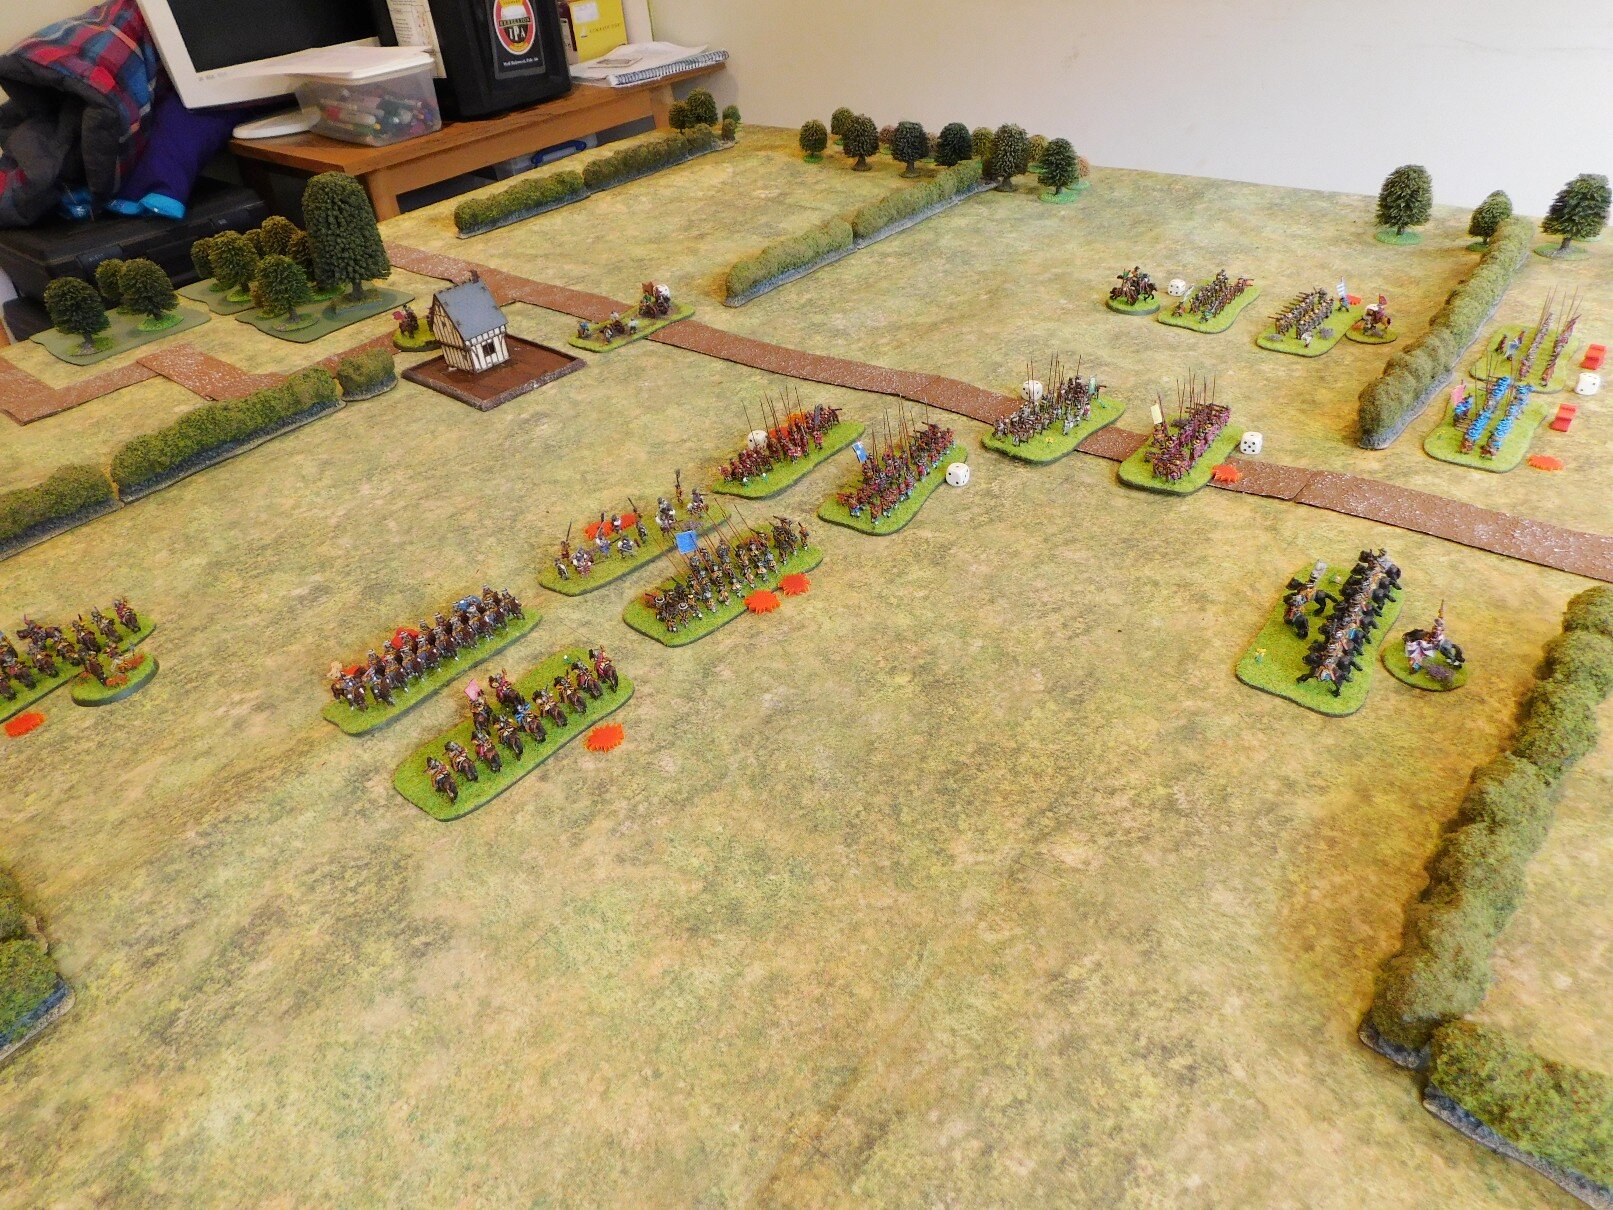
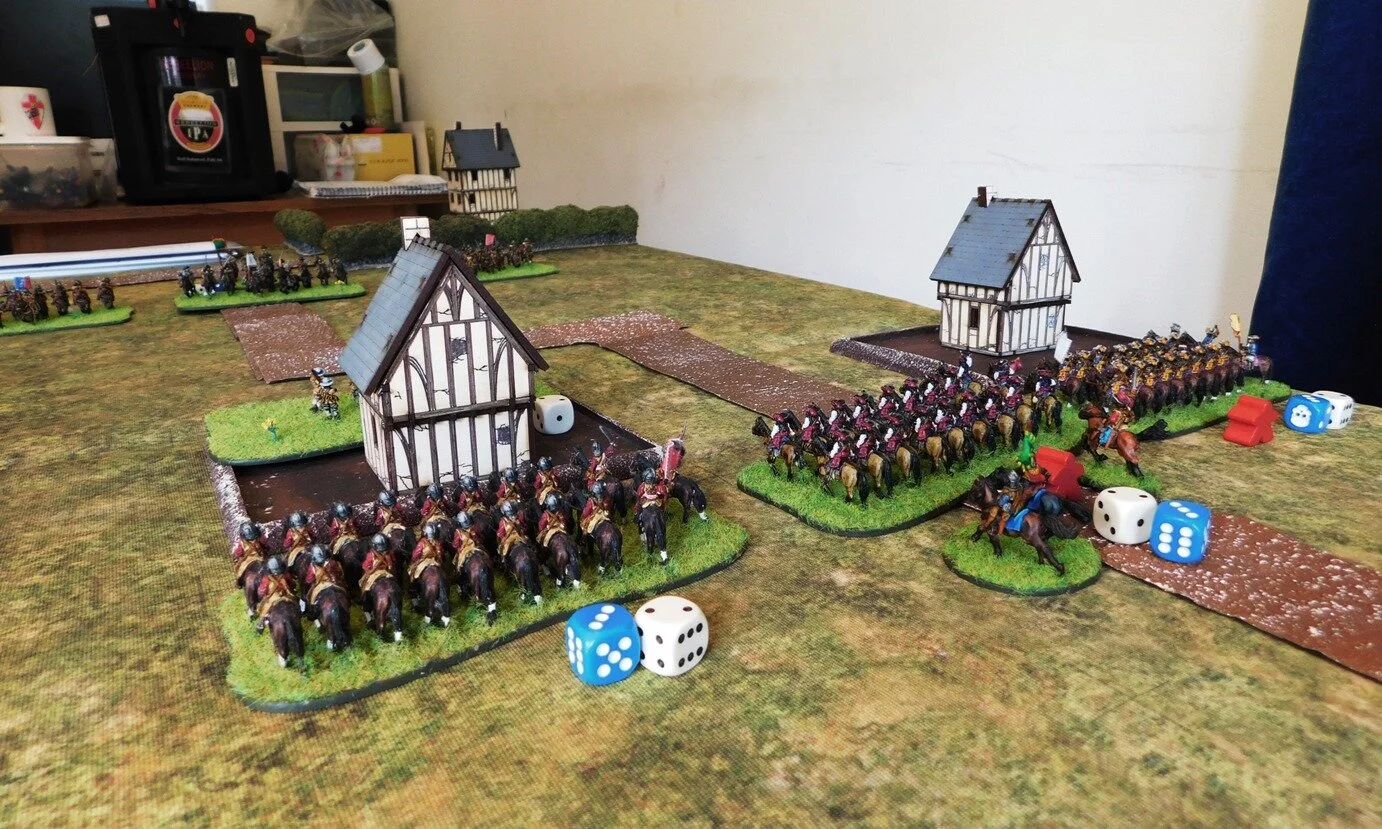
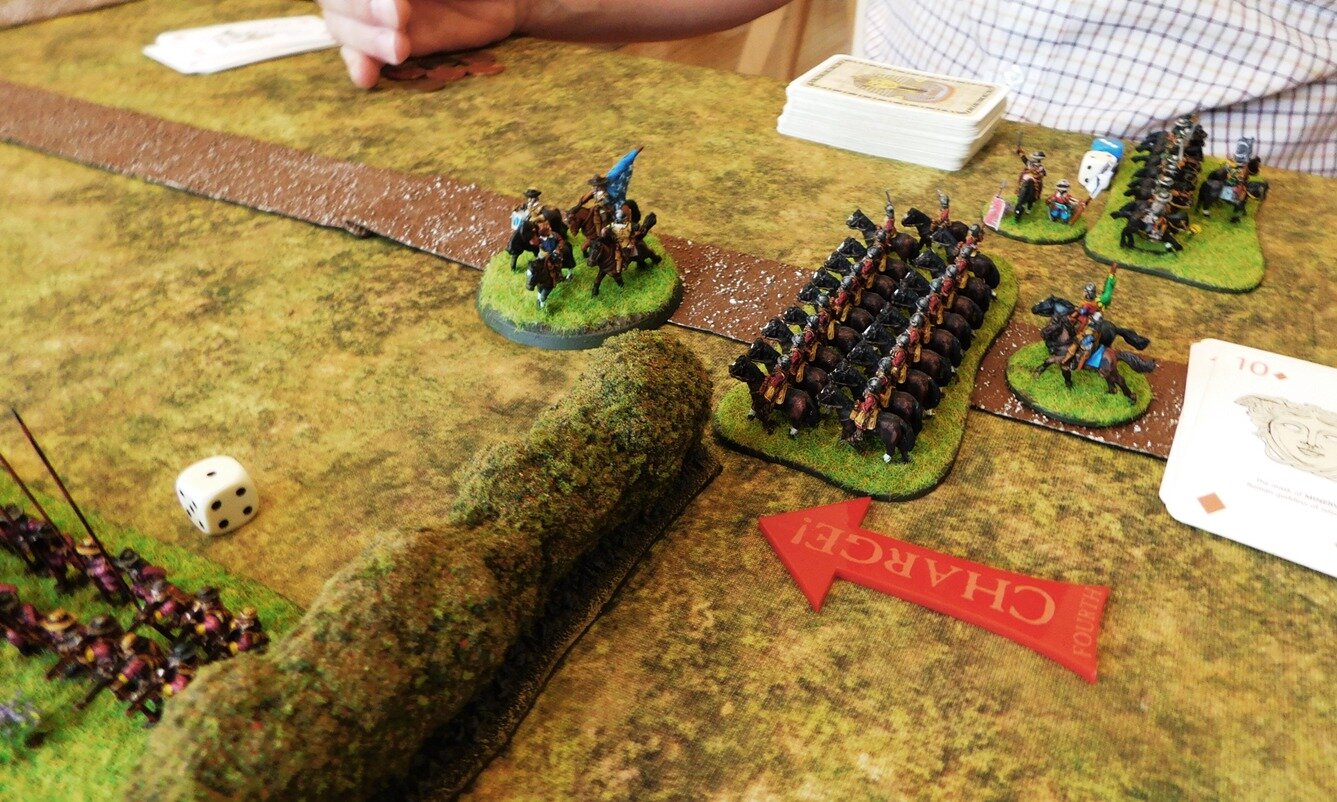
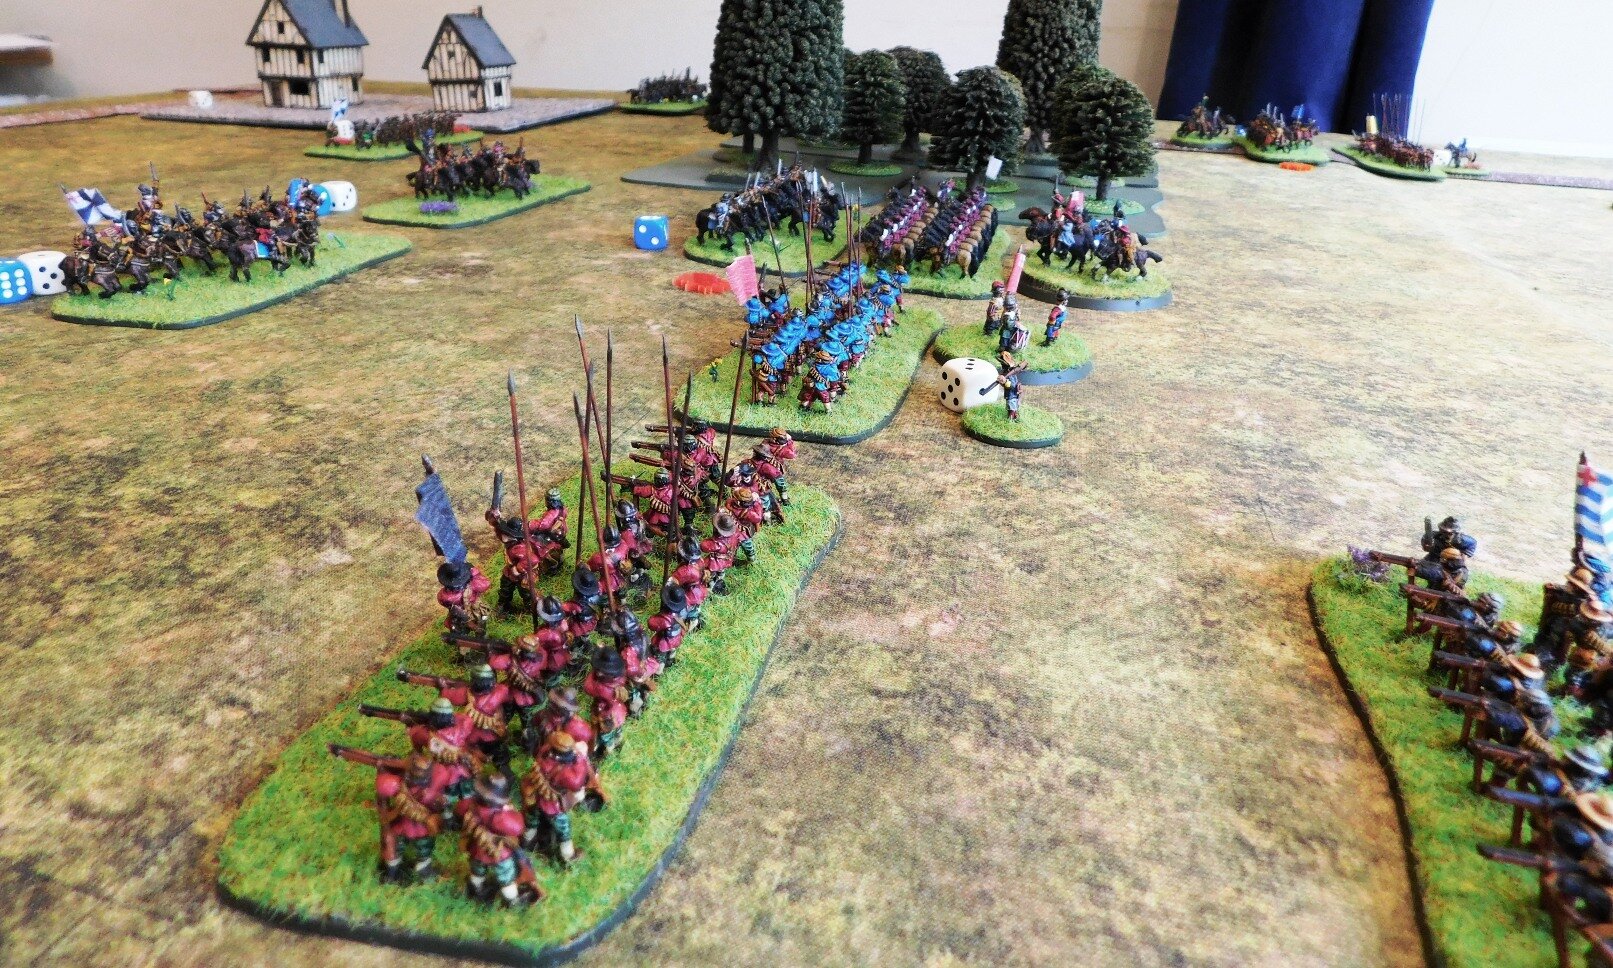
My plan was for my Highlanders to deal with the Rabble then sweep in to the Gappe from the flank. Bevan, my opponent, however, was up to all my tricks, and moved his Dutch horse to the right of the village, threatening the Highlanders’ flanks.

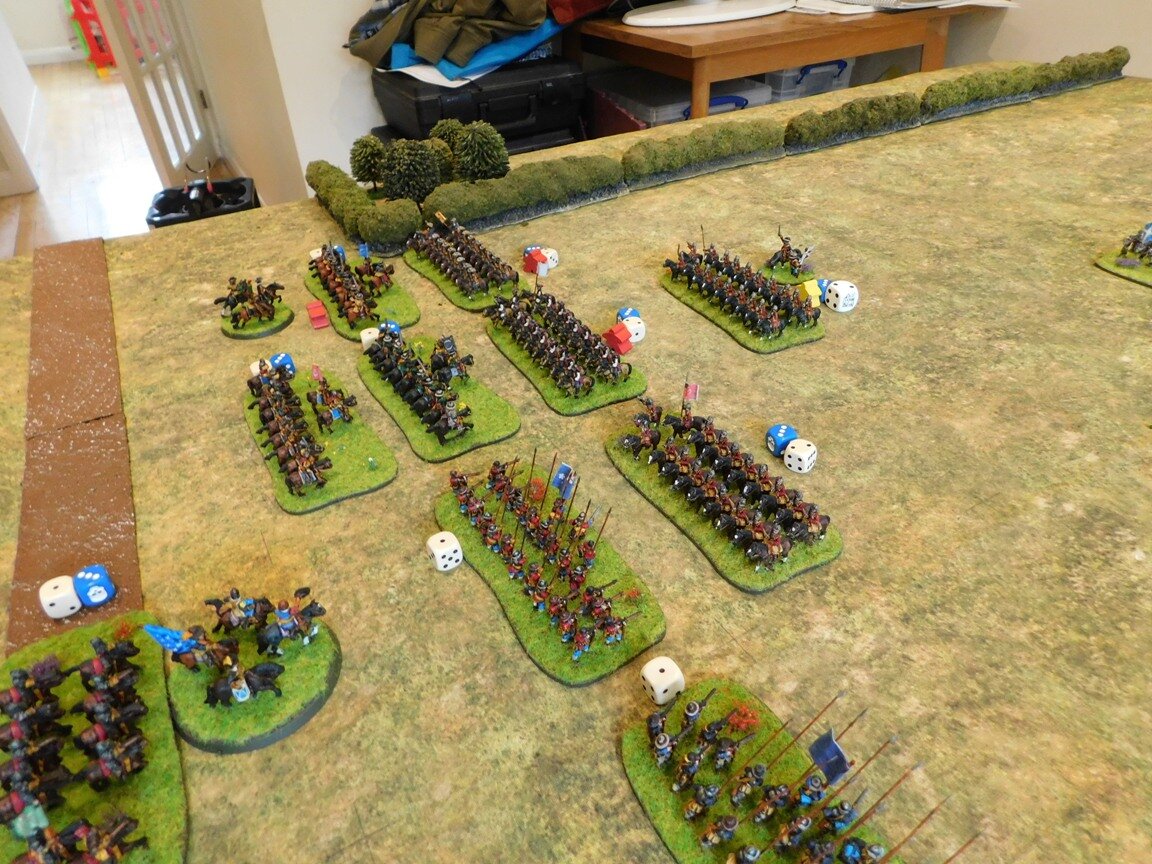
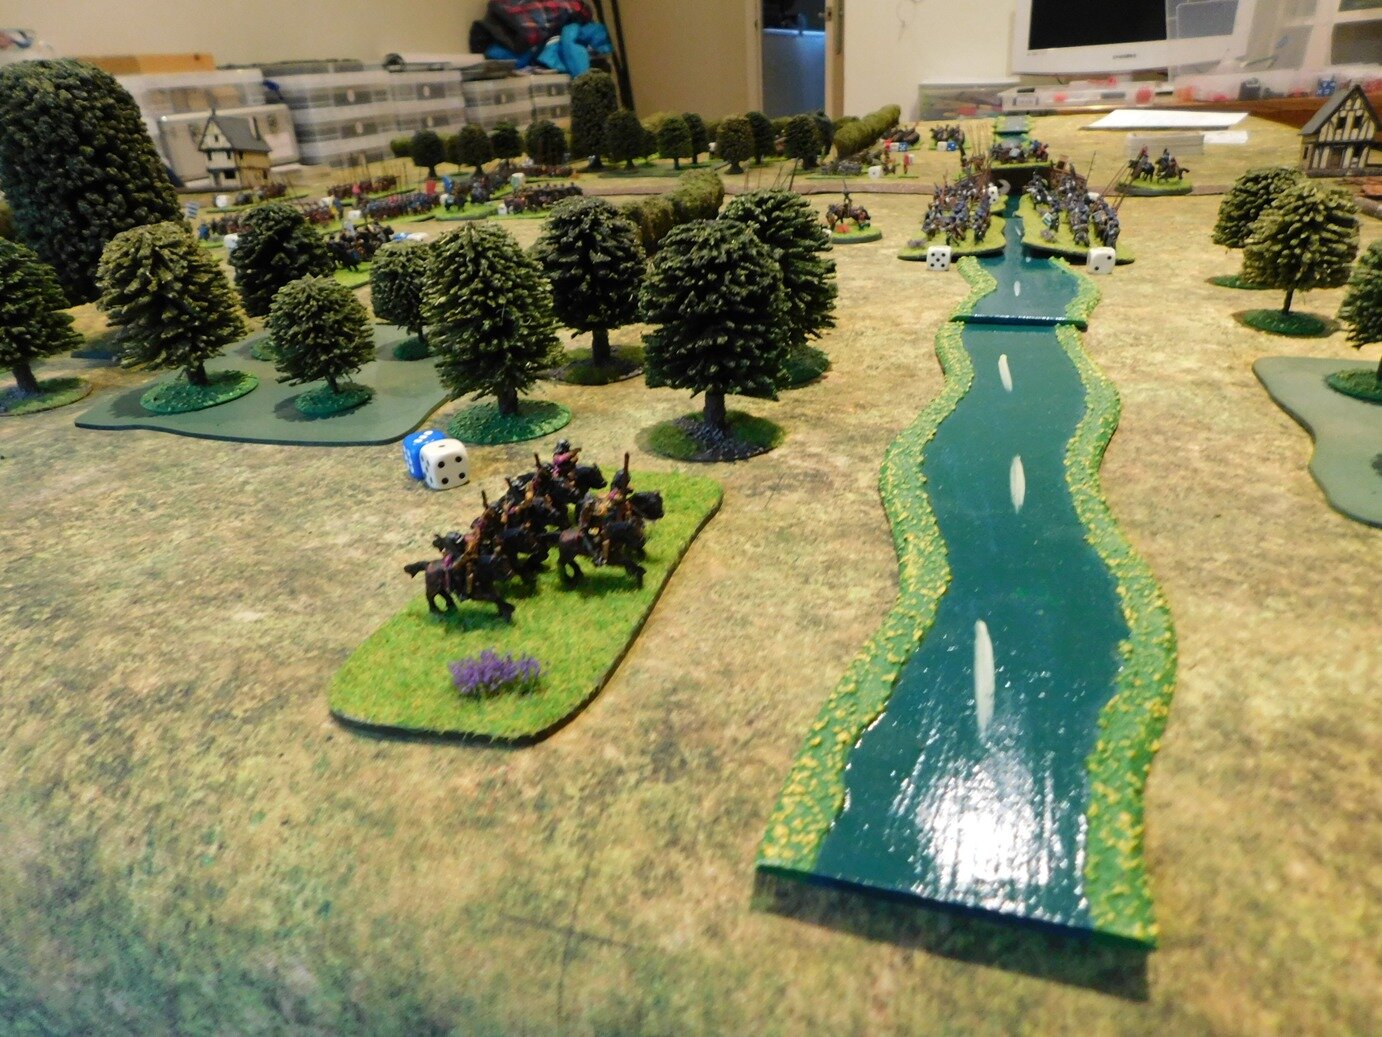
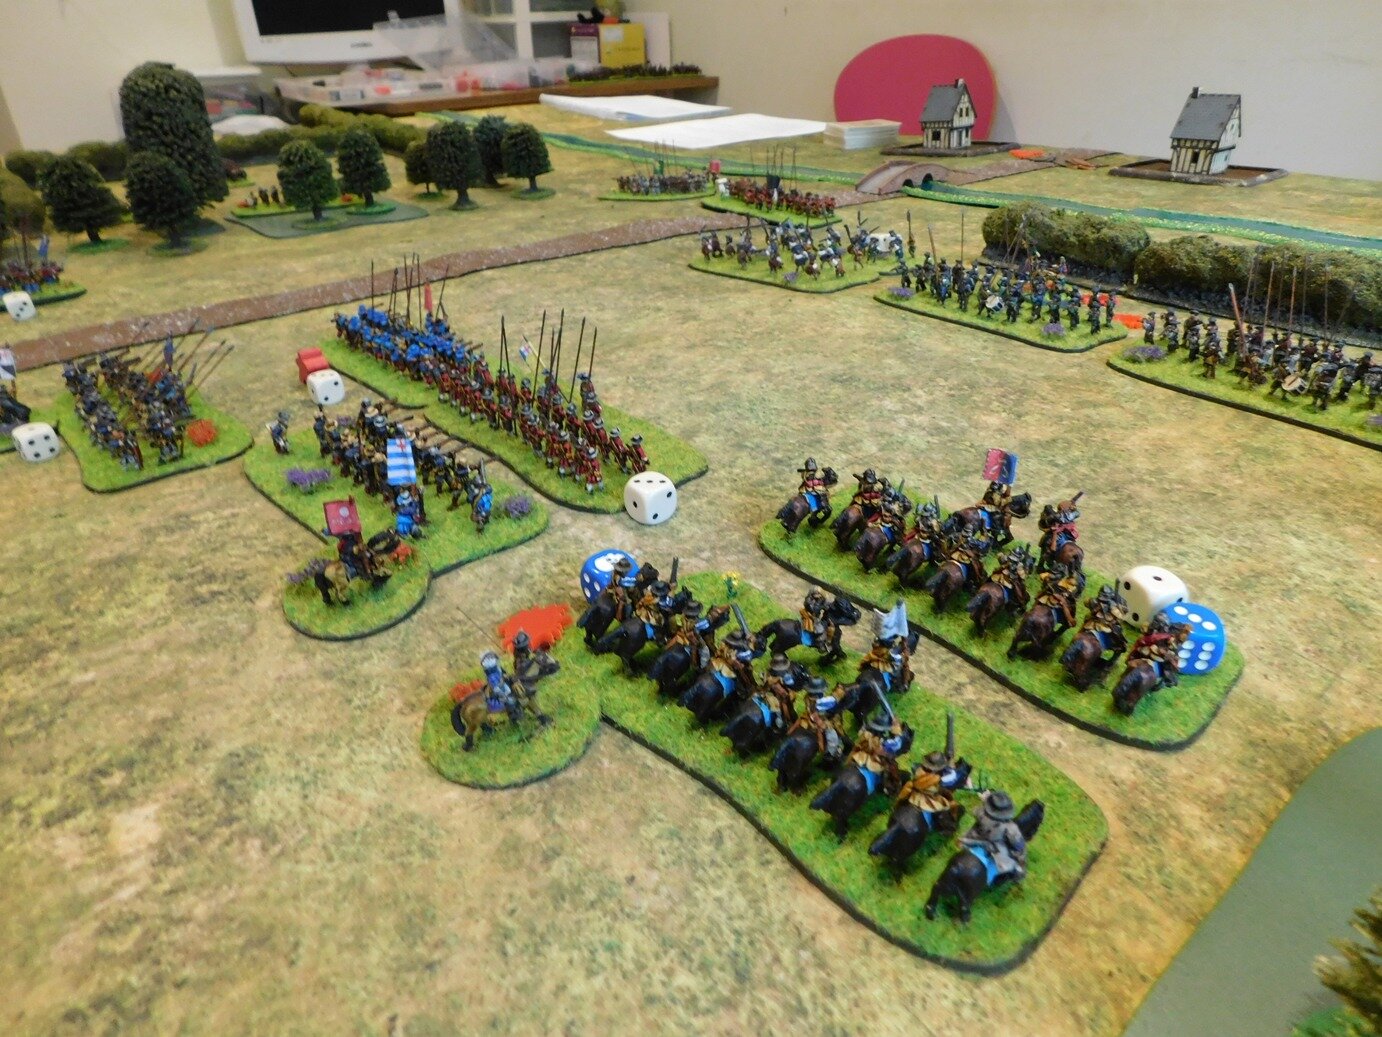
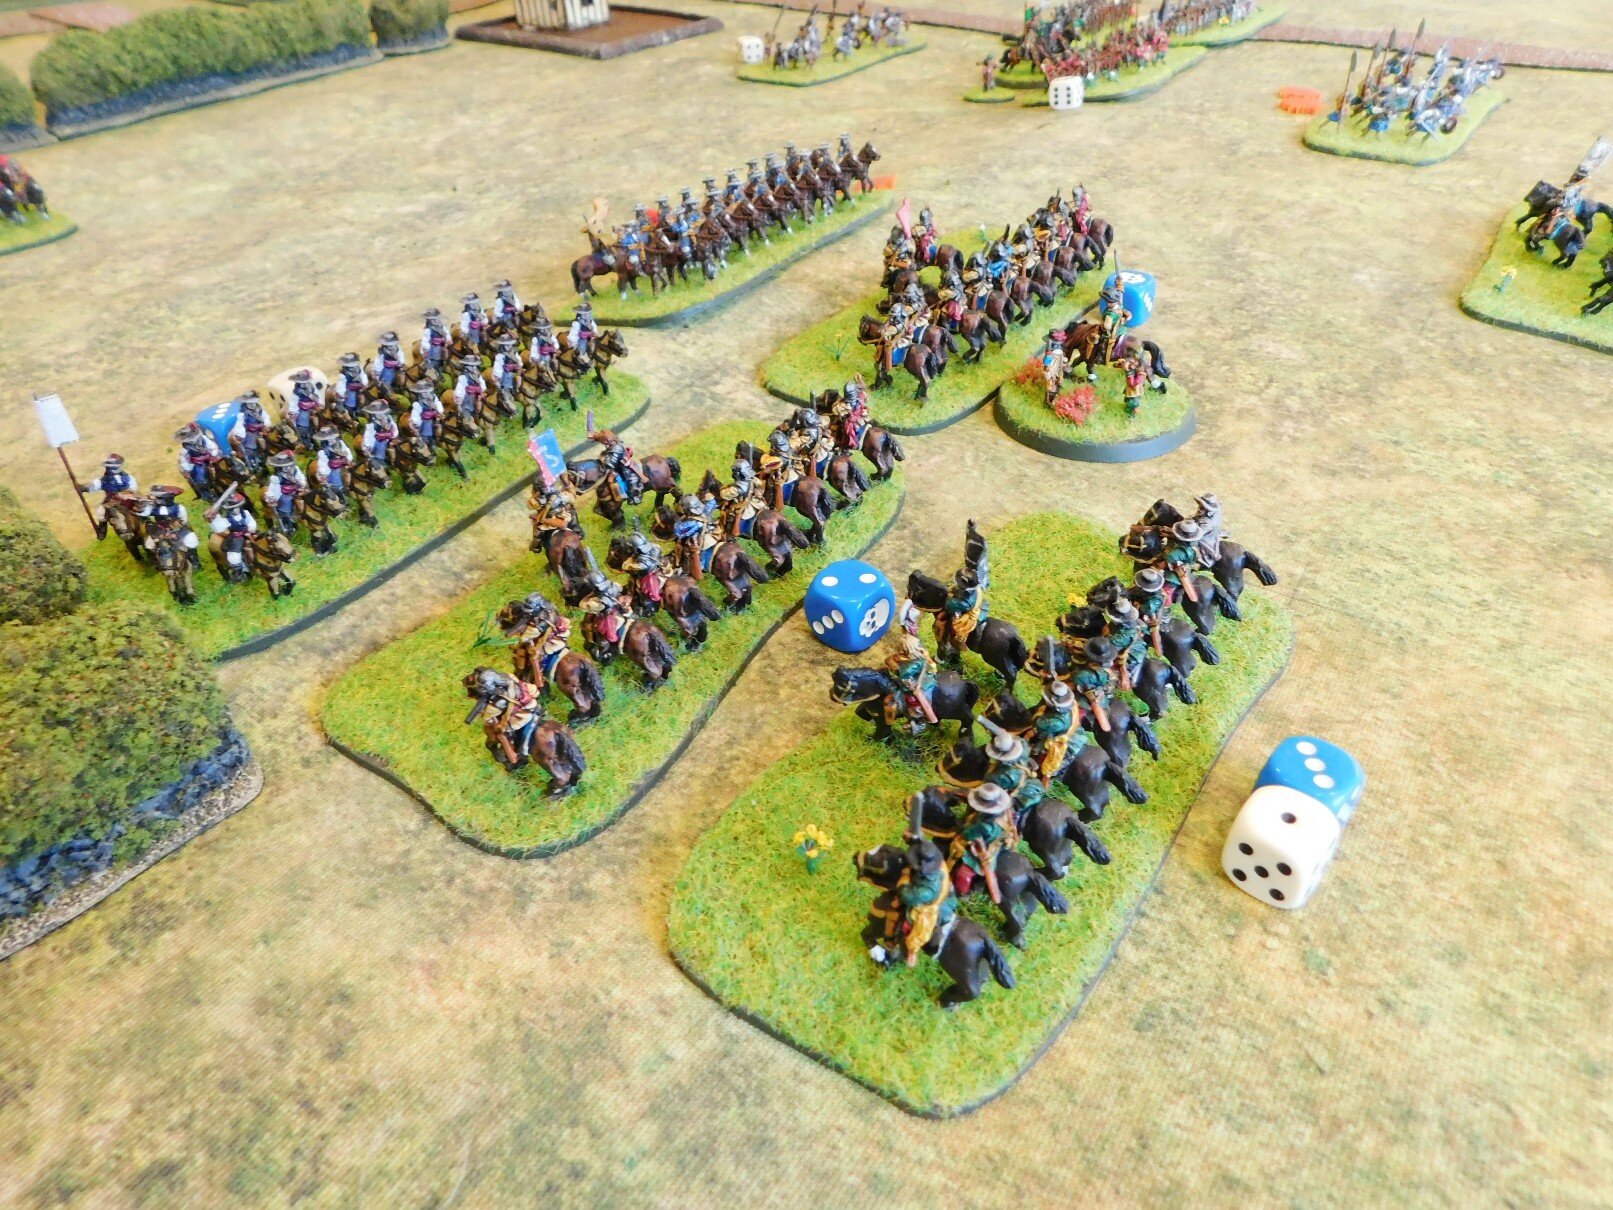
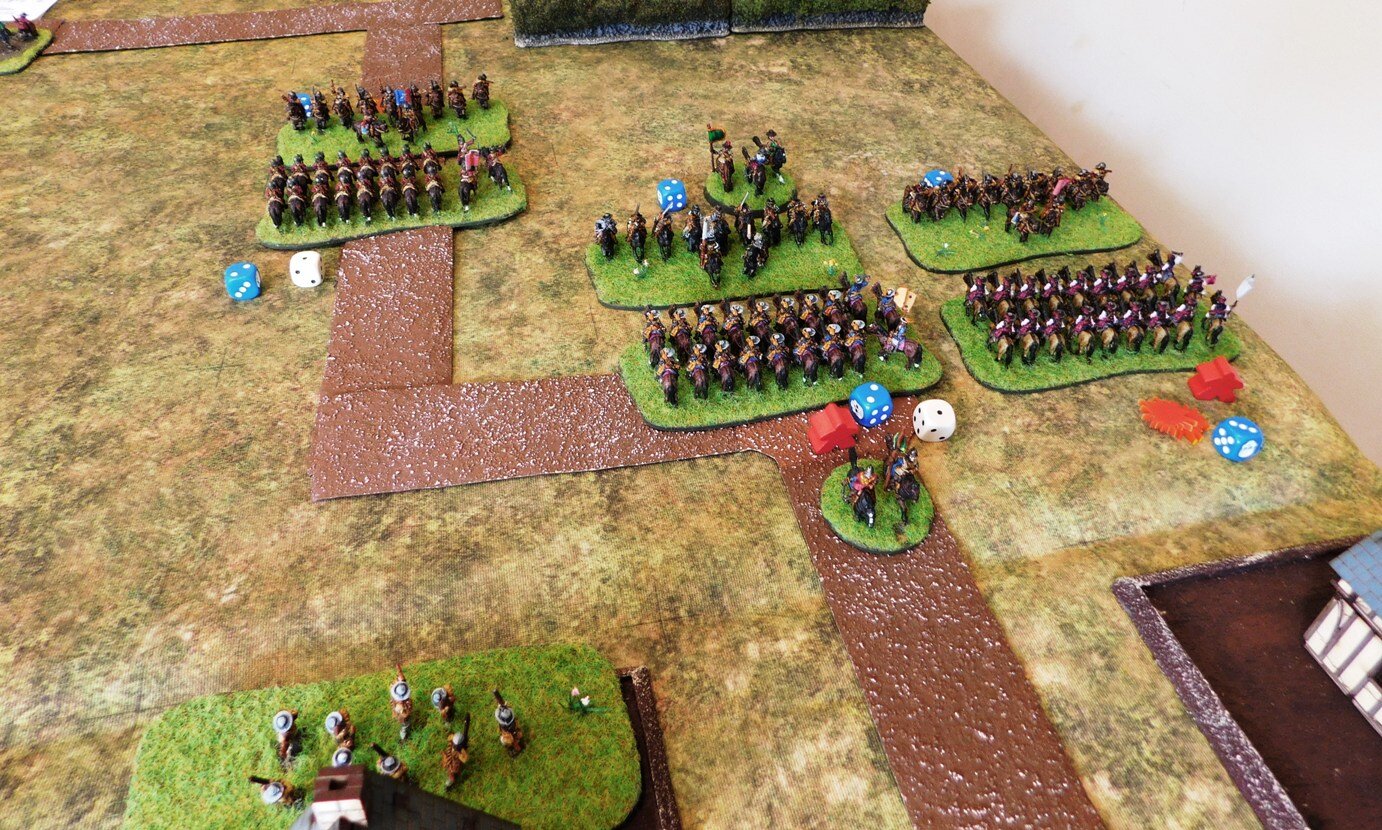
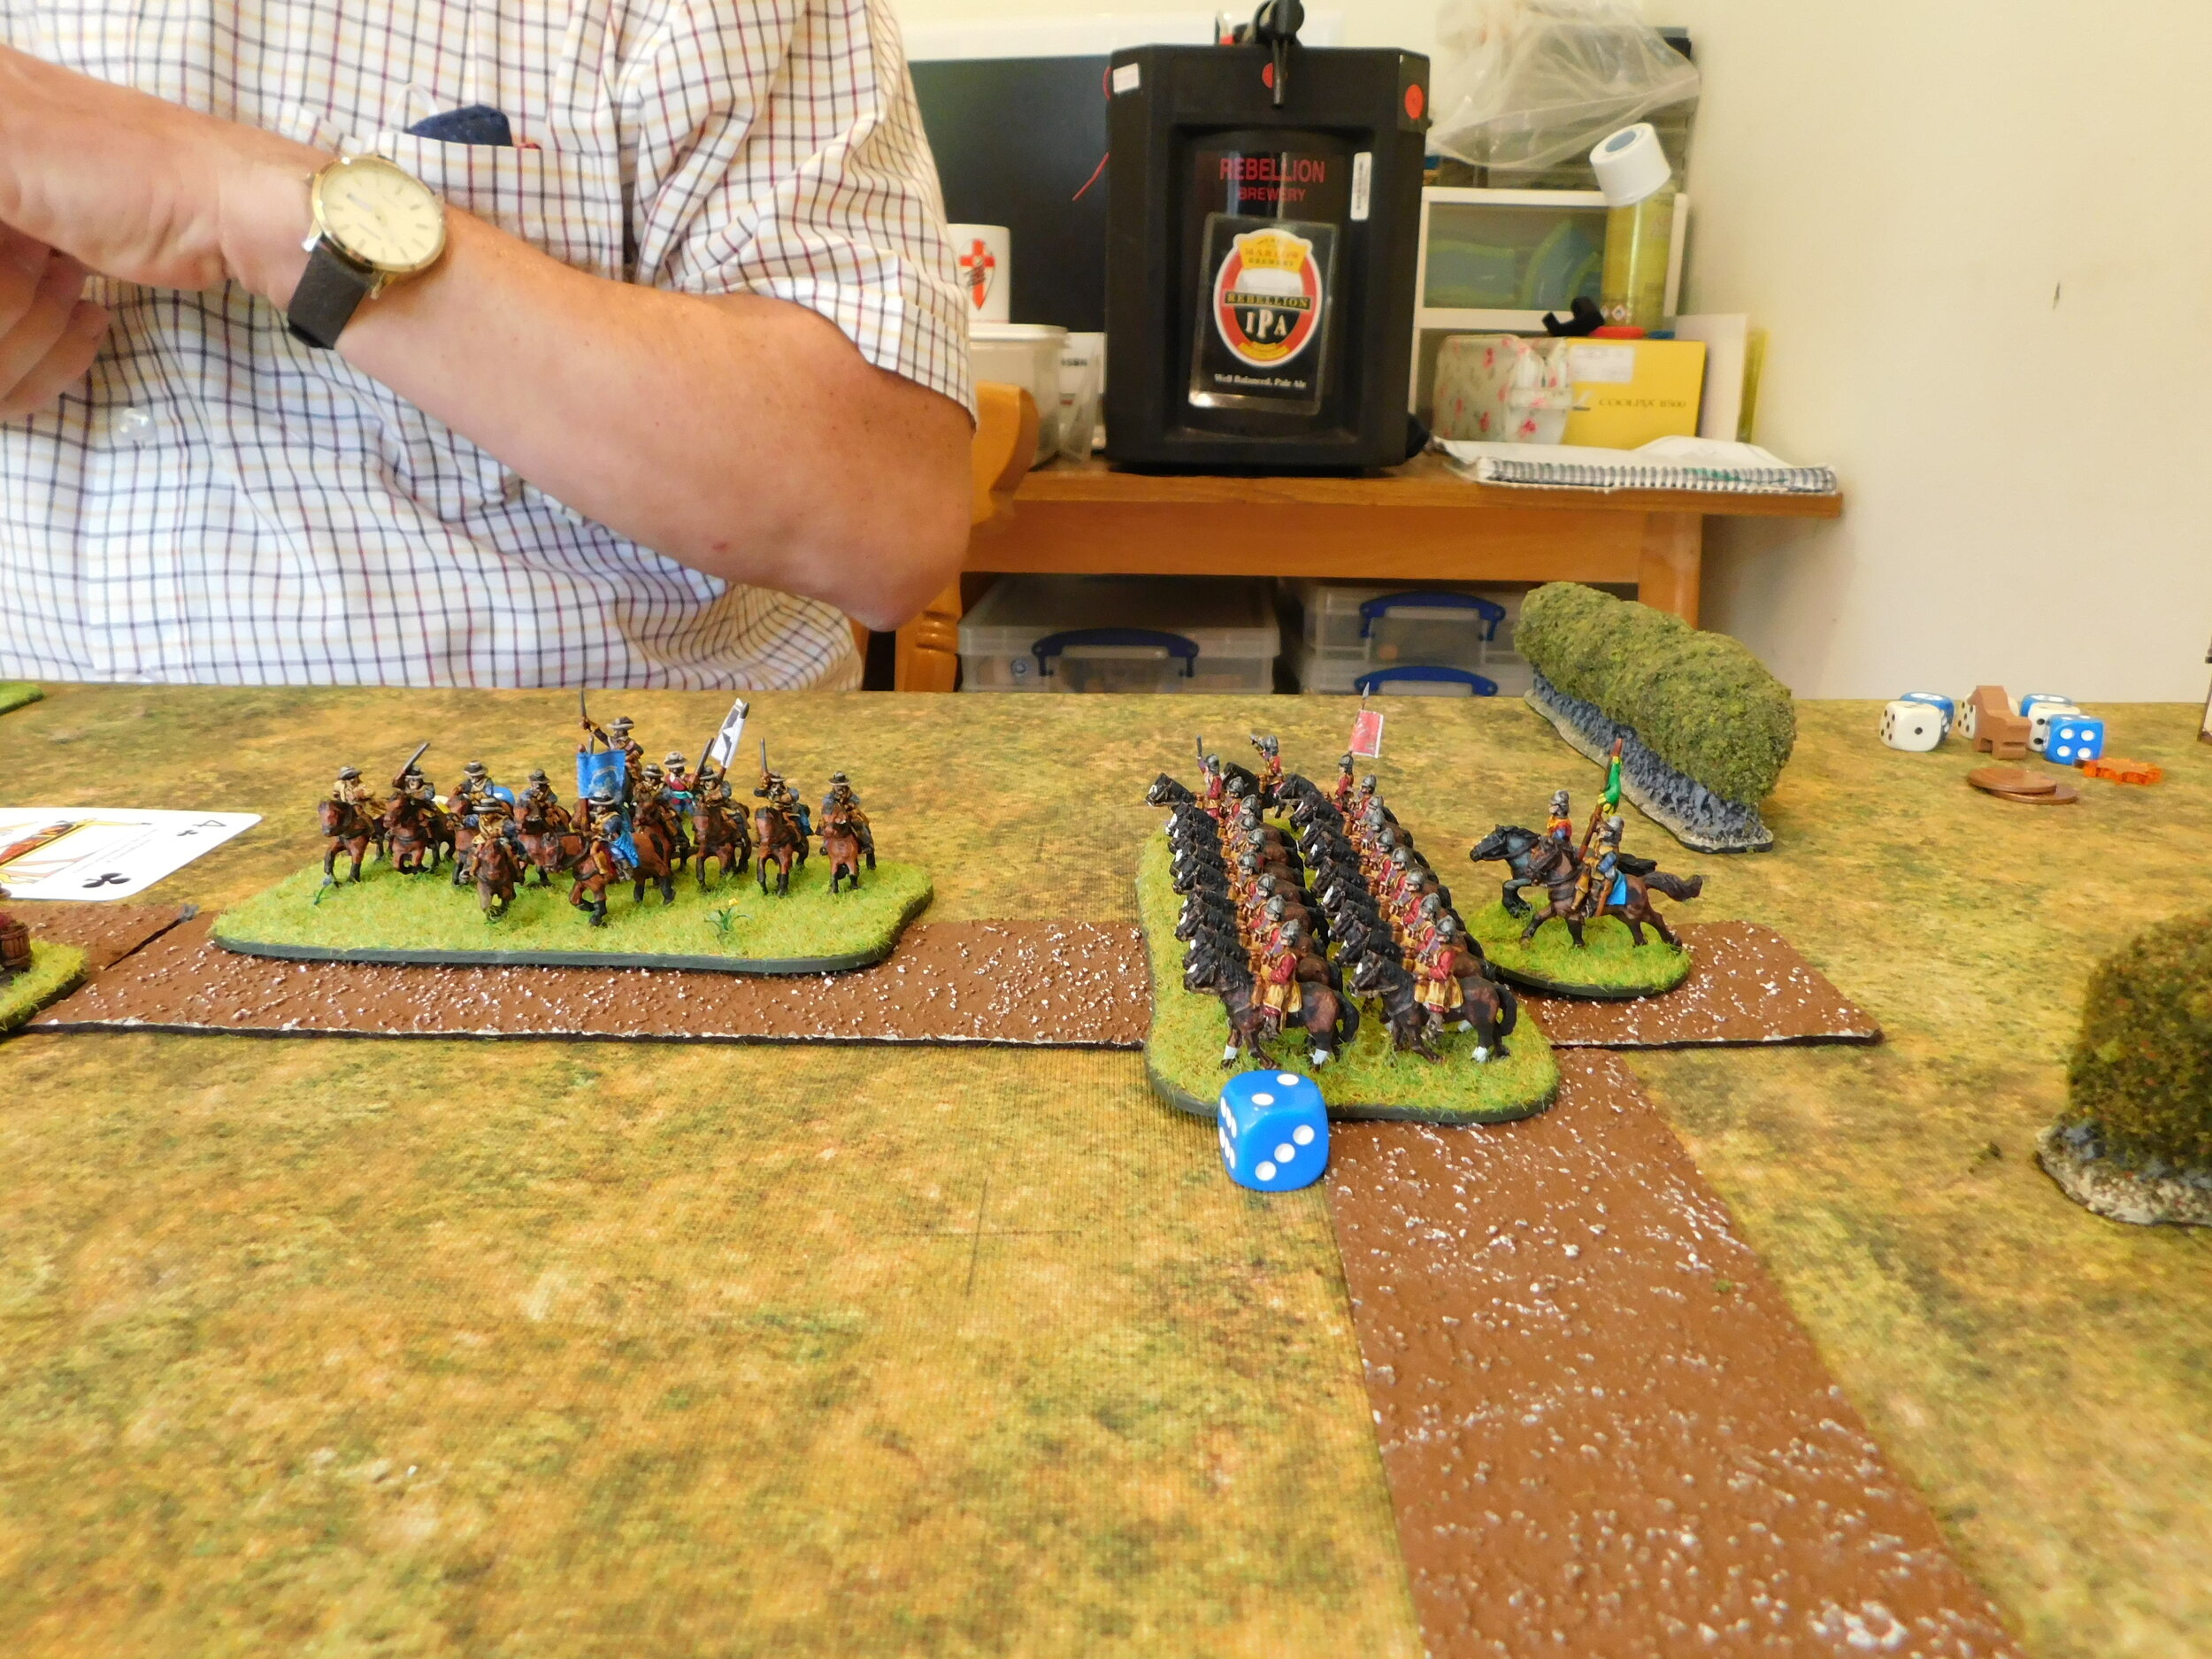
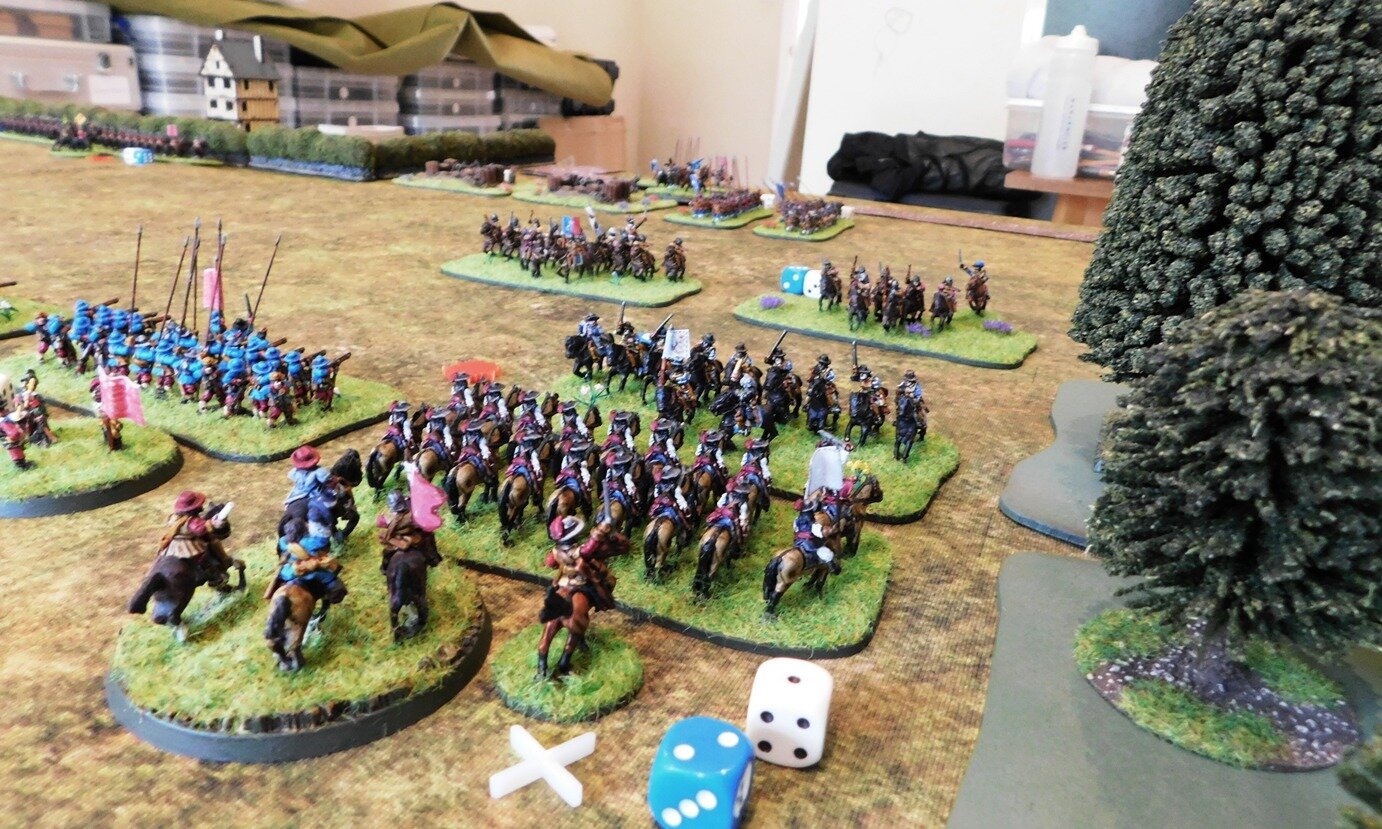
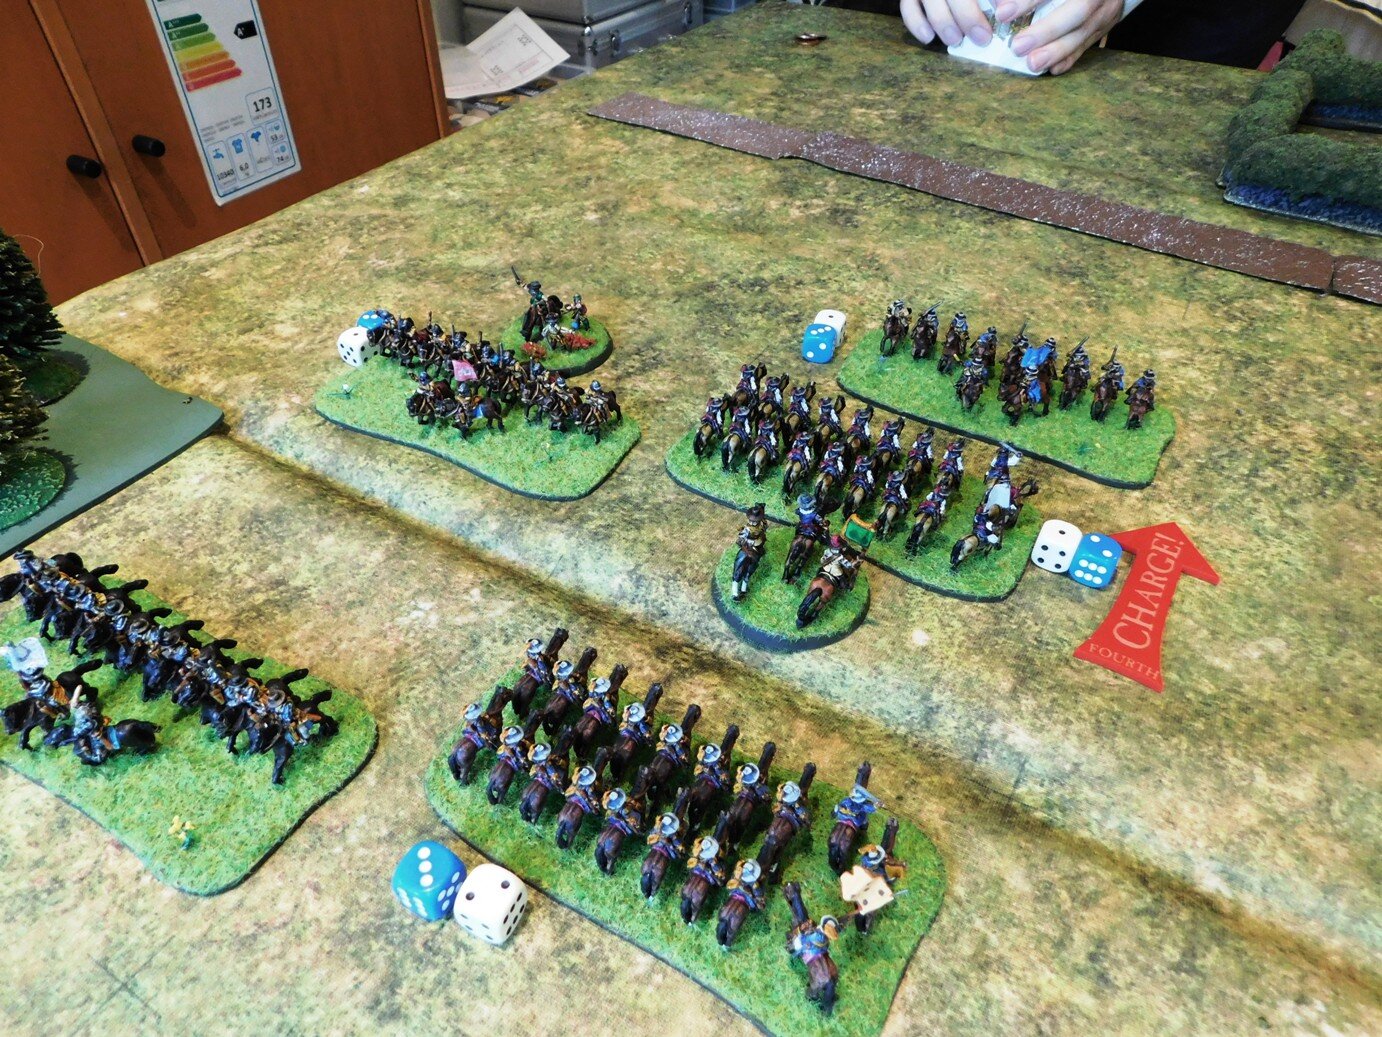
At the same time, the enemy Swedish horse moved out to their left. Not wanting my day ruined by the sudden arrival of cavalry on my right flank, I moved the Scots horse to counter: you can see them top left in the picture below.

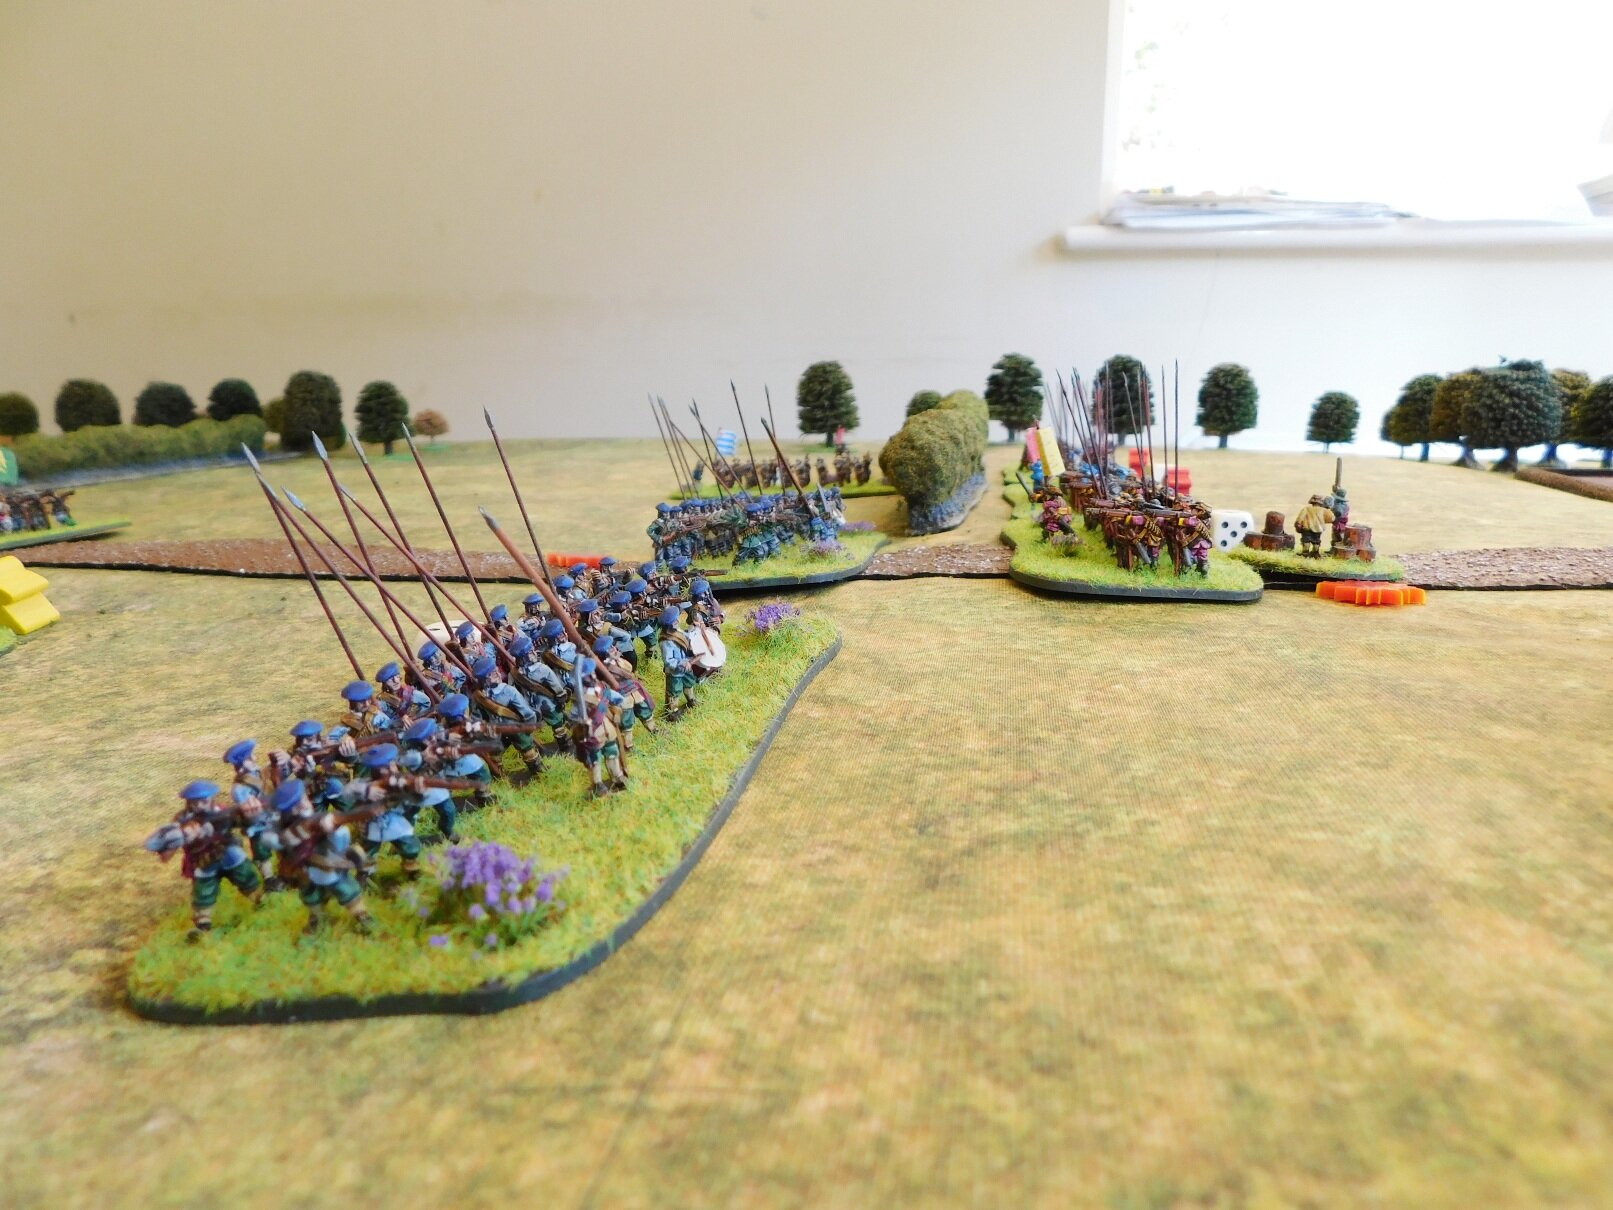
Finally, my main infantry units moved forward…but my pike-armed battalia decided that they had walked far enough and just about refused to move.

Everything then seemed to happen at once.

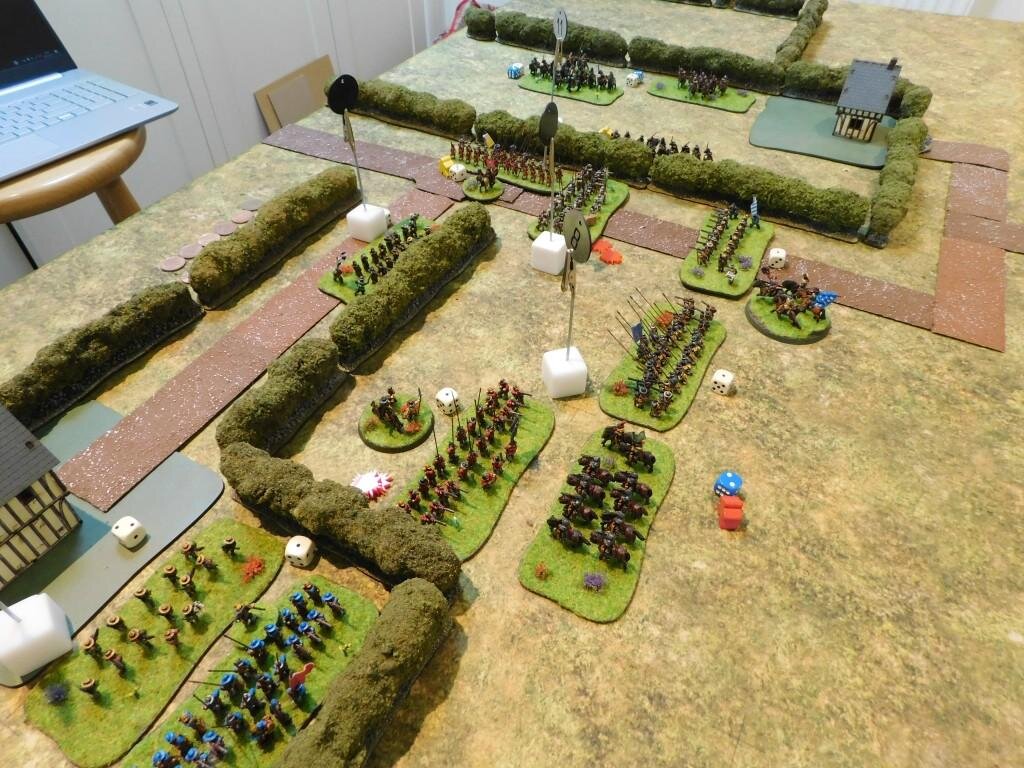
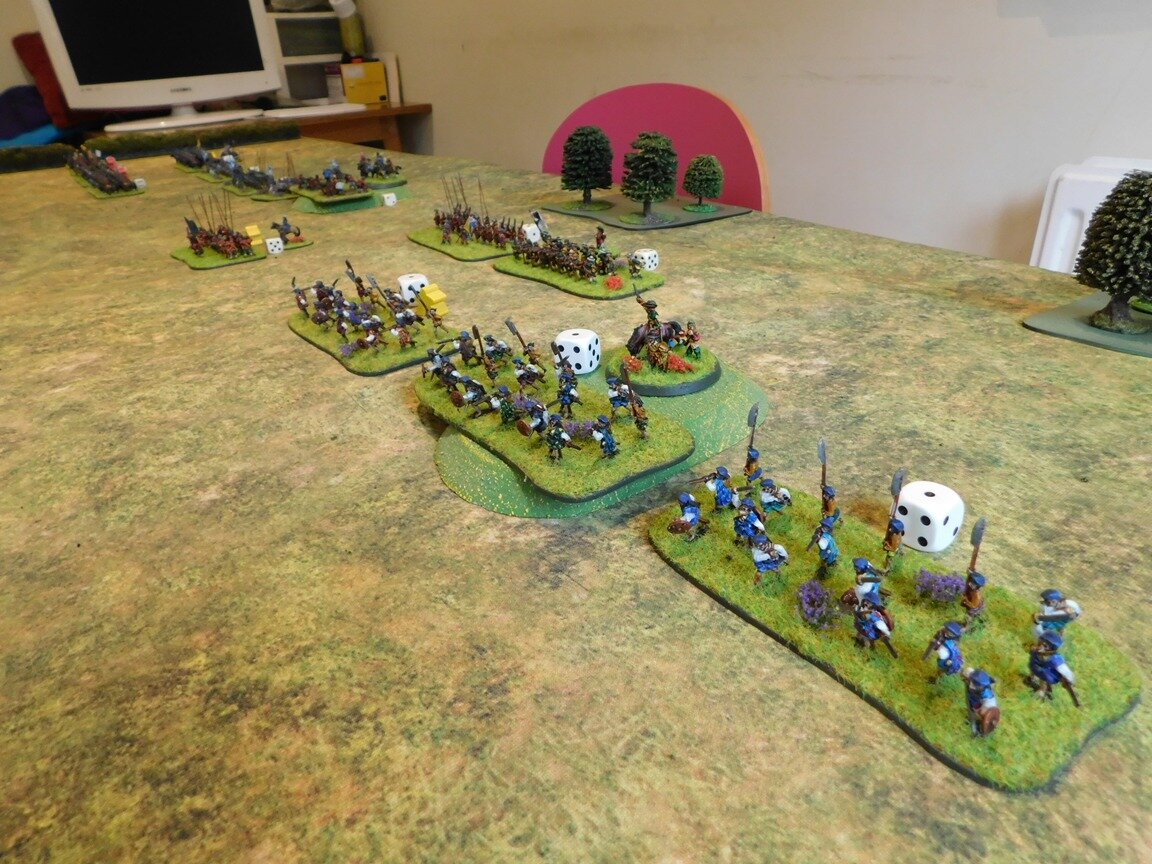
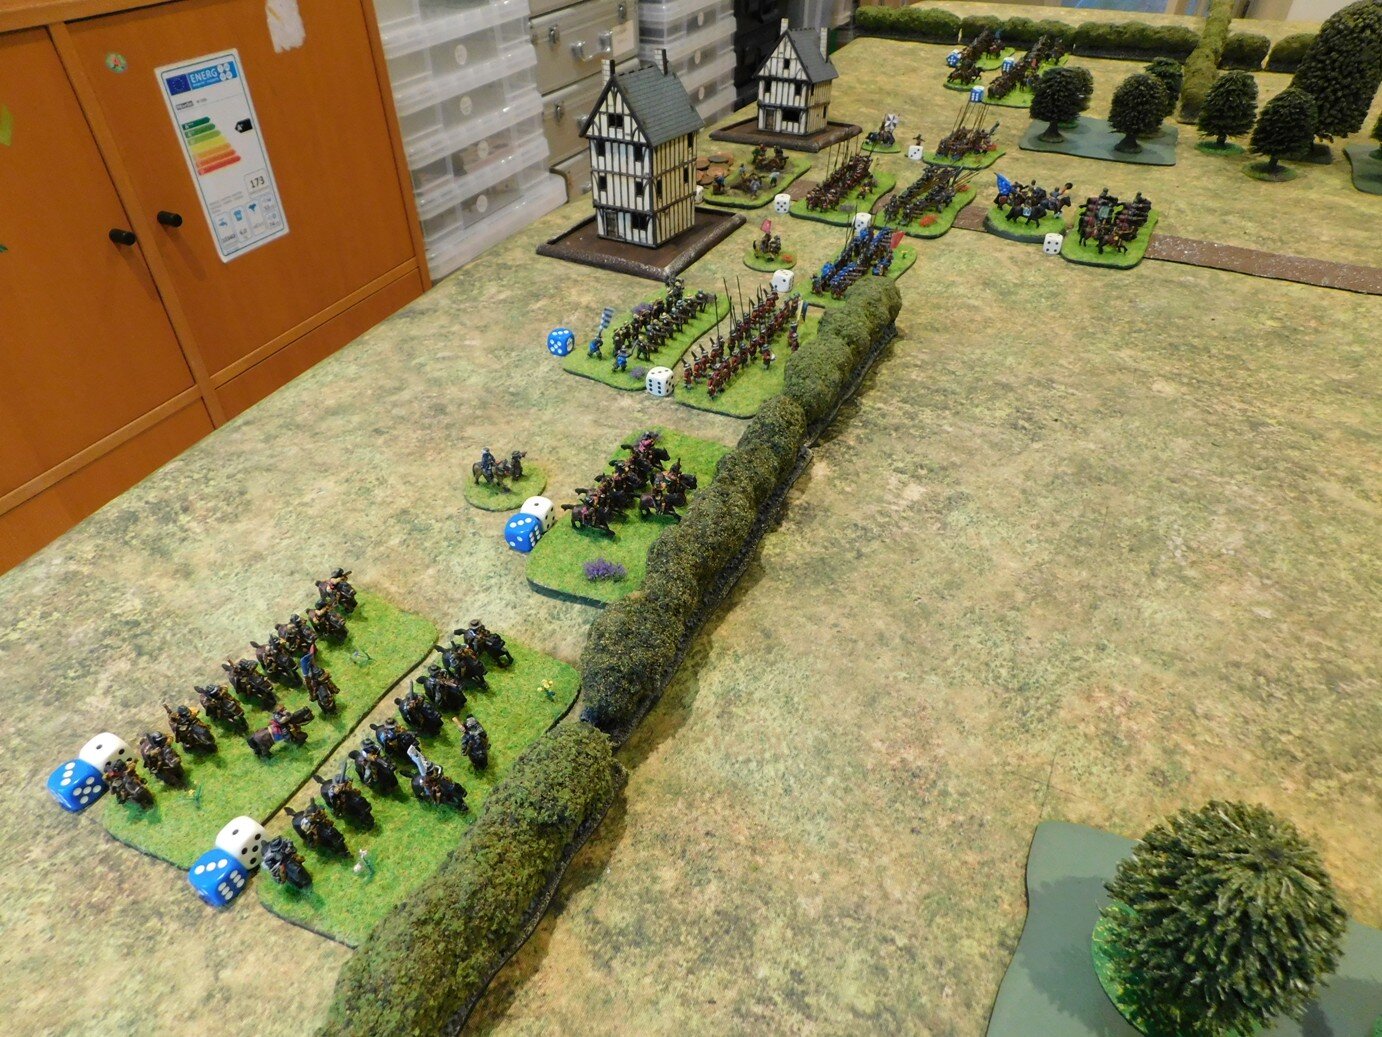
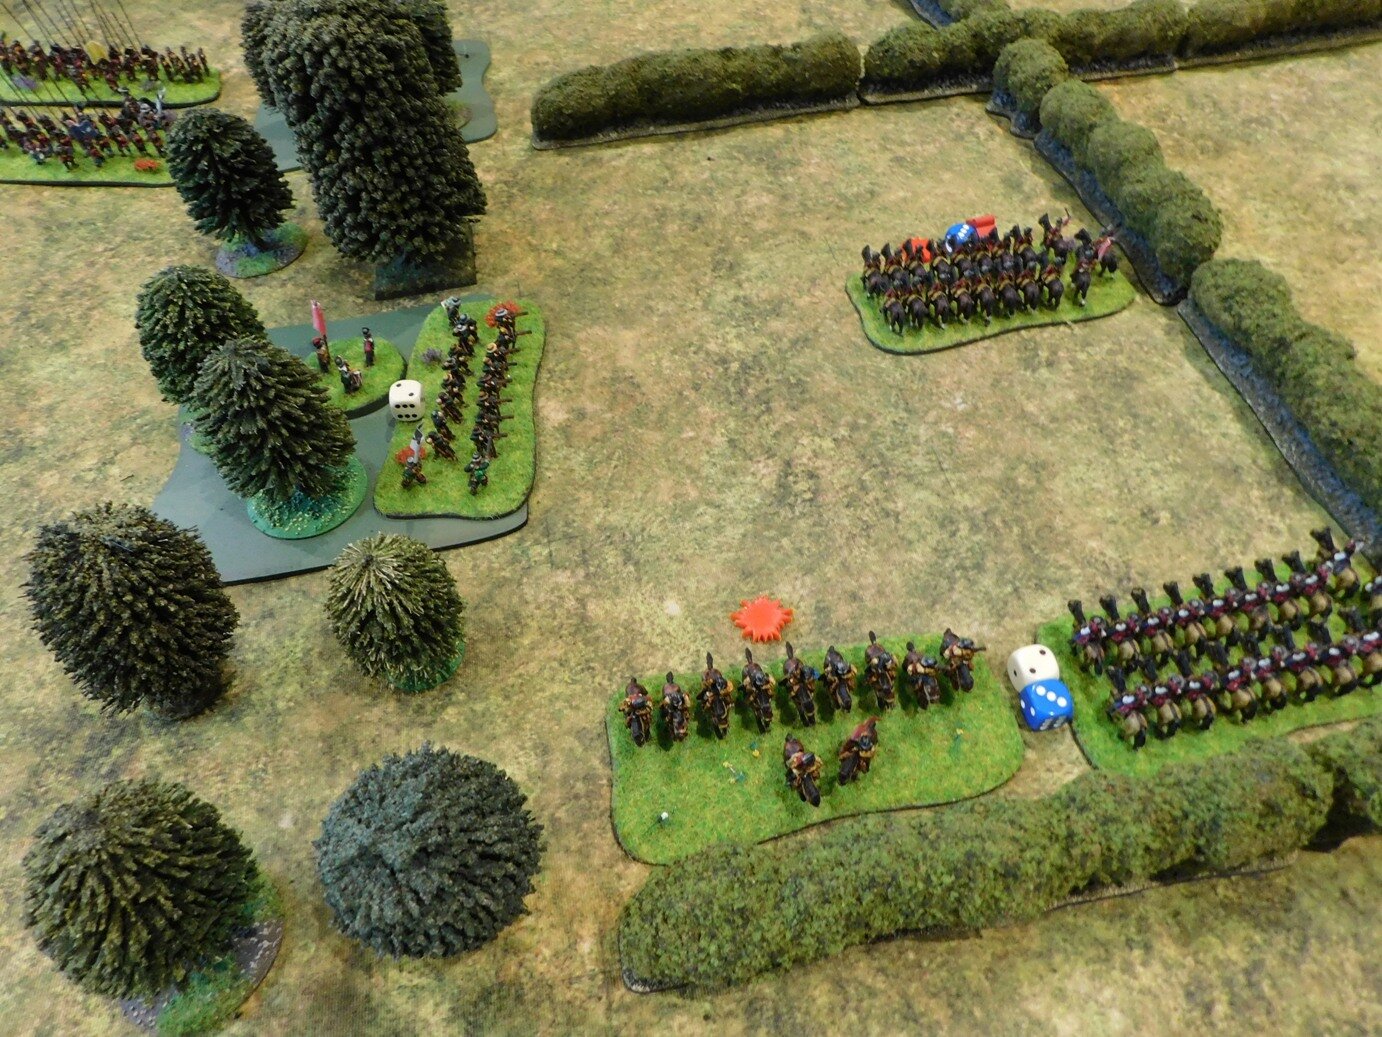
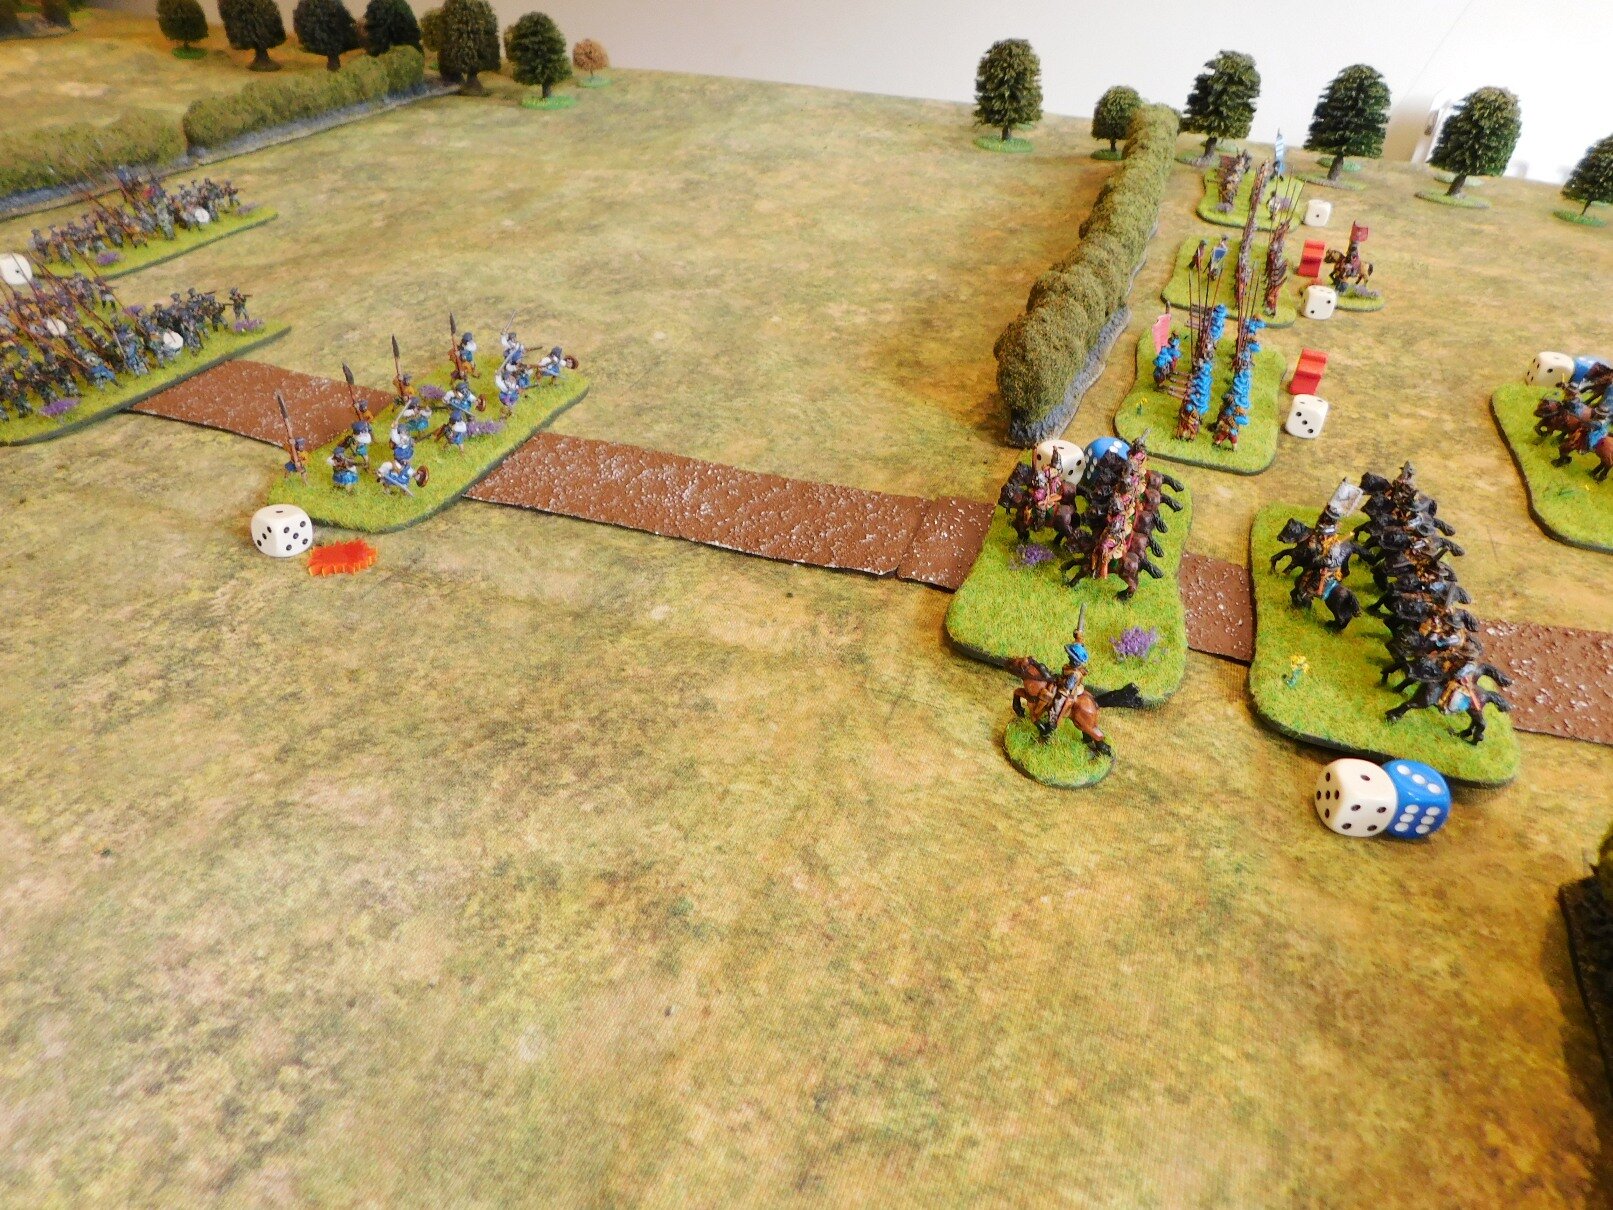
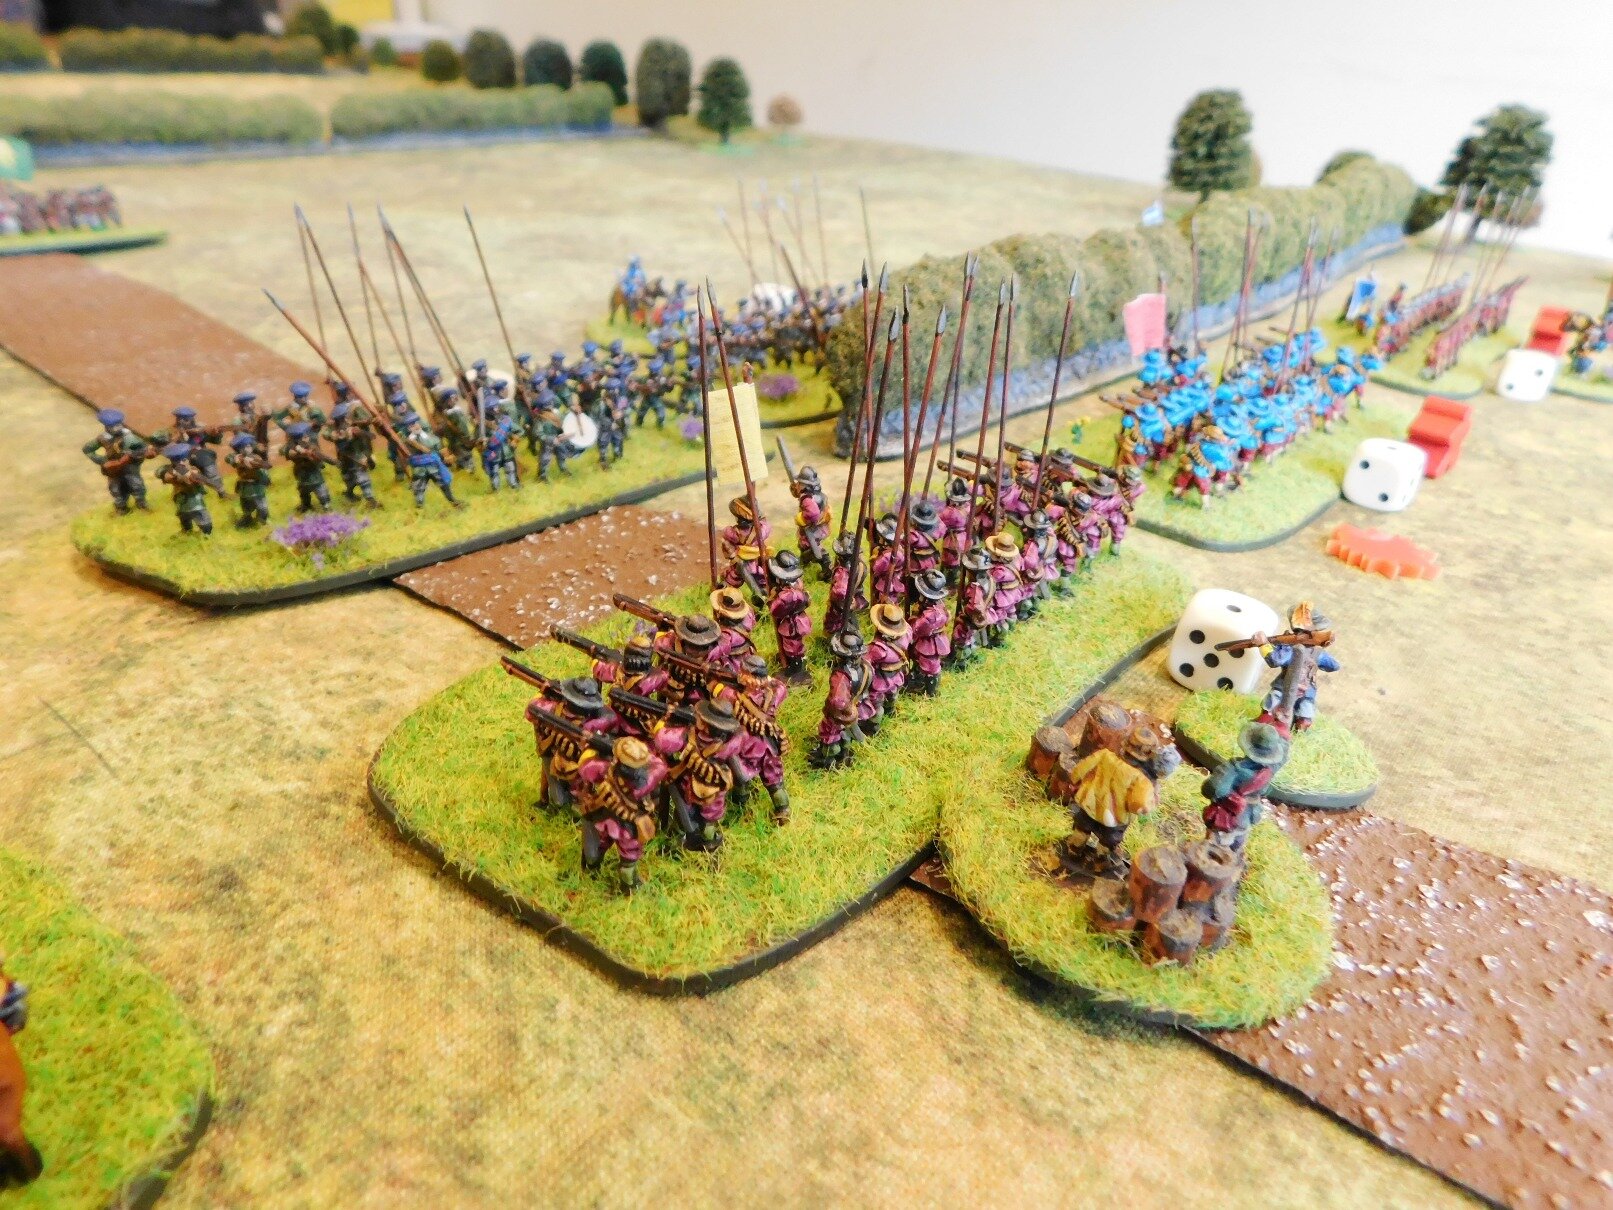
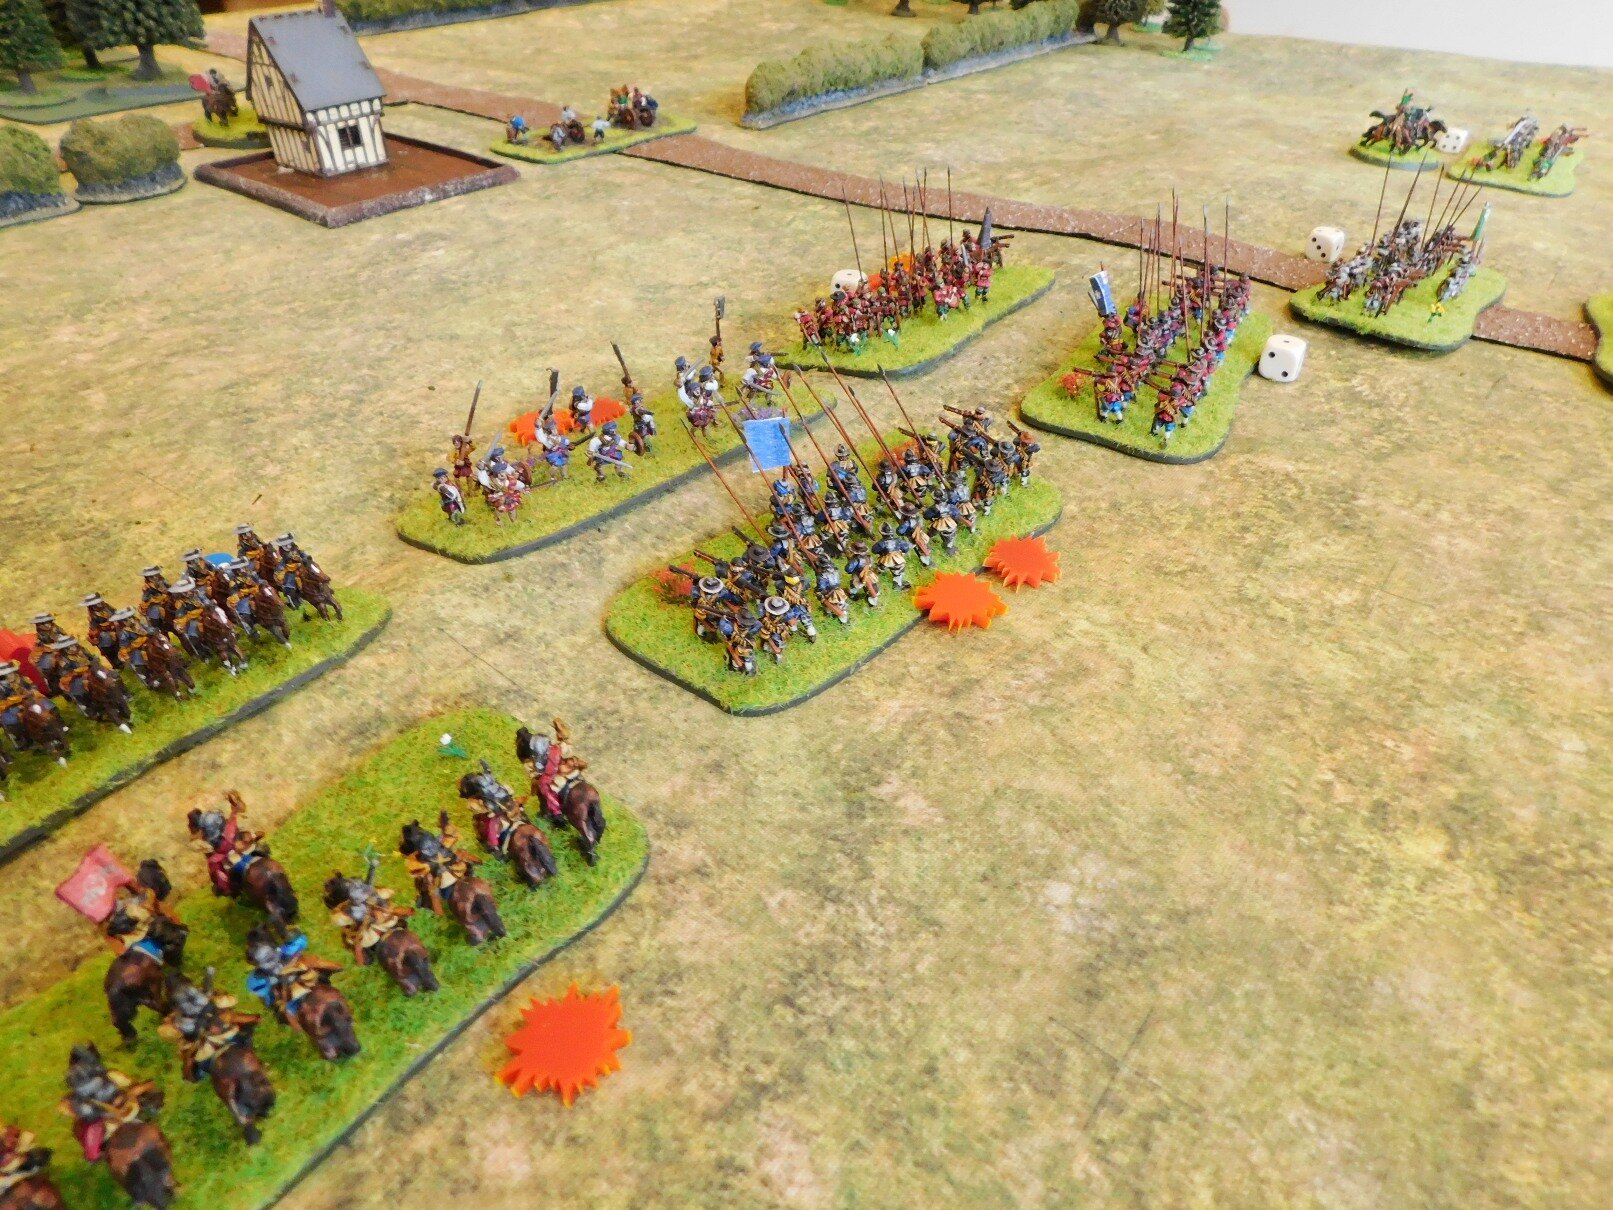
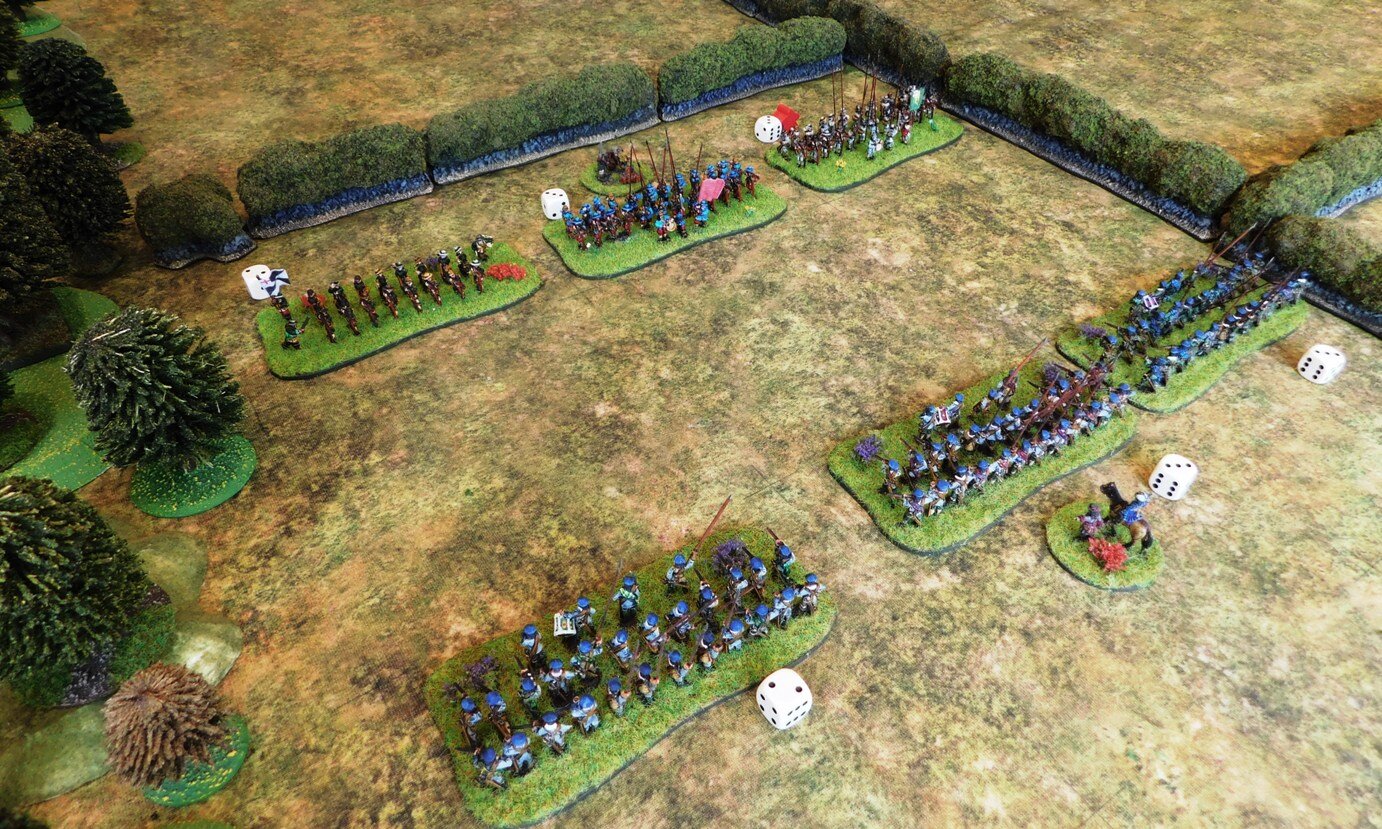
On the left, two of my Highlander units were charged, as predicted, by the enemy Dutch horse, with both surviving the charge but becoming disordered in the process. I struck back and, incredibly, one unit of Dutch horse was double-disordered and had their Colonel wounded.


This was a great opportunity for a game-winning opening clash but, try as I might, I just couldn’t find a way to break the enemy horse and would now have to suffer the fate of all loose infantry attacked by large numbers of close formation horse!

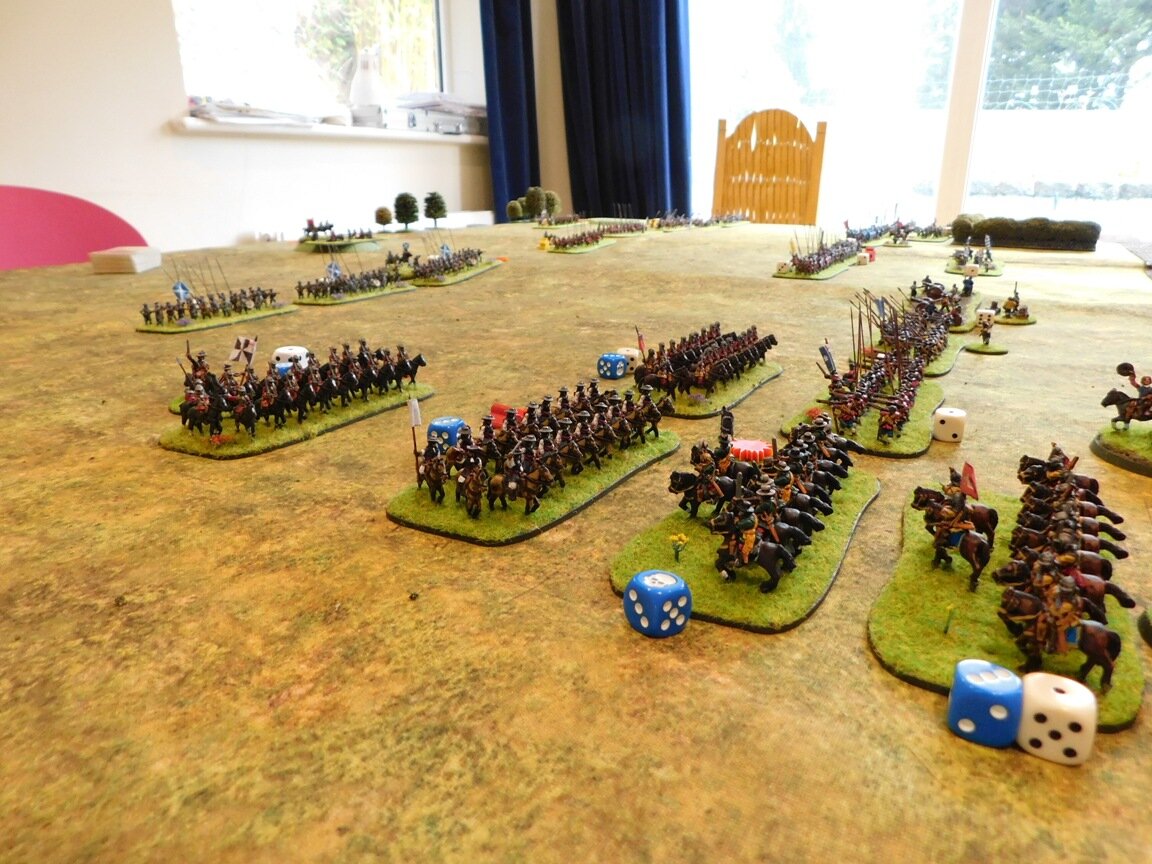
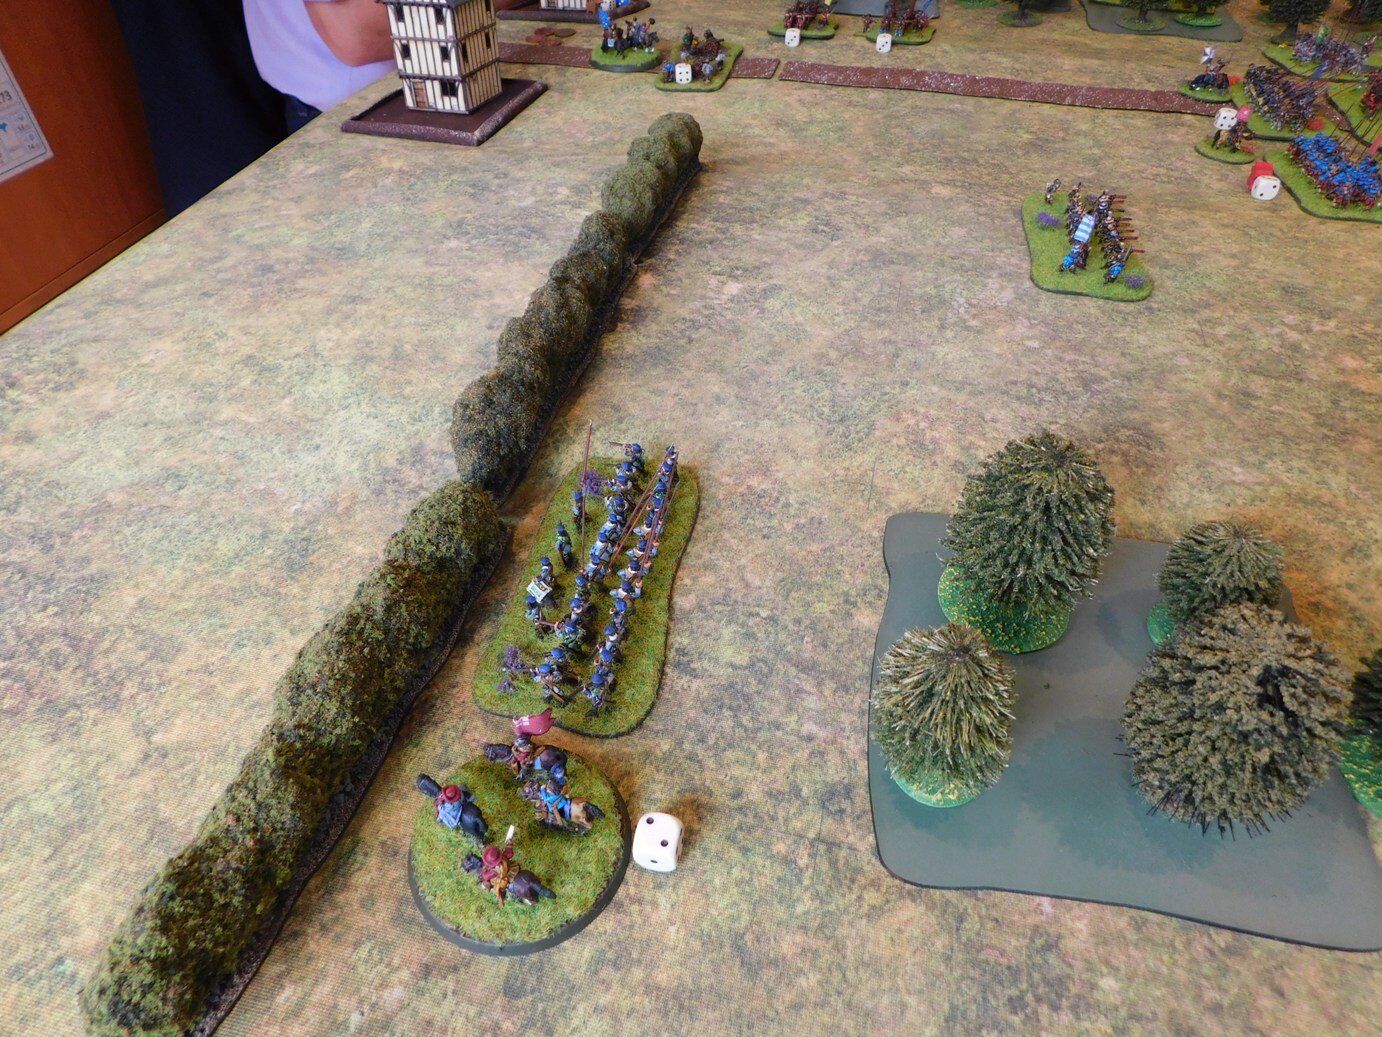
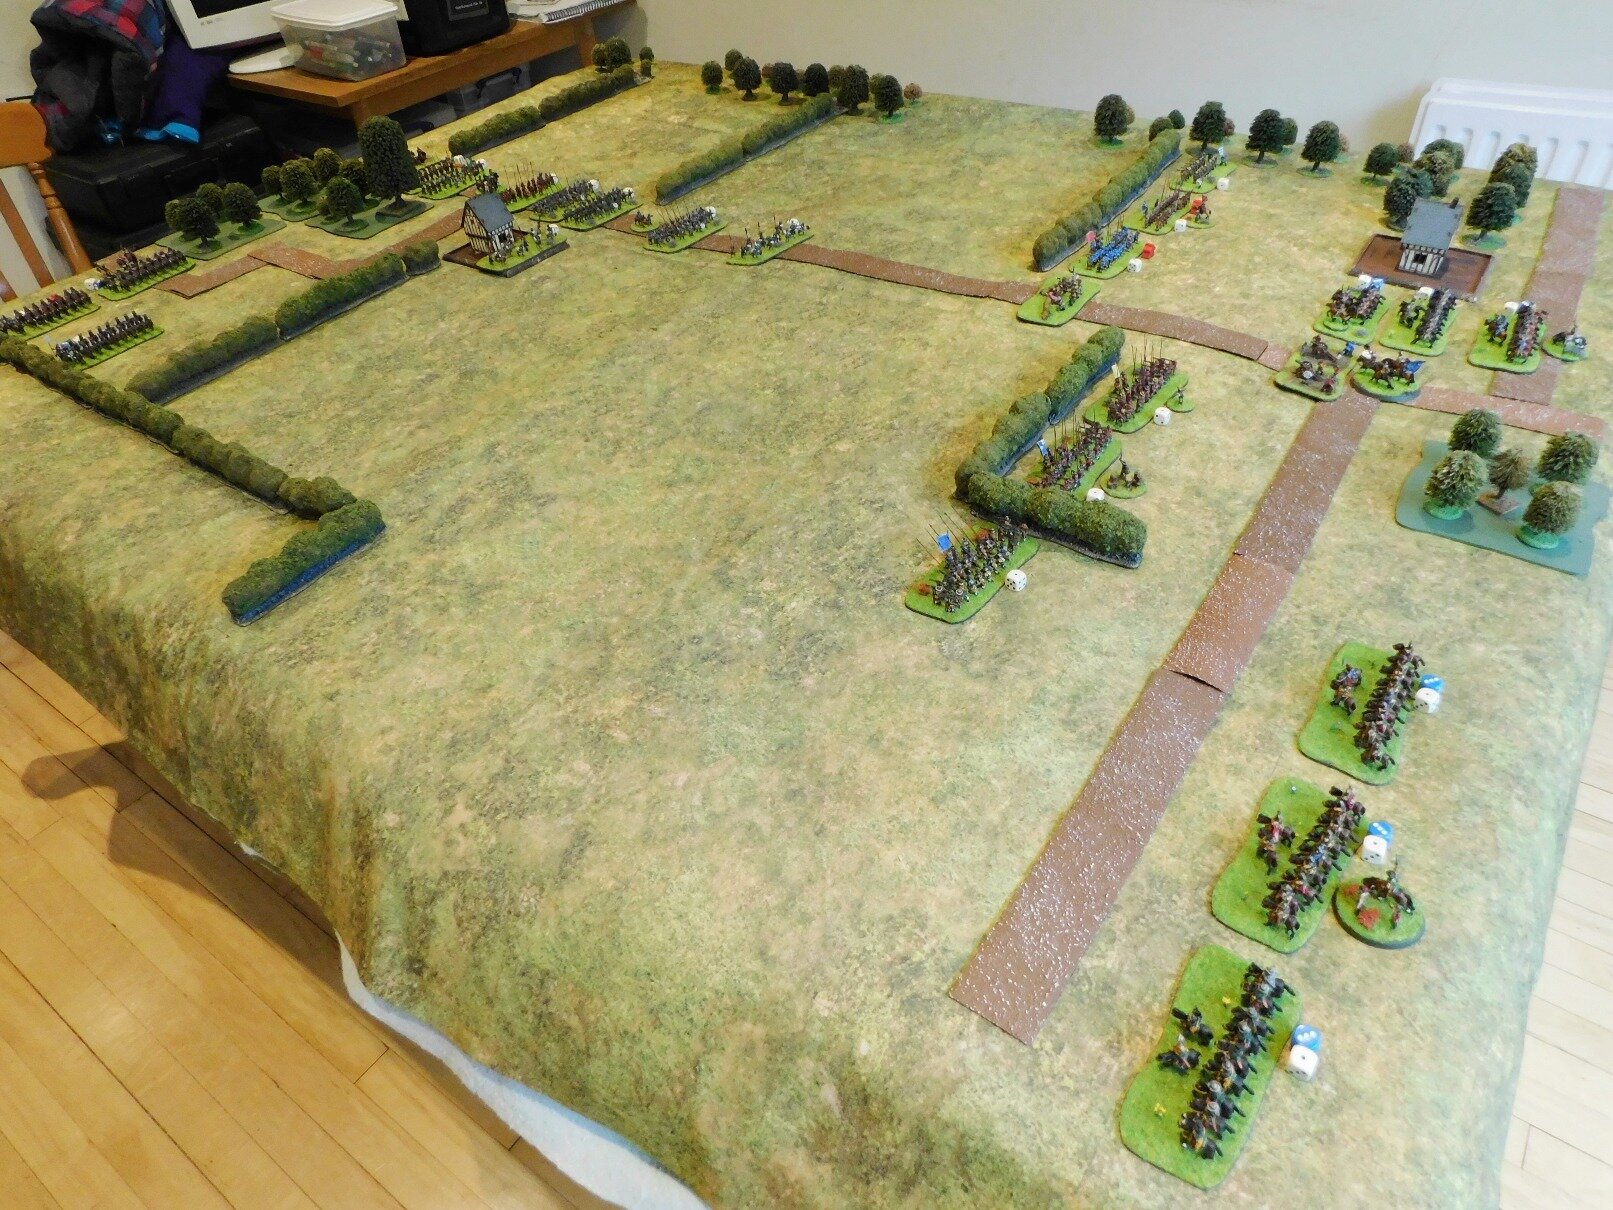
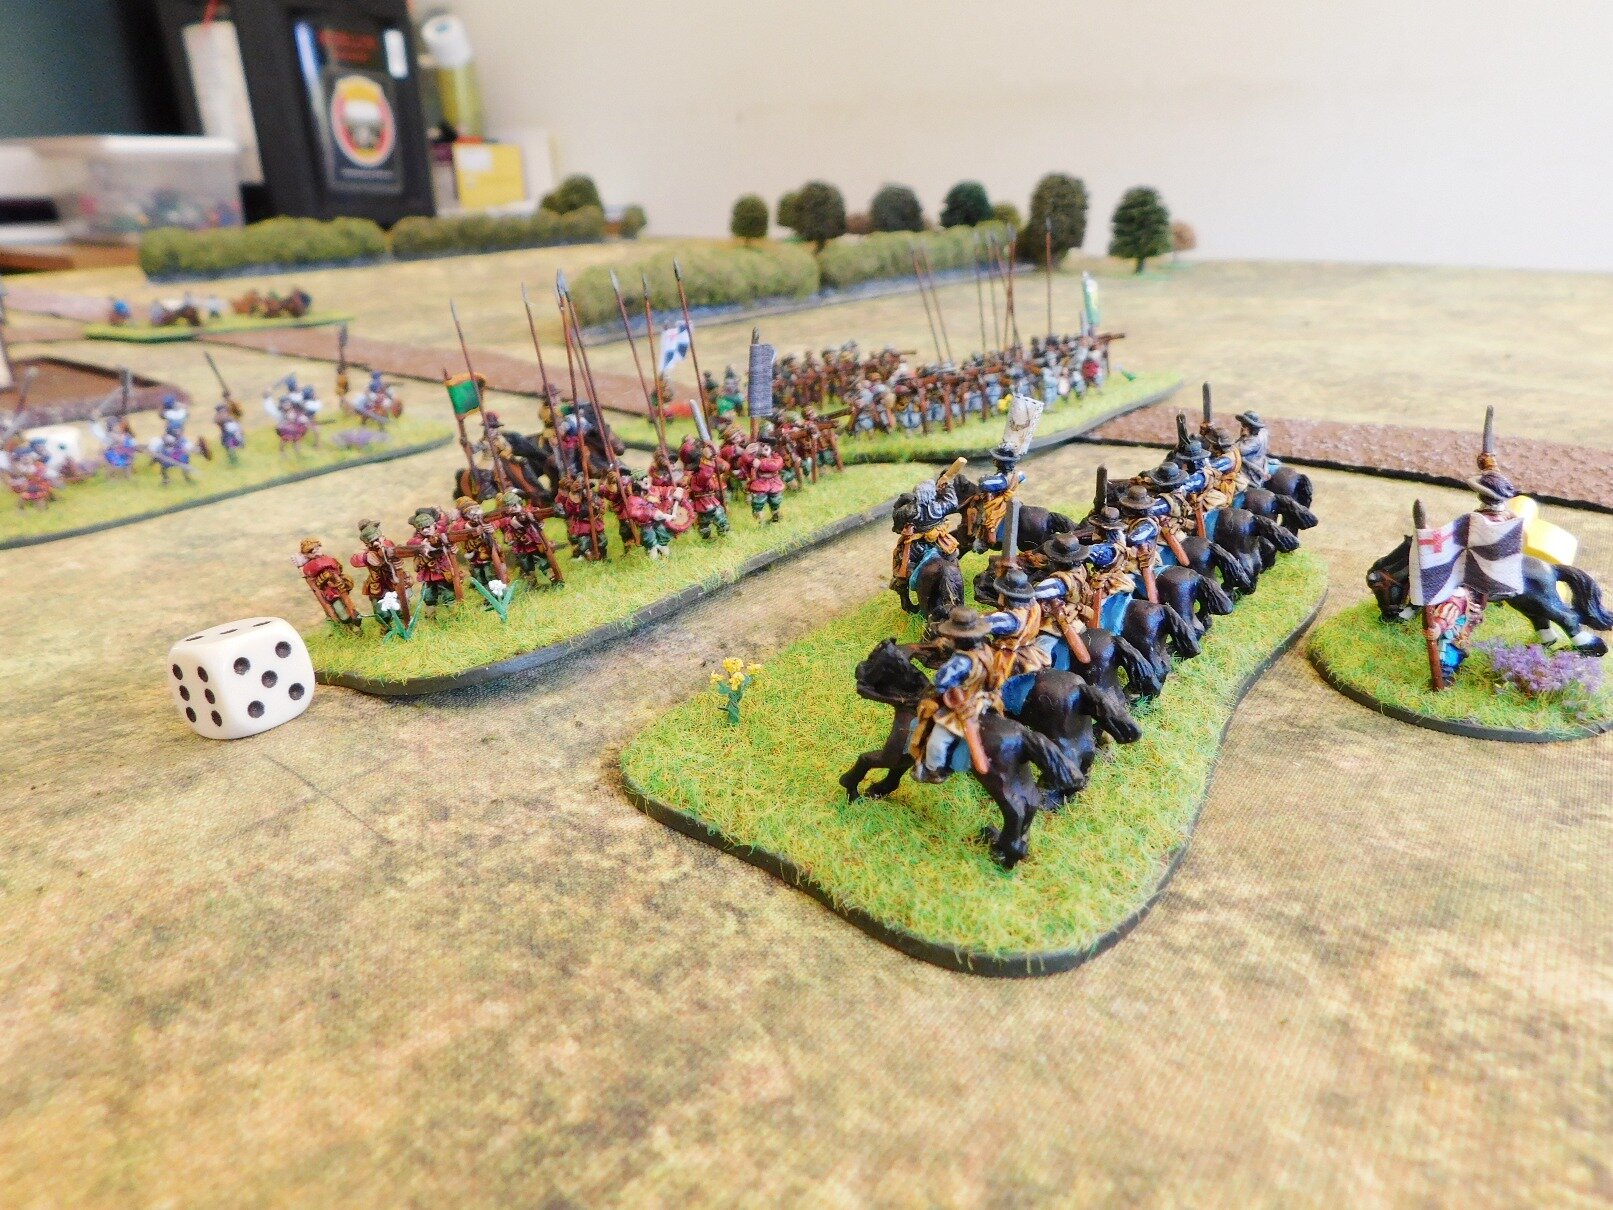
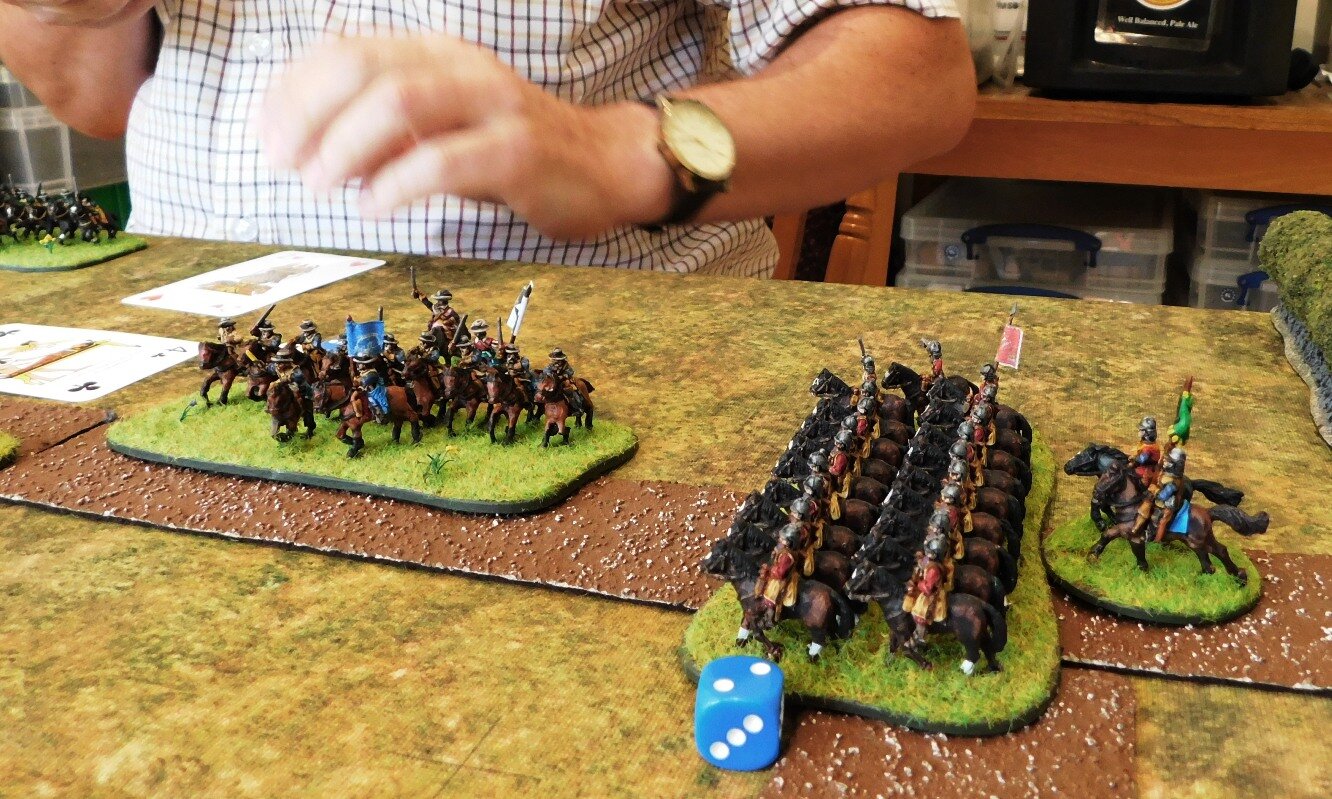
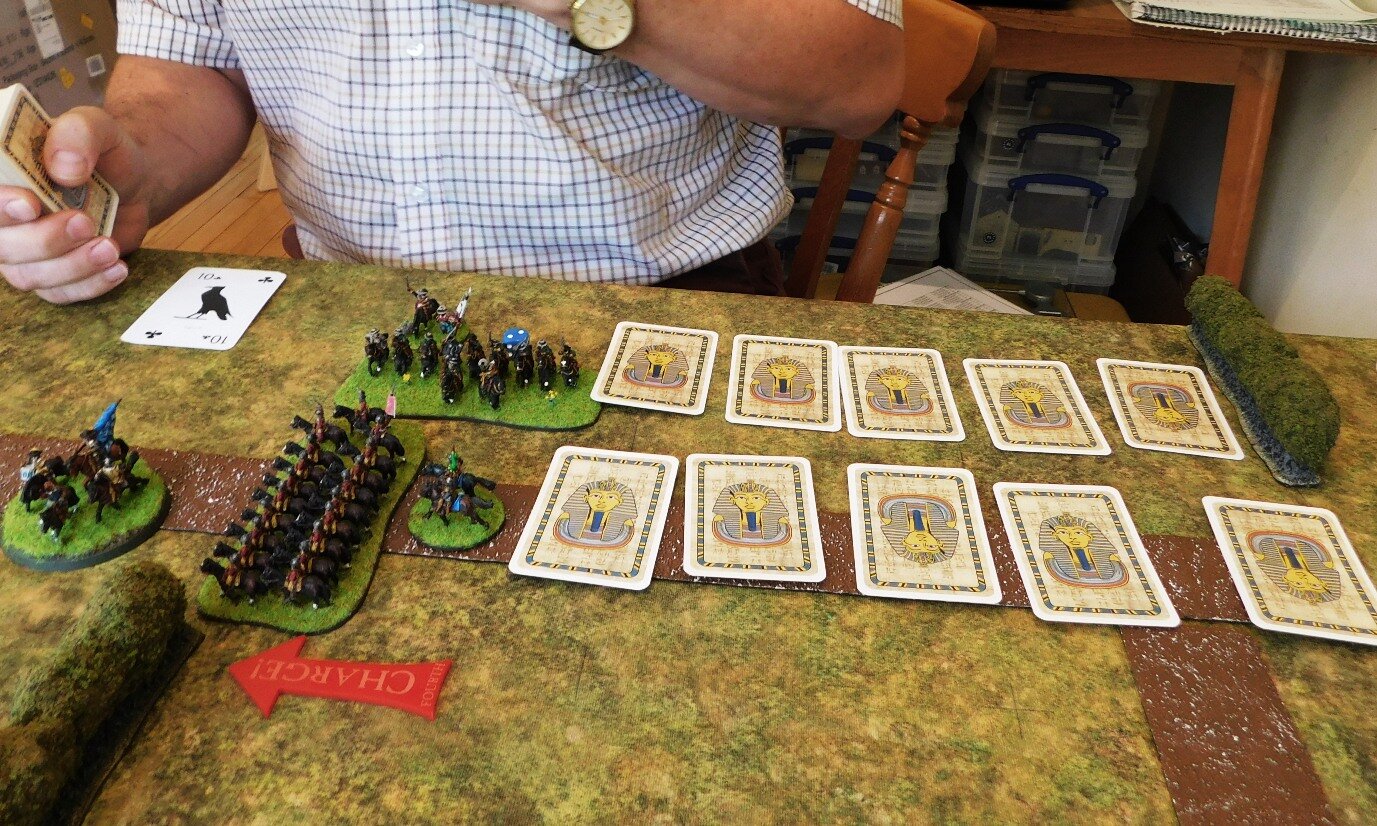
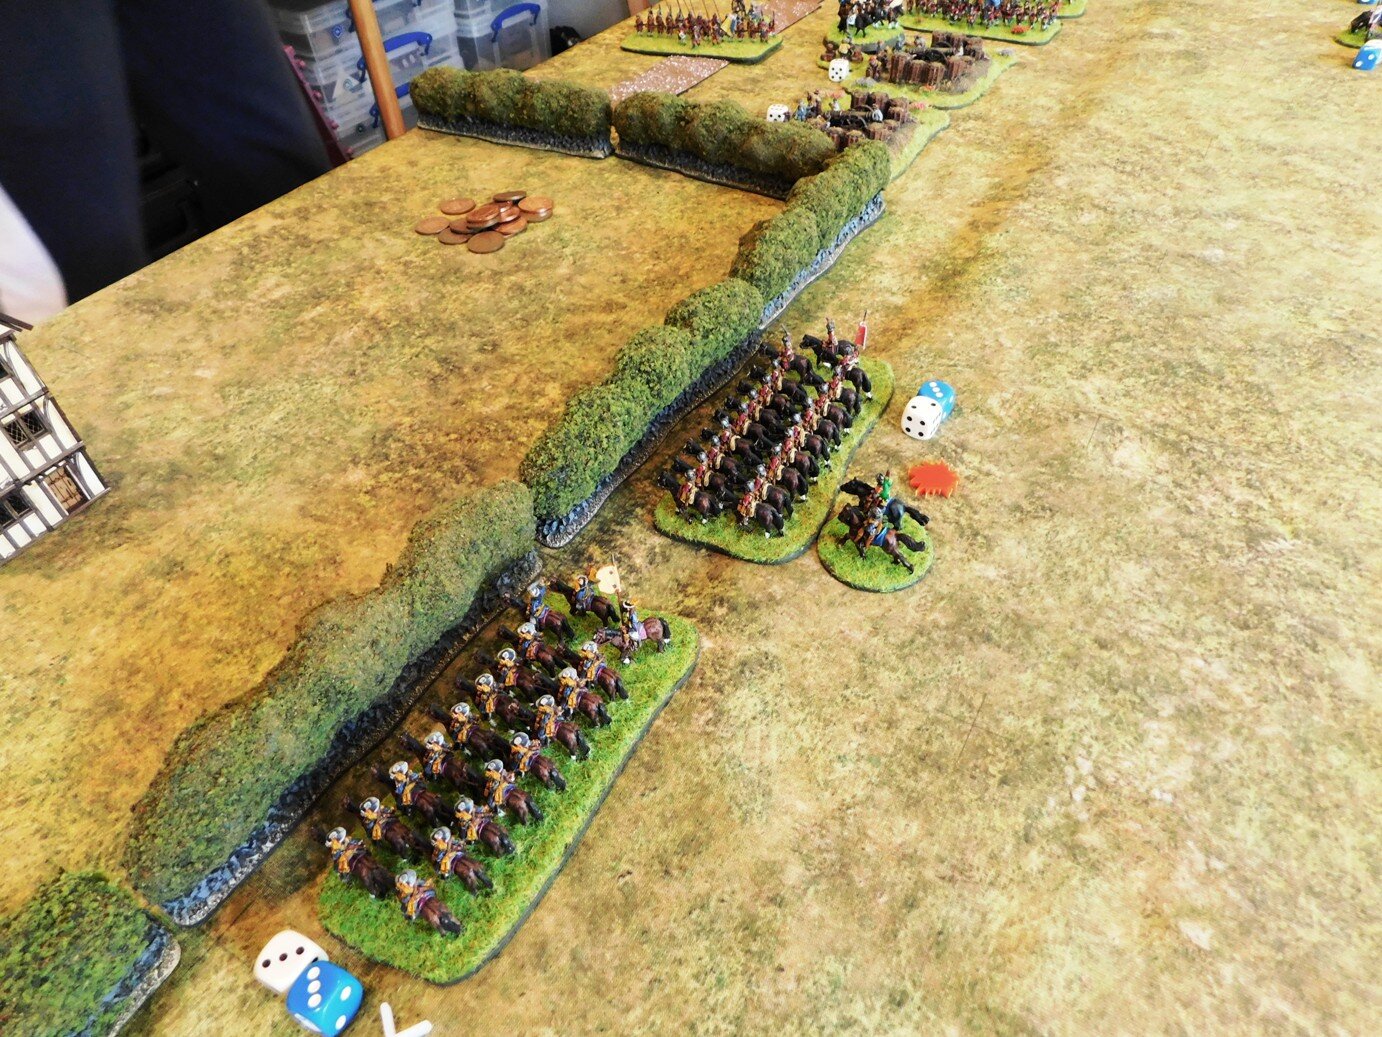
Meanwhile, on the other flank, my horse and the enemy Swedish horse now faced each across one of the fields outside the village.

A victory for the Scottish horse, despite their manky mounts, but now they would Pursue their fleeing enemies from the field unless they stopped and rallied.

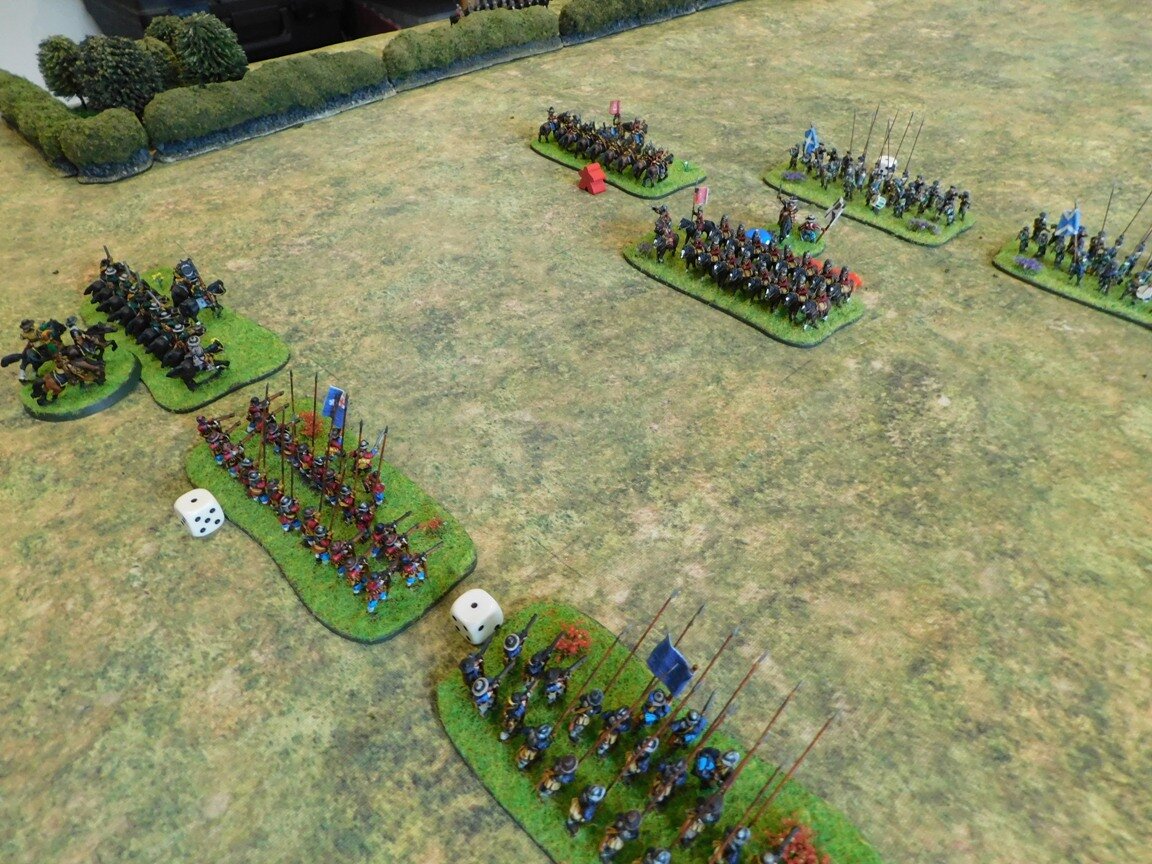
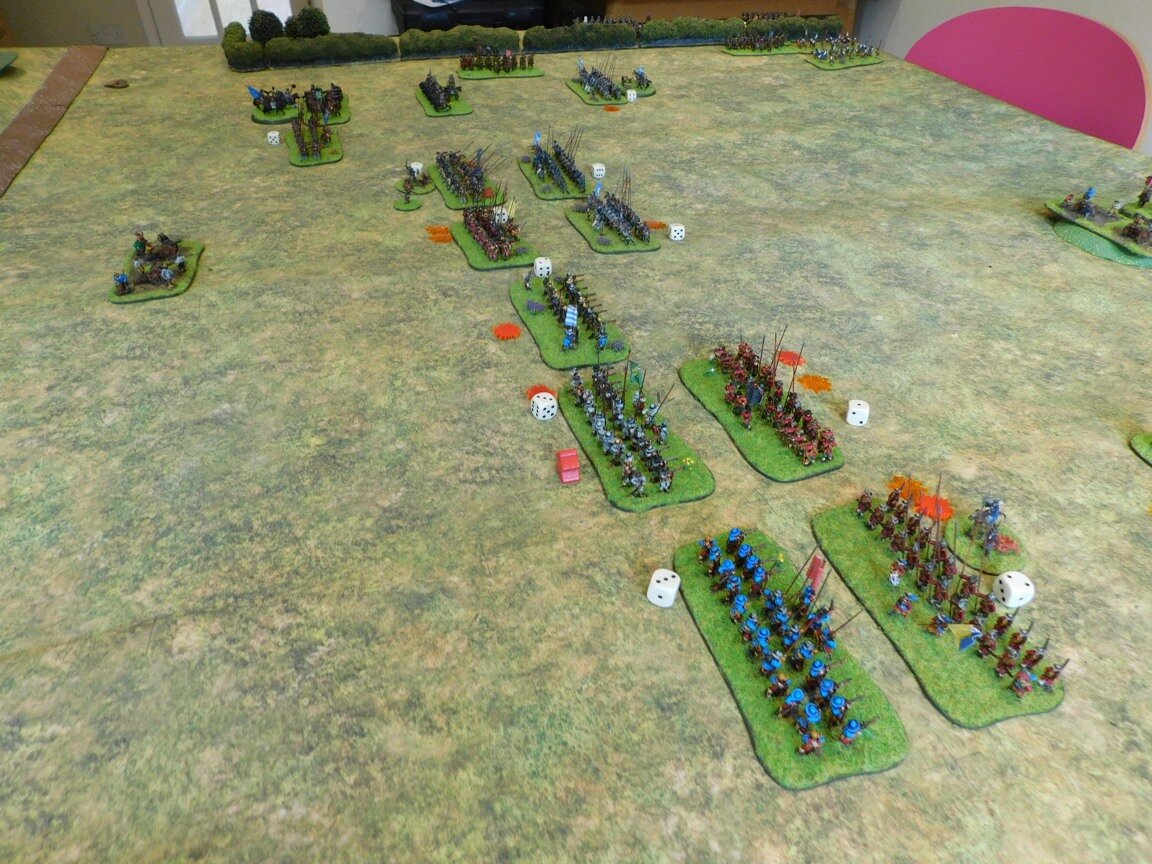
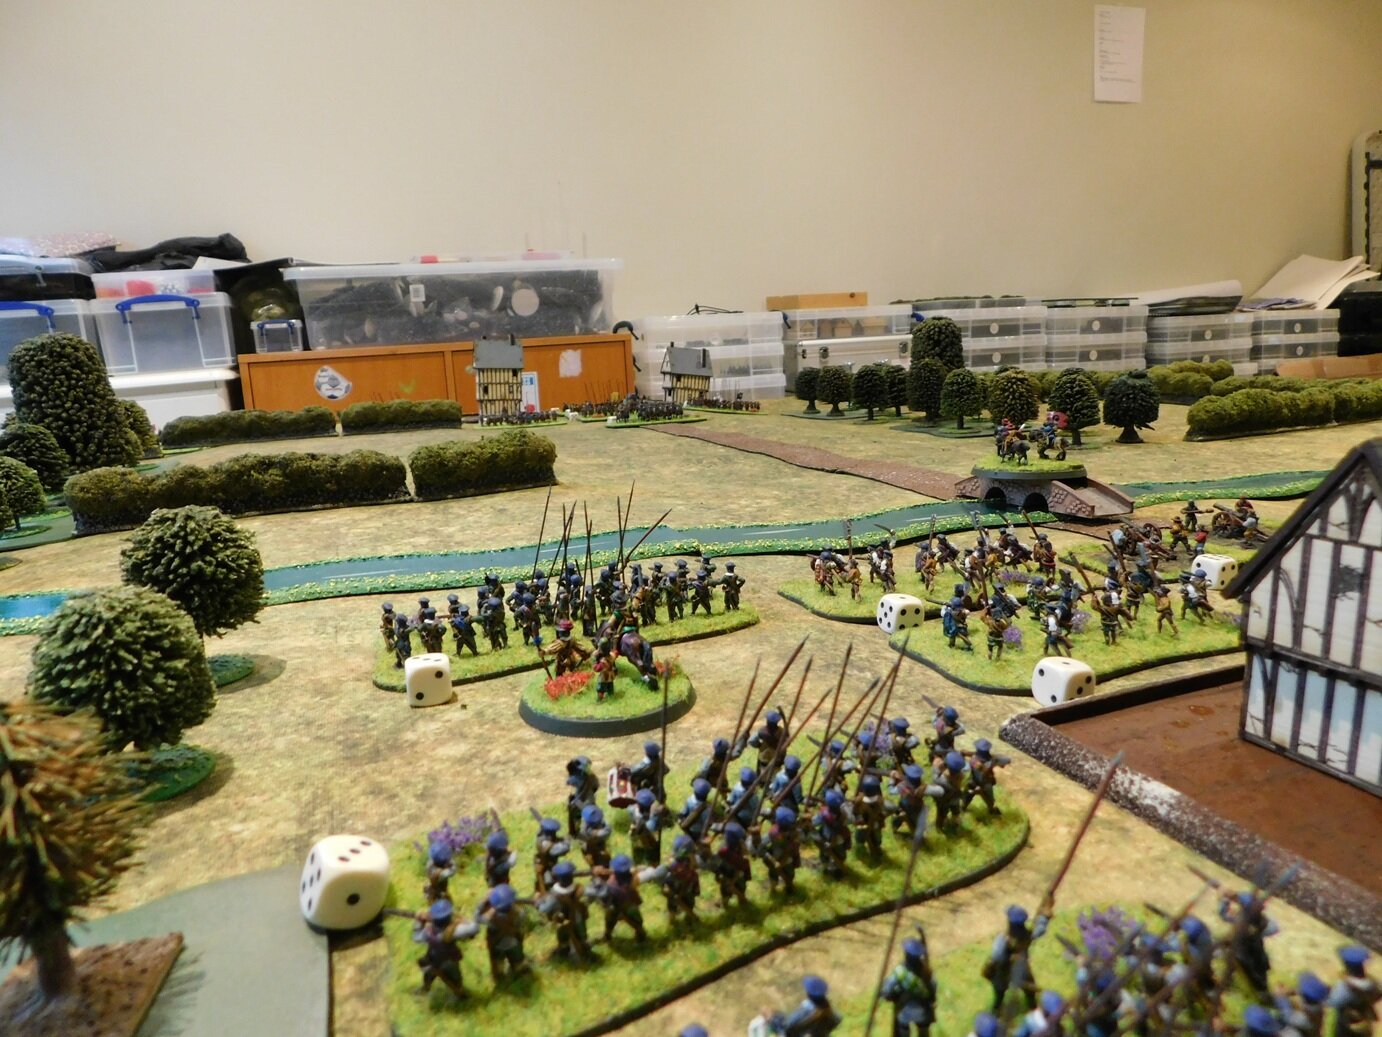
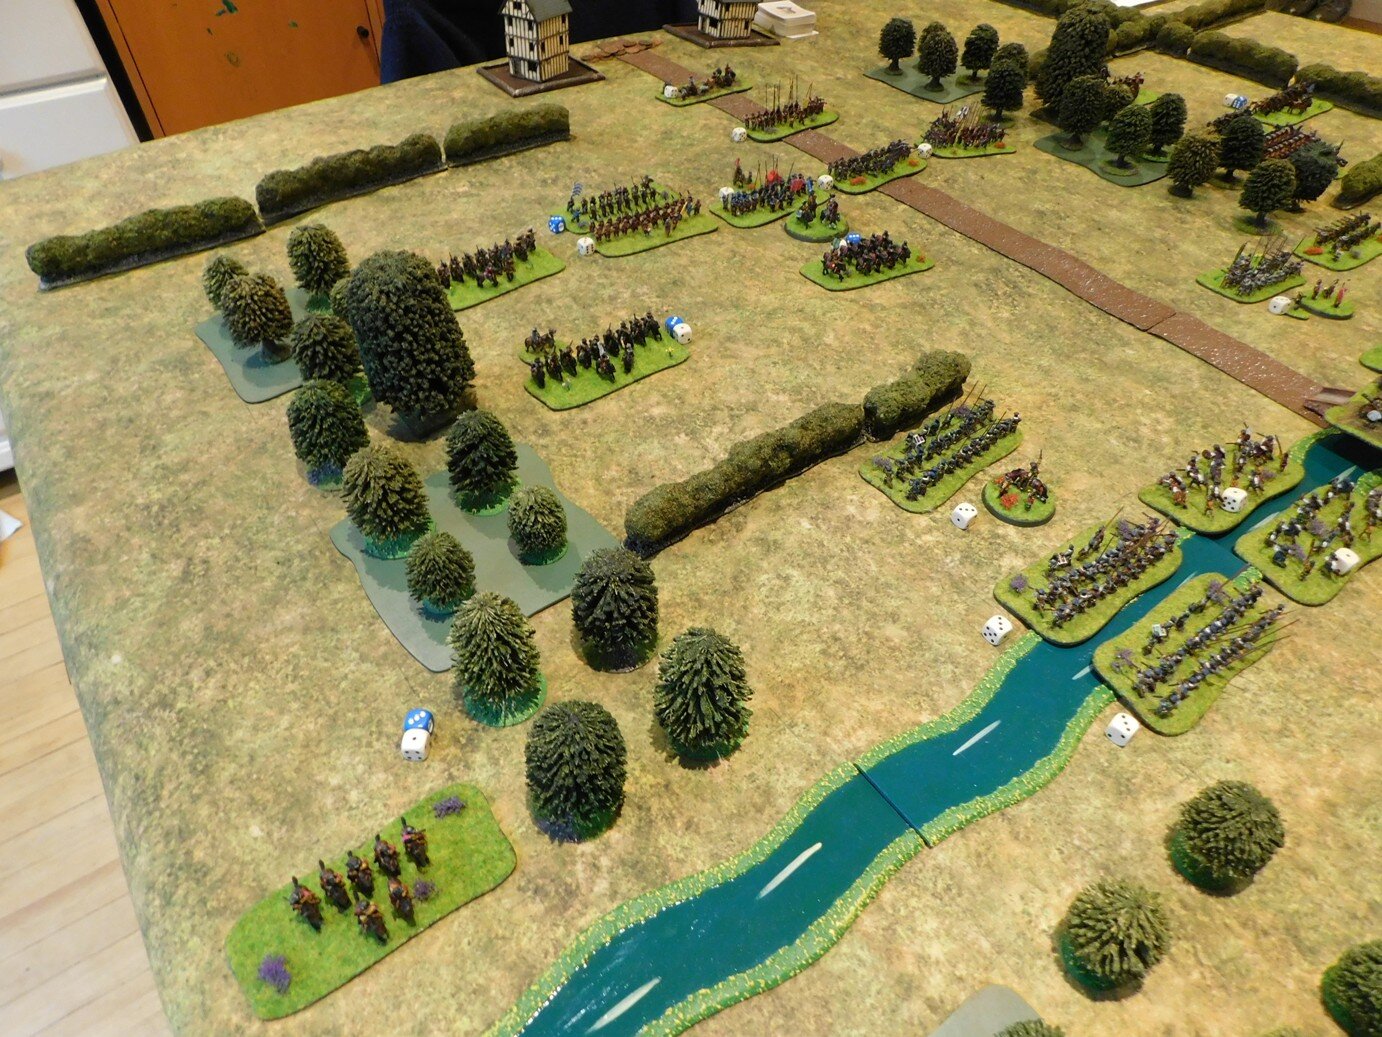
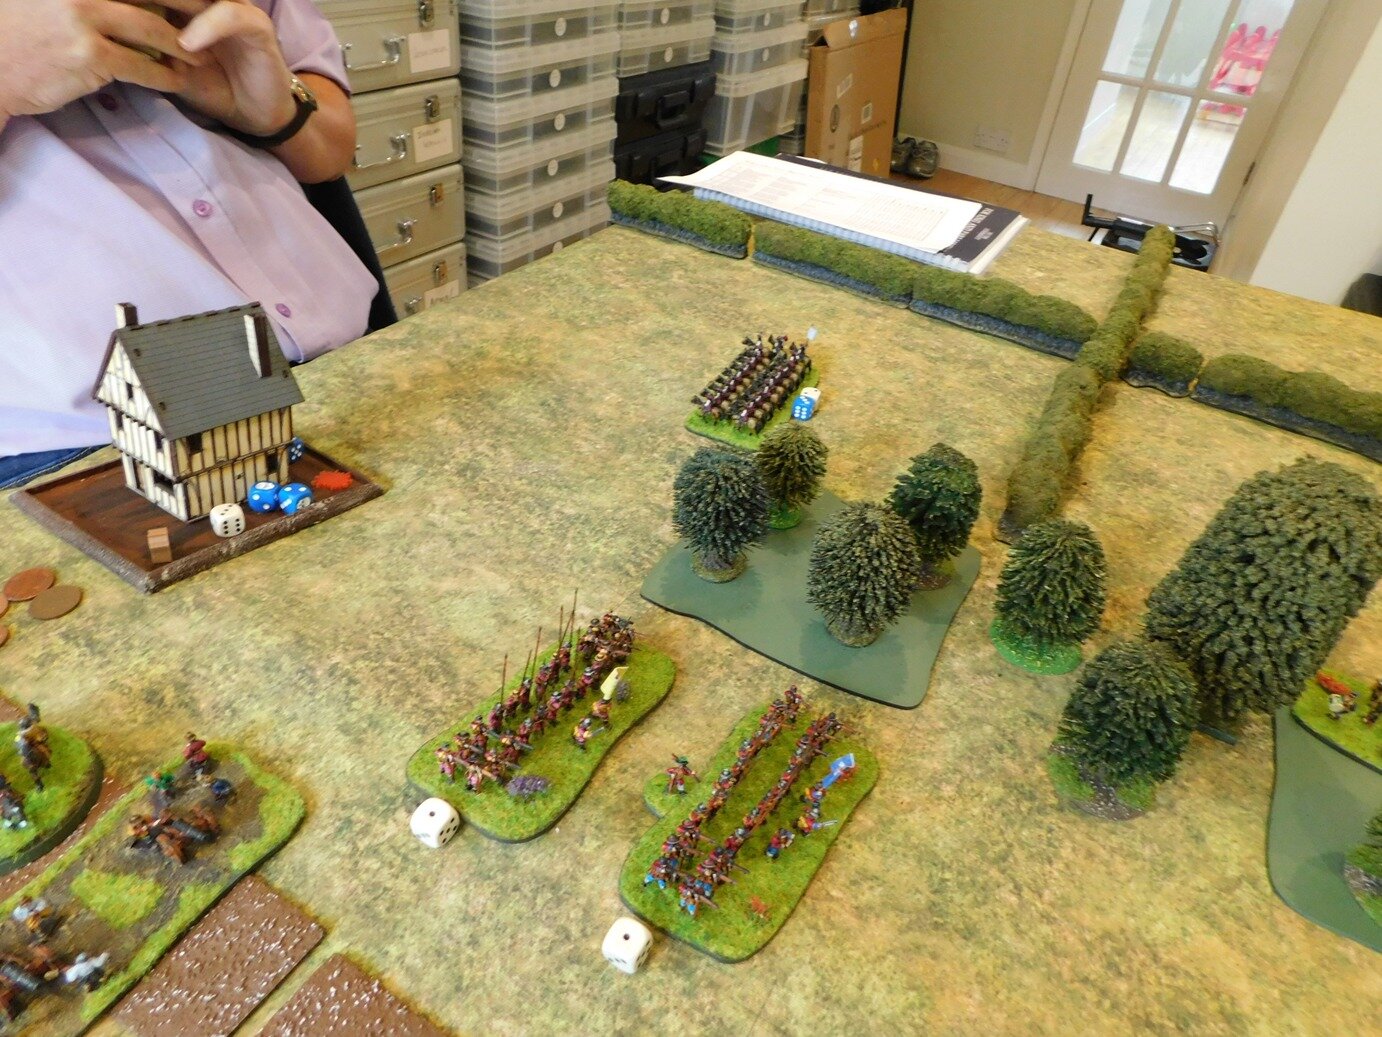
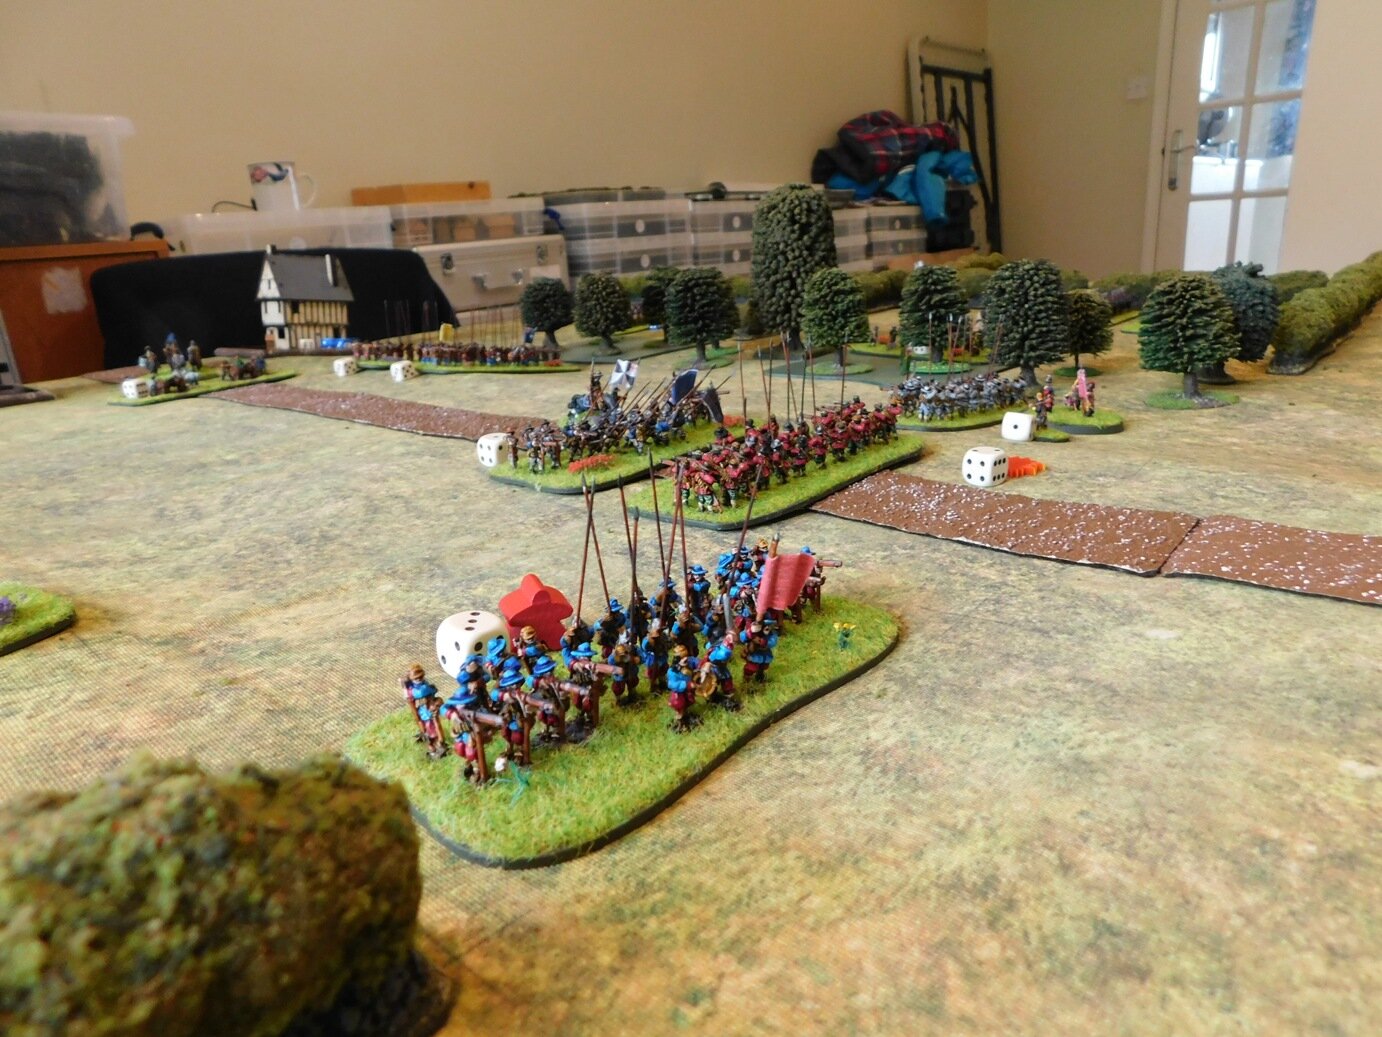
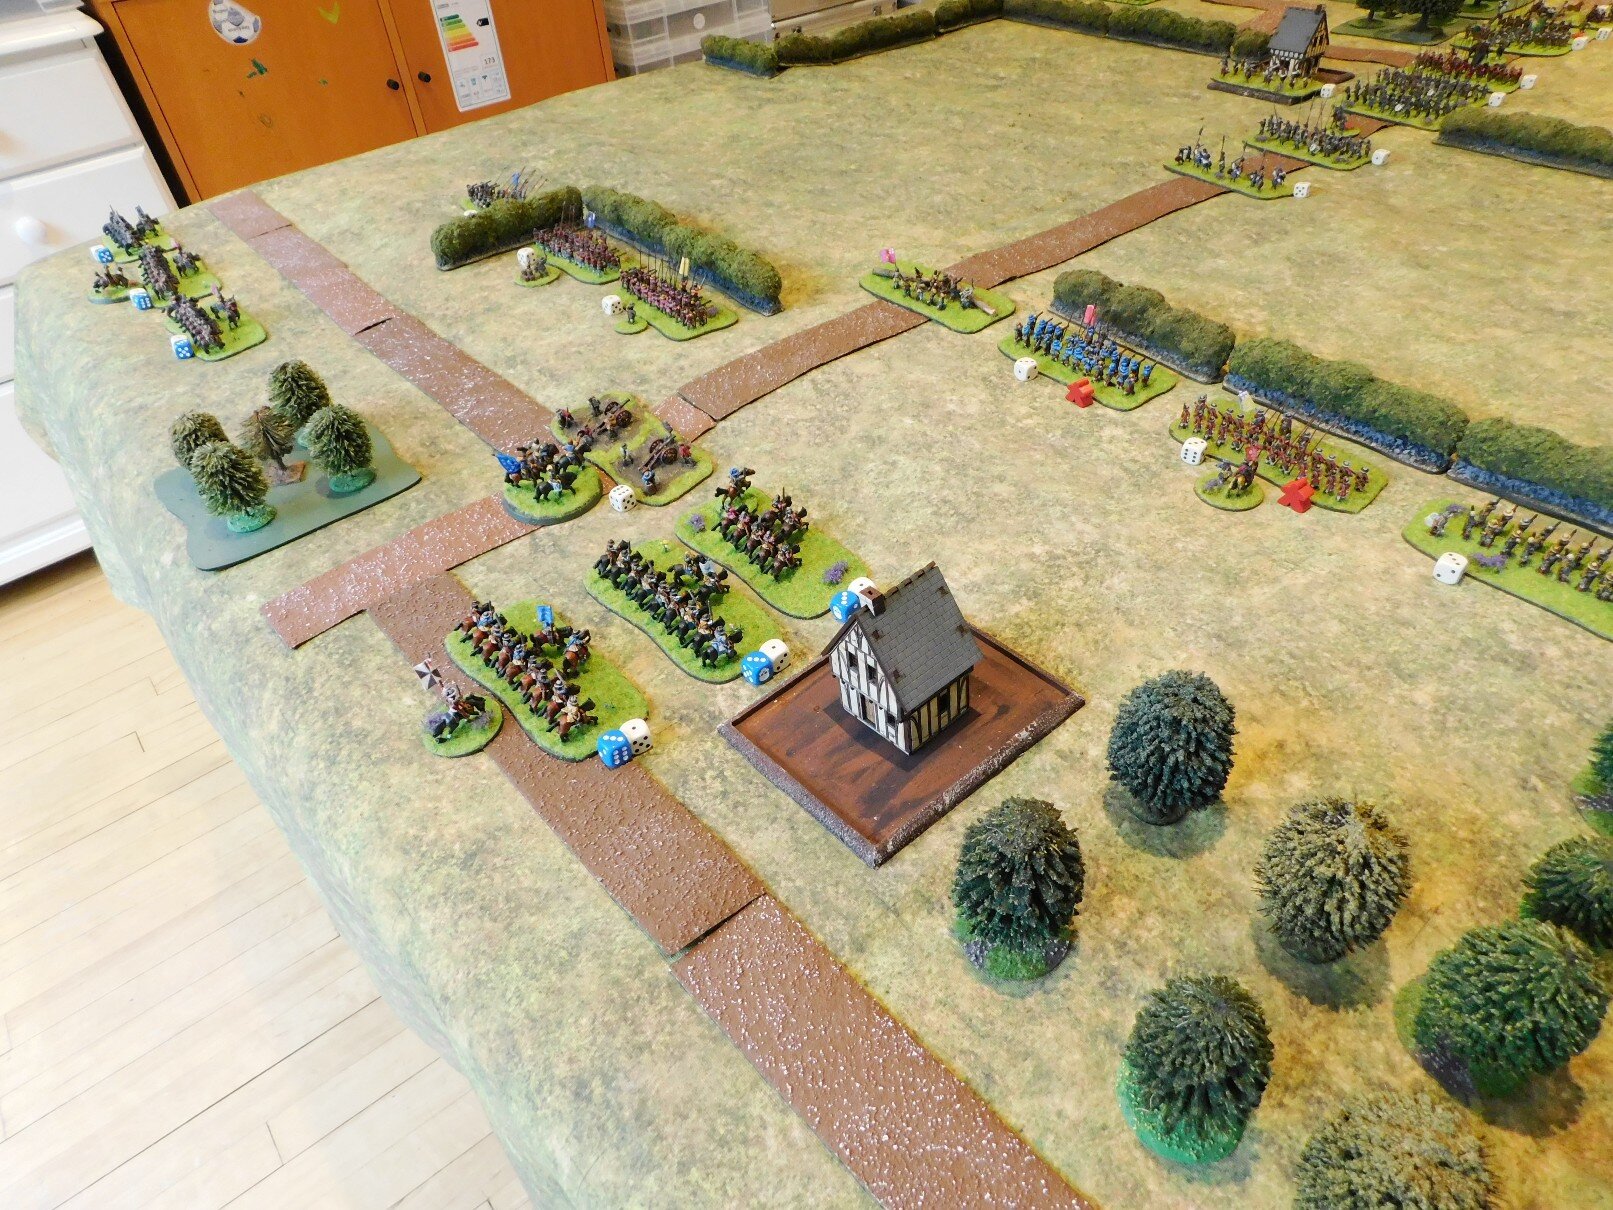
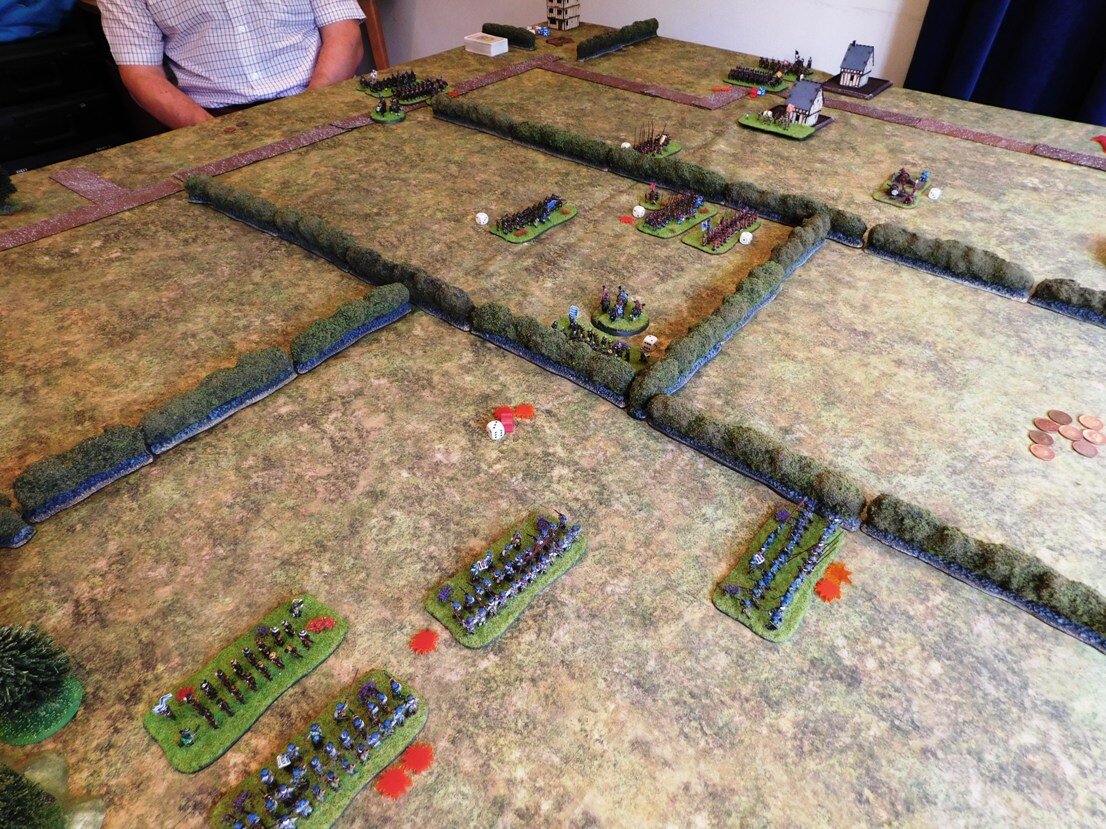
As these actions were happening on the flanks, my centre moved forward, me seeking an advantage by overlapping his left wing.

Mid Game

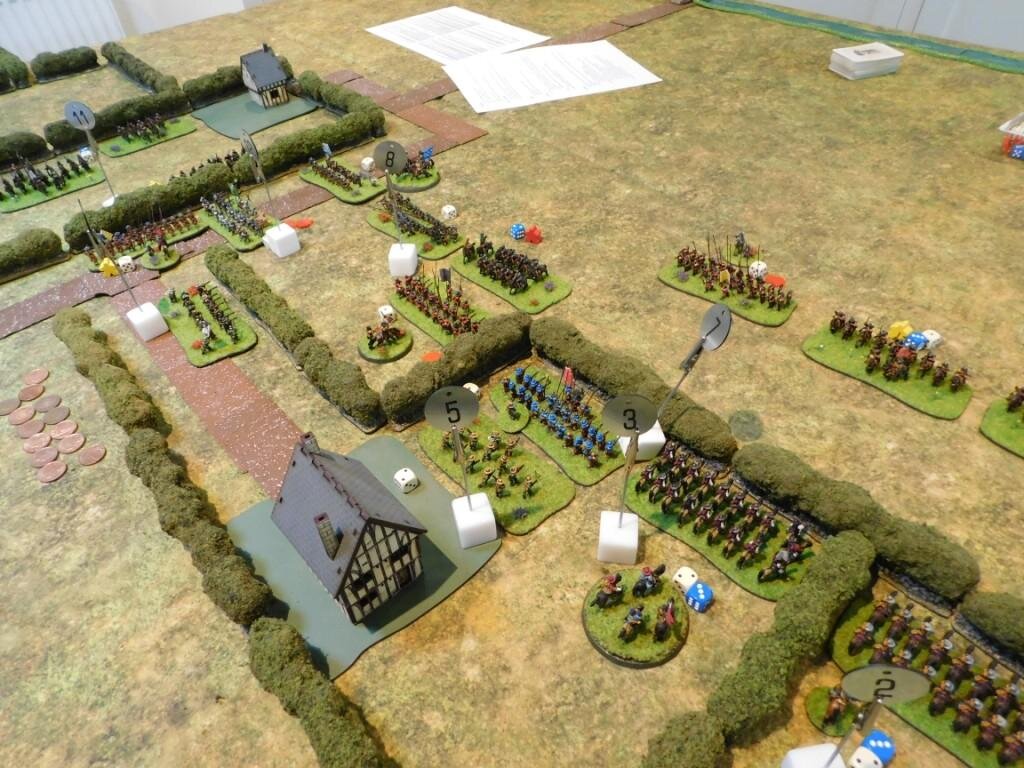
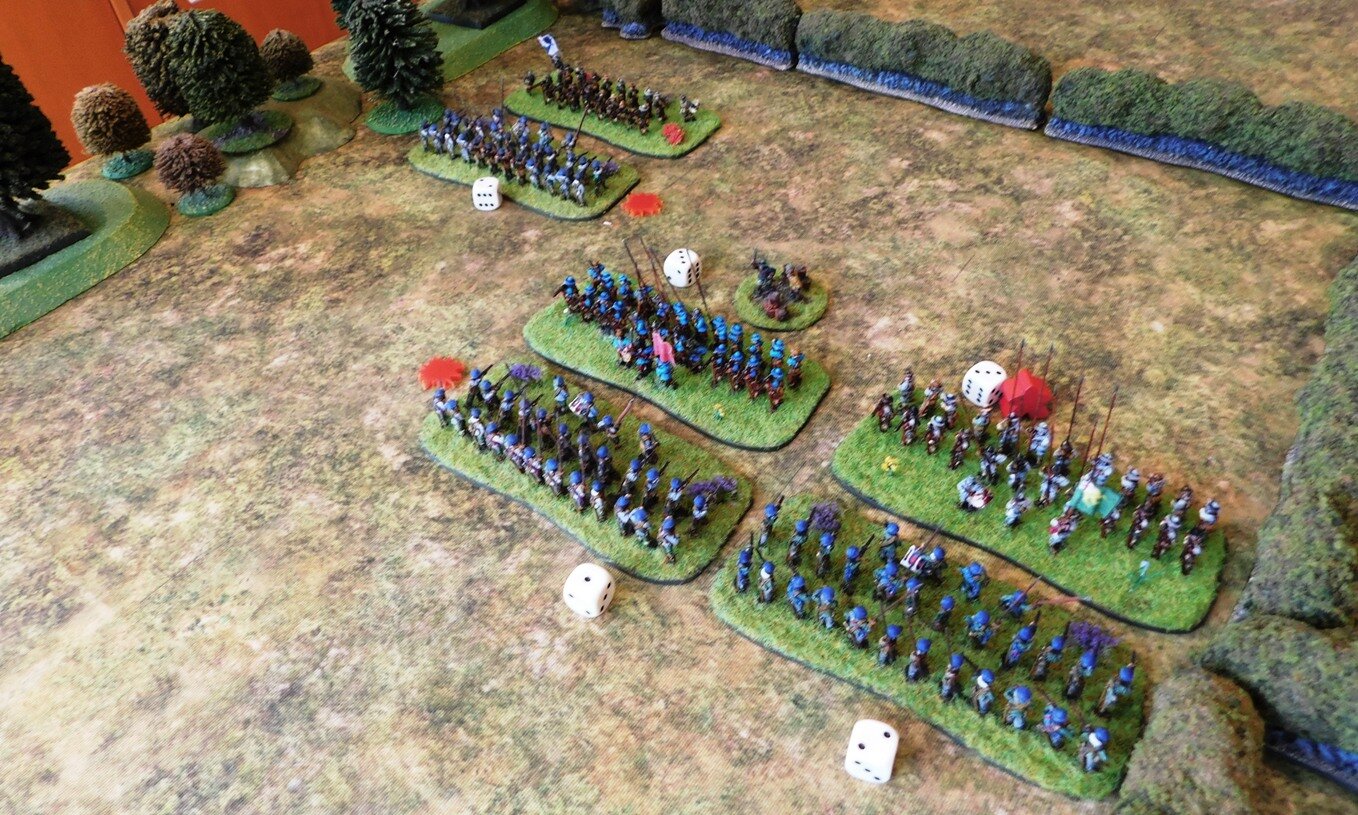
After the initial clash, I had won the right flank but was about to lose my left flank: the Highlanders were outnumbered 5:3 and could do nothing except take the charges from the Dutch horse.

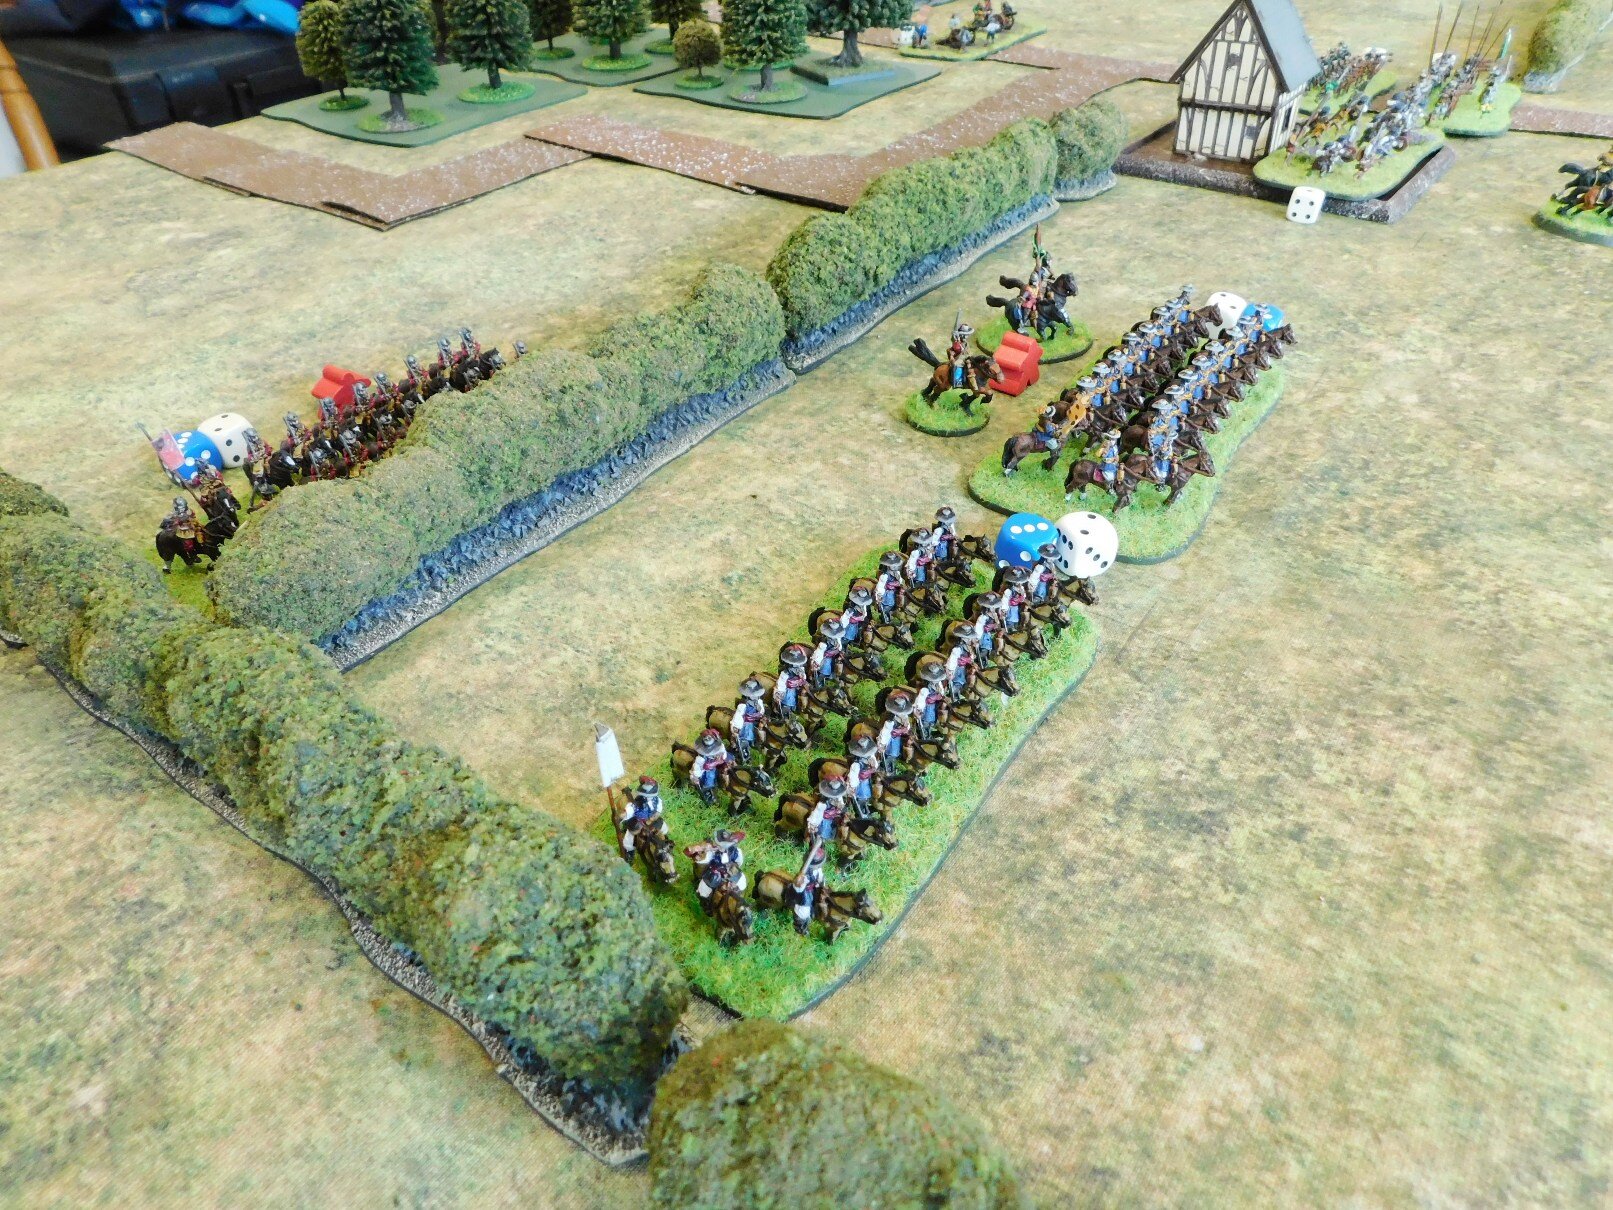
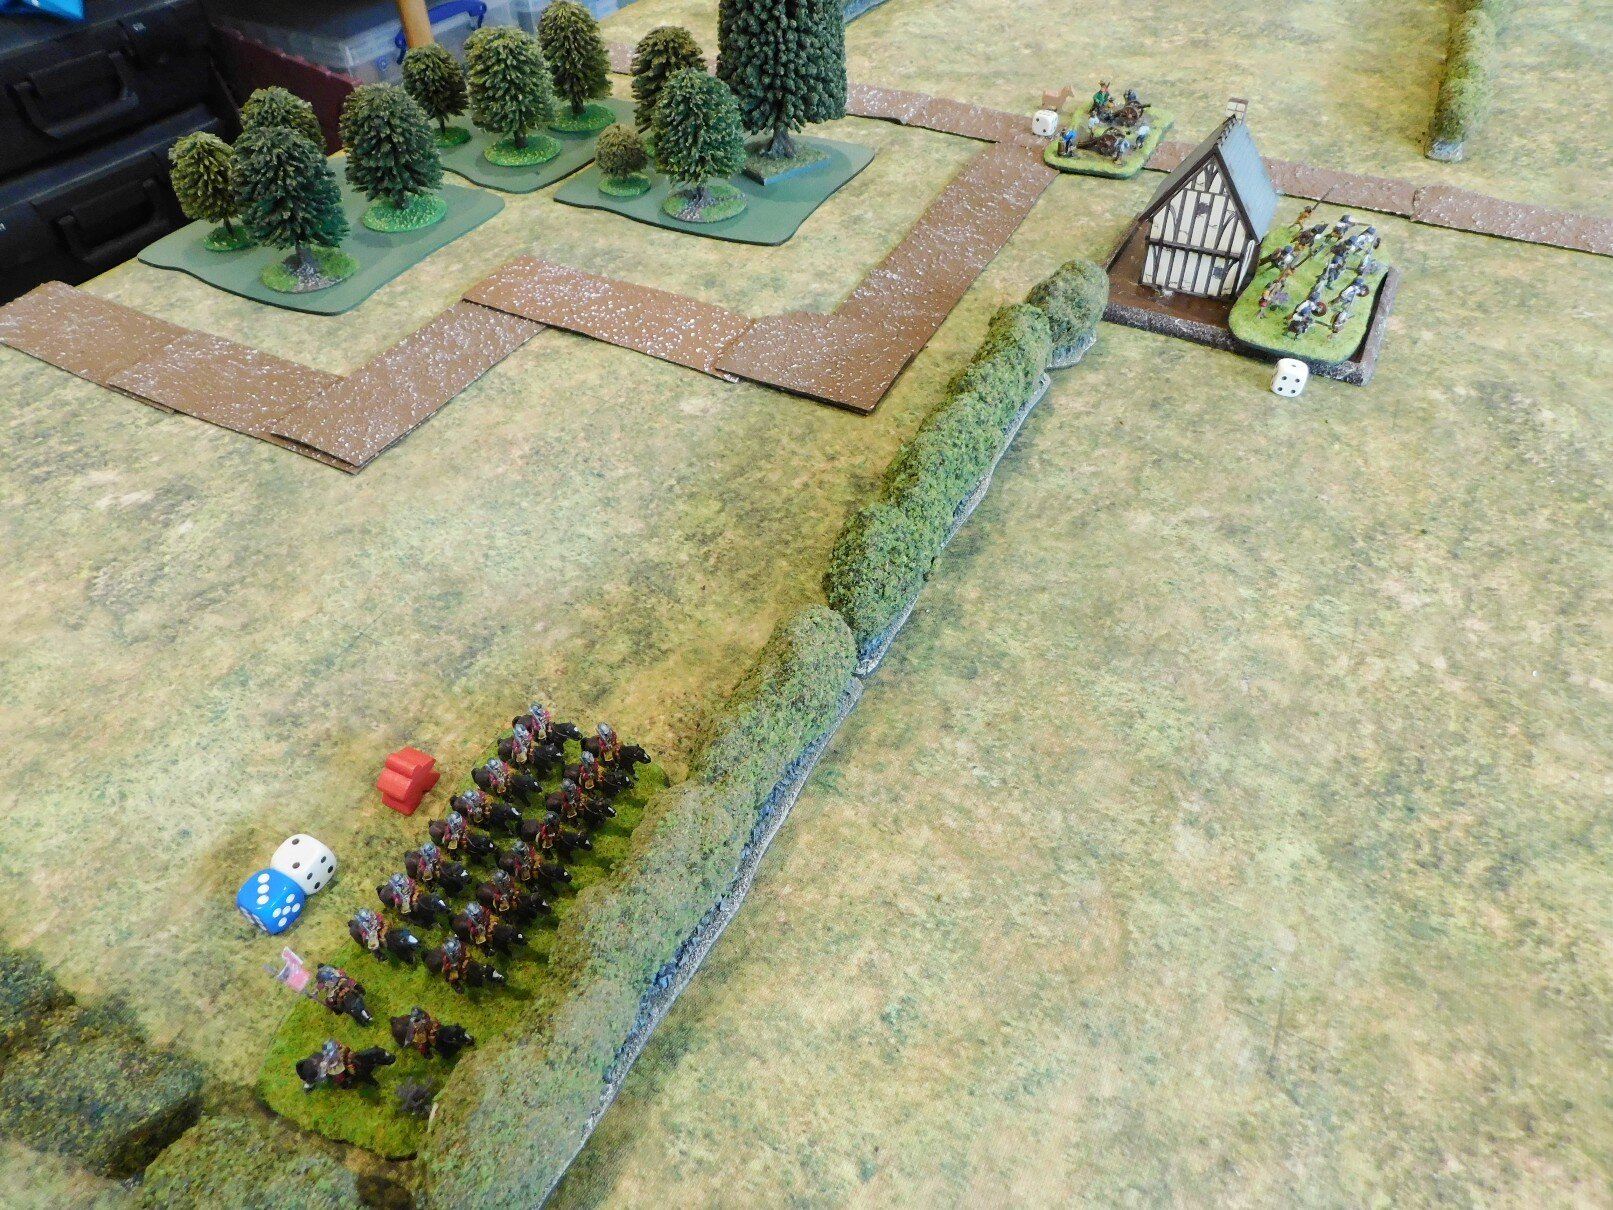
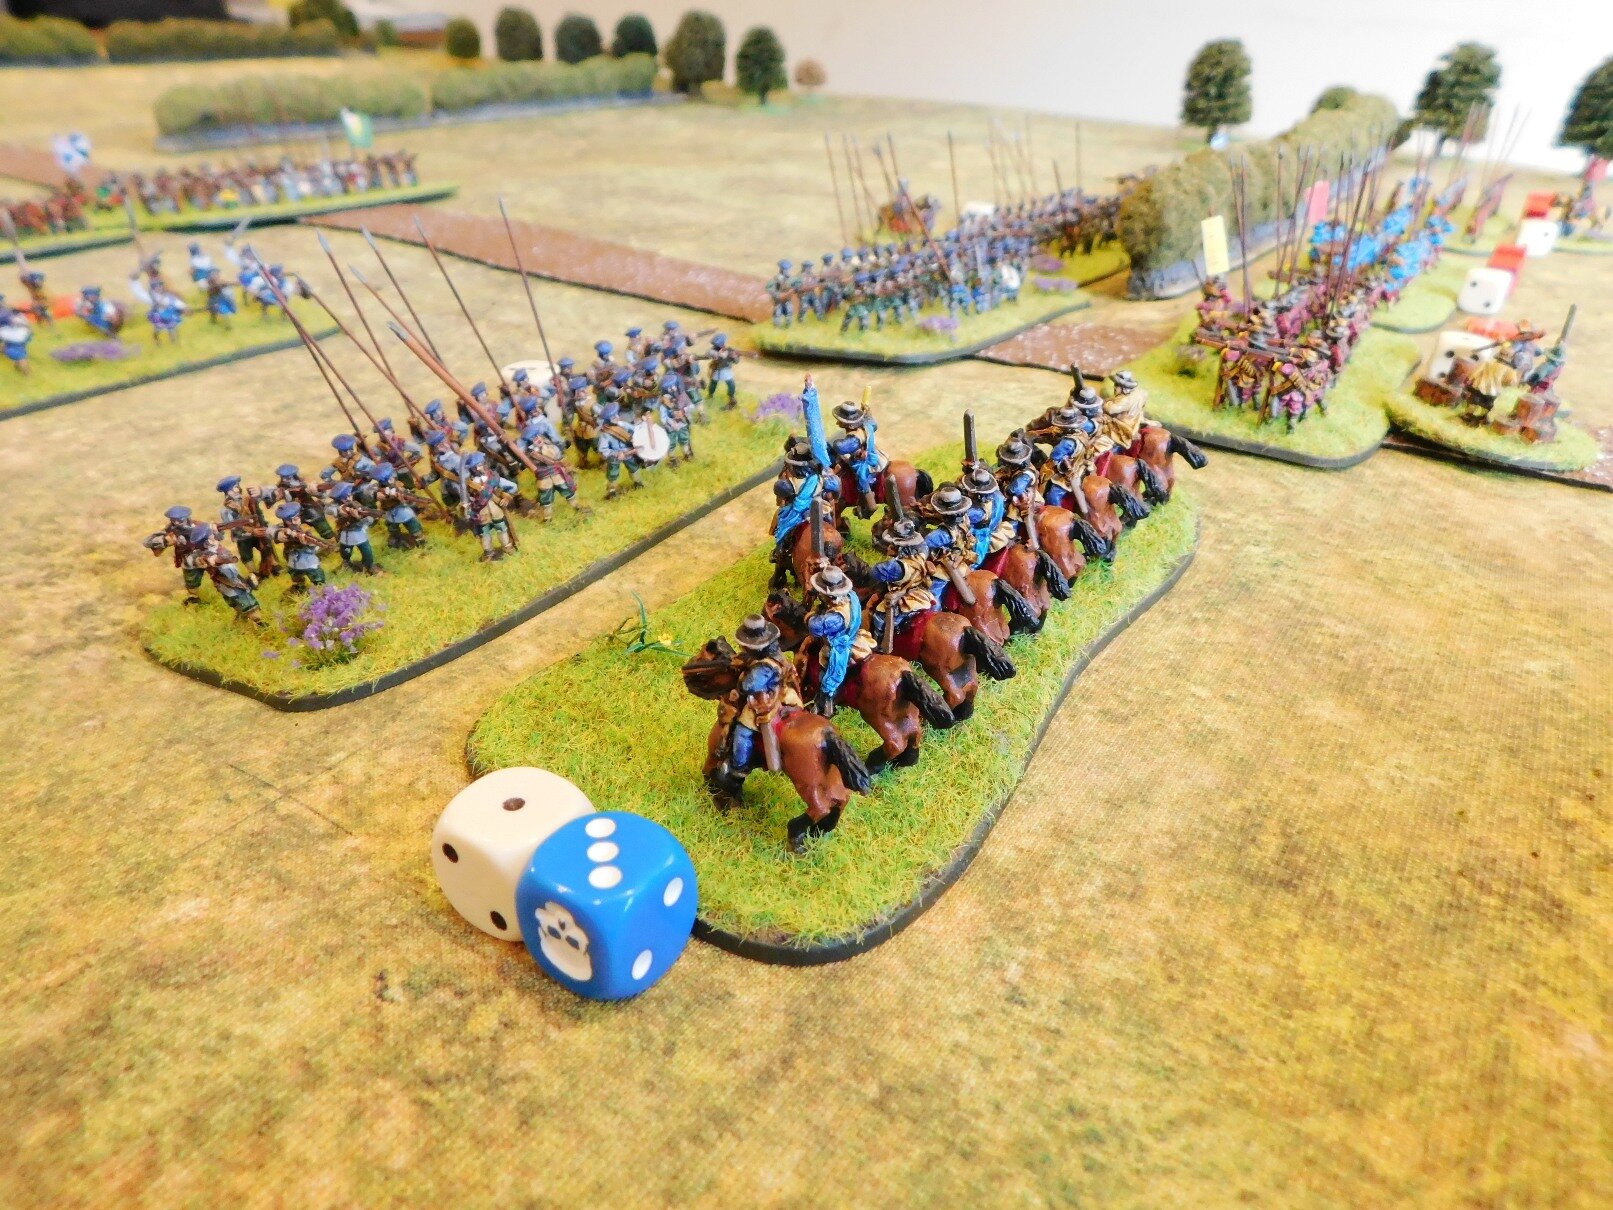
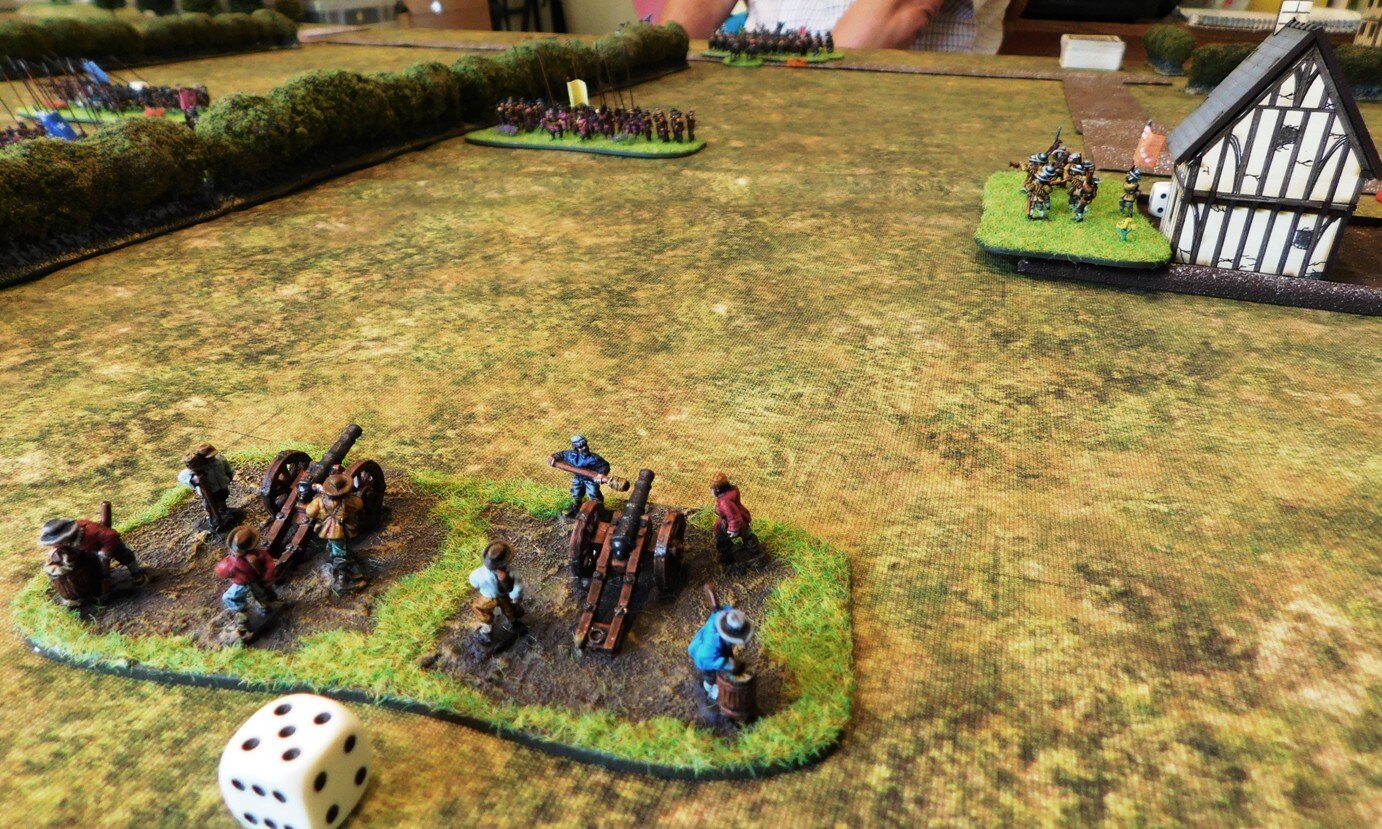
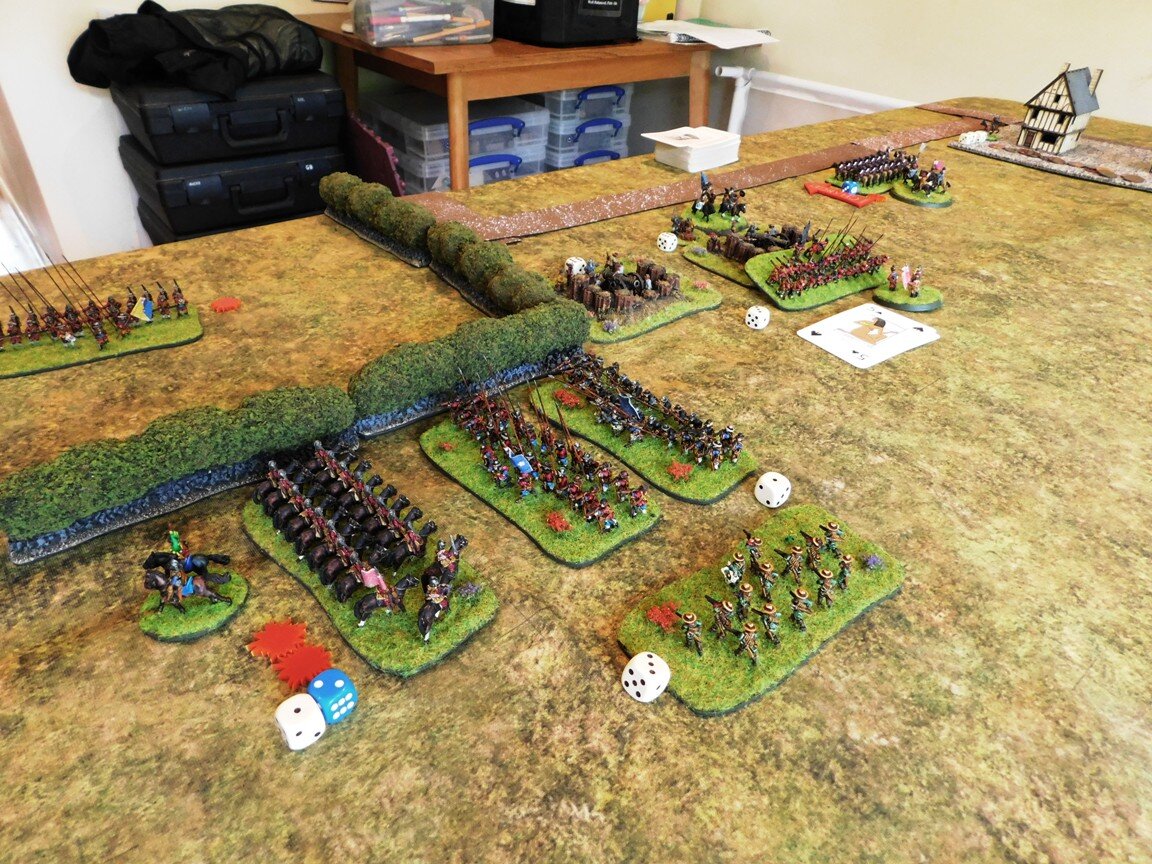
One unit of Highlanders crumbled and fled, leaving a gap through which one unit of Dutch horse could pour. The enemy horse pursued for a bit, then rallied and headed into the big open space behind my centre. All that was in front of them was my guns, and although I managed to disorder the horse and wound the General with them with some startlingly accurate artillery fire, I was soon overrun.

Meanwhile, another of my Highlander units had gone, leaving the third in a dire situation.

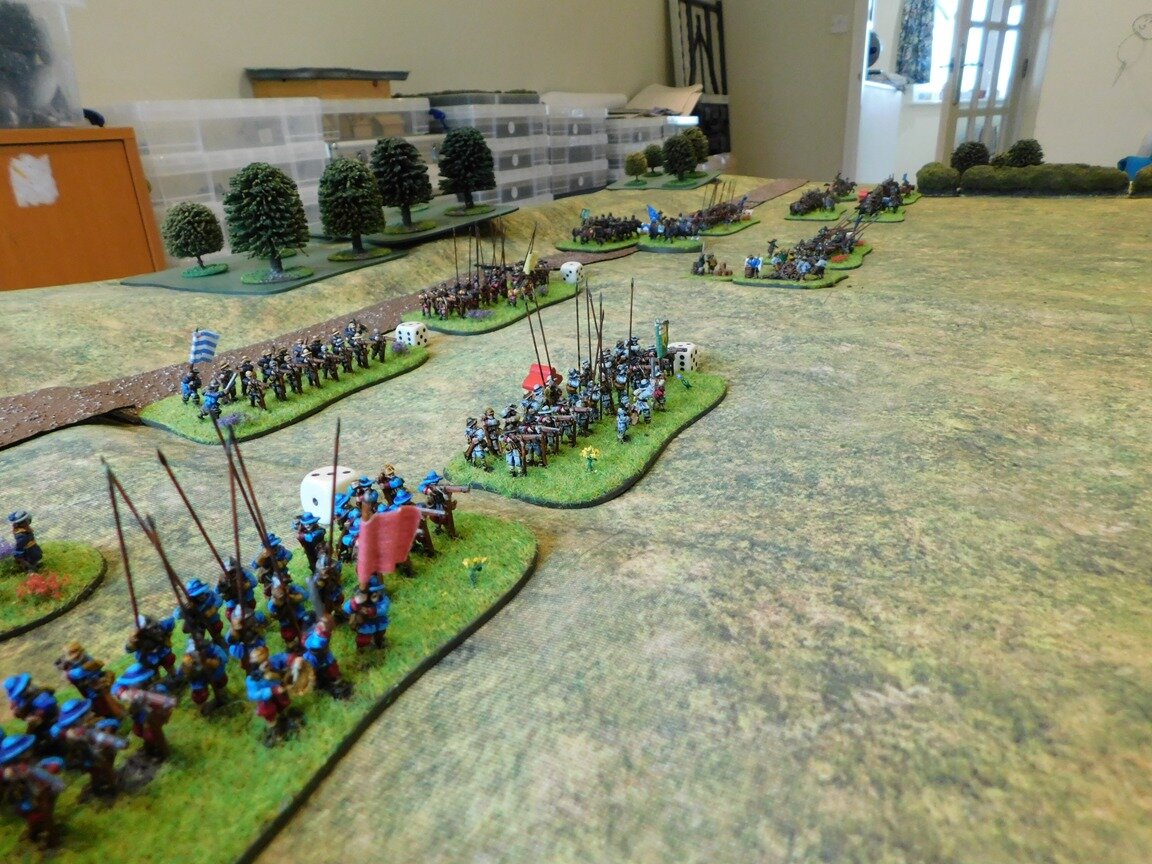
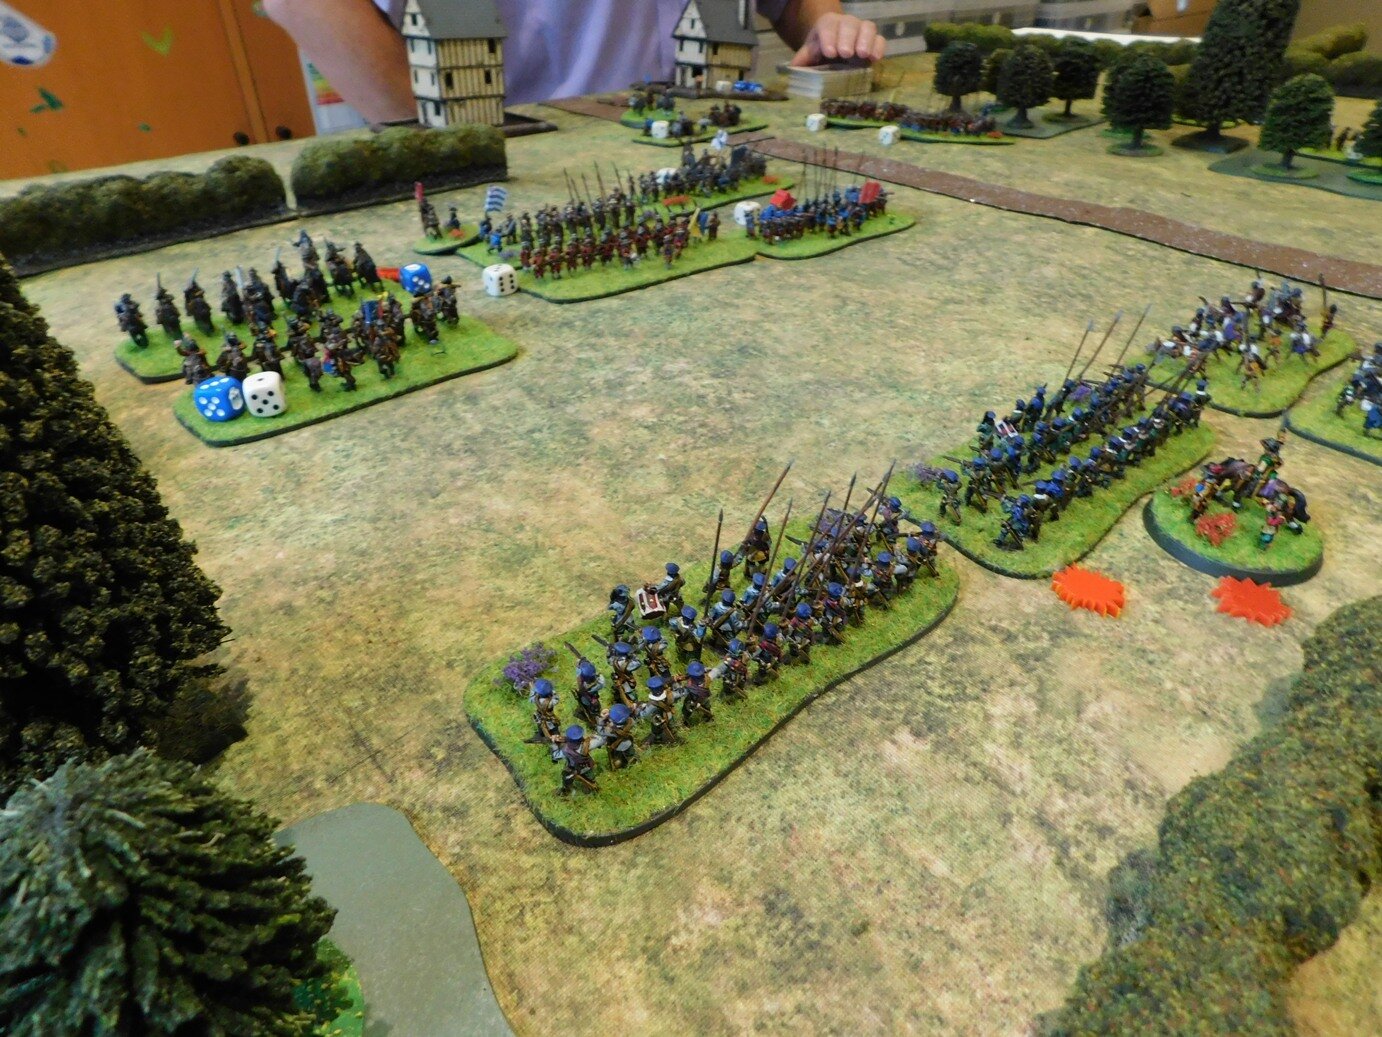
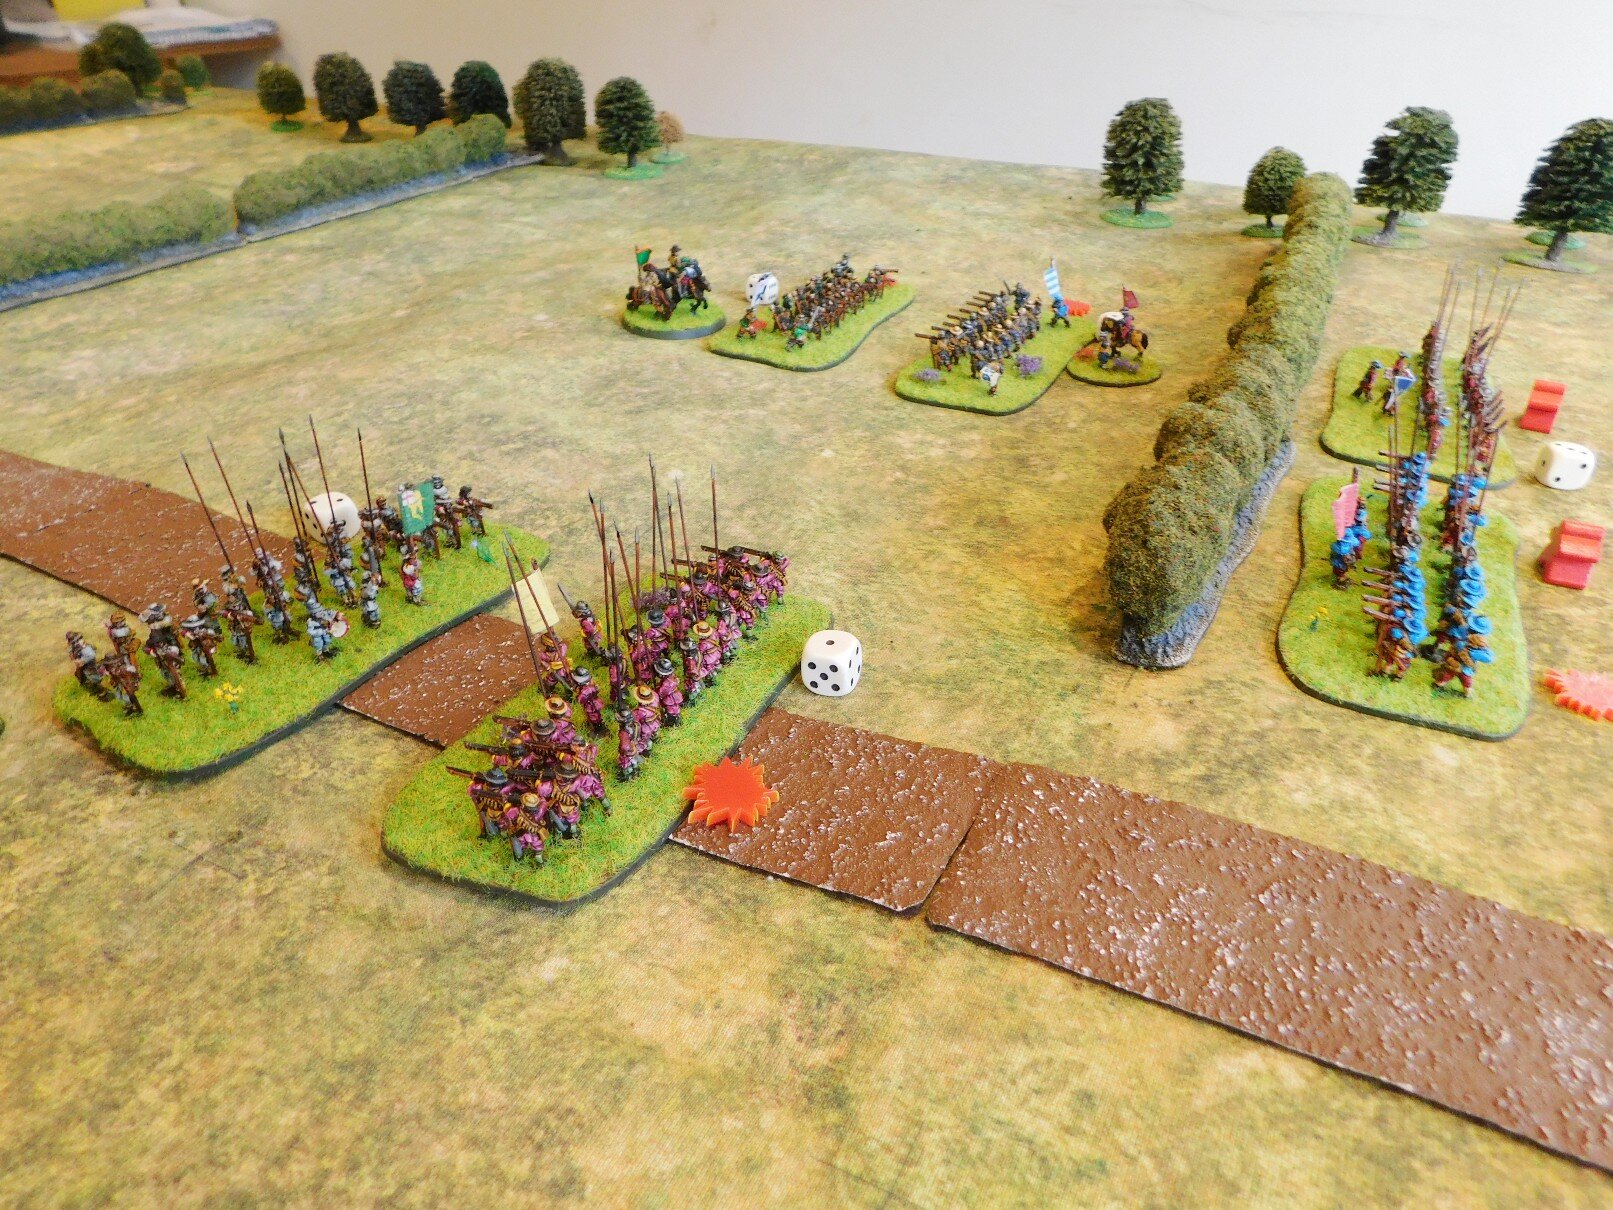
Meanwhile, the two centres were fighting it out but, despite having superior numbers, a bit of bad luck meant I was losing.

If my cavalry didn’t return soon, I was going to be out of victory medals!

End Game

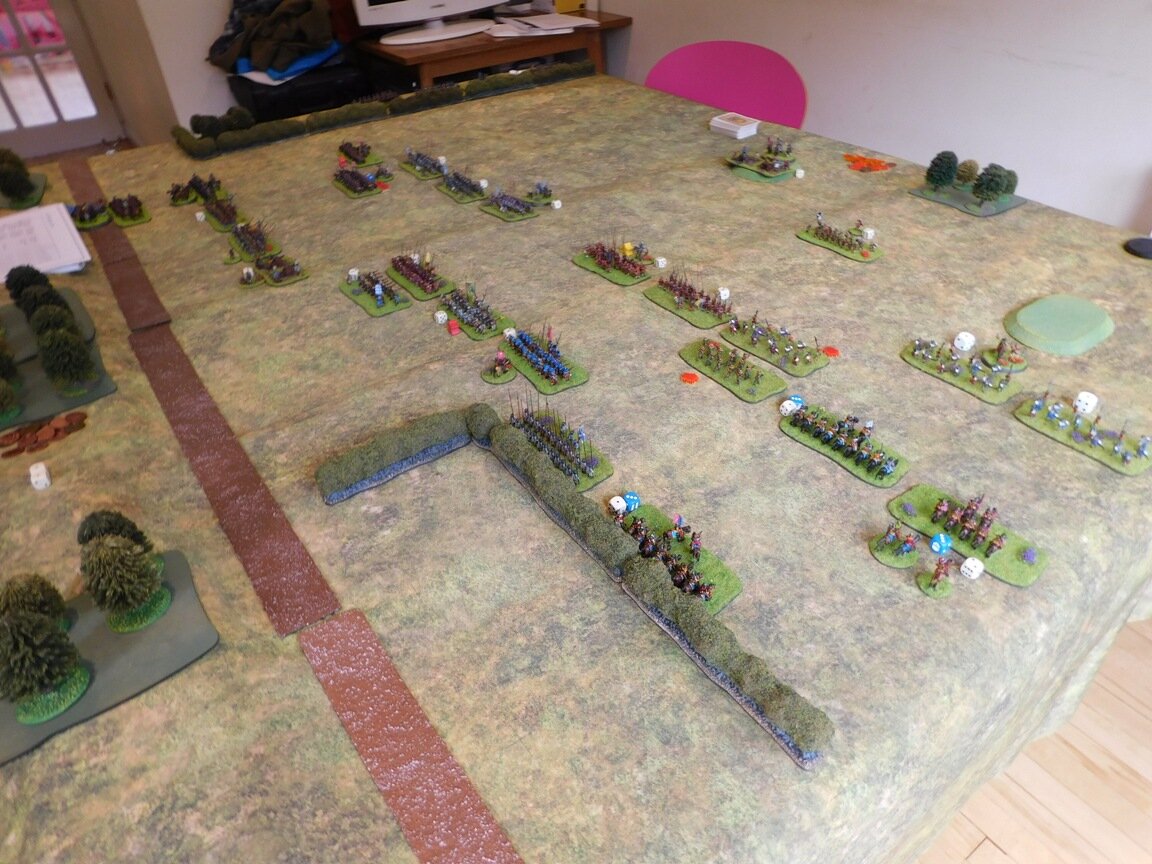
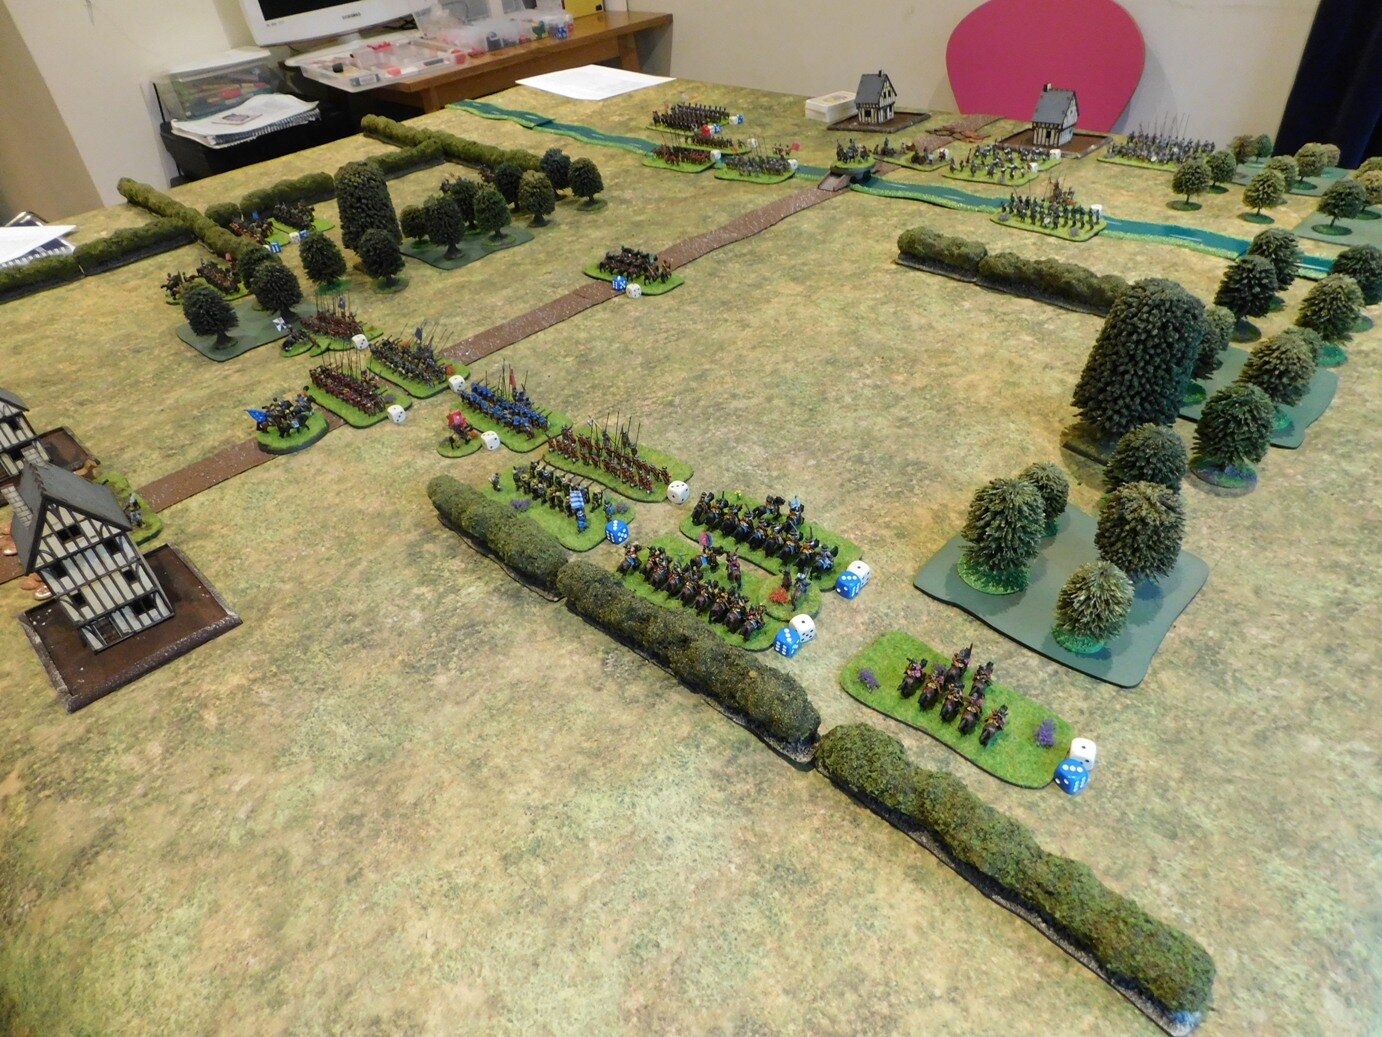
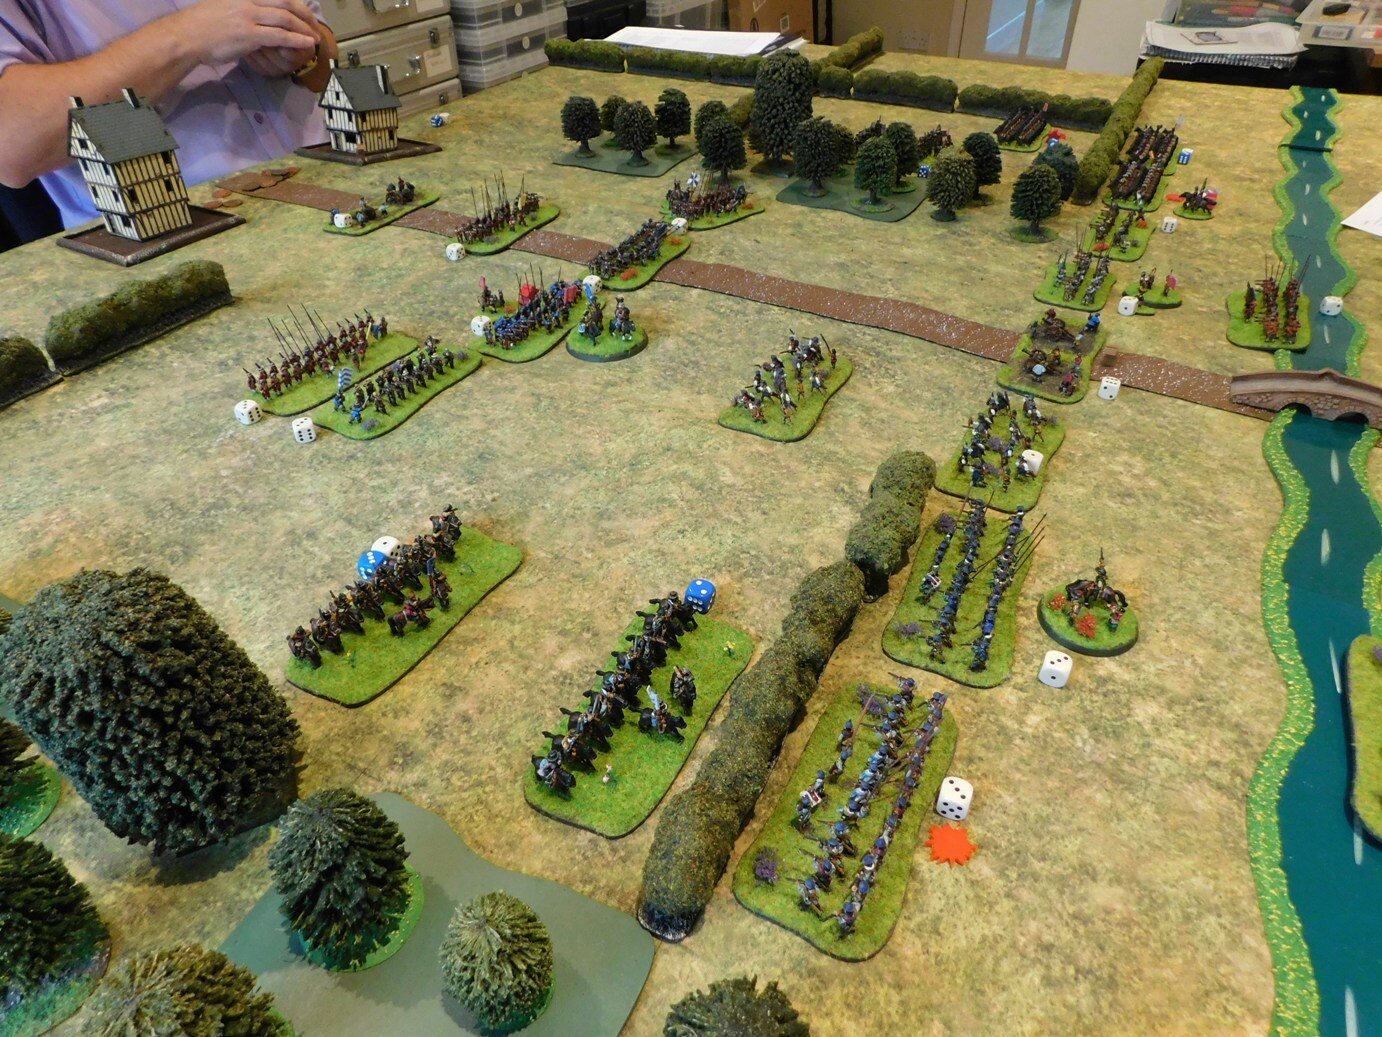
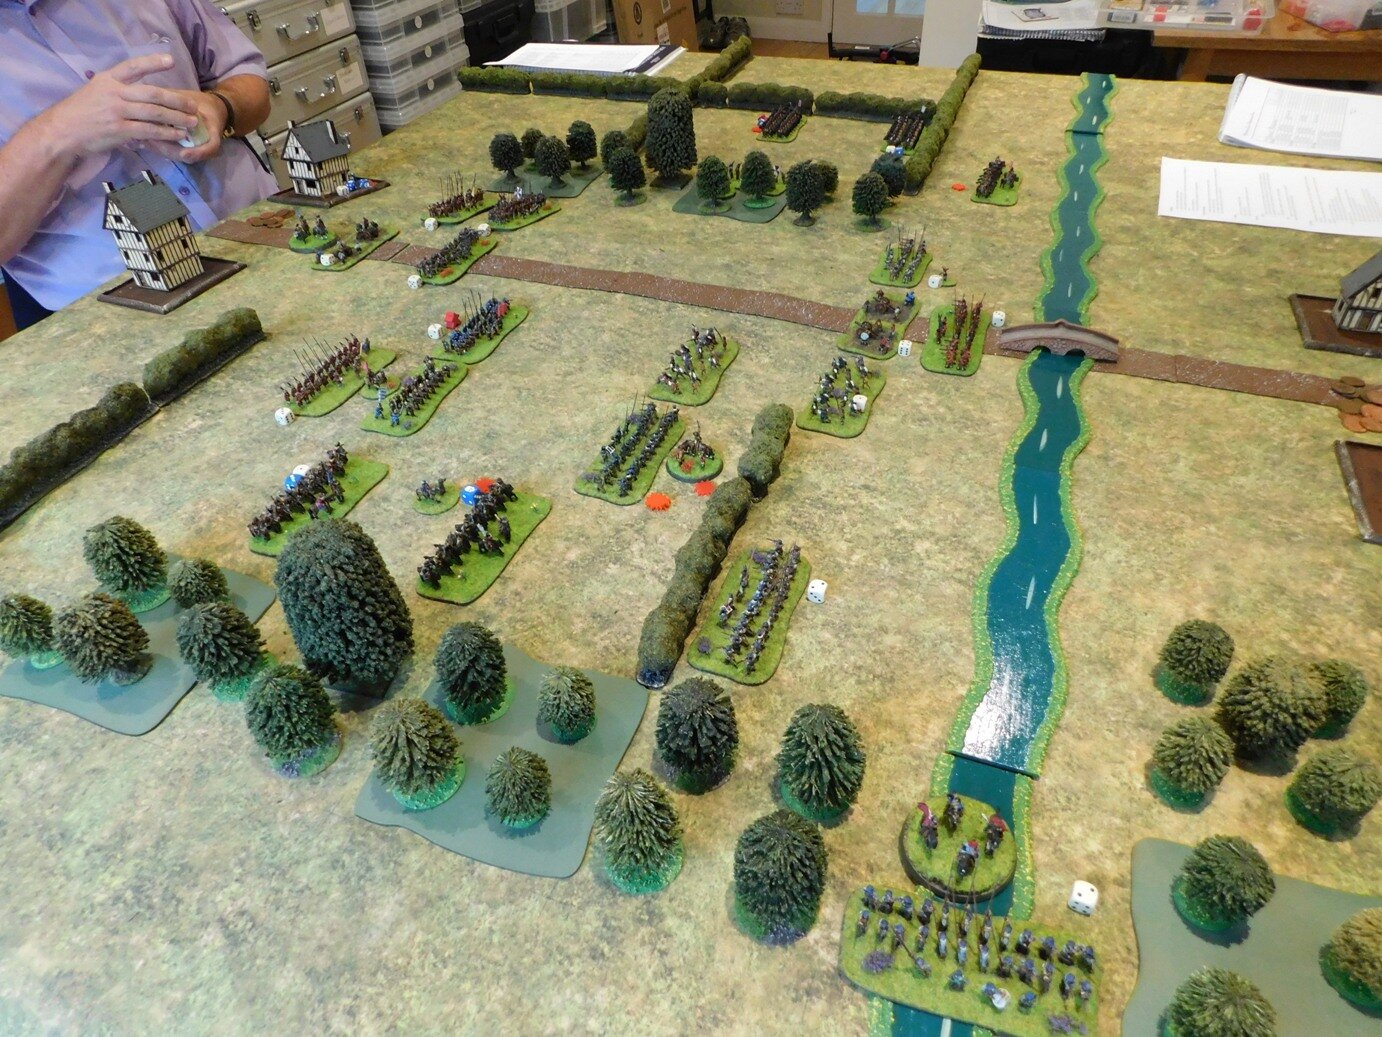
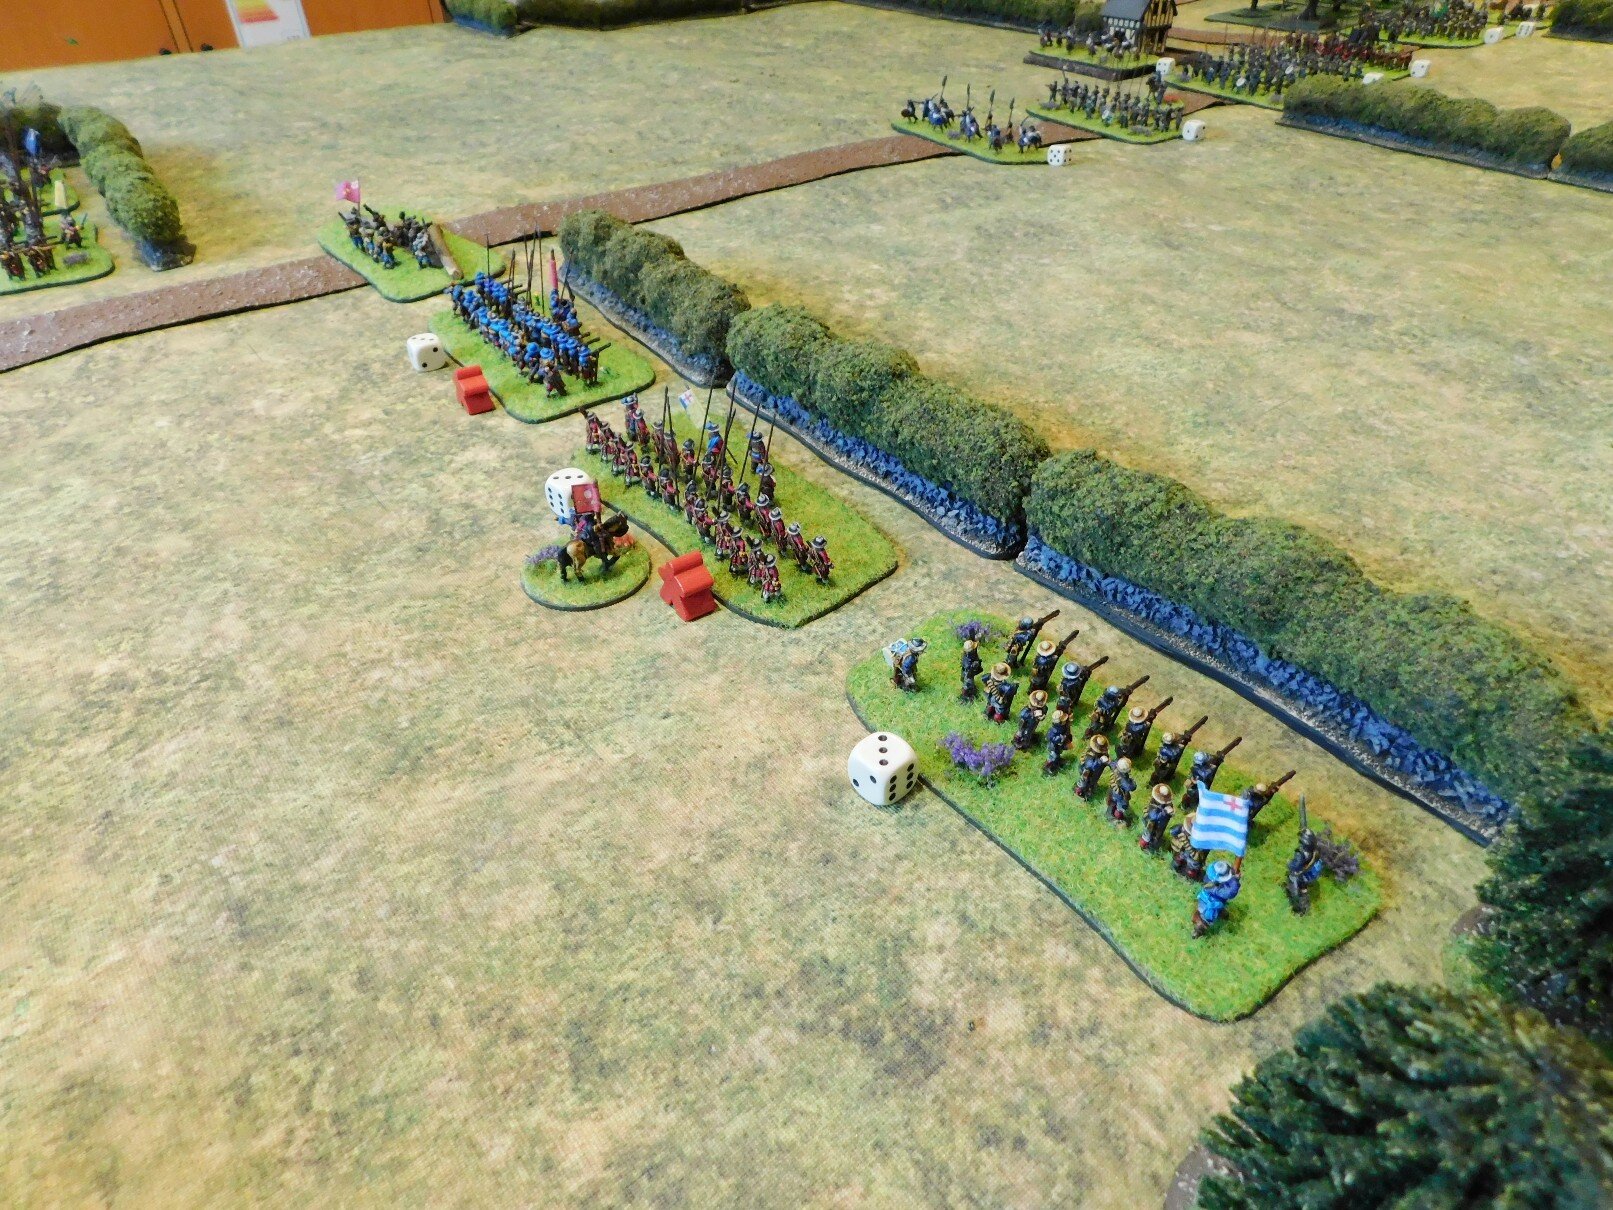
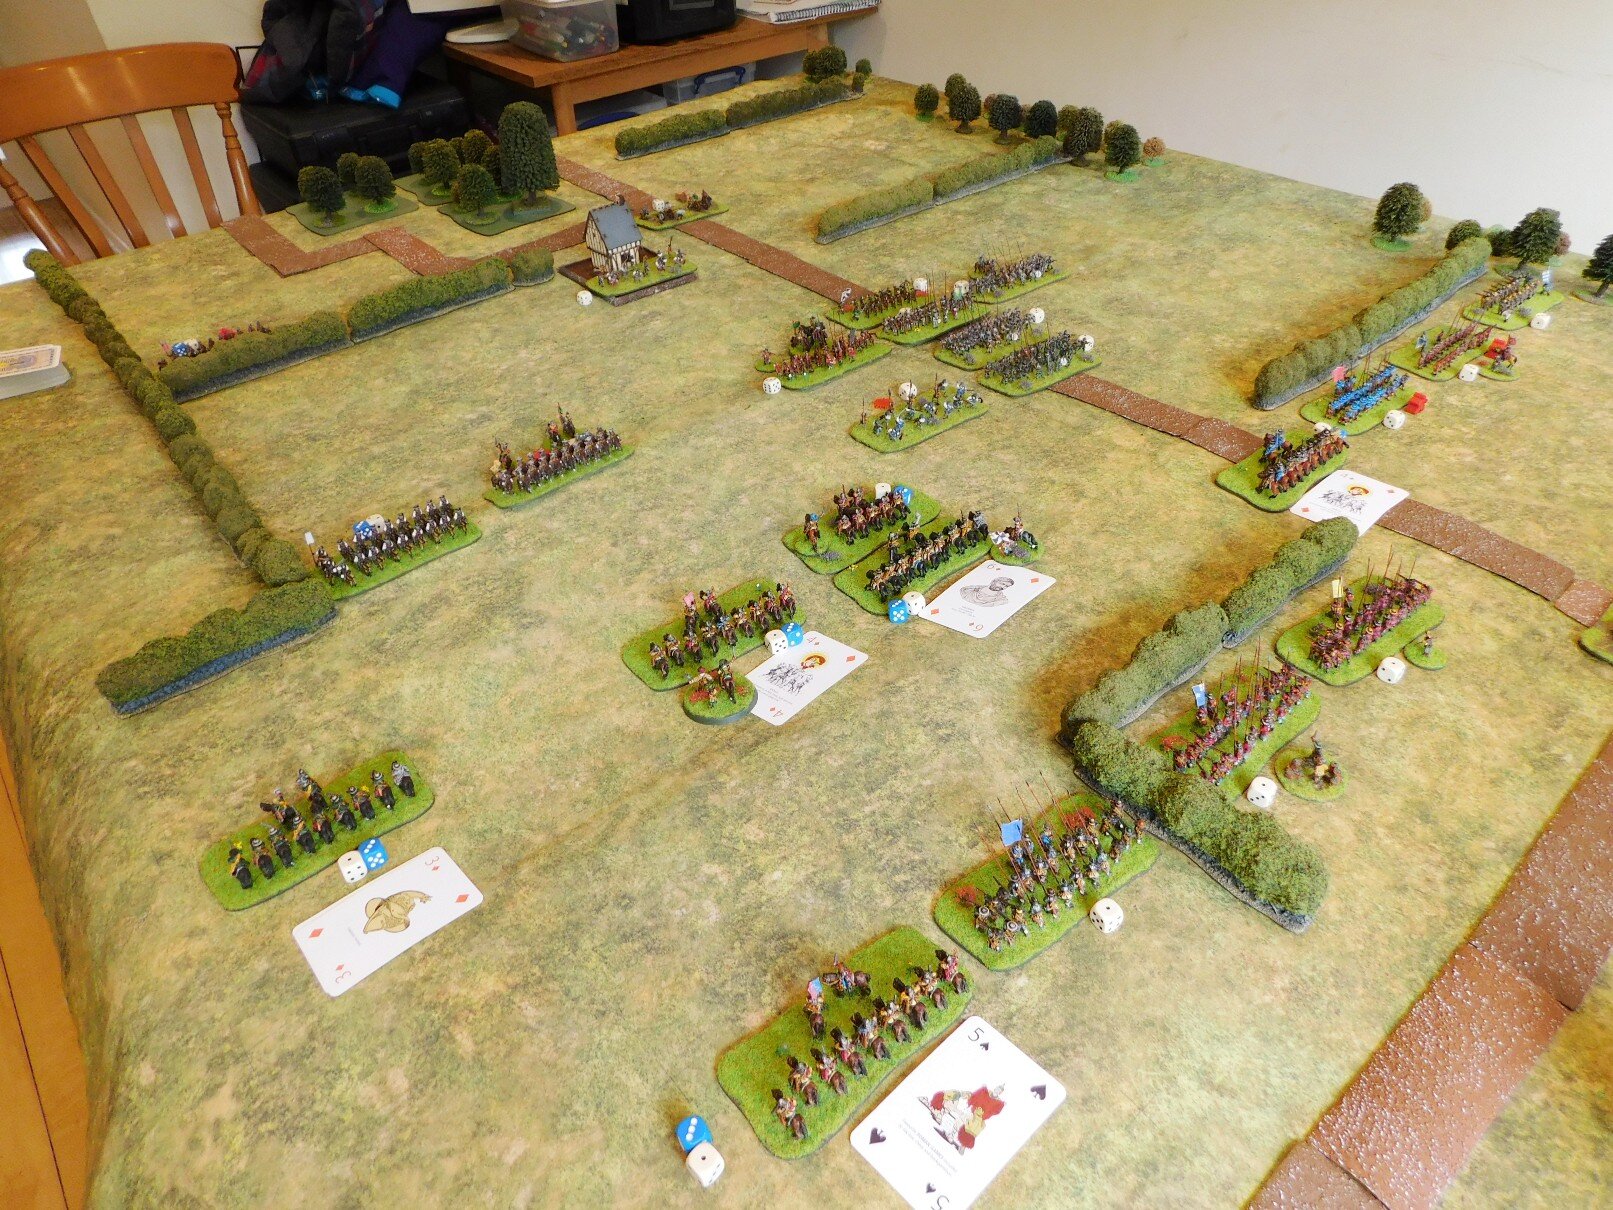
The left side of my centre was now beginning to crumble as well as his successful right wing started to curl in on me.

We were both down to a handful of victory medals, with enough units at double-disorder to settle the matter one way or the other if they broke.

My pistolier horse quite their pursuit and crashed into the left side of the enemy battalia in the right hand building. That pike unit broke, and the advantage was momentarily mine, but then my pike-only unit in the centre of the field (bottom left in the pic above) went, and we were evens again.

It was down to whoever lost the next unit and, finally, my last unit of Highlanders could take no more: they had been fighting front and flank for three turns now, somehow hanging on…and that was the last of my coins gone!

The day was lost: but it had been an epic battle that, once again, had come down to a could-go-either-way climax.

Afterword

My big mistake was to let my Highlanders get into combat with Dutch horse: I should have retreated to cover if I could. That would have meant I went into the more successful clashes on the right and centre without having haemorrhaged victory coins on the left.

A great game, however, whatever the result.

FK&P AAR: Return to Widbrooke Common

This being the second game in my latest run-through of Marlowe to Maidenhythe, my just-published scenario pack for For King & Parliament.

I had lost the first game quite badly (down ten victory medals) so was keen that this one went my way. The scenario is an encounter battle, with the Parliamentarians (played by Peter, boo, hiss!) facing the Royalists (played by me, huzzah!) across Widbrooke and Battlemead Commons: the open land between Cookham and Maidenhythe down near the river.

Roundheads to the left, skulking in the hedgerows!

The Royalists face a couple of problems. Number one, the enemy has hedges to hide behind meaning that if they didn’t attack I would have to assault troops in cover with an even number of points; and number two, my main infantry brigade is all untried, meaning the danger of disorder in any first clash is high.

On the other hand, my opponent, Peter, was absolutely paranoid about the large numbers of “Swedish” horse that I was fielding. He was convinced that they would make mincemeat of his “Dutch” horse (a fair assumption, but one that had been firmly shown not to be a surety in our first game last week*) to the point that I am fairly certain that he had lain awake at night moaning “the Swedes, the Swedes: what do I do about the Swedes”!

This worry would actually be the major factor that decided the outcome of the game.

*Dutch horse fight deep and slow, Swedish horse fight fast and thin. They tend to lap around the flanks of Dutch horse and thus get a substantial advantage in an initial melee.

The Battle Begins

I opened the proceedings by sweeping forward on either wing with, you guessed it, my Swedish horse. My infantry I advanced cautiously in the centre.

Peter replied by opening fire with his artillery, which actually did me a favour, as the units targeted had to check for disorder due to their untried status: which both failed, but so early on in the game that I had the chance to re-order them before any enemy was encountered. My men had now had their first taste of battle and survived unscathed: they would act normally from now on.

As my Swedish horse on my left approached his Dutch horse, they retreated behind the hedgerows to their rear. This suited me just fine as Dutch horse, despite their deficiencies, are worth more points that Swedish horse (they are strong against almost everything else) so I was happy to have his cavalry bottled up in a corner ‘guarded’ by units worth half the cost.

The Roundhead Dutch horse bottled up in one corner by their own fear of my Swedish horse

Meanwhile on my Right

Meanwhile on my right, my other brigade of Swedish horse was attempting to turn the Parliamentarian flank.

This looked difficult to do at first, as there were a couple of infantry battalia there who turned to face me, but my infantry were coming forward as well, meaning that the Roundhead foot would potentially have to fight in two directions at once.

Scene from behind the Parliamentarian lines. Units 9, 11 and 12 are about to retreat to their right, leaving my horse free to curl in from the flank

The Roundheads attempted to consolidate their position by pulling back and to the right as much as possible, but this manoeuvre, whilst sensible in some ways, let me bring my cavalry around in a proper outflanking movement.

Once my cavalry were around his flank, with my infantry coming forward, the Parliamentarians were in some difficulties. I used a battalia of infantry to clear his guns (by this time out of ammunition) and then sent them in through the gap opened up to attack the right hand side (from my point of view) of his line.

A bit of bad luck saw me lose the battalia, so I was forced to commit my reserve (my commanding general’s Cuirassier bodyguard) into the attack, but by this time my cavalry were in position for their flank attack.

The Royalist cavalry are round the flank!

With commanded shot to their front and Swedish horse to their flank, the grey-suited Roundhead battalia quickly crumbled, exposing the flank of the untried infantry battalia next to them.

This followed suit, and the rest of his line quickly followed them off the table: pinned from the front and rolled up from the right.

The Roundhead cavalry were, eventually, thrown forward but, by this time, it was too late to have any real effect: the day was mine.

Aftermath

A solid victory that netted me 10 victory medals (I had lost a couple of units early on) and evened up the campaign to date.

Next we will fight for Pinkneys Court, but here are some more pictures of today’s encounter:

FK&P AAR: Attack on Marlowe Again

One of my regular To The Strongest Ancients opponents wanted a go at For King & Parliament, so I suggested we play through the new Marlowe to Maidenhythe campaign.

I have recently been playing the Parliamentarians a lot, so we agreed that I would play the Royalists, and he would play the Roundheads. With that decided, it was on to scenario #01: The Attack on Marlowe.

The battlefield from the Royalist side. We were playing by Zoom.

This first, introductory, scenario is quite small (only 90 points per side) and features a Royalist attack on Parliamentarian forces drawn up waiting for them.

My plan was simple: use my superior horse to dispose of his cavalry, and then harry his flanks as my infantry took the centre.

Well, that was the plan…but it didn’t work. Despite the fact that my horse were fighting in the superior “Swedish” style and his were fighting in the old-fashioned “Dutch” style, my cavalry on my right flank were swept from the field!

The battle has begun: the field from the Parliamentarian side. Note the unit markers used to help my opponent keep track of his troops over Zoom.

Worse than that, on my left I manoeuvred my two units of cavalry to face and flank one of his pike units only to fall victim to some amazing shooting from both the unit and its accompanying light gun.

The opening stages of the game therefore left me down five units!

Although the outcome was now something of a foregone conclusion, I had no choice but to battle on: each game in the campaign is scored on how many victory medals the winner had left at the end of the game, so although I was fairly sure I was now going to lose, I needed to make it as painful as possible for my opponent to finish me off!

“‘Ware Horse to our right!”

Unfortunately this proved no very painful at all!

As my line moved forward, the Roundhead Dutch horse returned from having disposed of my cavalry and lined up to roll up my main battle line (as shown in the pic above).

I committed my reserve battalia to stopping them, but they were soon overwhelmed by a combination of infantry and cavalry attacks. I managed to blow away a couple of enemy Forlorn Hope units away, but soon my last victory medal was gone and I had suffered a pretty devastating defeat: down 10 victory medals after only the first game!

Revenge had better be mine in Game 2!

ECW: The Mob!

Finally managed to actually finish some painting: four bases of Rabble for my ECW armies and a coach & horses model to provide an objective or battlefield colour.

Let’s start with the coach:

This an Essex Miniatures model, with outriders from Peter Pig. It is a lovely, chunky bit of kit, and not too complicated to build.

That’s not to say it was easy (it wasn’t, and there was a lot of Superglue involved, most of which ended up on my fingers) but it was easier than the Magister Militum version that I bought at the same time. That arrived with no wheels, and had so many teeny-tiny fiddly bits that I eventually gave up trying to build it at all!

The problem for both is the way that the coach part is supposed to “float” above the carriage bit, hanging from the suspension springs that attach to uprights from the carriage. If you look at the picture above, that odd bit of blue above the rear wheels (don’t understand how that ended up there: there’s no blue on the model!) is where the suspension spring attaches to the upright. On this model, the suspension springs are very cleverly part of the main coach body, bending out from it at whatever angle you need them to. On the MM version, you had to build each part bit by bit i.e. tiny bit attached to tiny bit attached to tiny bit. I’m sure a better modeler than I would have coped, but it was too much for me.

As you’ll see, I based the model to fit with how I’m going to use it when playing the grid-based For King & Parliament rules. The team is separate from the coach, so when the coach is in a square on its own or with nothing in front of it, I shall put the team on the table; and if there’s no room, I won’t. It seems a bit odd, but works without having to use one of my double-deep bases to fit the coach and team on in one, which would then prevent me putting another unit into the same square.

The Mob

You need some Rabble bases for three of the scenarios in my newly published Marlowe to Maidenhead ECW scenario book, so I thought that I’d better finish the ones that I’ve had part-finished for some time.

The figures are a real mixture. There are all the civilian figures I could find from Magister Militum’s Hallmark range; there are the Peter Pig clubmen and peasants; there are the Peter Pig plague doctors (I had to find a use for them somehow!) and then there are a few carefully chosen “specials” from Minifigs’ ECW range. All in all, a wide variety of poses that look properly mob-like.

I always think that it’s difficult to get a good looking Rabble base, and I’m still sure of that now. These are okay, and will do, but they don’t look at good as, say, the equally-mob-like Highlanders that I painted for my Scottish ECW army. On reflection, rather than going for a wide variety of colours, I should have decided on a very simple colour scheme and used that for all the figures, making allowances only for what they are wearing.

Well, looking at them again in the picture above, maybe they don’t look as bad as I thought. Let me know what you think via the comments.

Oh, and that is a single Minifigs Highlander out front: a Gallant Gentleman for the Scots.

FK&P AAR: Return to Cookham Moor

After last week’s defeat, there was nothing for it but to play the next game in the campaign: Cookham Moor.

The Moor is a fun battle where both sides start the game facing each other across a stretch of open land:

My right flank consisted of a brigade of Dutch horse. They are good, solid troops, but the Royalists in front of them were in Swedish formation: more agile and, most importantly, able to counter-charge. That has led to defeat in previous battles, so I decided to try something new: I would advance up to the hedgerow and wait for them to come to me. The Commanded Shot from the nearest infantry brigade would move slightly forward into the woods, threatening the flank of any Royalist advance. At the same time, the guns would deploy and the Scots on my left flank would move up to the hedgerow in front of them. For once, the cards fell my way:

The Royalists advanced forward across their line, and soon the battlefield looked like this:

DSCN2349.JPG

The Royalists then moved their central infantry to their right to face up against the Scots, uncovering the cavalry that had moved over from the right. This cavalry then charged straight forward: right at the Parliamentarian guns just over the bridge!

This was a disaster, as the Royalist cavalry swept the guns from the field, then heading off table in pursuit. There was now a massive hole in my line.

A general melee then broke out across the entire line. My Scottish pikemen did well, forcing the Royalist Commanded Shot to intervene; but my Highlanders, as usual, proved ineffectually weak.

With the infantry locked into combat, the focus changed to the cavalry clash on the right.

Here, my decision to hold the hedgerow proved a very good one, as after a couple of turns all his cavalry was dispersed.

This made up for the disaster in my centre, but both sides were now looking very battered indeed: so battered, in fact, that whichever side next lost a unit would lose the game.

If that was not exciting enough, on my far right the Royalist CinC at the head of his small-unit bodyguard cuirassiers was faced off against my CinC at the head of some Dutch horse!

It all came down to this combat. Could I do the single hit I needed to break the bodyguard and win the game?

Well, you can see from the picture above that I didn’t manage to hit the enemy in my turn. No matter, I thought, he needs two hits on me to break me.

Unbelievably, however, the two hits were done, my cavalry broke, leaving Sir Christopher all on his tod! I had lost the combat and lost the battle!

Aftermath

Phew! What a game!

I had managed to retrieve the situation in the centre and everything had all come down to one final combat that I had really lost on the luck of the cards…but at least I had played the Dutch horse well!

FK&P AAR: Return to Whyteladyes Lane

I had another play through of the Whyteladyes Lane scenario last weekend, hoping to put my previous defeat (to John) behind me as I sent Bevan’s Royalists running from the field. As is now usual, the game was played over Zoom, with markers showing the number of each unit so that Bevan could more easily work out which of his troops were where.

The game is a tough one for the Roundheads, as they begin the game in an extended column against ready-for-them Cavaliers in a more sensible formation.

Last time, I had pushed forward right from the start, and been chewed up piecemeal. This time I decided that I would form approximately on the head of my column and work from there.

This definitely seemed to work much better, and although I still had one unit (the one at the head of the column) isolated, I now had a bit of a battle line formed to hold the front whilst the rest of my troops deployed. As you can see in the photo below, the Royalists spotted my isolated Highlanders and charged them with a small unit of “bodyguard” Cuirassiers.

All my cavalry were on my right flank, so I advanced them forward to block his cavalry moving down behind a hedge and into my rear.

Usually I charge my Dutch-style horse in as soon as possible but, this time, knowing that the enemy Swedish-style horse would then take the initiative through a counter-charge (something my more ponderous units cannot do) I decided to employ more historical tactics and halt just beyond charge range and discharge my pistols into the advancing enemy.

This worked a treat, as you’ll see in the picture below. All three units to the right are disordered, but it will only take one more hit to break either of the enemy horse units, whereas my greater numbers mean that I can survive another two hits.

All now seemed to be going well, and even Bevan confessed later that he felt that, at this stage, I had the advantage. That was, unfortunately, about to change!

If you look at the picture, below, you’ll see that out at the top of the screen two Royalist units are overlapping my line. I should have taken steps to deal with these immediately, probably by withdrawing back over the hedge or by moving sideways…but I didn’t, not seeing how much of a threat these would turn out to be.

This was a bad mistake, compounded by my response: I thought I move forwards out of danger by breaking through the enemy line.

This is the situation (below) a few minutes later: the enemy unit of pikemen dressed in red in the centre of the photo have swept in from the left and destroyed two of my pike units.

My unit dressed in blue managed to get onto their flank, but the cards didn’t fall for me, and the Royalists would go on to destroy the Highlanders as well. That was nine Victory Medals gone in one fell swoop!

To add insult to injury, on the other side of the field my Dutch horse had now been forced into engaging two battalia of enemy pike: not something that horse enjoy doing! The game continued for another couple of turns, but the writing was on the wall. I eventually had no choice except to order a retreat.

Afterword

I came close this time, so I think when I replay this scenario again I will try pulling back my column and forming on the hedge line behind the first couple of battalia.

Whatever the result, another great game of FK&P: I shall just have to get my revenge at Cookham Moor this afternoon!

ECW Limbers

After playing quite a few games of For King & Parliament, I realised that I could really do with a couple of bases to represent limbered, and therefore still capable of moving, artillery bases.

For my 19thC and WW2 armies, I don’t usually bother with anything fancy: just a limber and team that I can place behind the deployed gun model, but the way that I have based my ECW troops in elements required a little more…especially as limbered guns are long as opposed to wide.

As you can see from the picture, above, I decided to use my special Warbases double-deep vehicle bases and create mini vignettes: each of the two artillery pieces that will deploy supported by a couple of ammo wagons.

The guns, ammo wagons, carters and teams all came from the Hallmark range via Magister Militum, with a few spare Peter Pig artillerymen scattered around the base to dress it up a bit. The command figures are from Hallmark as well.

The size of the base makes a really substantial feature for the table, and suits how slow artillery in FK&P is to get into position and deploy.

Can’t wait to try them out, but that will have to wait until after lockdown…!

FK&P AAR: Cock Marsh

After the battle for Cookham Moor, the Parliamentarians have retreated in some disarray: falling back to a position where their rear and one flank is protected by the river Thames.

This protection, however, forms two sides of a potential cage, so the Royalists have hurried forward to do battle again, knowing that if the Roundheads break, there is nowhere, at least on two sides, for them to run.

Could this finally be the decisive battle that both sides have been seeking?

The Field of Battle

The action takes place on Cock Marsh: a bleak, wind-swept area of open ground between Winter Hill and the Thames. The lower slope of Winter Hill borders the south side of the battlefield. The north and part of the east side of the battlefield are bordered by the Thames i.e. impassable terrain. Any unit that is forced off-table into the Thames is lost.

The main part of the tabletop consists of moorland separated by hedgerows and the odd patch of trees. All hedgerows count as linear rough terrain. All wooded squares count as rough terrain. There are two Iron Age burial mounds on the Parliamentarian side of the field.

The Game

Postscript

I’d like to say that my (extremely heavy) defeat was all my fault, but that would be to underplay John’s skill at exploiting my errors.

I am now writing out one hundred times "Do not throw away your cavalry on a frontal charge against even or worse odds” whilst Sit Christopher and his surviving men drag themselves out of the water on the far side of the river!

A great game of For King & Parliament despite my defeat: 150 points a side played out in just over 90 minutes.

Robert Avery

More Dutch Horse

This weekend I finally had the chance to get back to the painting table and polish off another unit of “Dutch” horse for my 15mm ECW collection.

The figures are Hallmark from Magister Militum, painted with GW Contrast Paints.

As with all my ECW figures, I mounted them as a For King & Parliament element on a Warbases Vehicle Base. They are lovely and chunky to move around the tabletop, but I am somewhat terrified of dropping one!

Whilst I was waiting for the paint to dry between colours on the above, I also managed to paint a command base for my Scots Covenantor force. Here I used the Peter Pig special Scots pack of ensign, preacher and dog and a Hallmark gentleman command figure.

I must remember to brush off the spider’s web before photographing!

These came out quite well, and I do love the preacher. One thing I must remember to do, however, is to brush off the bits of errant spider’s web that the varnish picks up when I’m spraying in the garage before photographing the figures. It comes off easily, but you can barely see it in normal light…or at least that’s my excuse.

Onto some pike-only units now.

FK&P AAR: Cookham Moor

After the encounter at Whyteladyes Lane, the Royalists retreated to the small hamlet of Cookham. The Parliamentarians, however, rather than withdrawing to regroup, have followed them.

Cookham, a pleasant place mostly home to farm labourers, is split by the Moor: an open piece of land crossed one way by a small stream, Strand Water, and the other way by Dean Lane, now more of a road.

Unwilling to surrender the Moor, “Little John” Boulters leads his men forwards to the eastern edge of the open ground only to see Sir Christopher and his men just arriving on the other side. The stage is set for another epic For King & Parliament clash!

And that’s where I ran out of coins!

Snatching Defeat…

Well that was a game that was really going my way when a sudden paralysis amongst my troops caused by the loss of my Colonel of Cavalerie and Sir Kavan’s defection (I can see no other explanation as to why Aces suddenly appeared all over his brigade!) meant that the Roylaists were given a chance to rally, catch their breath, and then move forward and concenrate their numbers with devastating effect.

It didn’t help that my CinC, Sir Christopher, led a sorely-needed Scots mercenary battalia on a complete Jeb Stuart-like perambulation up the wrong side of the left hand wood, effectively taking them out of the battle at the moment of decision. That was deffo my fault though!

A great game that saw John keeping his nerve as I scored early successes, pulling back and then seeing an opportunity and taking full advantage. Just to emphasise the point: at one stage of the game (after the early clashes) I was something like eight coins in front!

Time for the Parliamentarians to retreat and regroup!

Robert Avery

FK&P AAR: Whyteladyes Lane

Time for the next encounter in my North Wessex For King & Parliament English Civil War campaign.

After the battle just north of Bisham Abbey, Sir Christopher Grey has led his Parliamentarian army (reinforced with more Scots mercenaries) east in an attempt to loop around the Royalists whom, he believes, are regrouping before moving north on their existing axis of attack.

The Roundheads get as far as Cookham Dean before they realise that the Cavaliers have been tipped off and have managed to get a blocking force across the Parliamentarian line of advance.

Battle will once more be joined!

At this point the Parliamentarians finally ran out of coins and I was forced to admit defeat: a fairly crushing defeat!

Aftermath

It had been a great game, even if I had lost!

The truth was that I never really got the Parliamentary battle line properly sorted, which allowed the Royalists to defeat my brigades piecemeal. Annoying, as before the battle I’d specifically told John that I needed to avoid that happening!

Robert Avery

FK&P AAR: Bisham Abbey

Time for another go at For King & Parliament, and the fifth scenario in my North Wessex campaign: Bisham Abbey.

After the last clash at Burchett’s Green, both sides have withdrawn to regroup and reform.

With “Little John” Boulters remaining in command whilst his father still recovers from wounds received at Widbrooke Common, the Royalists are bolstered by the return of the troops from Maidenhythe, hitherto sequestered by the King in Oxford. The Roundheads also receive reinforcements in the shape of a brigade of mercenary Scots troops under Colonel Macintosh MacLeod, and Sir Christopher (overall commander) is finally persuaded to lead from the back rather than the front!

The Royalists are ready to move first: marching north towards Marlowe. The Parliamentarians are ready for them, however, blocking their path just north of Bisham Abbey, a monastery-turned-manor-house that sits on the banks of the Thames.

The table from the Parliamentarian side

The Sides

The Royalist army, ably commanded by my friend John, consisted of four brigades. On the right was Col. Stafferton’s brigade of horse (two units of Swedish horse); to their left was Col. Spencer’s brigade of foot (the Cookham Militia, three battalia); to their left was Col. Sir William Ray’s brigade of foot (two standard battalia - the Maidenhythe Foot - and the Oxford Musketeers, a commanded shot battalia); and finally, on the far left, was Gen. Derrick’s brigade of horse (three units of Swedish horse).

The Royalist commander ponders his plans

The Royalist commander ponders his plans

The Parliamentarians, with Yours Truly in command, consisted of only three brigades. The Cavalerie, on the right, were led by Col. Hurst, and consisted of three squadrons of Dutch horse. Next to them, in the centre, were Gen. Nelson’s three battalia of infantry supported by the guns of Littler’s Battery. Finally, on the left, were the three battalia of mercenary pike under Col. MacLeod. A Forlorn Hope was positioned in the small hamlet of Bisham, mid-way between the battle lines.

MacLeod’s Scots in the dawn light. Well, we started at 9am, which is pretty dawn-like for a Sunday!

MacLeod’s Scots in the dawn light. Well, we started at 9am, which is pretty dawn-like for a Sunday!

The Best Laid Plans…

My plan was to pivot on the mercenary Scots, sending my horse forward as quickly as possible to smash through his lighter Swedish-types and then curl around the rear of the Royalist army. I would give up the distant hedge on the left, but take the nearer hedge in the centre.

As this was only John’s second game of FK&P, his plan was to advance generally across his entire front and see what happened when the enemy was encountered!

The Game

The End

The Parliamentarian coup de grace was administered by Sunnybank’s commanded shot and the Scottish mercenaries. Between them they utterly destroyed the Royalist 2nd Foot Brigade (the Maidenhythe Foot and Oxford Musketeers) which, added to the coins lost when the Royalist horse and artillery evaporated under the tender ministrations of Grey’s Cavalerie, finally emptied the King’s coffers!

In the end, my plan had worked, albeit with several road bumps on the way. I lost three of my command stands, and would have been gradually overwhelmed if it hadn’t been for the extraordinary fight shown by the 3rd Grey’s Cavalerie (the only non-veteran unit in the brigade, obviously). They turned the tide of the battle, with the Scots then digging in their heels and refusing to be broken.

All in all, another great game of FK&P!

A Few Odds & Ends from the Painting Table

Very busy at work this last week, so only time to complete a few odds and ends for the two projects I’m currently working on: English Civil War and Marian Romans.

I always find that having two projects on the go at any one time is better than having just one. If, like I do, you only collect in one scale (15mm for me) I also find that it’s best to use different manufacturers as well: alleviates the boredom factor.

First up, a couple of command stands for my English Civil War armies. Here I’ve used a couple of gentleman officers from Hallmark (via Magister Militum) as a random Colonel-type, and then a couple of spare figures from Peter Pig - one command, one artilleryman - as a Colonel of artillery. The mini-gabions are Hama beads filled with basing material!

The Hallmark figures are really exquisite and, if you use Contrast Paints like I do, really easy to paint.

On top of the above, I’ve now painted up the five Hero figures I need for my Marian Roman army. Representing Heroes is always difficult, as you need a figure that stands out a bit and yet is not being used for the rest of the army.

What I chose to do was to add a set of Peter Pig Centurion figures to my Baueda Marian Roman army.

One of the great things about Peter Pig (in addition to the huge range and lovely, very paintable sculpts that they do) is that you can ask them to give you a custom built pack of just one sculpt. So here I looked at one of their mixed command packs, chose one figure, and had a pack of eight of just that figure sent to me. Very handy indeed.

FK&P AAR: Burchett's Green

I had a chance to get my new English Civil War siege gun bases onto the tabletop as I played out the latest scenario in my North Wessex campaign using the For King & Parliament campaign.

Both sides have withdrawn from the field of their last encounter at Pinkney’s Court, with the Royalists now looping round to try and outflank the Parliamentarians. As a desperate excuse to justify the use of siege artillery, the Royalists receive a couple of huge cannon as a gift from the King. Keen to try them out, they set them up across open fields and prepare to fire off a coupe of shots. As they do so, the Roundheads appear on the other side of the field and battle is joined.

Here’s what happened:

This was a tricky battle for the Royalists as they start the game in a very awkward position. In addition, their siege guns just couldn’t hit anything and, when they did, my units saved time and time again.

A workmanlike Parliamentarian victory.

FK&P AAR: Pinkney's Court Again

I’ve now had a chance to play the Pinkney’s Court scenario another three times.

The first game, versus Bevan, was a complete disaster. The more nimble Swedish-style Royalist cavalry sliced and diced their Parliamentarian opponents, destroying all three units for the loss of only one of their own. That meant that I had to divert troops to shore up the position, leaving me short of infantry (and victory coins!) for the clash on the other flank. A crushing defeat!

The other two games, against Kavan, however, went much better. The first was a close run thing, but I eventually prevailed. The second was a glorious, overwhelming victory caused, I hasten to add, by the most amazing run of luck at the cards. In each of the initial three clashes, I hit three times out of five: not bad when you’re needing an 8+ on a 1-10 evens chance. Much like my men in the game described above, Kavan’s troops never really recovered.

Here are some pictures of the game I lost:

Siege Guns

Having equipped my ECW armies with light guns and field artillery, it was time to add the big boys: a couple of Siege Gun elements.

The guns themselves were no problem: many years ago I was at an English Heritage site (or similar) and came across a tub of artillery models that have, over the years, proved ideal for siege gun-sized artillery pieces. I still have a handful left, so two of them would form the centrepiece of the elements.

I wanted the siege gun elements to look immobile, so rather than having the guns “naked” on a base, I bought a couple of resin gabion pieces from Peter Pig to serve as dressing. This also meant I didn’t have to have any sort of limber and team in the vicinity: they always take ages to do!

The crews initially came from Peter Pig, who do six different poses. Six men per gun didn’t seem enough, however, so I added a couple of Hallmark officer/sergeant types to each to bulk things out. Hallmark (available through Magister Militum) and Peter Pig size very well together.

I then discovered that the guns, gabions and crews didn’t really fit depth-wise on the standard element bases I’m using for my ECW troops. My standard bases are Warbases Vehicle Bases that fit up to about thirty foot or half as many horse figures without difficulty, and sit very nicely on my FK&P grided battlemat…but the combination of crew, gun and gabion stuck out over the end. Fortunately Warbases were able to supply customised “double depth” vehicle bases that exactly did the trick. I can even use the spares I ordered for TTS camps.

So that’s two siege gun elements now completed. More Romans on the way…

FK&P AAR: The Battle for Pinkney's Court

With Sir John Boulters seriously wounded as he led his Cuirassier bodyguard in a desperate, but ultimately futile, attempt to shore up his left flank at the battle of Widbrooke Common, his son, “Little John” Boulters, has taken command of Royalist forces around Maidenhythe.

This is not a moment too soon, as the Parliamentarians seek to take advantage of Sir John’s injury by striking for Pinkney’s Court, the manor house that sits on the edge of Pinkney’s Green, north-east of the town itself. Taking the manor will give them a fitting place from which to plan and direct the rest of their campaign.

The two sides will therefore fight it out at the Battle for Pinkney’s Court.

The Royalists (on the far side of the field, above) have positioned themselves around the court: infantry and gun in the centre and on the left, and most of their cavalry on the right.

The Roundheads have placed their strong Dutch horse contingent on the left, aiming to sweep across the open ground of the Green. Their infantry are on the right, and will need to cross fields in order to get at the opposition.

Both sides must defend their building. The Royalists lose three victory coins if the Court falls; the Parliamentarians have their train in the yards of the Golden Ball tavern, so will also lose three victory coins if the building top right is taken by the enemy.

Opening Moves

The action began with the cavalry on the Parliamentarian left wing. As the Roundhead Horse swept forward, one Squadron of Royalist horse headed left thinking to move up the road and take the enemy guns.

The Royalist commander (me!) had, however, misjudged things, and the right-hand unit of enemy Horse managed to get forward and charge them in the rear, smashing the Cavaliers from the field.

This success drove the Roundhead cavalry into a frenzy and, without thinking, they charged after the retreating Royalists, heading straight for the hedge behind which one of the Cookham Militia battalia waited.

This proved a foolish thing to do, and they were sent crashing backwards, and would spend the rest of the game lurking in the woods trying desperately to rally.

In the meantime, the rest of the Royalist horse would take advantage of their superior number of units and defeat the rest of the Parliamentarian cavalry. This wasn’t enough to break the whole Roundhead army so, as the Royalist horse promptly disappeared off table in pursuit, the game would be decided by the infantry.

The Other Side of the Field

The Roundheads advanced smartly up the field, but let one of their battalia get too far forward and become an isolated target for what little Royalist cavalry had been put on this flank.

I was sure that my two units of horse could take the Parliamentarian battalia: one to pin from the front, the other to hit if from the side.

Unfortunately, the rebels were made of stronger stuff than I had expected, and I ended up losing both units of horse to fire and melee. In particular, the Roundhead Gallant Gentleman (in blue on the front of the pike unit’s base) intervened at a crucial moment: the extra hit being just enough to finish me off.

Not a good start!

The main lines then clashed, but it was going to take something fairly miraculous to save the day now: I was outnumbered five battalia to two!

Miracles were in short supply on the Royalist side, so although my lone pike block lasted far longer than anyone expected, the Oxfordshire commanded shot were soon sent flying backwards, which was enough to finish the game in the Roundhead’s favour.

Aftermath

This was the narrowest of defeats. For about two turns, whoever lost the next unit would lose the game: my outnumbered infantry balanced by the lost Roundhead cavalry.

Another great game of For King & Parliament

Robert Avery

FK&P AAR: Widbrooke Common

With lockdown easing, K. (daughter #1’s boyfriend, trapped with us for the duration, now a keen wargamer) was able to travel back to his native Ireland, so it was with a heavy heart that I took the news that he was going to visit his mother for three weeks. This was serious stuff: who was going to do the cooking and, obviously more importantly, who was I going to wargame with?

We decided to see him off with the next For King & Parliament English Civil War scenario in my North Wessex campaign.

For this encounter, the Parliamentarians under Sir Christopher Grey have discovered that the well-drilled and armed Royalist foot that did them so much damage last battle have been requisitioned by the King and sent to fight further west. This leaves Sir John Boulters, Royalist commander around Maidenhythe, very short of infantry: he must now rely on hastily recruited farmworkers from the Cookham area. Sir Christopher now leads his men towards Maidenhythe, seeking to take advantage of his erstwhile friend’s shortage of good quality foot. Grey’s men are strengthened both by reinforcements and a supply of arms and ammunition, including a couple of cannon. The two forces will meet half way between Cookham and Maidenhythe, at Widbrooke Common.

The set-up from the Parliamentarian side

And from the Royalist side

The Royalists have their back to a small splash-across stream. They have brigades of seasoned horse on either flank, and their untried, pike-heavv foot in the centre. Finally, they have a Forlorn Hope in the farmhouse on the right hand side of the field.

The Royalist infantry (the smoke markers represent an Untried unit yet to test for first-time nerves)

The Parliamentarians are just coming on to the common from the farmland immediately south of Cookham. Their Dutch horse has secured their right flank, half their foot is busy deploying in the centre, with the other half still in the process of arriving on the left flank. Their cannon have set up on or near the road: the common looks a bit soft for the guns!

The Parliamentarian Horse

The Parliamentarian Centre

The Battle Begins

One unit of Parliamentarian horse advanced forward quickly, the other two inexplicably lagging behind. This advanced unit was met by the three squadrons of Cavalier cavalry, also advancing strongly. In the resultant clash, the Parliamentarian horse was swept from the field, but one unit of Royalist horse had been lost, and another had set off in hot pursuit of their fleeing foe.

Note that the lost Parliamentarian cavalry squadron was my newly painted Dutch Horse unit, thus proving the adage that a unit never performs well on its first outing on the tabletop!

Meanwhile, the Royalist infantry advanced forward strongly, and the Parliamentarian foot on the left flank joined battle with the Royalist Forlorn Hope in the farmhouse.

Opening Stages

The main action continued with the cavalry. The pursuing Royalists ran over the Parliamentarian Dragoons, who had inexplicably pushed their way through the hedge in front of them rather than hiding behind it. This left the Royalists still in pursuit, jumping the hedge themselves as they headed off table to the Roundhead rear.

“That Be a big hedge, Jethro!”

Meanwhile, the other Parliamentarian horse had finally worked out how to get their steeds to go forward, and crashed in to the other remaining Royalist squadron. Honours were even in this fight, with each side losing a squadron, but that left one unit of Roundhead cavalry in a superb position behind the main Royalist infantry line.

Big problem for the Royalists!

Fortunately the Royalists had a reserve in the form of Sir John himself at the head of his Cuirassier Bodyguard. As the two infantry lines came together, Sir John led his loyal lobsters forward: outnumbered two-to-one.

This was actually an epic encounter, as Sir Christopher Grey was also at the head of his Cavalerie. The two commanders were therefore leading their horse directly against each other!

This proved a good move tactically, but a disaster for Sir John himself: seriously wounded in the clash that followed, he was carried from field, close to death, his Cuirassiers fleeing around him pursued by the Roundhead cavalry. History, unfortunately, does not record whether the two former friends actually met each other in the melee.

Worse was to follow. Although on the other side of the field the other Royalist horse had managed to flank charge a battalia of Untried Parliamentarian militia, the boys from Medmenham proved a tough nut to crack: quite frankly refusing to break no matter what the Royalists did.

The first flank charge goes in!

And worse! In the centre, the Untried Royalist foot wavered at the sight of the Roundhead foot in front of them, doubtless also unnerved by the fall of Sir John. Gradually the Royalist line began to bow backwards, and then suddenly broke: all victory coins gone. The Roundheads had won the day!

Just before the Royalist line broke

Aftermath

A great battle, and a suitable victory for K. as he heads off home.

The Untried Royalist foot proved no match for the seasoned Parliamentarian battalia, but it was really the two cavalry actions that decided the day. On the Royalist left, honours proved even with both sides losing the same number of units, but the Royalist horse left the field in pursuit whereas the Roundheads managed to rally and found themselves nicely behind the Cavalier line. On the Royalist right, the cavalry should have KO’d at least one of the infantry battalia they hit in the flank, but just couldn’t quite break them: they breed them tough in Medmenham.

But it was the wounding of Sir John and the dispatch of his Bodyguard that really did for the Royalists. It was an encounter that could have gone either way - a small but veteran Cuirassier unit versus a much larger but less protected Dutch horse squadron - but, as it was, the clash, and therefore the battle as a whole, went to Parliament.

Robert Avery

More ECW Dutch Horse

Having painted up three units of Republican Romans, I needed a break from things Latin, so dipped into one of the more recent outcrops from the lead mountain: another unit of Dutch horse for my English Civil War collection.

These are more from the excellent 15mm Hallmark range, available from Magister Militum. They are painted with GW Contrast Paints, with the flag from Maverick. The base is a large vehicle base from Warbases.

ECW Artillery Bases

Managed to find time to paint up a couple of ECW artillery bases for For King & Parliament. Guns and figures are all 15mm from Peter Pig and, as usual, they’re painted with GW Contrast Paints.

These have come out quite nicely, and will form the centrepiece of the next scenario in my fictional North Wessex campaign.