TTS AAR: Crusades Game 1: Venice Abroad vs Mameluke Egyptians

Earlier this month I travelled to Weston Super Mere for the Crusades event at the Games Bunker there: a tournament where only armies that could conceivably have fought in the Crusades could take part.

My Later Italian Condotteri Venetians therefore packed their suitcases and became a Venice Abroad army: largely the same but with no Later Knights and no Handgunners.

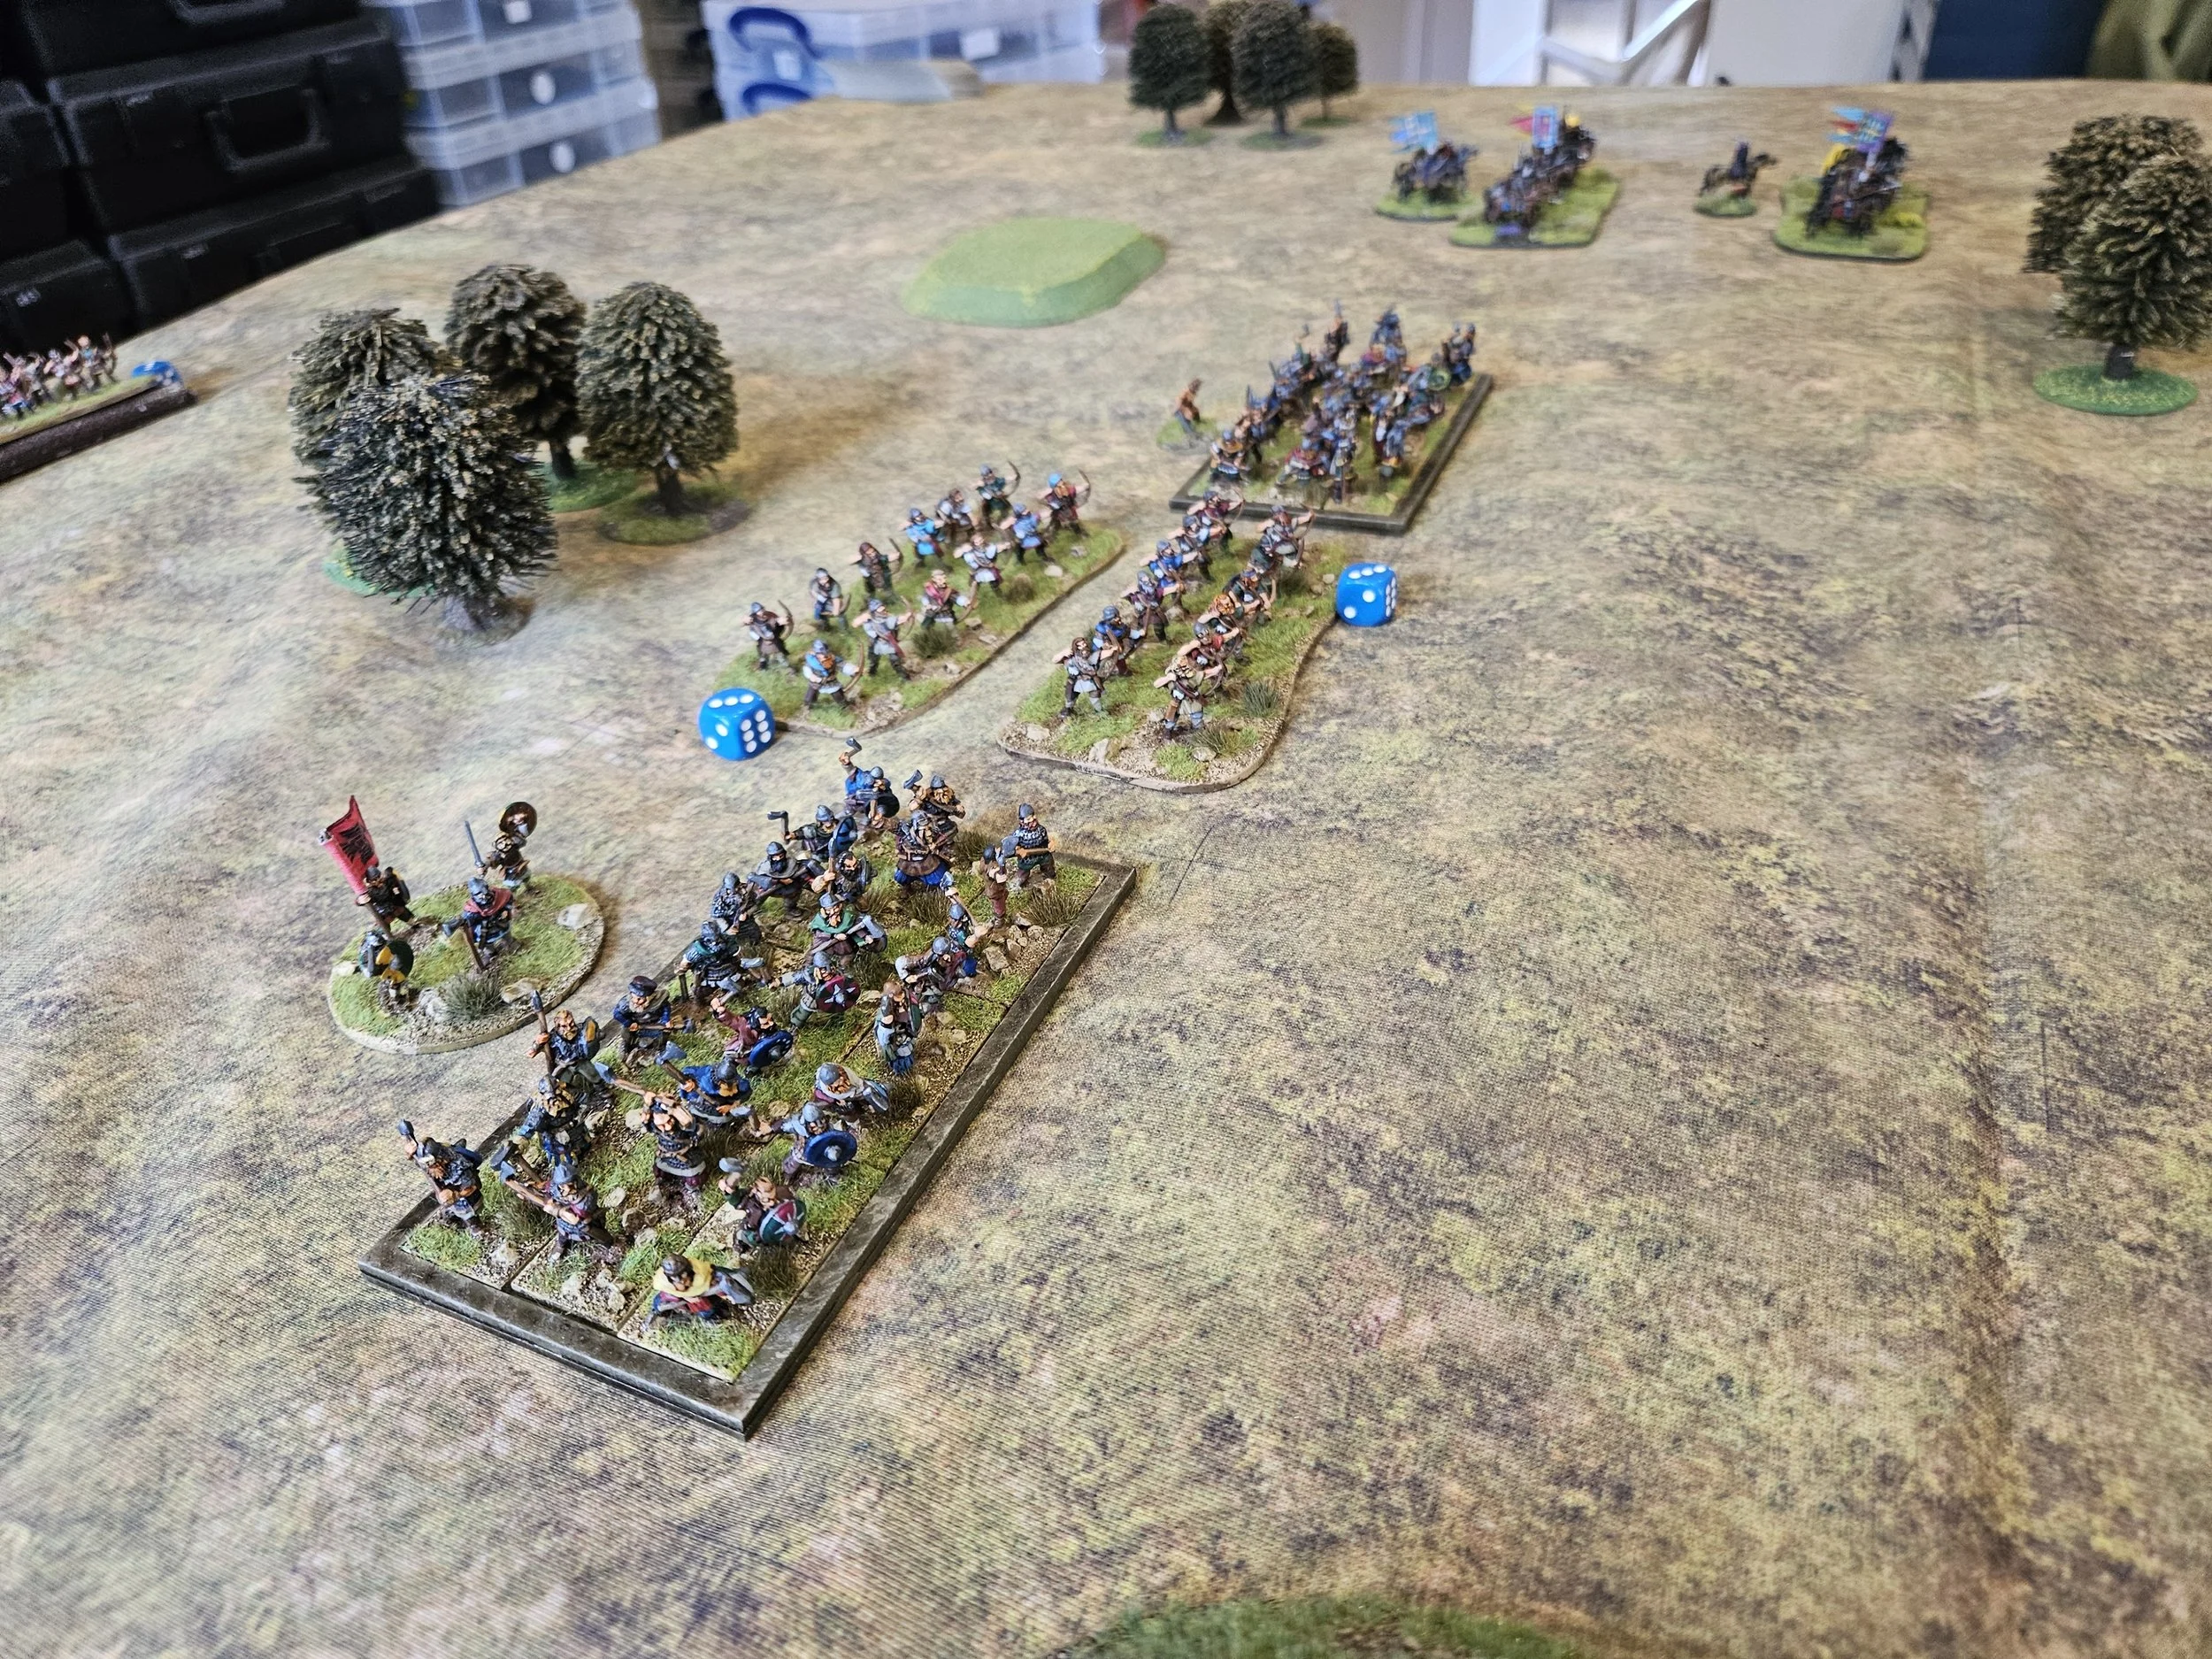
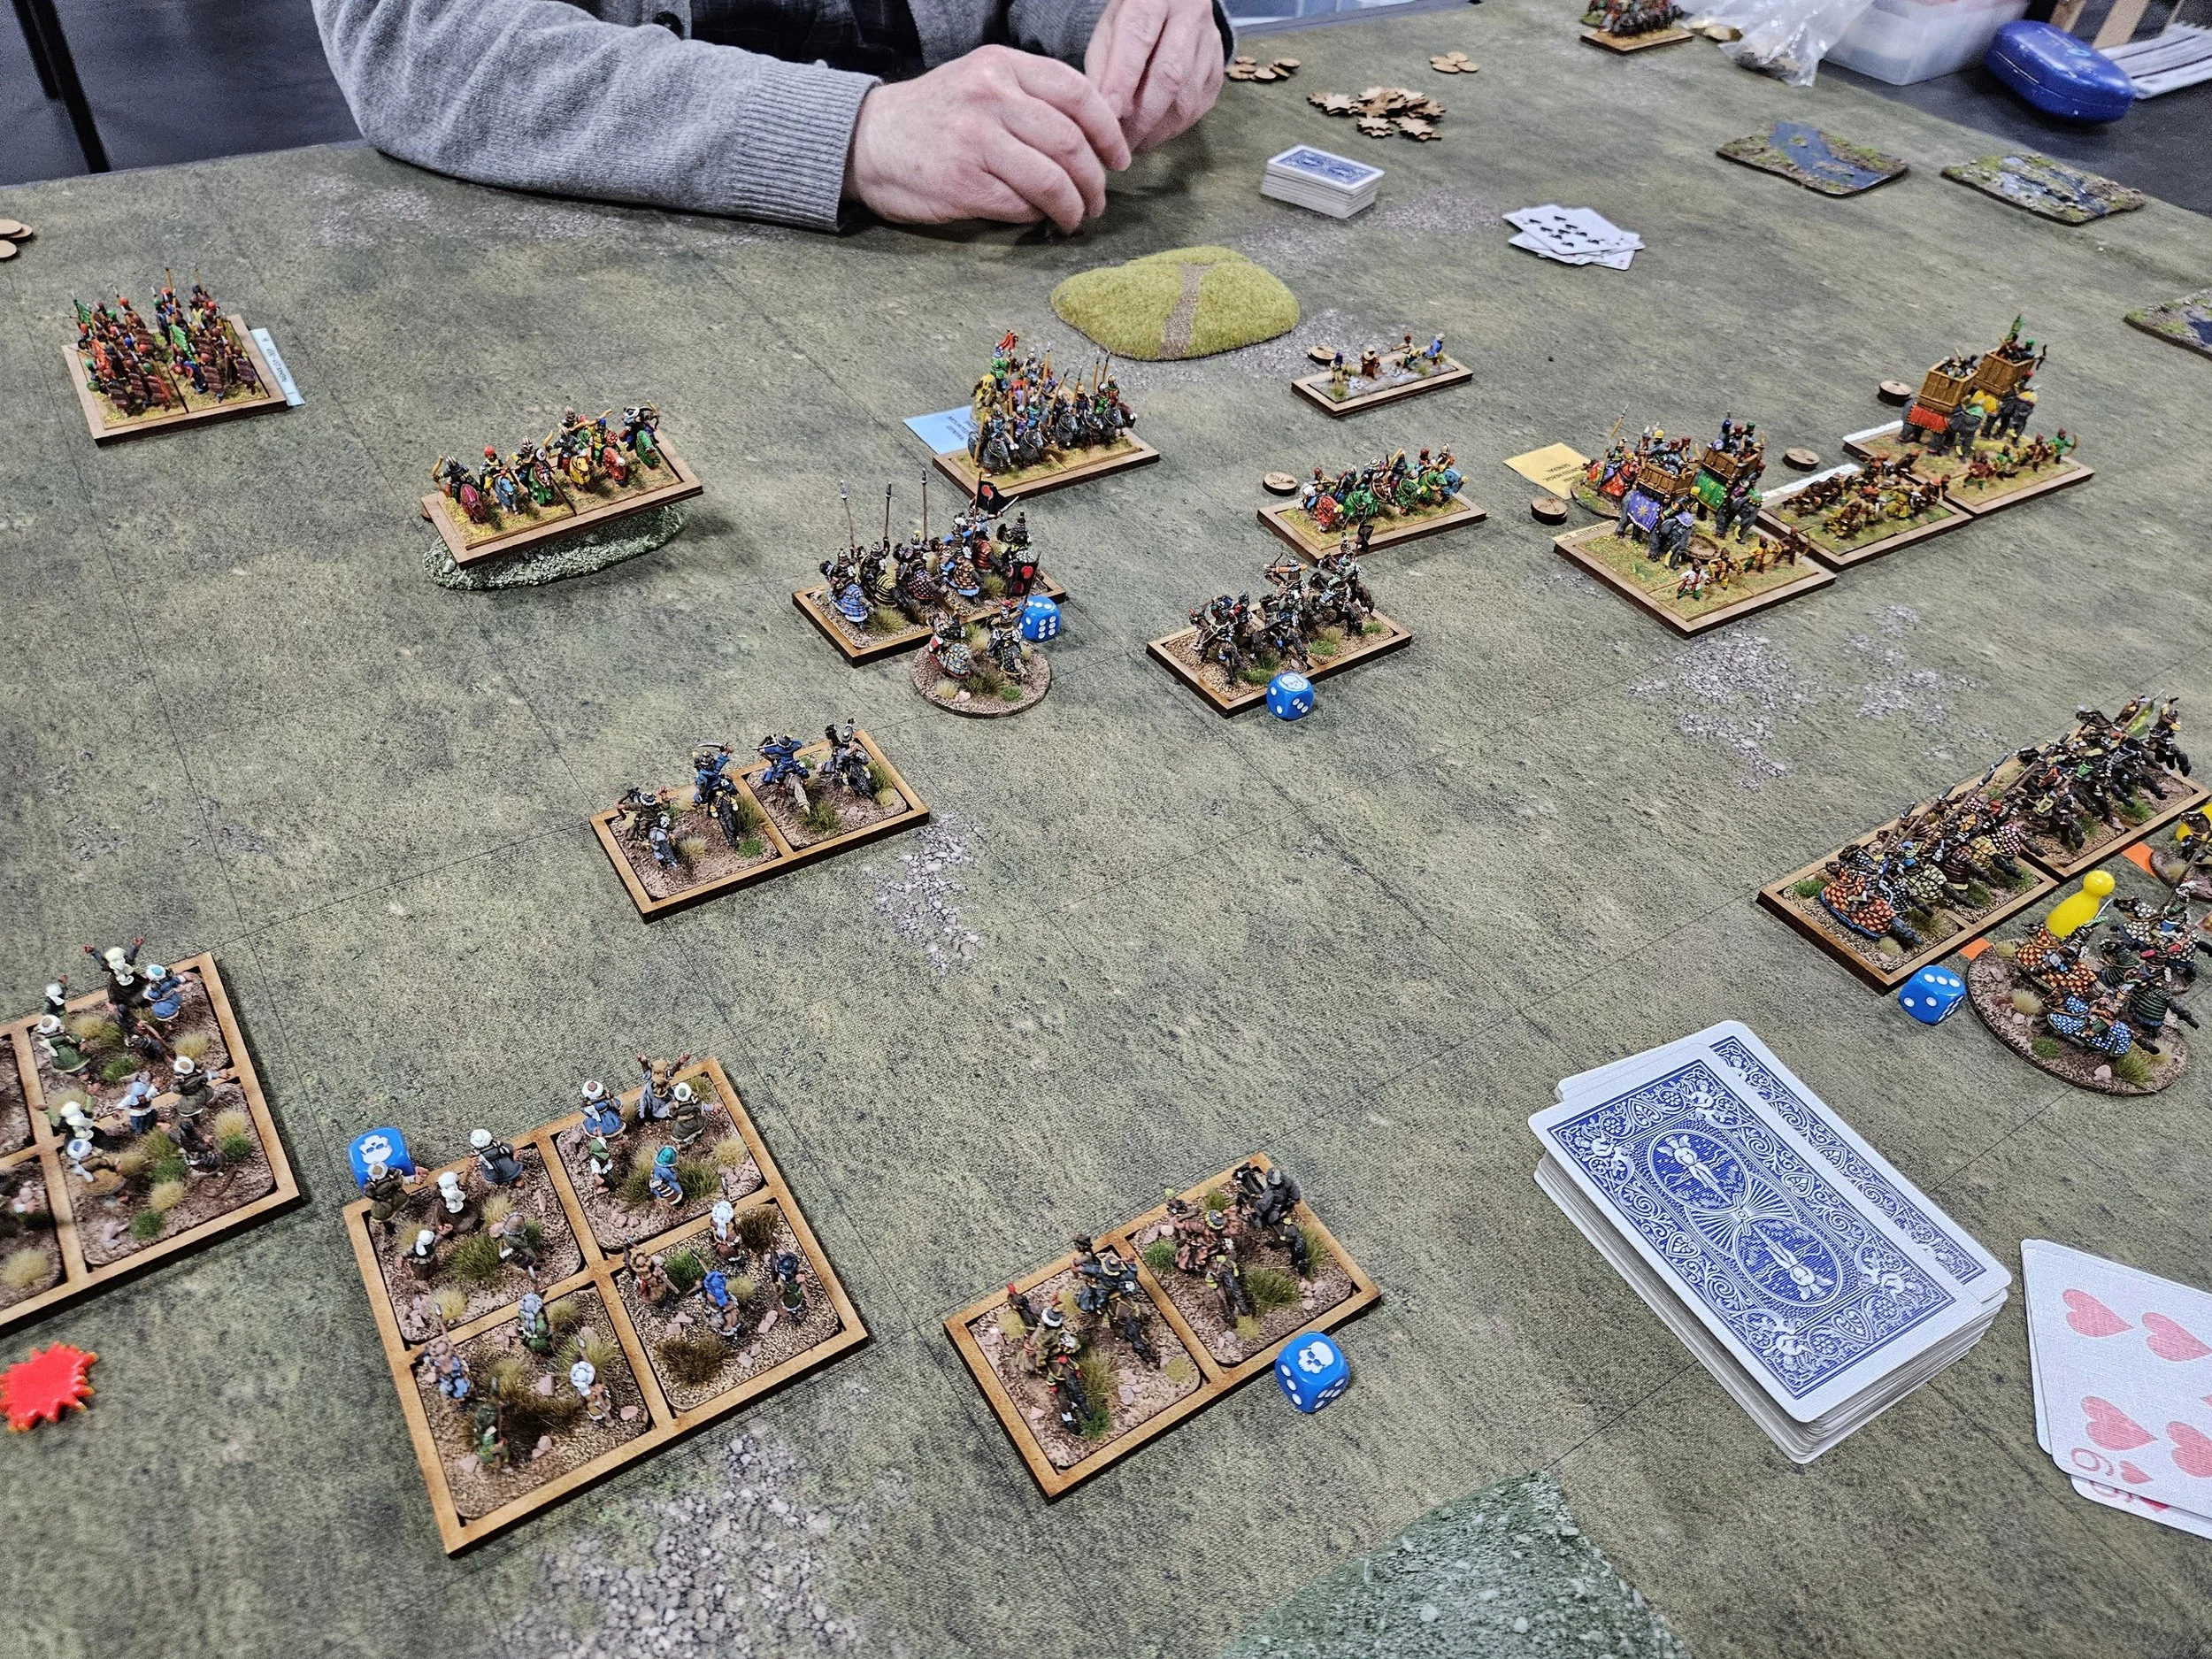
My first game was up against Don’s Mameluke Egyptians. I lost the scouting, so set up in a traditional infantry in the middle, cavalry on the wings formation, and watched vast amounts of enemy cavalry deploy in front of me. Looking at the pictures, I think Don only had one formed and one light infantry unit, with all the rest of his troops being mounted.

As I was fairly certain that my units were stronger than Don’s on a one-to-one basis - knights vs heavy cavalry, spearmen vs mounted - I determined to get stuck in as soon as possible whilst watching out for enemy light cavalry finding their way onto my flanks.

The Mamelukes opened the action, coming forward in what looked like piecemeal fashion, but was actually an attempt to weave their way through weak points in my line. It certainly looked like they had amanged this with a unit of light cavalry sneaking past me on the left, and a unit of heavy cavalry attempting to run over my raw crossbowmen on the right!

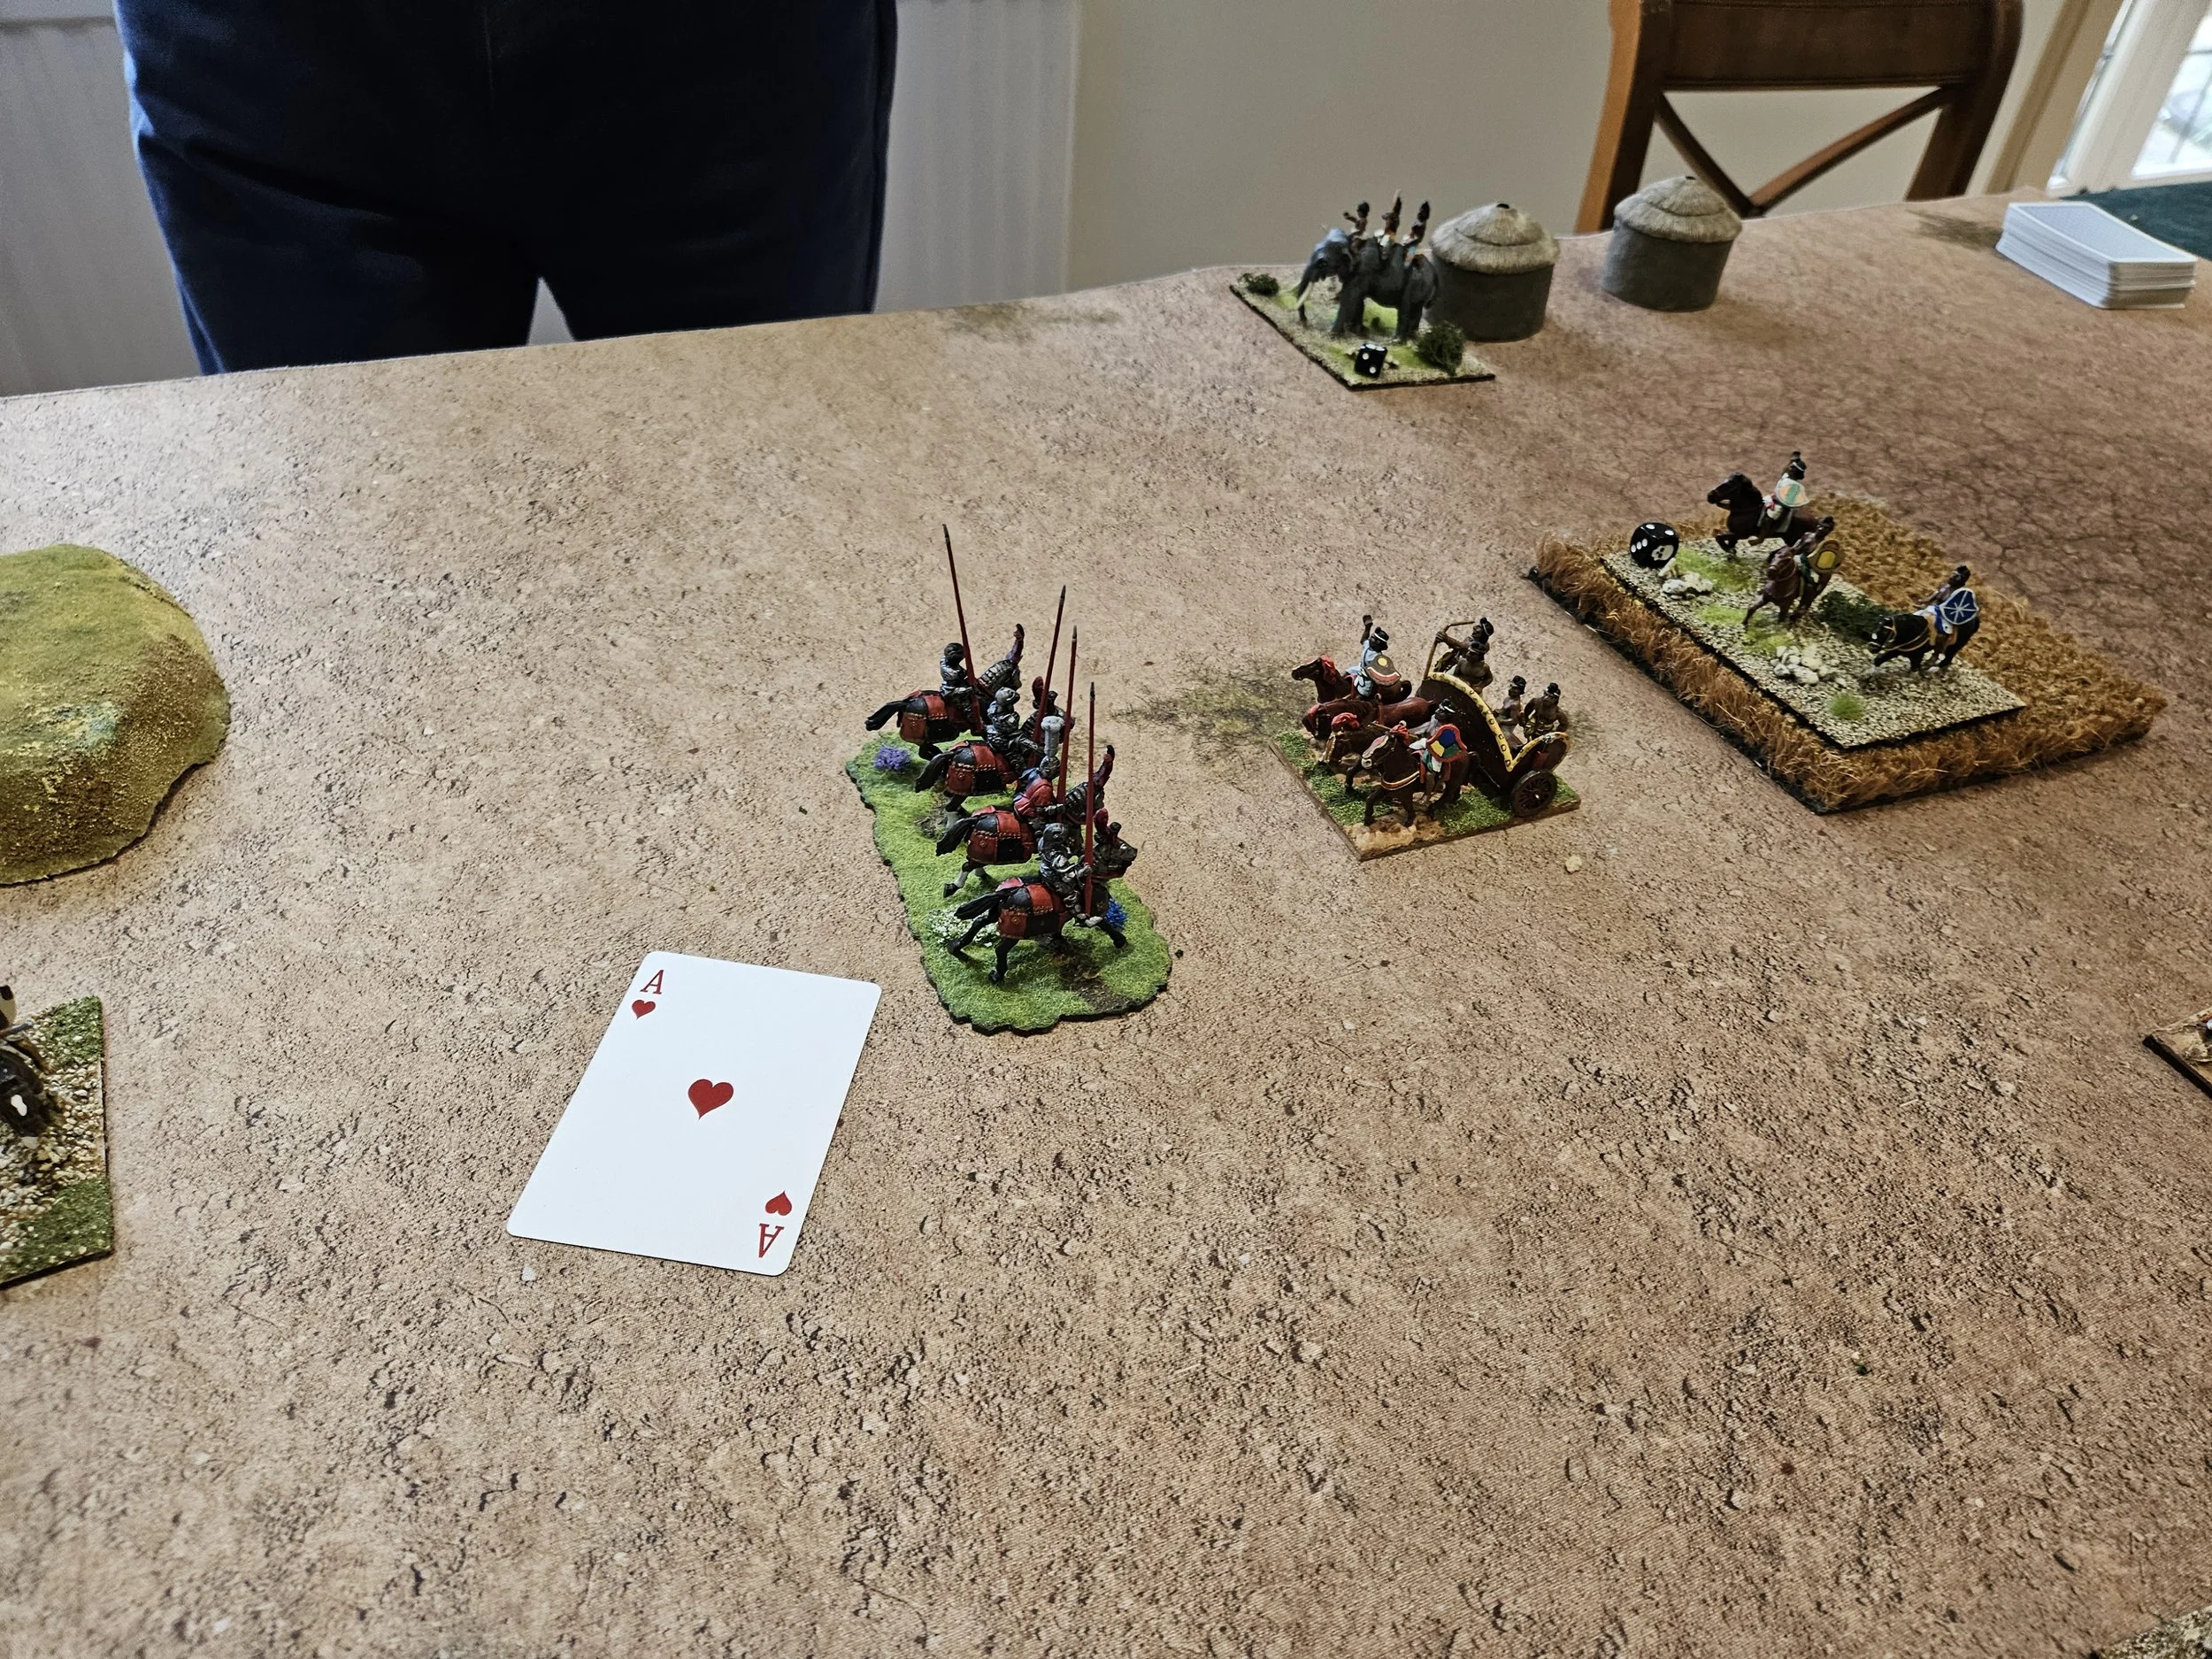
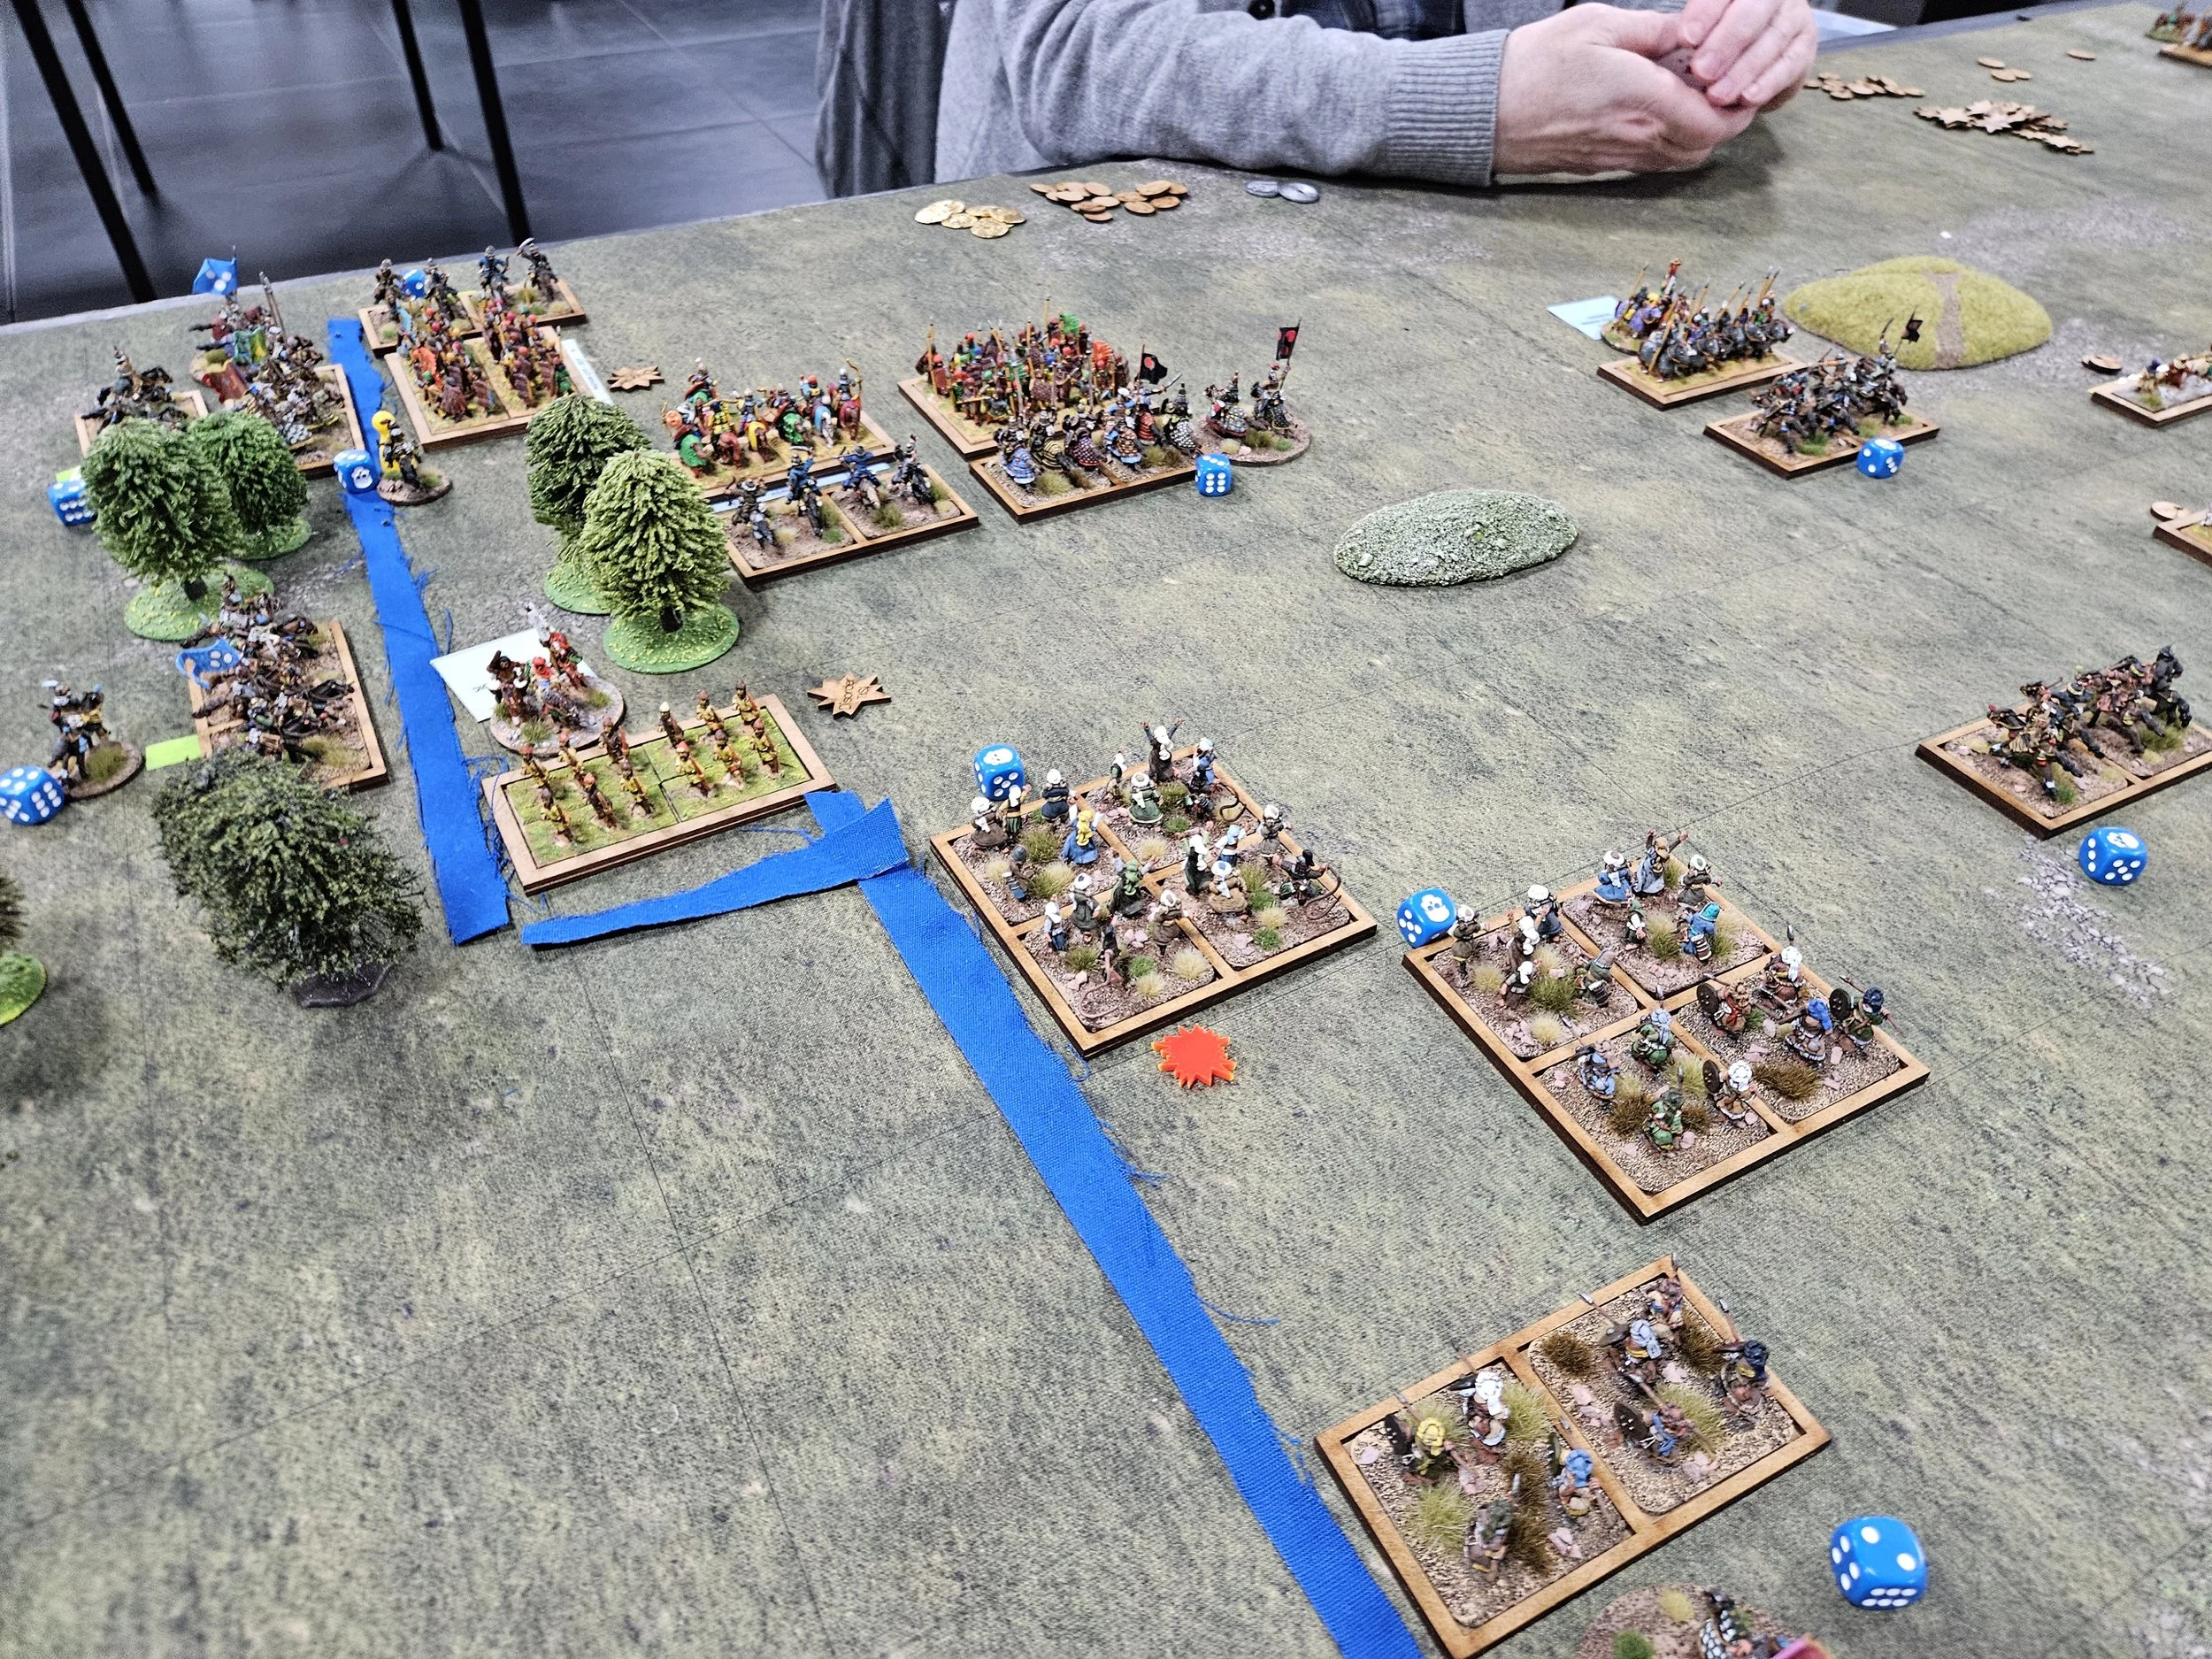
On the right flank, somehow the militia crossbowmen survived the charge of the heavy cavalry (they were helped by the spearman unit just to their left), with my Knights coming round the outside to engage two units of veteran heavy cavalry towards the Mameluke side of the table.

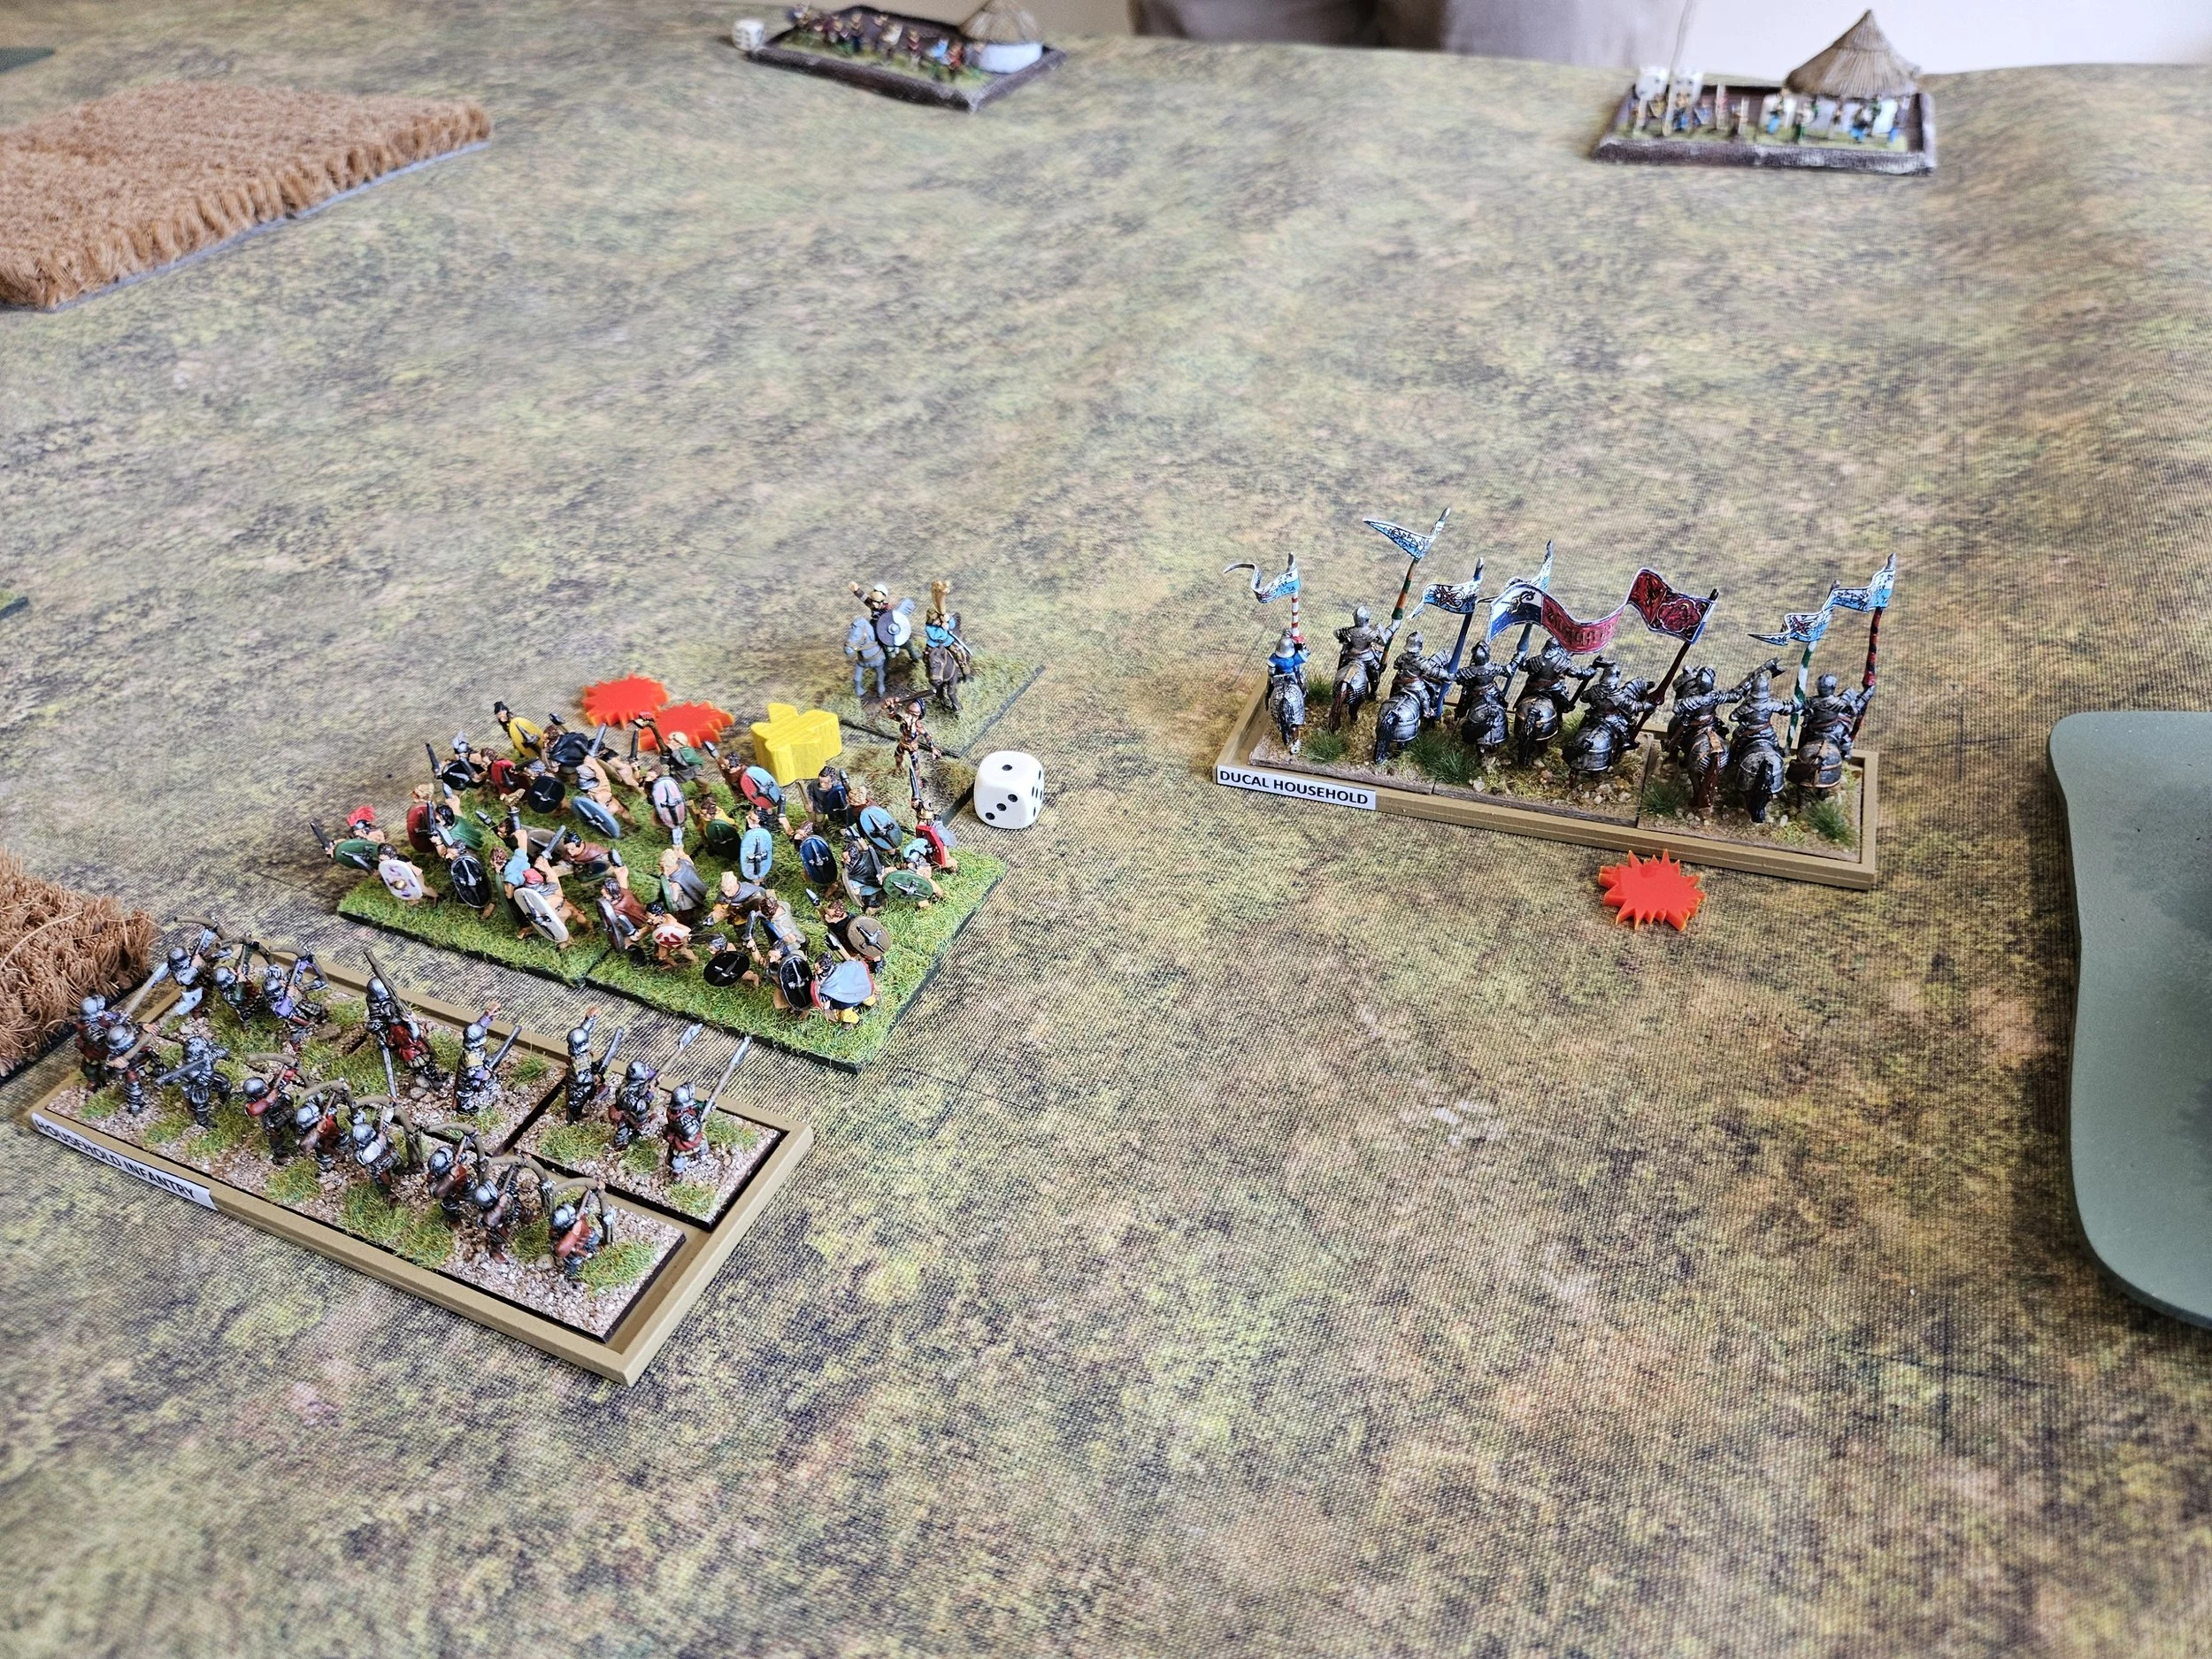
Back to the left flank, and the gap was plugged, with my infantry going forward, bouncing backwards slightly, and then being reinforced by Knights. I was determined to push through the opposition here and go on to take the Mameluke camp.

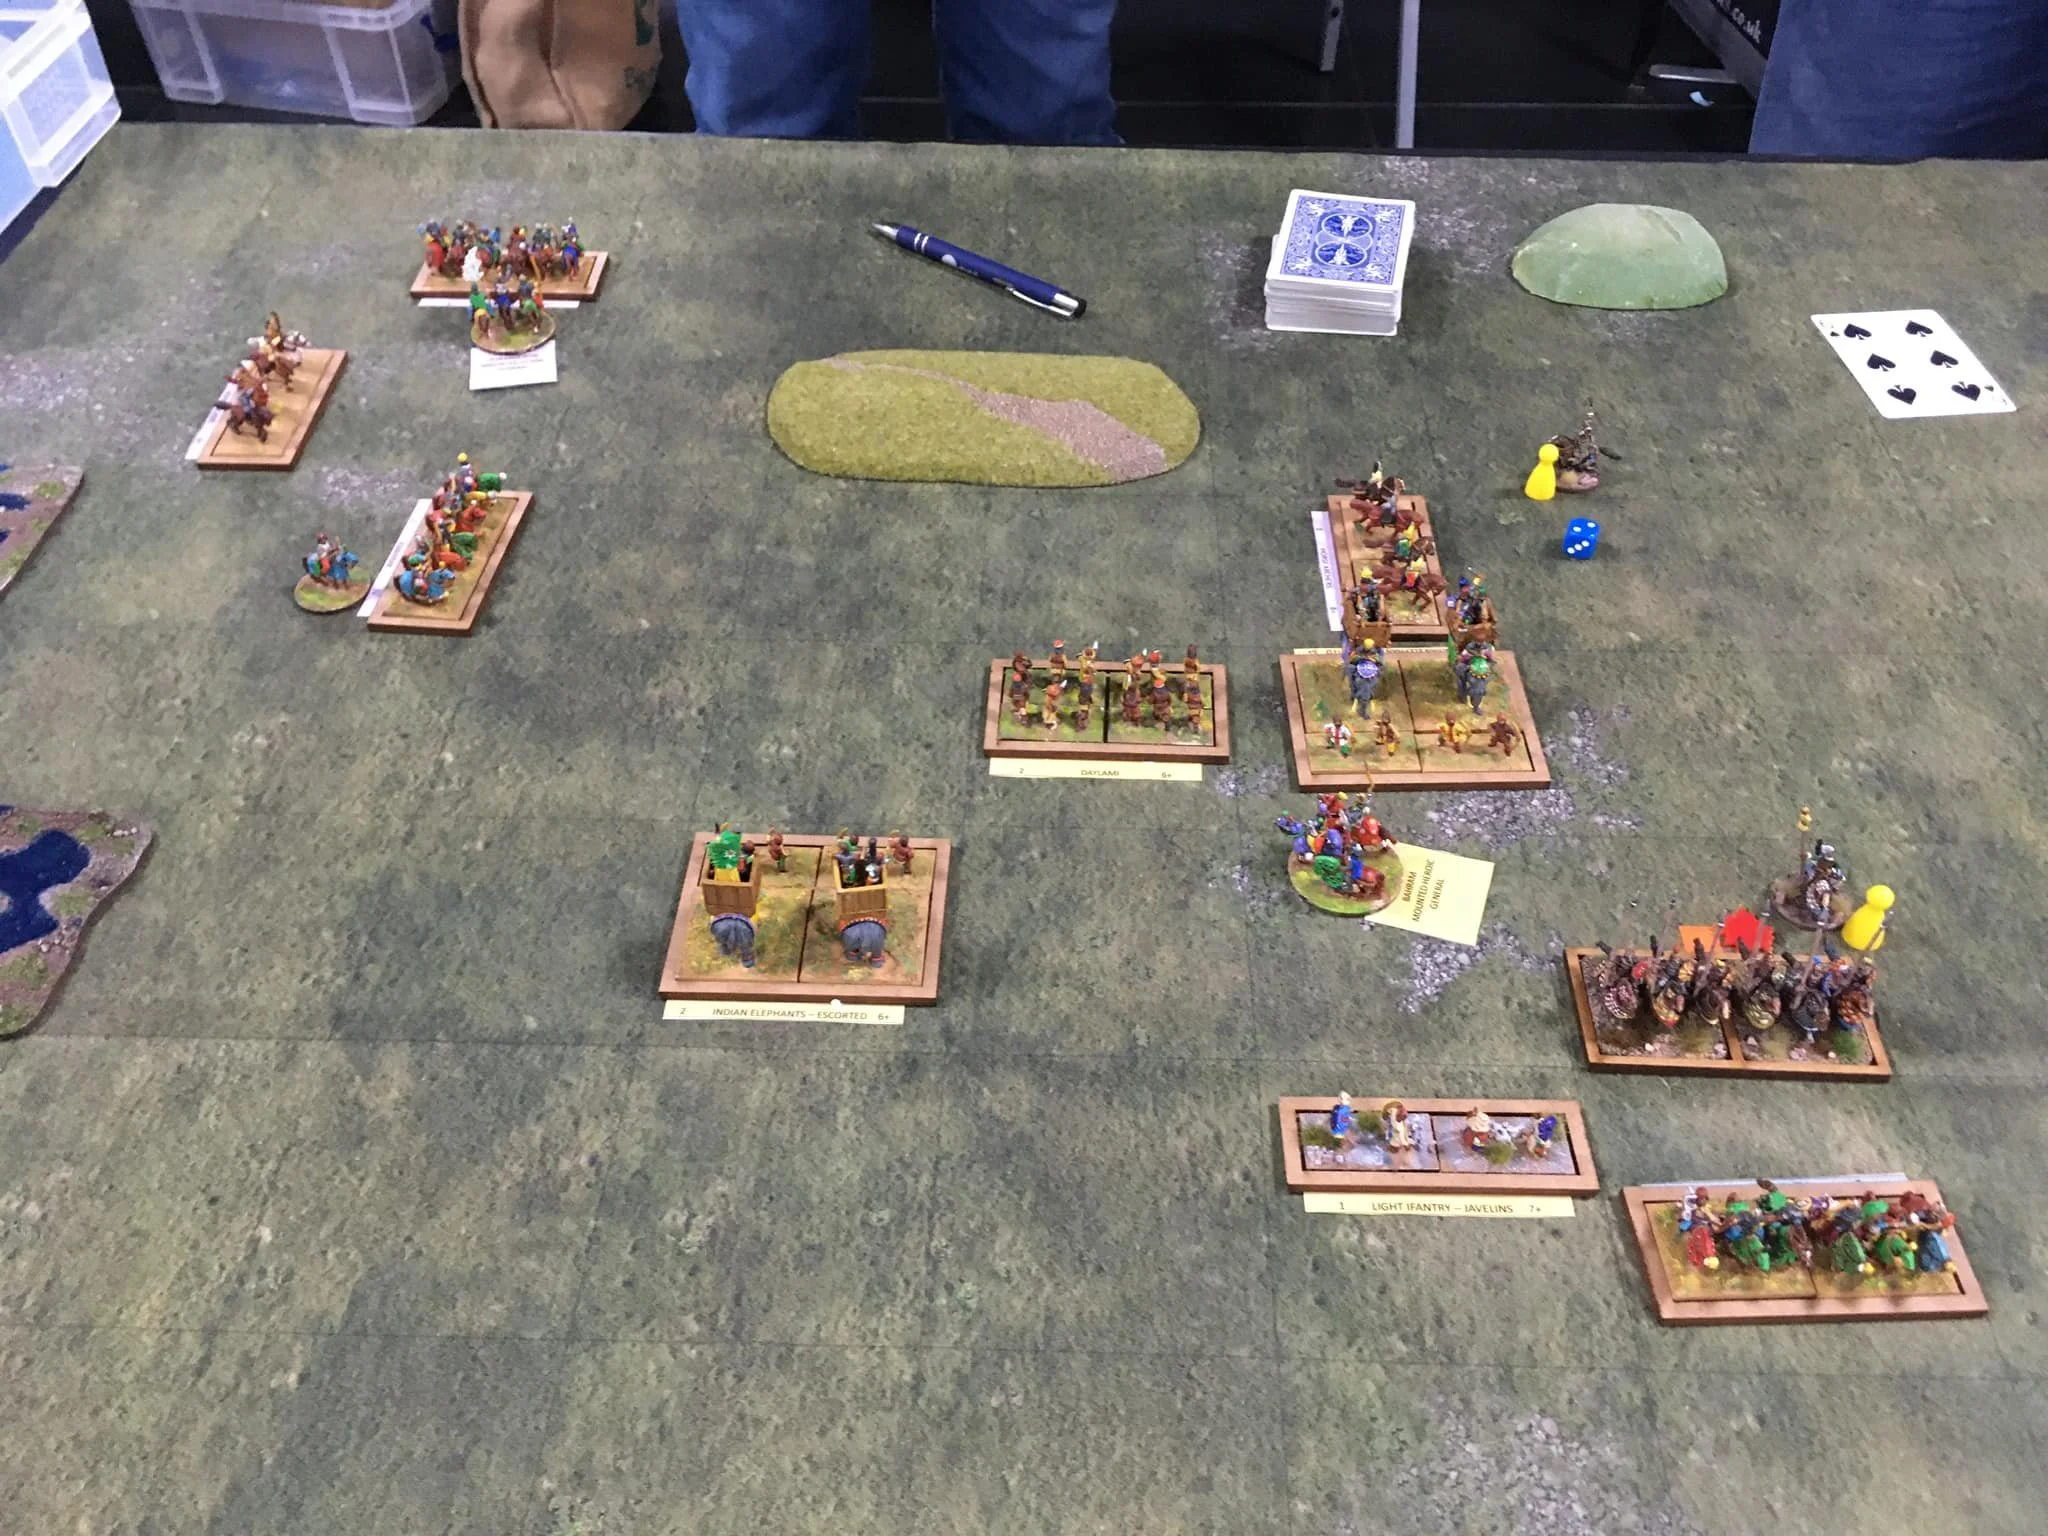
Back to the right again, and the Venetians were slowly but steadily pushing the Mamelukes back.

One unit of elite cavalry had already been broken by the Venetians Knights, and it wouldn’t be long before the other went as well.

There were now two clearly-defined battles taking place: one on the left and one on the right, with a big gap in the centre.

I had just about won the right hand flank, and only needed a little bit more to do the same on the left. Although the spearmen had got themselves in a bit of trouble from flank-charging light infantry, the Knights and Alabardiers had combined and soon the Mamelukes had lost another two units and the game.

So a good start to the Crusades with a 12-3 victory.

Hittite Chariots and Chariot Runners

The Hittites are coming along nicely now with the addition of another bases of chariots and two bases of light infantry chariot runners.

As with all the Hittites so far, these are 15mm Red Copper miniatures 3D printed by Baueda in Italy. Yes, the lead time is slightly extended, but I have found the Baueda prints very high quality and as there’s a set postage fee of €12.50 however much you order and wherever it’s going to, buying in volume makes the whole process very cost-effective indeed. Recommended as a source of the Red Copper range.

First up are another two heavy three-man chariots. It looks like the chariot on the left is only manned by two crew, but that’s because there’s a chap taking a breather sitting on the back of the chariot, presumably regularly asking “are we there yet?” to his two comrades!

I can’t emphasise how nice these models look in real life. They’re a pleasure to paint too, with the relief so clear that getting the ‘plank’ effect on the chariot bodies is easy (you just have to stay within the lines!) and the horse-armour just about paints itself (dry-brushed bronze over a Snakebite Leather base if you’re interested).

Then I’ve finished a couple of bases of light infantry chariot runners. In To The Strongest, these are light infantry with javelins, but I quite like the light axemen look of the Red Copper figures:

Again, very easy to paint and highly recommended.

Now onto the rest of the light infantry, the ally-Syrian light chariots, and more chariots…

TTS AAR: Anglo-Normans & Akkadians

Time for another game of To The Strongest: my Anglo-Normans would take on friend Rob’s Akkadians, both sides using figures from Museum Miniatures excellent 15mm Z range of CAD designed miniatures.

The Anglo-Normans (half Normans, half Vikings!) won the scouting and advanced forward to take the centre of the battlefield.

The Akkadians responded with an advance of their own, and before long the two sides were ready for the first clashes:

On my left flank, I managed to get two units of Norman Knights deep behind Rob’s main line with only a couple of units of Akkadian spearmen to hold them off.

Unfortunately, although the Knights managed to get the advantage, they never really managed to exploit this to its full extent: failing to either finish off the remaining spearmen, take an enemy camp or even curl back to take the rest of the Akkadians in the rear. In the end, the sector became a side show for the main battle.

Just to the left of the central hill, the Anglo-Saxon contingent of the Anglo-Normans faced off against more Akkadian spearmen. I thought I had a decent advantage here: two deep warbands plus a couple of skirmishing bowmen versus two enemy spearmen units, but if you look closely in at the first picture in the gallery below, you can see another Akkadian unit lurking in the background. This unit turned out to be the Akkad City Guard, armed with great big axes.

The two lines clashed, and although one of the warbands burst through the enemy line and headed towards their other camp, the rest of the combat was, again, pretty much honours even, especially when the Akkadian axemen intervened.

Which left the main action to take place in the right-centre of the field.

Initially, things looked quite good: I pushed the enemy on the hill backwards and then got into a position where I could flank the units just to the right, with my cavalry preventing the Akkadian chariots from outflanking my line.

Unfortunately, I just couldn’t seem to take advantage of the situation, and the next thing I know it’s my infantry that are being flanked and, indeed, the whole of my troops on that side of the table were crumbling!

I’m still not quite sure how this happened!

At this point the battle was effectively lost, particularly as the Anglo-Saxon warband that had brokne through the enemy line had failed to take the enemy camp and was now surrounded on all sides and fighting for its life, with things being no better around my own camps.

A few moments later, that was all she wrote: the Anglo-Normans thoroughly trounced by the Akkadians: just goes to show that newer isn’t always better!

TTS AAR: Elephant Screen Part II

With the Alexandrian Macedonians defeated twice by Peter’s Made-Up Ancient Indian army (designed to experiment with the relatively new Light Infantry - Elephant Screen troop type) it was time to give someone else a go: step forward my trusty Venetians.

I’d like, at this point, to laucnh into an exciting battle report where the initiative, luck and clever use of tactics swung first one way then the other, all culminating in a glorious Venetian victory by the narrowest of margins…but I can’t. The appalling cards that had been the downfall of the Macedonians followed me into this game with entirely predictable results:

Well that’s not entirely fair on Peter: having won the scouting, his skillful deployment meant that I was largely on the back foot from the start, with his army almost wholly threatening my right flank.

I had, however, managed to get my troops into a position to blunt if not fully counter his attack, but was then, as you can see, betrayed by the cards.

Okay, so the mounted ballesteri lights in the first picture might not have done much to the elephant they were trying to assault, but the Knights in the second picture were surely onto a chicken-dinner winner! And don’t talk to me about the Knights versus the chariots in the third picture: what you aren’t seeing is the rear charge that they had also failed to make in the previous turn!

Here’s a helicopter-view shot of early in the battle showing the way Peter had managed to get onto my right flank and effectively fight a third of my army with all of his:

But hopefully you can also see how I have managed to get my troops into a position where I have Knights ready to counter his cavalry and have manouevred to get a two:one advantage on his lead attacking unit (see close up picture, below) all brought to nothing by the cards!

So that was the end of our session: three defeats for me at the hands of the Made-Up Indians with their high numbers of Elephant Screen units.

Even though the Screeners didn’t make that much difference to the results in the end (my losses were down to Peter’s skillful play and the cards) I am still quite glad that they are made-up Indians and not one I expect to face in future!

Just off to tend to a small bonfire in the back garden, and anyone know where’s the best place to get some new sets of cards!

TTS AAR: Elephant Screen Test

Off to Peter’s house for a bit of training in the run up to this year’s Warfare tournament. My aim was just to have a few enjoyable games of To The Strongest, Peter’s aim was to thoroughly investigate the capabilities of the relatively new troop type Light Infantry, Elephant Screen (there’s a reason he wins a lot of tournaments!).

Peter had therefore constructed a mythical army consisting mostly of elephants, a good half of whom were included in the aforementioned light infantry screening units. We’ll call these the “Made Up Indians” or MUIs. I would fight our first battle with some Imperial Alexandrians: pike, Companions and lights.

I had lost the scouting - hardly surprising with all those light units on the other side of the table - and soon found myself watching a whole herd of pachyderms thundering towards me.

To translate the pictures into something useful, the elephants with red howdahs or cloths are ‘normal’ escorted Indian elephants, the others are the light infantry/elephant screening units.

Not wanting to get caught on my base line, I advanced forward, driving the lights backwards. This, however, left my relatively narrow frontage army vulnerable on the flanks: Peter taking full advantage by heading down towards my empty right flank with his cavalry and chariots, seeking to turn my flank and roll me up.

Note how my two units of cavalry , centre-bottom in the picture above - are faced by escorted elephants i.e. kept occupied whilst his flanking force curls around the rear. It’s easy to see this happening in hindsight and in the photos, not so easy to see it and prevent it on the tabletop!

The inevitable happened, and I found myself fully engaged from the front and hit in the right flank: things were not looking good!

The writing was now on the wall: my cavalry were forced to leave the table, and had real difficulty getting back on and, despite some success elsewhere, I was soon hamorraging victory medals and defeated!

The only good thing was that it was a fairly quick battle, leaving us time for a re-match…but that’s another story!

The Re-Match

With my defeat in the first game partly due to being outflanked, I decided on a change of tactics for Game 2: rather than set up in the centre of the field, I would huddle in one corner, ermging to cruch the MUIs once their dispositions had been revealed.

At this point it’s worth reminding regualr readers that sometimes Lady Luck is decidedly, shall we say, unkind to me. Well, today, she really went to town!

Rather than a full report, I invite the reader to count the number of Aces drawn in the pictures below:

And that’s just a selection! In the same game, Peter managed to have a unit of cavalry enter the table and then pull an 8, 9, 10 for activation cards to send a unit of my elite cavalry routing off the table. Sometimes, it’s just not worth setting out the figures!

More Hittites

A couple more units for my 15mm Hittite army using Red Copper miniatures printed by Baueda.

First up is the first of the command bases: a unit of 3-man chariots with attached General:

Next is the first unti of line spearmen: quite a chore to paint with all their different robe and shield colours:

Very nice figures: very easy to paint and enough variety to make the units look good.

Now to paint the same again for the next batch!

TTS AAR: Britcon Game 5: Venetians vs Florentines

My final game at Britcon this year was against another Italian Condotteri army: Nigel’s Florentines.

Although technically a different army to mine (an Early Italian Condotteri army versus my Later one, and from Florence as opposed to Venice), Nigel’s force was actually/obviously quite similar to mine, with the contemporaneous nature of the clash promising an interesting game.

As you can see in the picture below, we even deployed in a similar way!

The oppening phases of the game saw both sides plagued by a series of Aces, something I had (quite surprisingly!) managed to avoid in the tournament so far.

Nevertheless, the Venetian Knights advanced strongly on the left wing, and managed to get into a position where I could threaten to roll up the Florentine line, with the only thing standing in their way being a couple of units of enemy Lights…

…who were disposed of in short order:

My other command of Knights was also in the process of doing the same thing on the other side of the battlefield:

Back to the left flank, where my initial success was now being slightly stymied by a combination of a really annoying unit of enemy Knights that just wouldn’t die and my decks of cards who had obviously decided that I had been having far too easy up until now:

Despite this, however, the rest of my troops on that flank had started to knock Florentine units off the board, helped by the Venetian infantry who had now caught up and were eager to join in the fun.

Things were also still going well on the right flank apart, again, for one really annoying enemy unit: this time a bunch of Light Infantry with Melee Weapons: a relatively new troop type who had the temerity to charge my overall commander, with army standard, bodyguard knights etc, in the flank!

I remember this being a deeply frustrating phase of the game, where a couple of Florentine units on the wings distracted me so much that it kept me from properly enjoying the process of destroying his centre…but the writing was on the walls of Florence and soon Nigel’s last victory medal was mine for a 181-38 point victory.

With all five games now done, as organiser I totted up everyone’s points from all the games and discovered, a bit to my embarrassment, that I was actually the overall winner, and with a clean sweep of five victories out of five.

So a good result at what had beena cracking tournament overall. All the games were fought with a great spirit of friendly, competitive, fair play, with no arguments marring the event at all.

My thanks to all those who took part (especially my opponents), to all the organisers at BHGS, and to Derek, who was kind enough to do all the list checking. Make sure you keep 7-9th August 2025 clear for next year’s competition.

TTS AAR: Britcon Game 4: Venetians vs Thessalians

My fourth game at Britcon was a re-match of the warm-up game I’d had on the Friday evening before the tournament started: my Venetians versus Adrian’s Thessalians.

The stakes this time around, however, were much higher: we were ranked one and two in the tournament so far, so whoever won this game would end up perfectly placed to take the title. It would be fair to say that I was a little nervous about this one: my Venetians had been hammered on the Friday night (as in soundly beaten not drunk as a lord!) and I couldn’t afford to let that happen again.

The Thessalians were another largely infantry army, and I’d beaten three of them already during the competition by sending my Knights around one or both flanks. Adrian, however, was far too canny to give me the opportunity to do that: his men were deployed to cover just about the entire width of the table, so no room around the sides!

His left flank, however, did look a bit weaker than his right and centre (where those nasty veteran Hoplites were waiting) so if I couldn’t go around a flank, I determined to punch through it using my larger command of Knights. First off, however, I had to deal with Adrian’s cavalry there, who were attempting to do to me what I’d done to others!

In the meantime, I kept my main line rigidly under control, just advancing far enough forward to give me a little retreating space should I need it.

Things continued to go well on my right: the Thessalian cavalry were disposed off (either routing or retreating off table) and, more importantly, two of my Knights units were now free to crash right the way through to the enemy base line.

Meanwhile battle had been joined in the centre, with the combination of Alabardiers and Picchieri proving more than a match for the Thessalian Hoplites, with the threat of a single unit of Knights enough to keep Adrian’s right wing forces at bay.

The Knights on the right finally properly broke through, with one unit heading for and taking the enemy camp (despite the best efforts of some pesky enemy light infantry) and the other crashing into the rear of the Thessalian reserve.

The game should have ended here in a Venetian victory but, unfortunately, I had made a mistake on my right flank: I had positioned my Knights and Lights there to keep the enemy light cavalry that had retreated off table from coming back onto the board, but forgot what they were there for and decided to “get my Lights back into the battle”. This let Adrian bring his light cavalry back onto the table, meaning that when his camp fell, he had one coin left rather than none.

How annoying!

The writing was, however, on the wall, and it was only a matter of time before I managed to get the extra coin I needed to win the game, but it was a pain in the backside and could have let Adrian back into the match.

Fortunately I managed to take the final coin needed before his Hoplites could relieve his camp: a 188-23 victory for the Venetians.

TTS AAR: Britcon Game 3: Venetians vs the Sea Peoples

With the Zanj Revolt and Spartans already defeated, it was now time to face Howard’s beautifully painted Sea Peoples: another infantry-heavy army.

Having beaten two infantry armies by curling the Knights around one flank, I thought it would be rude not to go for a third win that way, so deployed much as I had done in the first two games.

The terrain was unfortunately quite heavy on either flank, with annoying woods all over the place, but all would be good if I could temp the Sea Peoples forward a bit into the more open centre of the table, where I could either get round the back of their line or just curl in on their flanks.

The sight of my line slowly advancing forward did indeed prove too much of a temptation for the SP’s and, even better, rather than attacking all at once, they dripped their warriors forward in a quasi-echelon formation meaning that the Venetian pichieri (pikemen) and alabardieri (billmen) could gang up on the lead unit and very quickly remove it from the board.

Even the mighty Goliath couldn’t stop the combination of pikemen and billmen

Meanwhile, I had made a bit of an error on my right flank.

The two units of Knights who were supposed to be keeping the enemy busy there had got themselves jammed up against the edge of the table and the piece of randomly-placed Impassable terrain and, faced by the SP’s elite chariots, had failed to punch through.

This left them horribly exposed to a flank attack, that duly went in, and my Knights disappeard off into the distance, bitterly complaining that their contracts stated that they delivered the flank attacks not the other way around!

My only consolation was that this little action had tied up quite a lot of the Sea Peoples’ force away from the main action, meaning that I could now try and follow Mr Riding’s principle of fighting the half of the SP’s army that was left elsewhere on the table with the two thirds of mine that faced them.

Back to the left, and my outflanking manoeuvre had been gloriously successful, which meant that I had managed to totally fragment the Sea Peoples’ main battle line.

This meant that my roving Knights could gang up on isolated warbands while my infantry ground inexorably forward.

Now hemorraging coins, it wasn’t long before the final Sea Peoples’ unit fell, leaving the Venetians masters of the field, with the coup de grace fittingly delivered from the left flank.

The only downside was that the loss of the Knights on the right had cost me more coins than I wanted, so the victory was a more modest 169-62 in my favour.

With three wins out of three so far, that left me in pole position at the end of day one. That meant that the next morning I would face Adrian’s Thessalians again - yes, the ones I had lost the warm-up game to just before the tournament began - with the winner then able to be fairly confident of victory overall.

Time for a curry - with only a modest amount of alcohol - and an early night!

TTS AAR: Britcon Game 2: Venetians vs the Spartans!

My second game at the Britcon To The Strongest tournament this year was against Andy’s Spartans - another infantry-heavy army.

This was going to be a horrible army for my Venetians to fight: veteran Hoplite Spartiates backed up by more Hoplites, backed up by even more Hoplites. How’s a Knight supposed to charge into that lot and survive?

One advantage I had was that I would almost certainly outscout the red cloaks, and this did indeed prove the case. I therefore adopted the same tactics that I had used against the Zanj in game one, and came forward infantry in the center to pin his line in place, while my Knights probed for a flank to turn.

And either or both flanks would do!

But the thing about Hoplites is that they can more really well in one direction and not at all in the other: my problem is that I couldn’t remember which was which! Was it right good,/left bad or left good/right bad?

As it turned out, it was right good/left bad, so that Spartans slewed across the field in an attempt to stop me getting around their right flank. Unfortunately for the Greeks, my horsemen were faster than them, and soon my mounted crossbowmen and some of the Knights on the left were looking at Spartan backsides!

On top of that, I was also in a position to use more of my Knights on the right flank, although some Spartan allies there had turned to face my assualt.

On the left hand side, Andy’s problem was that his men couldn’t face in two directions at once: a problem made worse when the first flank charge from my mounted crossbowmen and some Knights killed the general in charge of the Spartiates. They would have to fight the rest of the battle without Leonidas!

Spartans are tough, though, and it was going to take me a bit of time to chew through them, even with the tactical advantages that I now had.

Meanwhile, on the other side of the field, my Knights and Lights had worked in perfect harmony (for once!) and cleared the Spartan allies from the field.

I would lose the Lights and one unit of Knights clearing more off the board here, so it was the left flank where the battle would be decided.

There I had by now dealt with one unit of Spartiates, and now threatened the rear of two more.

Andy was still unwilling to commit his men to frontal charges against my Knights facing forwards, presumably worried about the fact that if he charged me, although he would get the first strike, it was likely my Knights would survive that and then strike back twice with their lances, and strike back at Spartans who had given up all the advantages that formed spearmen get when receiving a mounted charge.

That meant that I had both the tactical positional advantage and the initiative, so could attack and defeat the Hoplite unit on the hill you can just see in the picture above with a combination of in-the-rear and in-the-front attacks. This removed a Zone of Control, allowing me to then start to roll up the rest of the Spartan line.

The loss of multiple deep units was also hurting Andy’s supply of victory medals, and it only really took one more unit of Spartiates, again beleaguered on two sides, breaking to finish the game. A victory at 177 points versus 54 points for the Venetians.

TTS AAR: Britcon Game 1: Venetians vs Zanj Revolt

My first tournament game at Briton this year was against John’s Zanj Revolt army: hordes of fanatical warriors who would keep fighting at full capacity no matter how many times you disorder them. My troops were missing the canals 0f Venice already!

As the Zanj had no cavalry, I won the scouting, and was pleased to see the enemy drawn up in what looked like a defensive posture to me. The last thing I had wanted was to face an unbroken wall of foot units stretching right the way across the table, so the open flank on one side of the Zanj formation seemed like an opportunity to be exploited.

I duly advanced my infantry slightly forward in the centre (always give yourself a little retreat room just in case you need it) while sending the Knights cantering forward on the left flank.

The Zanj weren’t moving: obviously hoping to act as a rock on which the waves of my assault would break, so I took the time they had given me to get my troops just where I wanted them.

John’s refused right flank, however, didn’t give me what I really needed: a clear path, free of ZoCs, into the side of main Zanj body of troops. It was time to try and break things up a bit: time to send in my main line.

My initial advance to contact didn’t go too well: the Alabardiers and a unit of Knights being disordered, but a quick step backwards began to open things up a bit, certainly enough to deploy one unit of my outflanking force into position.

A lot of the Zanj were on the right hand side of the table, facing air…so they ganged up on the only unit of mine that they could reach: more Knights. For once, however, the Knights did what they were supposed to do, and punched through the warriors in front of them to escape the threat.

In the right hand picture above, you can also see how John’s echelon formation was keeping my outflanking force at bay…but all I needed was one chink in the Zanj armour and I was in!

That came as my re-ordered infantry pushed forward again, leaving a lane behind them for my flanking knights to cross the entire field and crash the side of the Zanj force on the ‘empty’ side of the table: as I said, they had been advancing forward so had got out of touch with the rest of their troops.

As the Zanj line fragmented, I was now able to gang up on their individual units. What this meant was that although the Zanj warriors and most of my men fought the same way, because the Zanj (as fanatics) saved very badly, I was able to inflict significantly more hits than I took, and even deep units can’t stand forever.

Zanj warriors began streaming from the field, leaving the Venetians with a 188-23 victory (we were using Peter’s Ewelme points system): a good start to the tournament proper.

A good win, but one that left me facing a tough opponent in round two: the Spartans!

TTS AAR: Britcon Warm-Up: Venetians vs Thessalians

One of the high points of the To The Strongest calendar year has to be the Britcon tournament: with five games over two days, it is the marathon event on the competition circuit.

This year’s Britcon was going to be even busier for me than normal as I had stepped in to run the TTS event after the original organiser had had to pull out.

Tradition has it that any early birds who arrive on the Friday night can play a warm-up game with whoever else is there, so my Venetians therefore found themselves lining up opposite the Thessalians, ably commanded by Adrian, last year’s winner.

The Thessalians are quite intimidating: a command of veteran Hoplites ideal for defending against a cavalry charge, a command of meaty heavy cavalry, then all sorts of support troops including a couple of veteran Peltast and small Hoplite units. This was not going to be an easy warm up!

At this point I wasn’t sure what my plan was…but I did know that it didn’t involve letting a couple of units of enemy light cavalry sneak around my left flank almost as soon as the battle began!

Those pesky lights forced me to drop back the Knights I had on that flank, causing me to spend the first half of the game with one eye constantly on what was happening there. Definitely not good for the concentration!

Fortunately, as you can see in the right-hand picture, below, I did manage to contain Adrian’s troops there, even managing to also see off the Thessalian cavalry that had come forward in support.

Meanwhile, my Knights on the other side of the table were trying to get forward to turn the Thessalian left flank.

This, however, just wasn’t working for me, although I can’t remember why. All I do know is that my Knights there were somewhat roughly handled by some more pesky lights and the veteran Peltasts forming the end of Adrian’s main battle line, and that this allowed the Thessalian Hoplites to get into contact with my infantry.

The Knights on the right just couldn’t seem to get involved. One unit, the one with the general and army standard, languished disordered at the back of the board covered by a small unit of enemy veteran Hoplites. The other was still trying to chew their way through a unit of enemy veteran Peltasts. Not a very good performance from the Knights.

There was other fighting still going on over the rest of the battlefield, but by now my units were fighting as individual elements, not together as part of a line.

The end, as they say, was nigh…with the coup de grace being delivered as a hoard of Hoplites smashed their way into my camp, the Lights I had left there as guards proving no more than a speedbump for the Greeks, despite fighting from behind fortifications.

So a 4-13 loss for my warm-up game: not a very auspicious start to my campaign. Let’s hope the Venetians learnt some lessons for the tournament proper…!

TTS AAR: Burgundians versus Celts

As is now our usual practice, Rob and I quickly cleared away the game of For King & Parliament that we had just finished and prepared for a quick ‘dessert’ of To The Strongest.

I was about to travel to Nottingham for the TTS competition at Britcon ‘24, so was quite keen to have a practice game against an infantry-heavy army. The closest equivalent in 15mm to the Venetians (Late Italian Condotta) that I would be using at Britcon were my Burgundian Ordnance troops, so I would use them whilst Rob took the Ancient Britons: plenty of infantry with enough mounted support from chariots to make them tricky to deal with.

view from the ancient british side of the table

Theer did seem to be an awful lot of troops facing my Burgundians but, as it turned out, that was nothing to what the Venetians would face in Nottingham, but more of that in future reports…

The Ancient Brits opened proceedings with a general advance forward, but a weird series of cards meant that their warbands were immediately strung out almost in an accidental echelon formation. The Burgundians kept their nerve and moved slightly forward in a solid line.

Digressing from the centre for a second, British chariots hurtled forward on my left, seeking to curl in behind my battle line.

I dispatched a squadron of knights to deal with the threat but, much to my surprise, although they held the chariots up the knights were eventually defeated.

Thankfully the chariots never managed to get moving again after the clash (presumably looting the bodies for steel weapons, armour, heads etc) so what was an awkward situation never developed into a crisis.

Back to the centre, and the lone Ancient British warband that Rob had pushed forward was soon dispatched by my line: three against one is never good odds!

Meanwhile, my mounted crossbowmen on the right had, through a bit of luck with activation cards, managed to charge the flank of the first wave of British chariots heading towards my camp.

This allowed me to send the knights covering that side of the field forward to engage another warband: once again allowing me to use my superior fighting power to hit an enemy unit whilst avoiding being overwhelmed by weight of numbers.

With two warbands and two chariots already lost, Rob was caught between a rock and a hard place. Either he jung back and let me use my longbows and then advance to finish off any pin-cushioned survivors, or he threw everything he had left forward in an attemtp to finally break my line.

Naturally he decided to throw everything forward, and an almighty melee broke out in the centre of the field.

Unfortunately, as I said above, the troops in my main battle line were either as good as or better than his on a unit-vs-unit basis, so it was only a matter of time before just one too many warbands broke and victory was mine!

It had been a great game, and really good practice for Britcon. Lessons learnt about facing a mostly infantry army included:

  • guard your flanks

  • always try to gang up on warbands that have got separated from the main body

  • use your lights in the enemy flanks

Now all I had to do was try remember them and then put them into practice!

TTS AAR: The Beardless King Strikes Again

Having spent all that time and effort re-basing my New Kingdom Egyptians, I now wanted to get them onto the table.

No wargaming friends were available (you just can’t get the staff these days!) so I persuaded (i.e. bribed) daughter number two to put aside her computer games and face me over the tabletop. I would take the Egyptians, she elected to lead the Italo-Normans into battle.

The Italo-Normans deployed with their infantry and camp on their far right, lurking behind a couple of hills. Their knights, half of them Veterans, were in the centre of the table.

I deployed the Egyptians in the traditional way: a command of chariots on either flank with the massed infantry in the centre. My plan was, somewhat obviosuly, to sweep the chariots forward in an attempt to outflank the enemy whilst pelting them with bow-fire. Meanwhile my infantry would be a rock on which the Norman knights could dash themselves to pieces.

Well, as Mike Tyson famously said, everyone has a plan until you get a punch in the face!

I opened proceedings with, as per the plan, a major advance forward with the chariots. The cards favoured me on the right, with one command ending the turn in prime position.

The Normans responded by advancing their infantry forward onto the hills in front of their camp, sending a unit of Knights to handle my massed Light Chariots on their left wing, and an all out advance in the centre: the Beardless King saying later that her strategy was to attack, attach and then attack some more!

On the left hand side of the table, my other command of massed Light Chariots were somewhat surprised when the Norman infantry (deep Spearmen) came down off the hills and headed for them, murder in mind. Didn’t they know they are supposed to stay on their hill and get peppered with arrows until they break?

I duly retreated back before the advance, loosing arrow after arrow to not a huge effect: a pattern of activity that would be repeated until the end of the game. I would have to win elsewhere!

Meanwhile in the centre, the Normans were coming forward fast.

One unit of Knights hit the Shardana Royal Guard (the Sea Peoples types) and smashed them straight off the table!

The rest of the Knights closed with the main Egyptian infantry line.

On the right flank, the other chariots division had split their efforts. Half of them now faced the Knights that had defeated the Royal Guard, the other half (the ones down the other Norman side of the table) opened fire on the Knights that had been sent to contain them and, in due course, shot them down.

The victorious chariots then turned and headed back to the main action: let’s see how the Norman cavalry like a chariot charge in the rear!

Unfortunately, however, the Egyptian infantry line was in deep trouble and, before the chariots could intervene, just collapsed under the weight of the charges of the Norman Knights.

So that was it! The relentless charges of both the Norman knights in the centre and the Spearmen in the left had driven the New Kingdom Egyptians from the field.

The Beardless King, triumphant, slunk back to her screens!

TTS AAR: To The Longest Game Three: Venetians versus WOTR Yorkist

The afternoon game at the 2024 To The Longest event was a maga-game where everybody would fight at once. In effect, this meant eight games of To The Strongest played simultaneously, with movement of troops from one table to another allowed.

My opponent was Steve and his Wars of the Roses Yorkist army, with all its units based and painted to its historical equivalents. It was a very good looking army consisting of bows, billmen and knights: not a combination to be lightly dismissed. Terrain-wise. the left side of the battlefield was dominated by another ruined monastery, impassable to mounted troops. In addition, lunchtime rain meant that the ploughed fields that had been good going in the morning were now rough ground. The presence of the monastery determined my deployment: infantry on the left, with my Knights on the right.

The picture above was taken after the game had been going for couple of turns. On the left you’ll see Steve advancing some infantry through the monastery grounds and, on the far right, my Knights advancing forward in an attempt to turn the Yorkist left flank where, actually, the game had started quite well for me: one units of Knights managing to drive some Yorkist knights from the field.

All seemed to be going well until, that is, we each deployed our final commands (in To The Longest, you started with one command off table until the end of the first turn).

I put my final lot of Knights onto the table centre-right, where they could either re-inforce the centre or follow up on any success on the right, but Steve deployed a huge command of billmen and bowmen right opposite where my original Knights were trying to turn his flank, neatly plugging the gap at the end of his line.

The picture below shows my original Knights on the right retreating in the face of this mass of veteran infantry!

With an advance on the right now looking a tad dangerous, I switched my efforts to the left and centre.

In the centre, my newly-arrived Knights and some infantry managed to clear some light units out of the way and then punch a hole through the Yorkist line. This was good, and I now threatened the enemy camp, but there was a huge mass of Yorkist units (seven of them) on the right hand side of the table and it would not be good if they pivoted through 90 degrees and headed to their right.

I needed to keep them occupied to their front, so my main body of Knights retreated back just far enough to keep the enemy pinned in place whilst I frantically worked out how to win the game elsewhere.

On the left, my light handgunners had put themselves into pole position for the “men of the match” award by managing to drive back the enemy infantry trying to infiltrate my left through the monastery grounds. They, supported by the Lancieri (spear) and Pichierrii (pike) had actually driven the Yorkists back onto their own side of the table, even though the enemy had survived several flank attacks from the ‘gunners.

The pikemen, after their humiliation in the last game, were also on a roll, squeezing through the gap between woods and fields to drive an enemy unit from the field.

I really needed to finish the game now: my Knights were running out of retreating room on the right, and although I had cleared the enemy centre, his troops on the right were starting to do what I’d feared they might: move to their right to re-take the ground I’d taken in the middle of the field, knocking off my units there from the flank.

Taking the enemy camp would do nicely, and I had a unit of Knights in position to do that…but the camp was defended and I’d had some bad experiences in the past trying to take a fortified camp with mounted troops.

So that left the pikemen…who could take the camp with an easy move forward and then a difficult diagonal move into the undefended portion of the Yorkist camp.

I drew a card for the easy move: a “10”.

Well, they certainly were keen, but were now presumably puffing and blowing and not in the mood to go again. Or were they? Only another natural “10” would get them into the camp and win the game for the Venetians…

Lady Luck had, for a change, smiled on me and my pikemen marched neatly into the Yorkist camp costing Steve his last three coins. Victory was mine 14:5!

So a decent final game for the Venetians, although it didn’t stop the English winning the event overall.

A great day’s gaming: many thanks to Peter for organising, and to all the players, especially my three opponents.

TTS AAR: To The Longest: Game Two: Venetians versus 100YW English

My second game at the inaugral To The Longest was also against an English Hundred Years War army: more longbowmen, more stakes and more dismounted knights!

Both John, my opponent, and I kept one command of mounted knights back from the initial deployment, with both sides then bringing them onto the field on the side of the table where the ruined monastry stood: the monastry being worth extra points at the end of the game to whoever held it by having units in orthagonal base to base contact with it.

Having learnt my lesson in sending my lights forward to die in a hail of longbow fire in the last game, I decided just to advance my fighting units forward, and get them stuck in as soon as I could.

This was a sensible tactic to adopt,,,until, that is, the cards decided to really mess with my plans!

First up, my pike advancing on the left had a great opportunity to run over some longbowmen, but didn’t:

The pikes then died, costing me three coins early in the game!

Next, a command of knights attempted to charge some enemy longbowmen safely ensconsed behind rows of stakes. This was a stupid thing to try to do anyway, but a couple of aces didn’t help:

The knights would spend the next few turns uselessly smashing away at the longbowmen with neither side able to damage the other!

I was still determined to get stuck in to his melee-weak massed longbows, particularly on the left side of the field…

…but those Aces kept coming thick and fast!

By this time I had had enough. I decided on a complete change of tactics and, unusually for me, play for a draw by retreating all my troops back to my side of the field, ceasing their Ace-ridden attempts to smash their way into John’s longbow-held position.

I therefore pulled back on both the left and centre, although I did keep possession of the monastry on the right.

Now this is where the game suddenly got interesting as John, with a sudden rush of blood to the head, decided to come after me.

Firstly, the dismounted knights guarding his camp left the safety of their fortifications and came a cropper against a unit of Lancieri and my Alabardiers, who executed a second quick 180 degree turn to re-engage the enemy once they were out in the open.

Second, a unit of veteran English longbowmen attempted to re-take the monastry position from my Later Knights, who promptly remembered why they were called Later Knights and ran them over without difficulty.

Back to the left flank, where enemy longbowmen had followed their dismounted knights out of the fortified camp only to also fall foul of the Alabardiers who, it must be said, were having a very good day indeed!

This left the English camp open…my Alabardiers walked into it…and suddenly John announced he was out of coins and I had won the battle!

Well that was quite a surprise!

With possession of the monastry, I had achieved a 14-8 victory over the invading English.

I’d like to say that my tactical retreat was indeed that: a carefully planned tactic to draw John out from his position…but it wasn’t. I was genuinely determined to retreat back to my side of the field and make him come to me if he wanted anything but a draw, and was then quite surprised that I managed to turn things around as I did.

I was lucky to kill the dismounted knights on the left so easily, and John was annoyed with himself for exposing his longbowmen on the right (he’d have been okay if he’d sent the knights behind them forward instead) but what a topsy-turvily fluid game!

On to the afternoon’s big bash…

TTS AAR: To The Longest: Game One: Venetians versus 100YW English

Earlier this month I took part in the inaugral To The Longest event: a 28mm To The Strongest battle day featuring eight players aside fighting three linked games, two individual mano e mano games in the morning and one gigantic group game in the afternoon.

You can get some idea of the scale of the event by looking at the picture, opposite, that shows the table set up first thing in the morning before the game got started. As you can see, the battlefield stretched the entire length of the hall we were in, including passing through a relatively narrow partition…but more of that later.

The Hundred Years War was the theme of the day, with one side playing England, the other France. As I’m a bit short on 28mm armies, I was using my trusty, but in this case slightly anachronistic and geographically challenged, Venetians as a Late Italian Condotta army…well, it’s so hard to get work sometimes you just have to get on your bike, cross Europe and go looking for it!

My first game was against Dean, playing an English 100YW army that was the usual mixture of knights, billmen and longbowmen.

At this point it’s also worth noting that the weather was dry, and the ploughed fields still counted as good going.

My plan was to use my strong infantry command to take the walled field on my right. At the same time, my light cavalry would secure the small herd of sheep on the left (as this was the first in a series of linked games, you got extra points for securing supplies) whilst the Knights in the centre waited to see what happened.

Well, the good news was that my Stradiotti soon secured the sheep and herded them off the table to be consumed roasted with some mint sauce later on.

The less good news was that although my infantry command quickly reached the walled field on the other side of the table, they would spend the entire game bashing themselves against the troops within in, unable to make any real headway.

The battle would therefore be decided mainly in the centre of the field, where both sides moved their “heavies” into position for a fight.

My plan was working: with so much of Dean’s army concentrated on his wings, I effectively had five fighting units versus his three, giving me the advantage.

It would have been six versus three except for the fact that one unit of knights stubbornly refused to move away from the Italian camp (you can see them bottom left in the picture, above) wasting vast amounts of time and initiative as I tried to get them into the fray.

Worse, my other Knights were having one of their off days: failing to smite the enemy from the field with their initial charges.

The grinding combat in the centre gradually worked its way through, with honours ending up about even.

I lost a unit of Knights to English dismounted knights but had some Lancierii all ready to take advantage of where the victorious enemy knights ended up, but luck was on the side of the English and this pivotal moment to flank charge King Henry passed without result.

I had another chance to smash through the enemy line when some more of my Knights ended a unit of English billmen.

This could have meant the opportunity to roll the English up, but Dean cunningly withdrew his vulnerable units into a defensive position in the top left of the field, meaning that my Knights now faced nothing but a row of longbowmen rather than the flanks and rear of retreating billmen.

By this time my Venetians were also getting a little tired and emotional!

Dean had gradually been knocking off my light units which, whilst individually unimportant, collectively mounted up to a significant amount of coins.

Add to this King Henry’s unit turning and polishing off the Lancierii and I had lost too many to recover from. Excellent play from Dean meant a bad start to the day with a 6-14 defeat for the Venetians!

TTS AAR: To The Smallest Game 4: Timurids vs Sassanid Persians

My final game at this year’s To The Smallest 15mm tournament was against another Sassanid army: this one commanded by Michael L, with the tabletop being a representation of the WOTR battle of Towton…fortunately without the snow storm!

For a change, I won the scouting, and watched as Michael deployed his men with their right flank anchored on the small stream that crossed the battlefield. This gave me the opportunity to deploy one of my commands on my far left, with my plan being to advance them forward and hit Michael in the flank as I held my main line back. There was also the prospect of taking the Sassanid camp, which didn’t look very defended to me.

I did see some elephants on the left of Michael’s line, so was determined not to close with them, instead shooting the pachys with lots of arrows…once bitten, twice shy for those who have read my previous reports from this competition!

As the battle began, I advanced quickly forward on the left, although progress was a bit stymied by the cards that first of all split my heavies from my lights and then prevented me getting into my outflanking position as quickly as I wanted to.

Meanwhile, I held most of my line back, just sending the lighst forward to harrass the Sassanids in the centre and on the left.

Spotting my intentions, Michael advanced forward as fast as he could, and soon things were posed for a massive clash in the centre of the field.

I say posed for the massive clash, but tht never really happened as, sticking to my plan, I carried out a bit of a strategic hang-back or withdrawal, limiting my exposure to melee as much as I could.

It’s worth mentioning that Michael had committed quite a strong force to his far left, presumably intending to try and curl around my right flank, but this force was delayed by just two of my light cavalry units (Turkoman horse archers), who kept them occupied and therefore out of the main action for several turns.

The final picture in the gallery, below, shows one Sassanid unit finally managing to get across to the centre to attack the flank of one of my Timurid lancer units.

All the above, however, was just a distraction for me: my main thrust was down the left flank. Theere a combination of my heavy cavalry, kharash driven slaves and the force on the other side of the stream had launched a series of succesful attacks that had put me into a game-winning position:

All this manoeuvring around had, however, been using up valuable time and, at this point, despite Michael and I’s best efforts to bring the game to a firm conclusion, we had to finish.

I had done enough to achieve a 9-2 winning draw, but just another 15-30 minutes would, we were both sure, have resulted in victory…but it was still a great game fought in the best of spirits. I also think it’s fair to say that Michael did suffer from several appalling run of cards during the game!

So how did I do overall? Well, with one loss, one losing draw and two winning draws, my Timurids managed 12th position from a field of, I think, 18. Disappointing, but it had still been a cracking tournament that I have already diarised for next year.

The Other Side of the Hill

Michael also wrote this battle up on the To The Strongest Facebook Group. I wroye my report independently of his, so interesting to compare the two…!

Here it is then, the final report of my (mis)adventures in the To the Smallest Competition run superbly by the great Sid Ben.

My fourth attempt to win a battle foundered against Robert Avery’s lovely looking Timurid Army. We fought on the battlefield of Towton, an odd place to find both the Sassanians and Tamerlane the Great.

As usual I was outscouted. In my second and third games I had been irritated by catching the palm trees on one of my camps with my sleeve, so seeing all the trees on the Timurid side of Cock Beck (yes I looked it up and it’s too good to omit) I decided to repeat the example of my first battle and place my camps adjacent to Cock Beck. All was fine until Rob deployed his last command amongst all those woods with the dastardly intent to grab my camps! Yet another error which was compounded by my deploying the Levy (the camp was in their command unfortunately) to protect it so my least manoeuvrable troops would have to fight off Cavalry and light horse.

Never mind I could win the battle elsewhere against Rob’s sadly diminished forces, couldn’t I? Well I could dream. Purandokhr got forward on my left but was detained for far too long disposing of some Turkomans. The Elephants trundled forward but the Timurid horse, in the main, skipped away neatly. We did catch one unit at the end with the assistance of some horse archers sent over by Purandokhr.

However the main effort was to be made by Shapur. This hope was very short lived as one unit of Cataphracts was soon lost, the other, with Shapur himself, was disordered and any thought of attacking the enemy was gone only desperate thoughts of preserving what was left until Purandokhr came up.

Well despite some poor cards the Turkoman light horse seized my camps. I could barely get the Levy turned to face the threat before the enemy was upon them. However the Levy proved sturdier than I had expected though poor cards prevented Rob making heavier attacks upon them. He was attracted (or was that distracted?) by the six further medals they represented.

With Shapur’s men falling back, time was called leaving me with a loss of 8 medals (I think) out of 15 while I believe Rob had lost 4 though I may be wrong there. Regardless of the score it was a sound drubbing from a most sporting and friendly opponent. Though galling to make such a mess of it, it was a good finish to a thoroughly enjoyable day. It only remained to hear if I was in with a chance to “win” the Wooden Spoon (actually the “Mouse that Roared!” As it transpired I couldn’t even win that!

Thanks once again to Sid and all the other gamers who made it a special day. Thank you one and all.

Here’s the gallery of Michael’s images: all the pictures have captions describing the course of the battle, so be sure to check them out…

Phew! Pretty similar if you ask me!

TTS AAR: To The Smallest Game 3: Timurids vs Neo Assyrians

My third game at the 2024 Tio The Smallest competition at Firestorm Games in Cardiff was against Michael’s Neo-Assyrians. The action would take place on the Thermopylae table i.e. a narrow-ish stretch of open ground flanked by the sea on one side and mountains on the other.

I forget who won the scouting, but the two armies set up very differently indeed. Michael, cautious of all my cavalry, squeezed his troops into one corner, whereas I, looking for that outflanking opportunity, occupied the other!

My plan was fairly obvious: advance forward strongly and curl around the Assyrians’ left flank, forcing them to fight to the front and sides at the same time.

For their part, the Assyrians stayed squeezed into their corner, which suited me down to the ground…although I was finding my cavalry weren’t advancing forward quite as fast as I wanted them too: the Assyrians had too much time to prepare for my assualt!

Finally I was in position to attack, but the delay had given Michael enough time to skillfully position his men in a defensive ring, making good use of the patches of rough ground to protect his flanks.

The first round of my attacks went in on the Assyrian flank with a collosal assault that swept the first line of Michael’s defence aside, forcing him to send his second line in to hold the Timurids back.

Meanwhile, a unit of kharash driven slaves probed the ‘corner’ of the Assyrian position and, much to everyon’e surprise, managed to send a unit of enemy infantry routing from the field.

The Assyrians, however, quickly recovered their balance, moving the last of their reserves to block the potential incursion.

Unfortunately, the clock was ticking onwards, and as the morning’s games had taken slightly longer than expected, the game’s slightly curtailed allocation of time was now coming to an end.

The Timurids smashed forward one more time, but just couldn’t break through the Assyrian lines.

With the game now ended, we totted up the victory medals: the Timurids might have sent quite a few Assyrian units fleeing from the field, but it had been an expensive business in terms of casaulties to do so.

In the end, the game was a winning draw in the Timurids’ favour: ten medals to nine i.e. the very narrowest of margins!

Michael had mounted a superb defence against my Timurids, and had come within Ames Ace of taking the result. A great game that had exhausted all involved!

TTS AAR: To The Smallest Game 1: Timurids vs Classical Indians

Earlier in June, I made the long journey to the excellent Firestorm Games in Cardiff for the inaugral To The Smallest competition i.e. a To The Strongest tournament played in 15mm.

This featured 160 point armies (15-20% larger than the usual 28mm tournament armies) played on a 10mm rather than a 15mm grid, giving everybody much more room to manouevre.

My problem was that all my existing armies were set up for a 15mm grid, so the only army that I could easily convert (i.e. no re-basing, just purpose built movement trays) were my Timurids. This wasn’t actually a problem: the Timurids conquered quite a bit of the world, so were bound to do well in competition!

My first game was up against Matt Slade’s Classical Indians on the Khadesh battlefield: so at least my horsemen would indeed have lots of room.

My plan was to keep his heavy chariot strikeforce busy with one of my cavalry commands whilst sweeping around his right flank with the other, attacking from front and sides to get the advantage.

As the game began, I therefore advanced strongly towards the Indians.

On the left, I quickly got in amongst it with one of his commands, although the elephants there caused my cavalry plenty of problems (in TTS, horse fight very badly against nellies); whilst on the right, I hung back and began peppering his charioteers with arrows, unfortunately to no effect.

Unfortunately, I just couldn’t break through on the right (fighting elephants with cavalry was one reason - I just couldn’t kill that elephant no matter what I threw at it) but Matt’s heavy chariots burst through my light cavalry screen and then my heavy cavalry as well.

Things were not looking good!

I needed to do something to break through on the left, so committed my reserves: the kharash units of driven-slaves. Here you see them moving up into action (bottom left).

The kharash c-rashed into the fight and, combined with some heavy cavalry, knocked an Indian infantry unit out of action. I was whittling his forces down on the left, but two units of elephants were still giving me problems.

Meanwhile, on the left, my troops had given up the ghost, leaving the way clear for his chariots to head for my now-undefended camps.

Which then promptly fell, giving Matt all the coins he could possibly need to win the game!

The score was a 9-14 loss for me, with Matt justly rewarded for his good play: his use of elephants to de-fang my heavy cavalry was excellent. I should have hung back and peppered the pachyderms with arrows instead of mixing it in melee!

Three games to go…and my Timurids had better pull their socks up!