IABNM Moderns AAR: Counter-Attack

Over the years, various people have adapted the TooFatLardies' company-level rules I Ain't Been Shot, Mum (WW2) and Charlie Don't Surf (Vietnam) for other, more modern periods.

One such adaptation, never officially published, was I Ain’t Been Nuked Mum. Here’s a battle report from 2015 taken from the now unfortunately moribund Maxim to Milan blog imagining action from the Cold War of the 1970’s.

The scenario is an attack-defence scenario based on a West German counter-attack after Soviet forces had been halted by NATO resistance.

Click on the pic below to see all.

IABSM AAR: Operation Compass: Fort Capuzzo

Blogger “A Wargamer in Cyprus” has been playing through the Operation Compass scenario pack. I haven’t been able to get hold of him to ask permission, so I hope he doesn’t mind, but here’s a quick report of his game using a slightly amended version of Scenario #01: The Road to Fort Capuzzo.

Hostilities have just been declared, and the 11th Hussars are on the rampage. Click on the picture below to see all:

FK&P AAR: Bisham Abbey

Time for another go at For King & Parliament, and the fifth scenario in my North Wessex campaign: Bisham Abbey.

After the last clash at Burchett’s Green, both sides have withdrawn to regroup and reform.

With “Little John” Boulters remaining in command whilst his father still recovers from wounds received at Widbrooke Common, the Royalists are bolstered by the return of the troops from Maidenhythe, hitherto sequestered by the King in Oxford. The Roundheads also receive reinforcements in the shape of a brigade of mercenary Scots troops under Colonel Macintosh MacLeod, and Sir Christopher (overall commander) is finally persuaded to lead from the back rather than the front!

The Royalists are ready to move first: marching north towards Marlowe. The Parliamentarians are ready for them, however, blocking their path just north of Bisham Abbey, a monastery-turned-manor-house that sits on the banks of the Thames.

The table from the Parliamentarian side

The Sides

The Royalist army, ably commanded by my friend John, consisted of four brigades. On the right was Col. Stafferton’s brigade of horse (two units of Swedish horse); to their left was Col. Spencer’s brigade of foot (the Cookham Militia, three battalia); to their left was Col. Sir William Ray’s brigade of foot (two standard battalia - the Maidenhythe Foot - and the Oxford Musketeers, a commanded shot battalia); and finally, on the far left, was Gen. Derrick’s brigade of horse (three units of Swedish horse).

The Royalist commander ponders his plans

The Royalist commander ponders his plans

The Parliamentarians, with Yours Truly in command, consisted of only three brigades. The Cavalerie, on the right, were led by Col. Hurst, and consisted of three squadrons of Dutch horse. Next to them, in the centre, were Gen. Nelson’s three battalia of infantry supported by the guns of Littler’s Battery. Finally, on the left, were the three battalia of mercenary pike under Col. MacLeod. A Forlorn Hope was positioned in the small hamlet of Bisham, mid-way between the battle lines.

MacLeod’s Scots in the dawn light. Well, we started at 9am, which is pretty dawn-like for a Sunday!

MacLeod’s Scots in the dawn light. Well, we started at 9am, which is pretty dawn-like for a Sunday!

The Best Laid Plans…

My plan was to pivot on the mercenary Scots, sending my horse forward as quickly as possible to smash through his lighter Swedish-types and then curl around the rear of the Royalist army. I would give up the distant hedge on the left, but take the nearer hedge in the centre.

As this was only John’s second game of FK&P, his plan was to advance generally across his entire front and see what happened when the enemy was encountered!

The Game

The End

The Parliamentarian coup de grace was administered by Sunnybank’s commanded shot and the Scottish mercenaries. Between them they utterly destroyed the Royalist 2nd Foot Brigade (the Maidenhythe Foot and Oxford Musketeers) which, added to the coins lost when the Royalist horse and artillery evaporated under the tender ministrations of Grey’s Cavalerie, finally emptied the King’s coffers!

In the end, my plan had worked, albeit with several road bumps on the way. I lost three of my command stands, and would have been gradually overwhelmed if it hadn’t been for the extraordinary fight shown by the 3rd Grey’s Cavalerie (the only non-veteran unit in the brigade, obviously). They turned the tide of the battle, with the Scots then digging in their heels and refusing to be broken.

All in all, another great game of FK&P!

TTS AAR: Marian Romans' First Outing

With the varnish on the first two cohorts of blue-shield legionaries literally still drying, it was time to take the Marian Romans out for their first game of To The Strongest.

Looking at their list, the Romans have three basic options dependent on their commander: Caesar (Spain and Gaul); Pompeii (the East) and Sulla. My choice was to field a Caesarian army, mainly because I already have Gauls so wouldn’t need to paint any of them. My list was therefore as follows:

  • Proconsul

    • Two units of legionaries (one veteran)

  • Legate

    • Two units of legionaries (one veteran)

    • One unit of Cretan Archers

  • Legate

    • Two units of legionaries (one veteran)

    • One unit of legionary artillery

  • Allied Cavalry Leader

    • Two units of veteran Gallic cavalry

    • One unit of horse archers

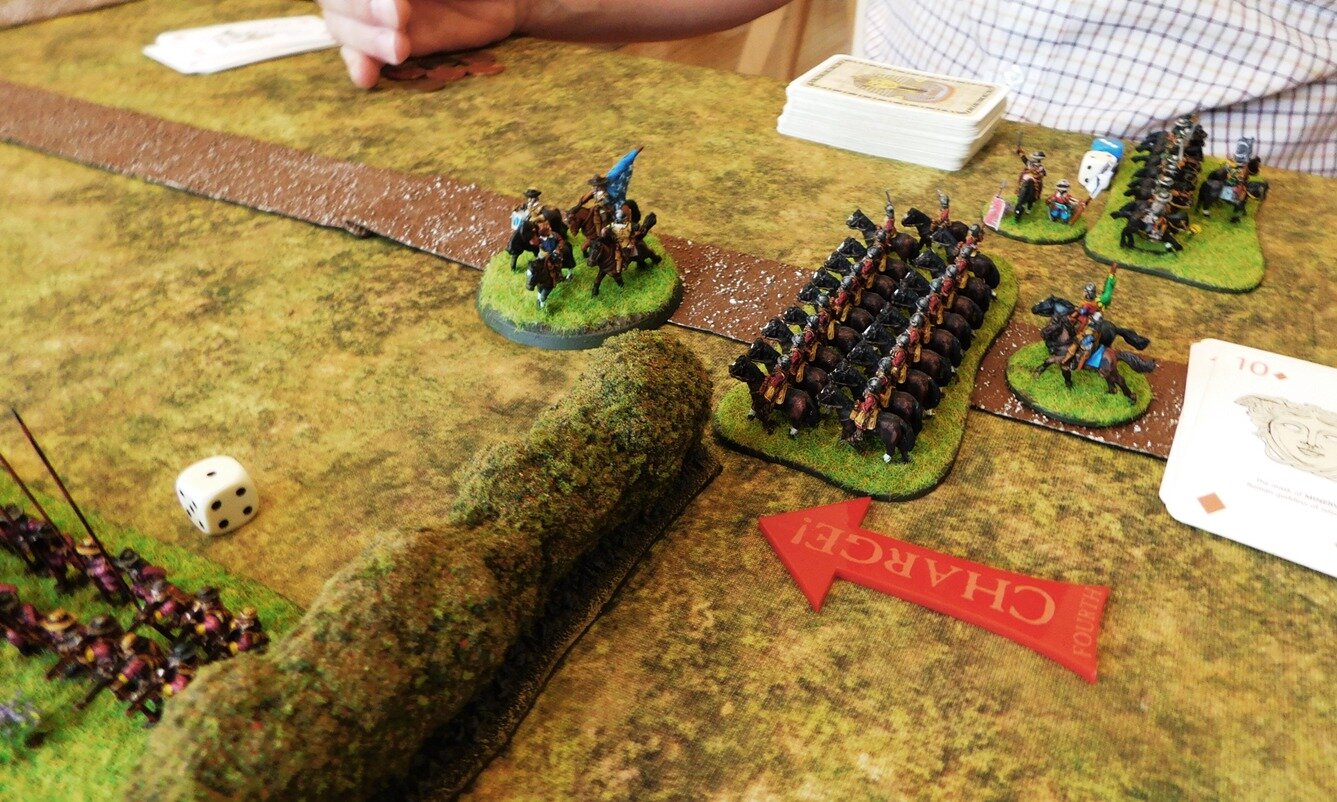
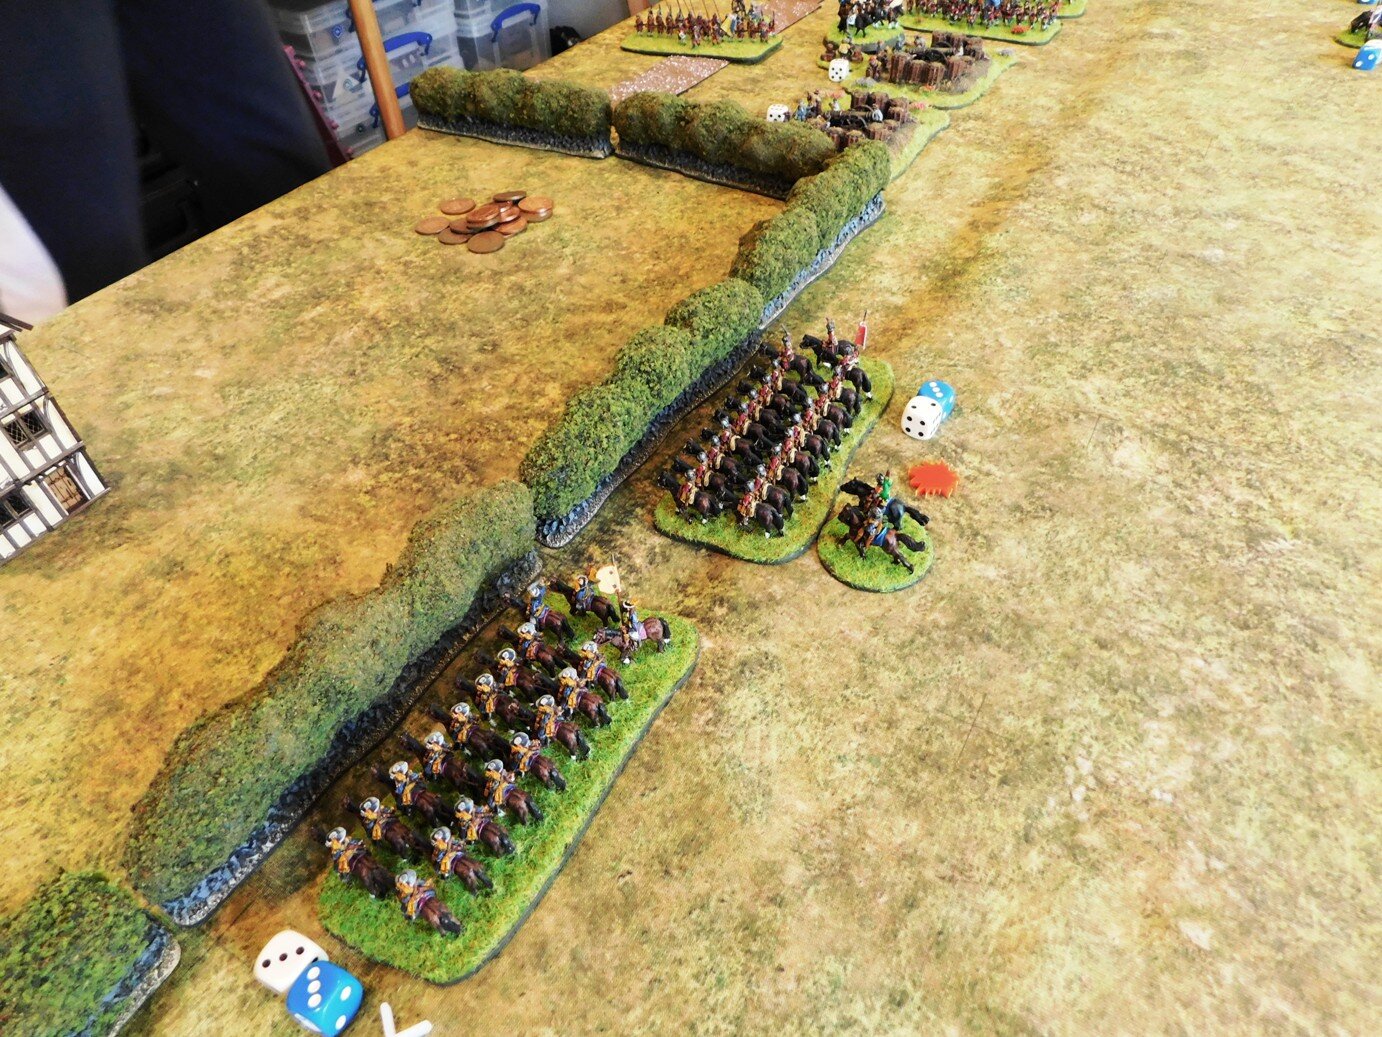
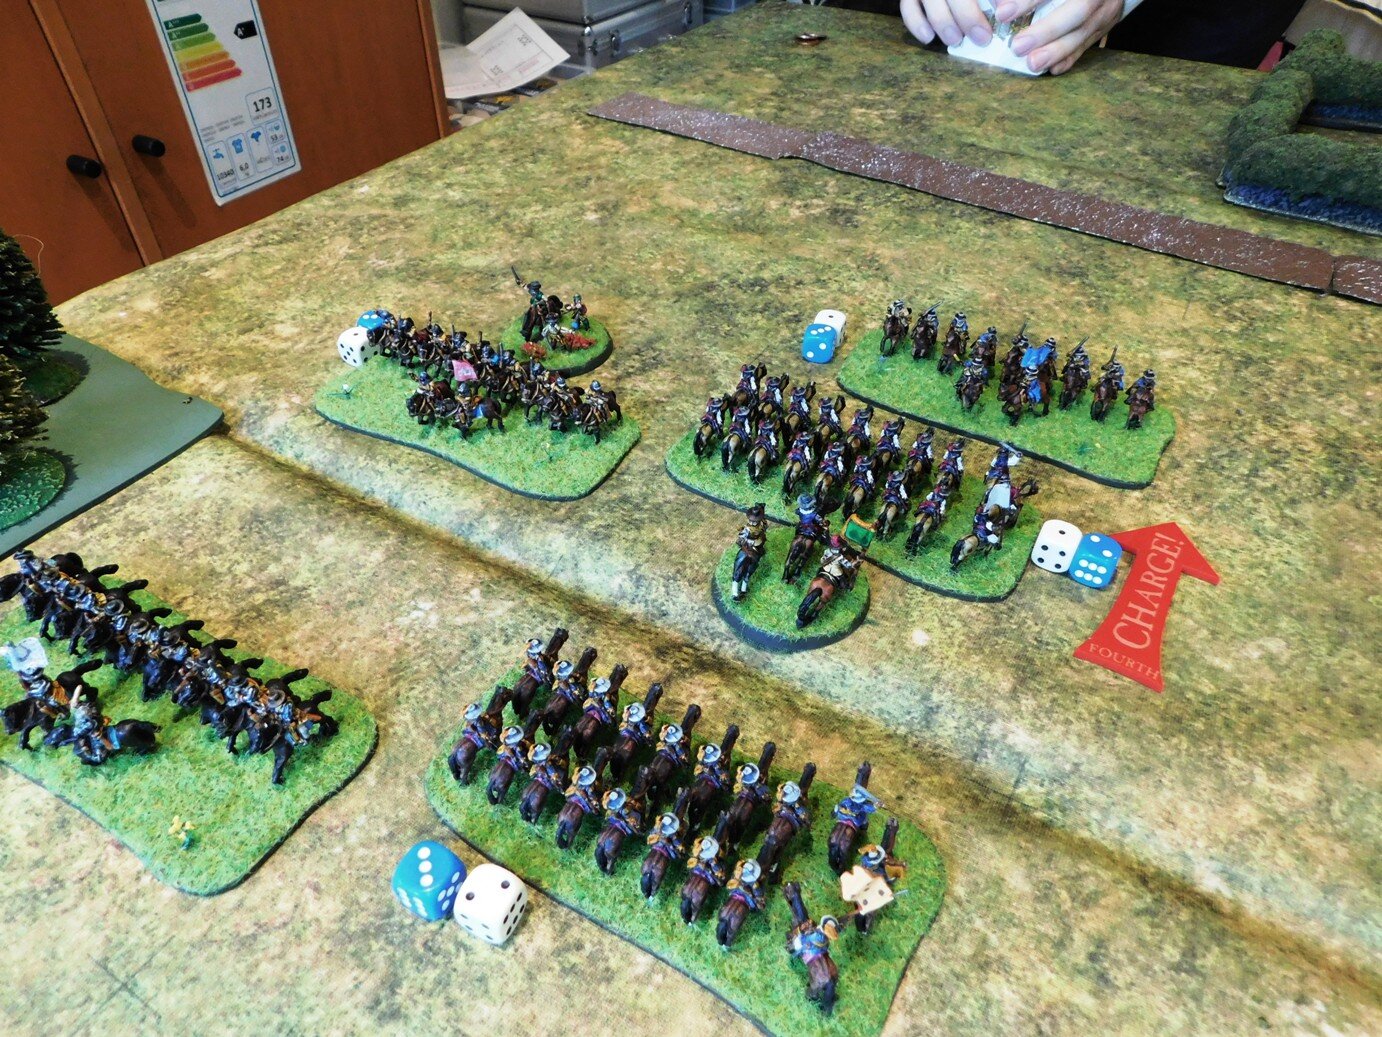
I’m thinking that perhaps the Gallic cavalry should, if veteran, more properly be Germanic cavalry, as the Gauls fighting for Caesar didn’t seem to be very good whereas the Germans were very effective, but that’s something I can rectify in due course: for this battle they were hyped up on Getafix’s potion!

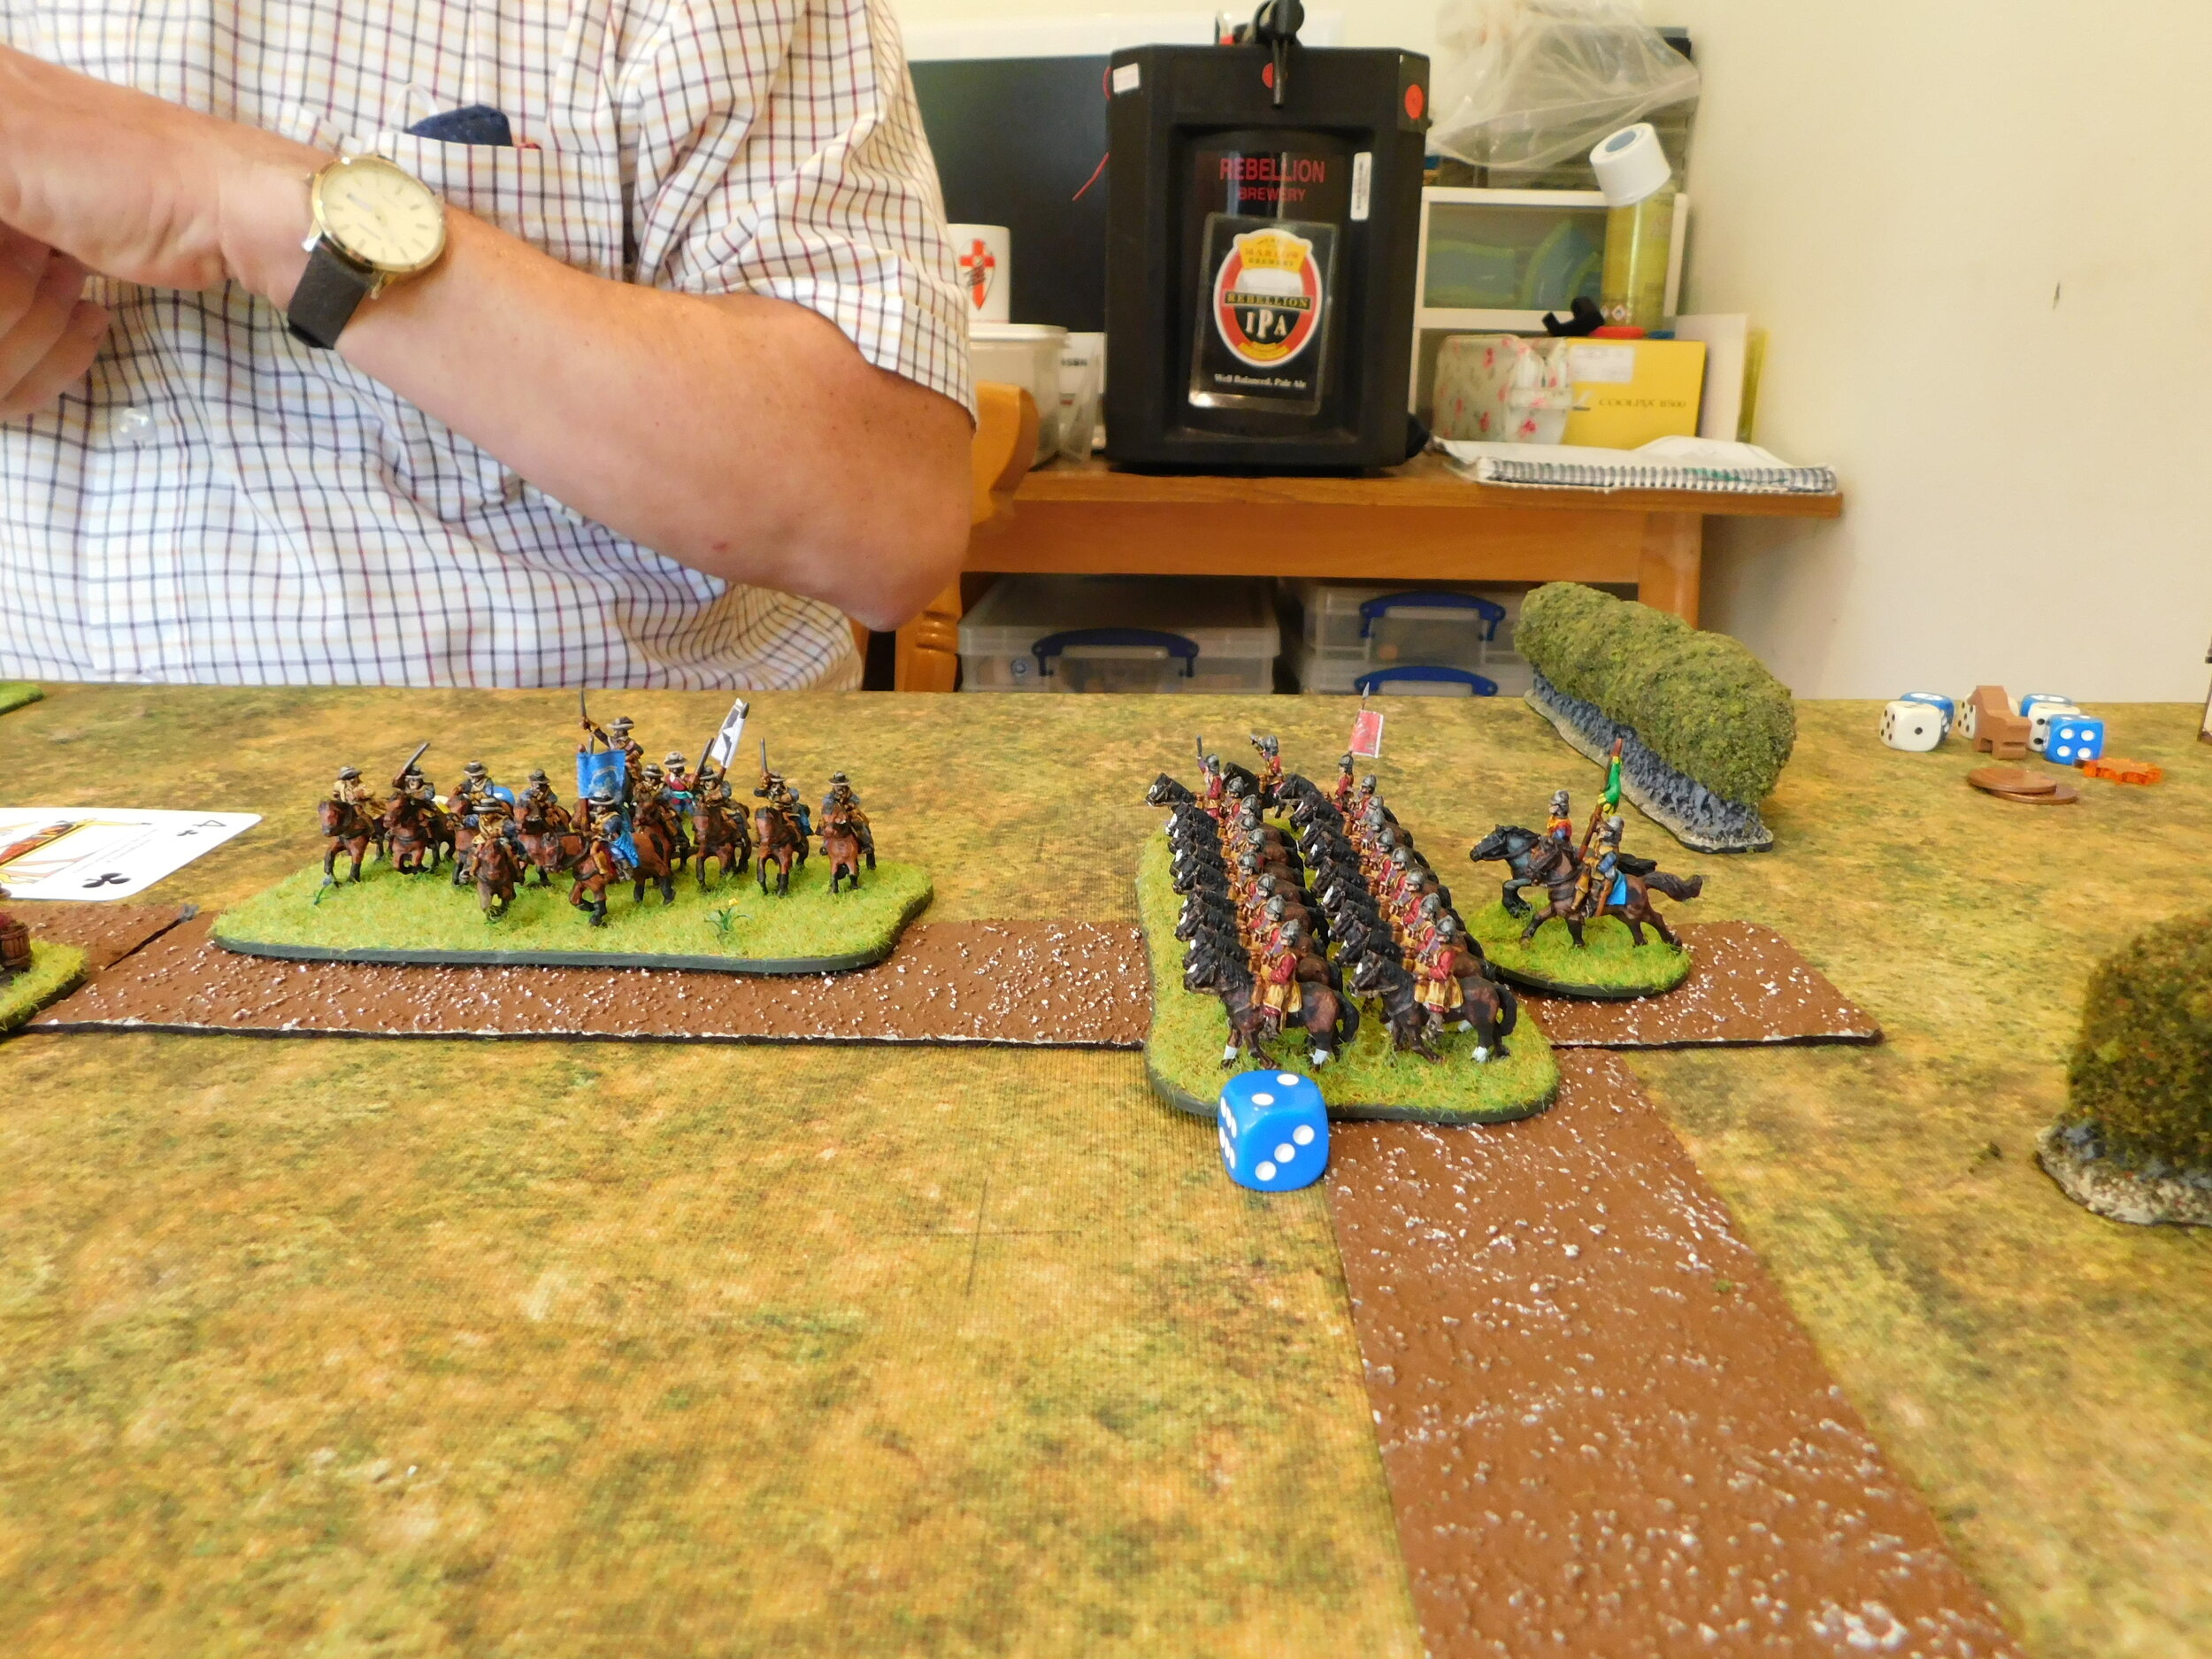
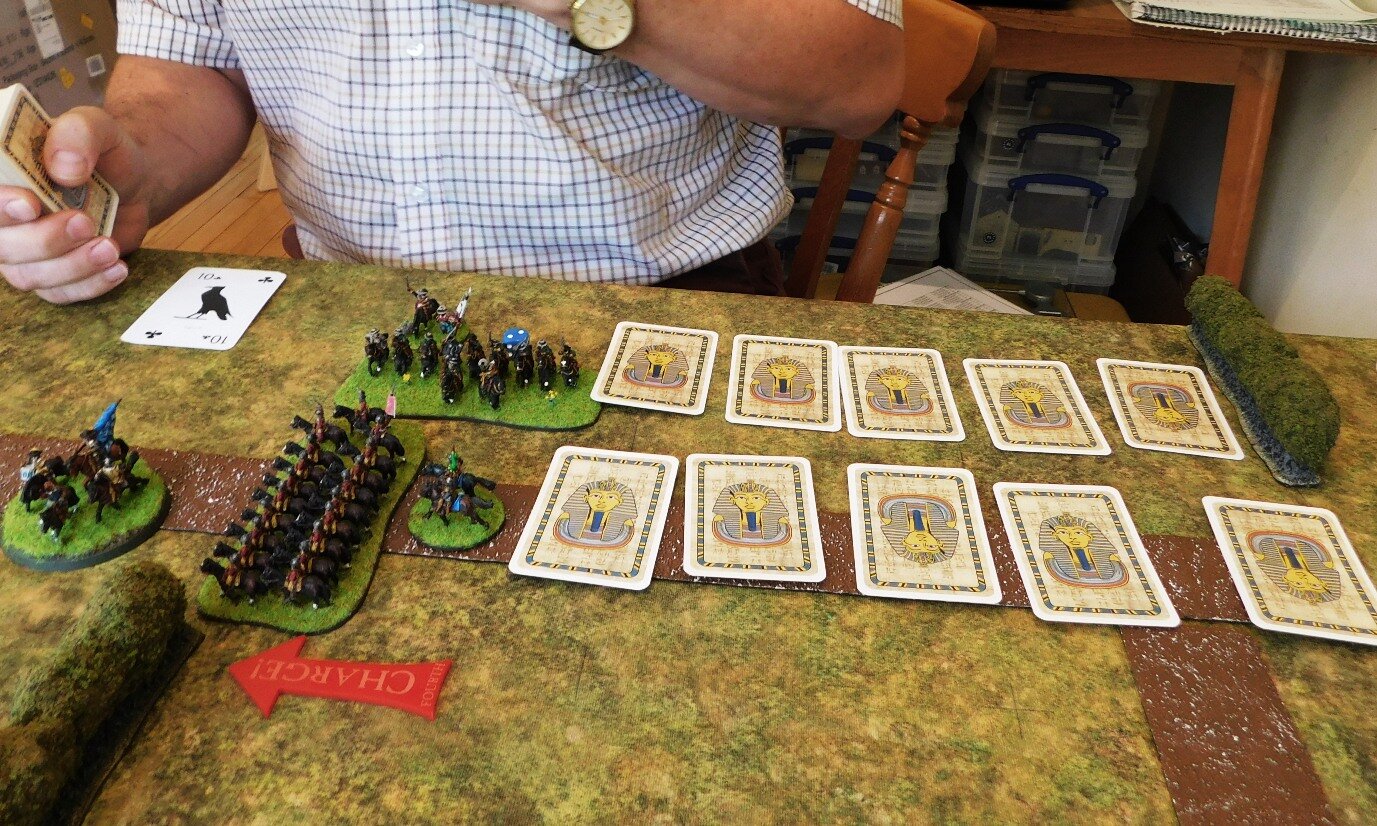
Kavan, my opponent, chose to field a Syracusan army. Not strictly speaking contemporary, but very much the sort of army the Romans had faced in the years leading up to the Marian period. His force consisted of:

  • Commander-in-Chief

    • One unit of Bodyguard Hoplites

    • One unit of Light Infantry

  • Commander

    • Two units of Gallic mercenaries

    • One unit of mercenary Greek cavalry

  • Commander

    • Two units of Syracusan Hoplites

    • Two units of light infantry

  • Commander

    • One unit of Syracusan Hoplites

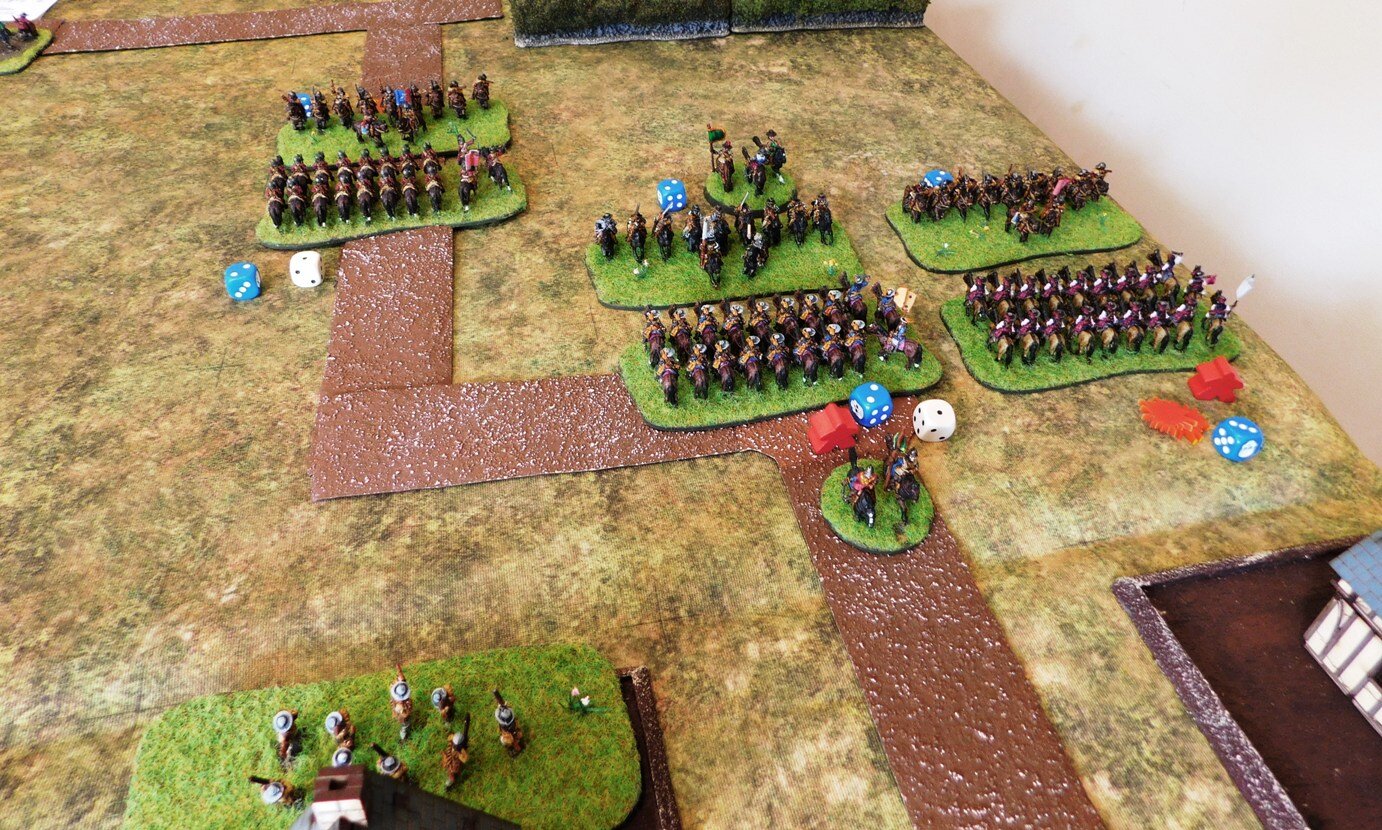
    • One unit of Syracusan cavalry

    • One unit of light infantry
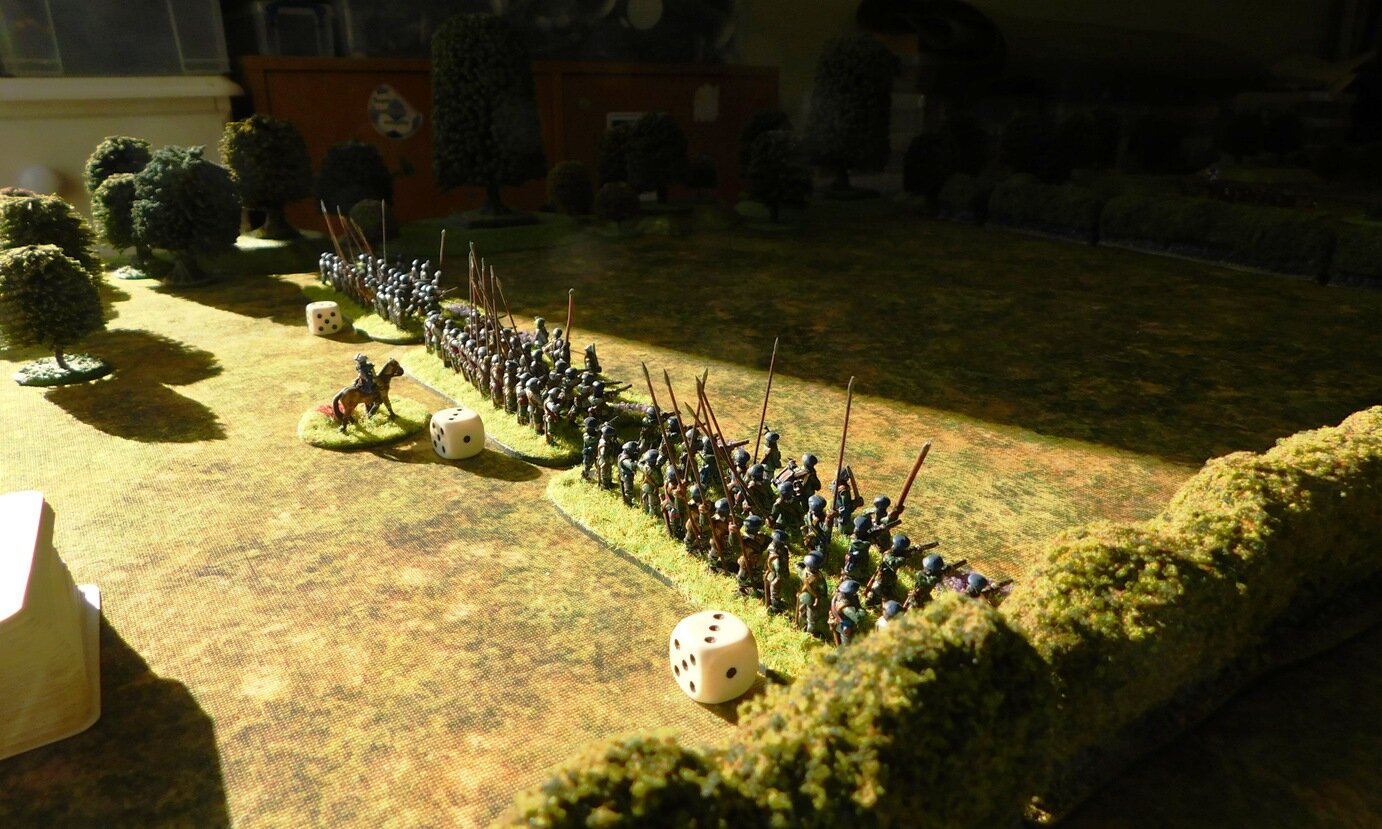
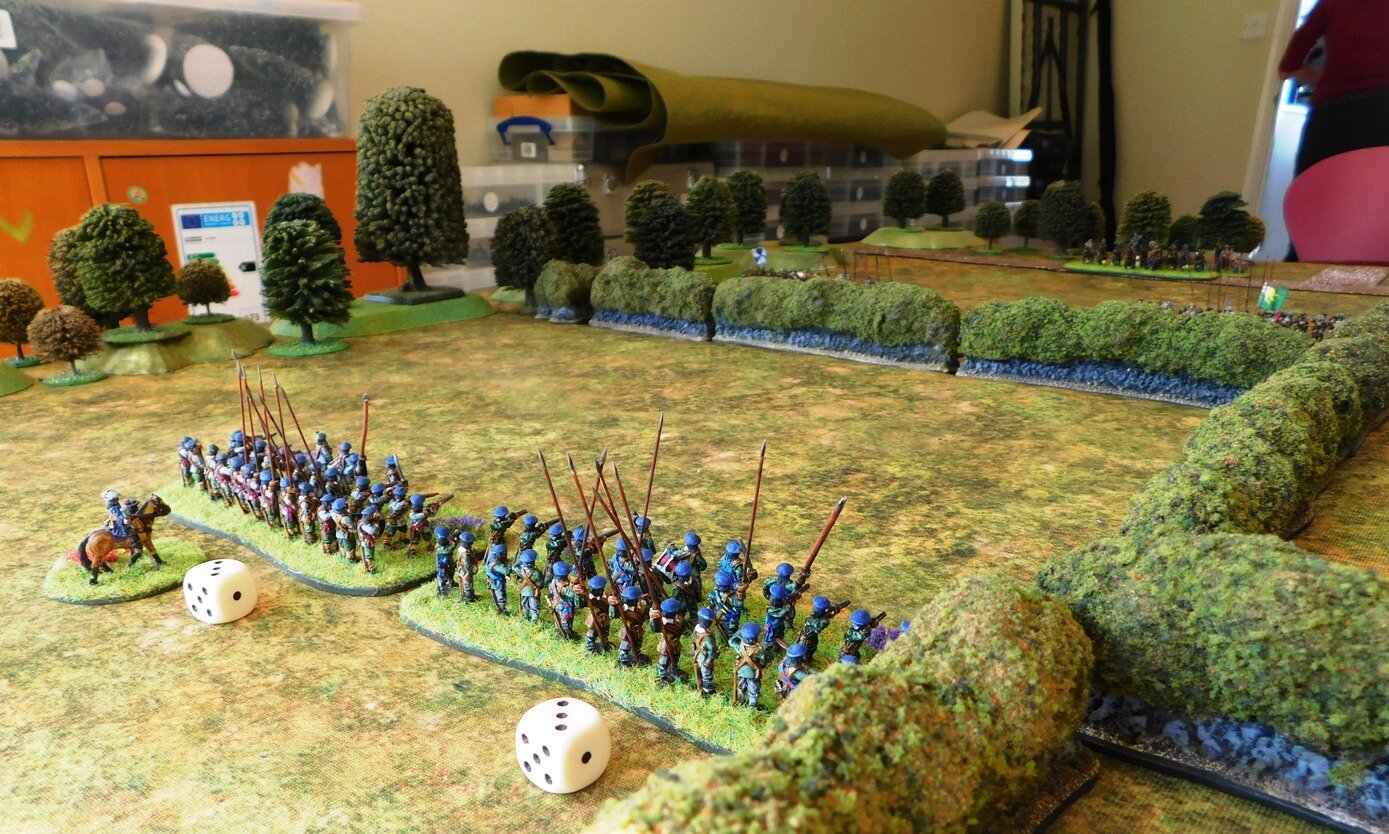
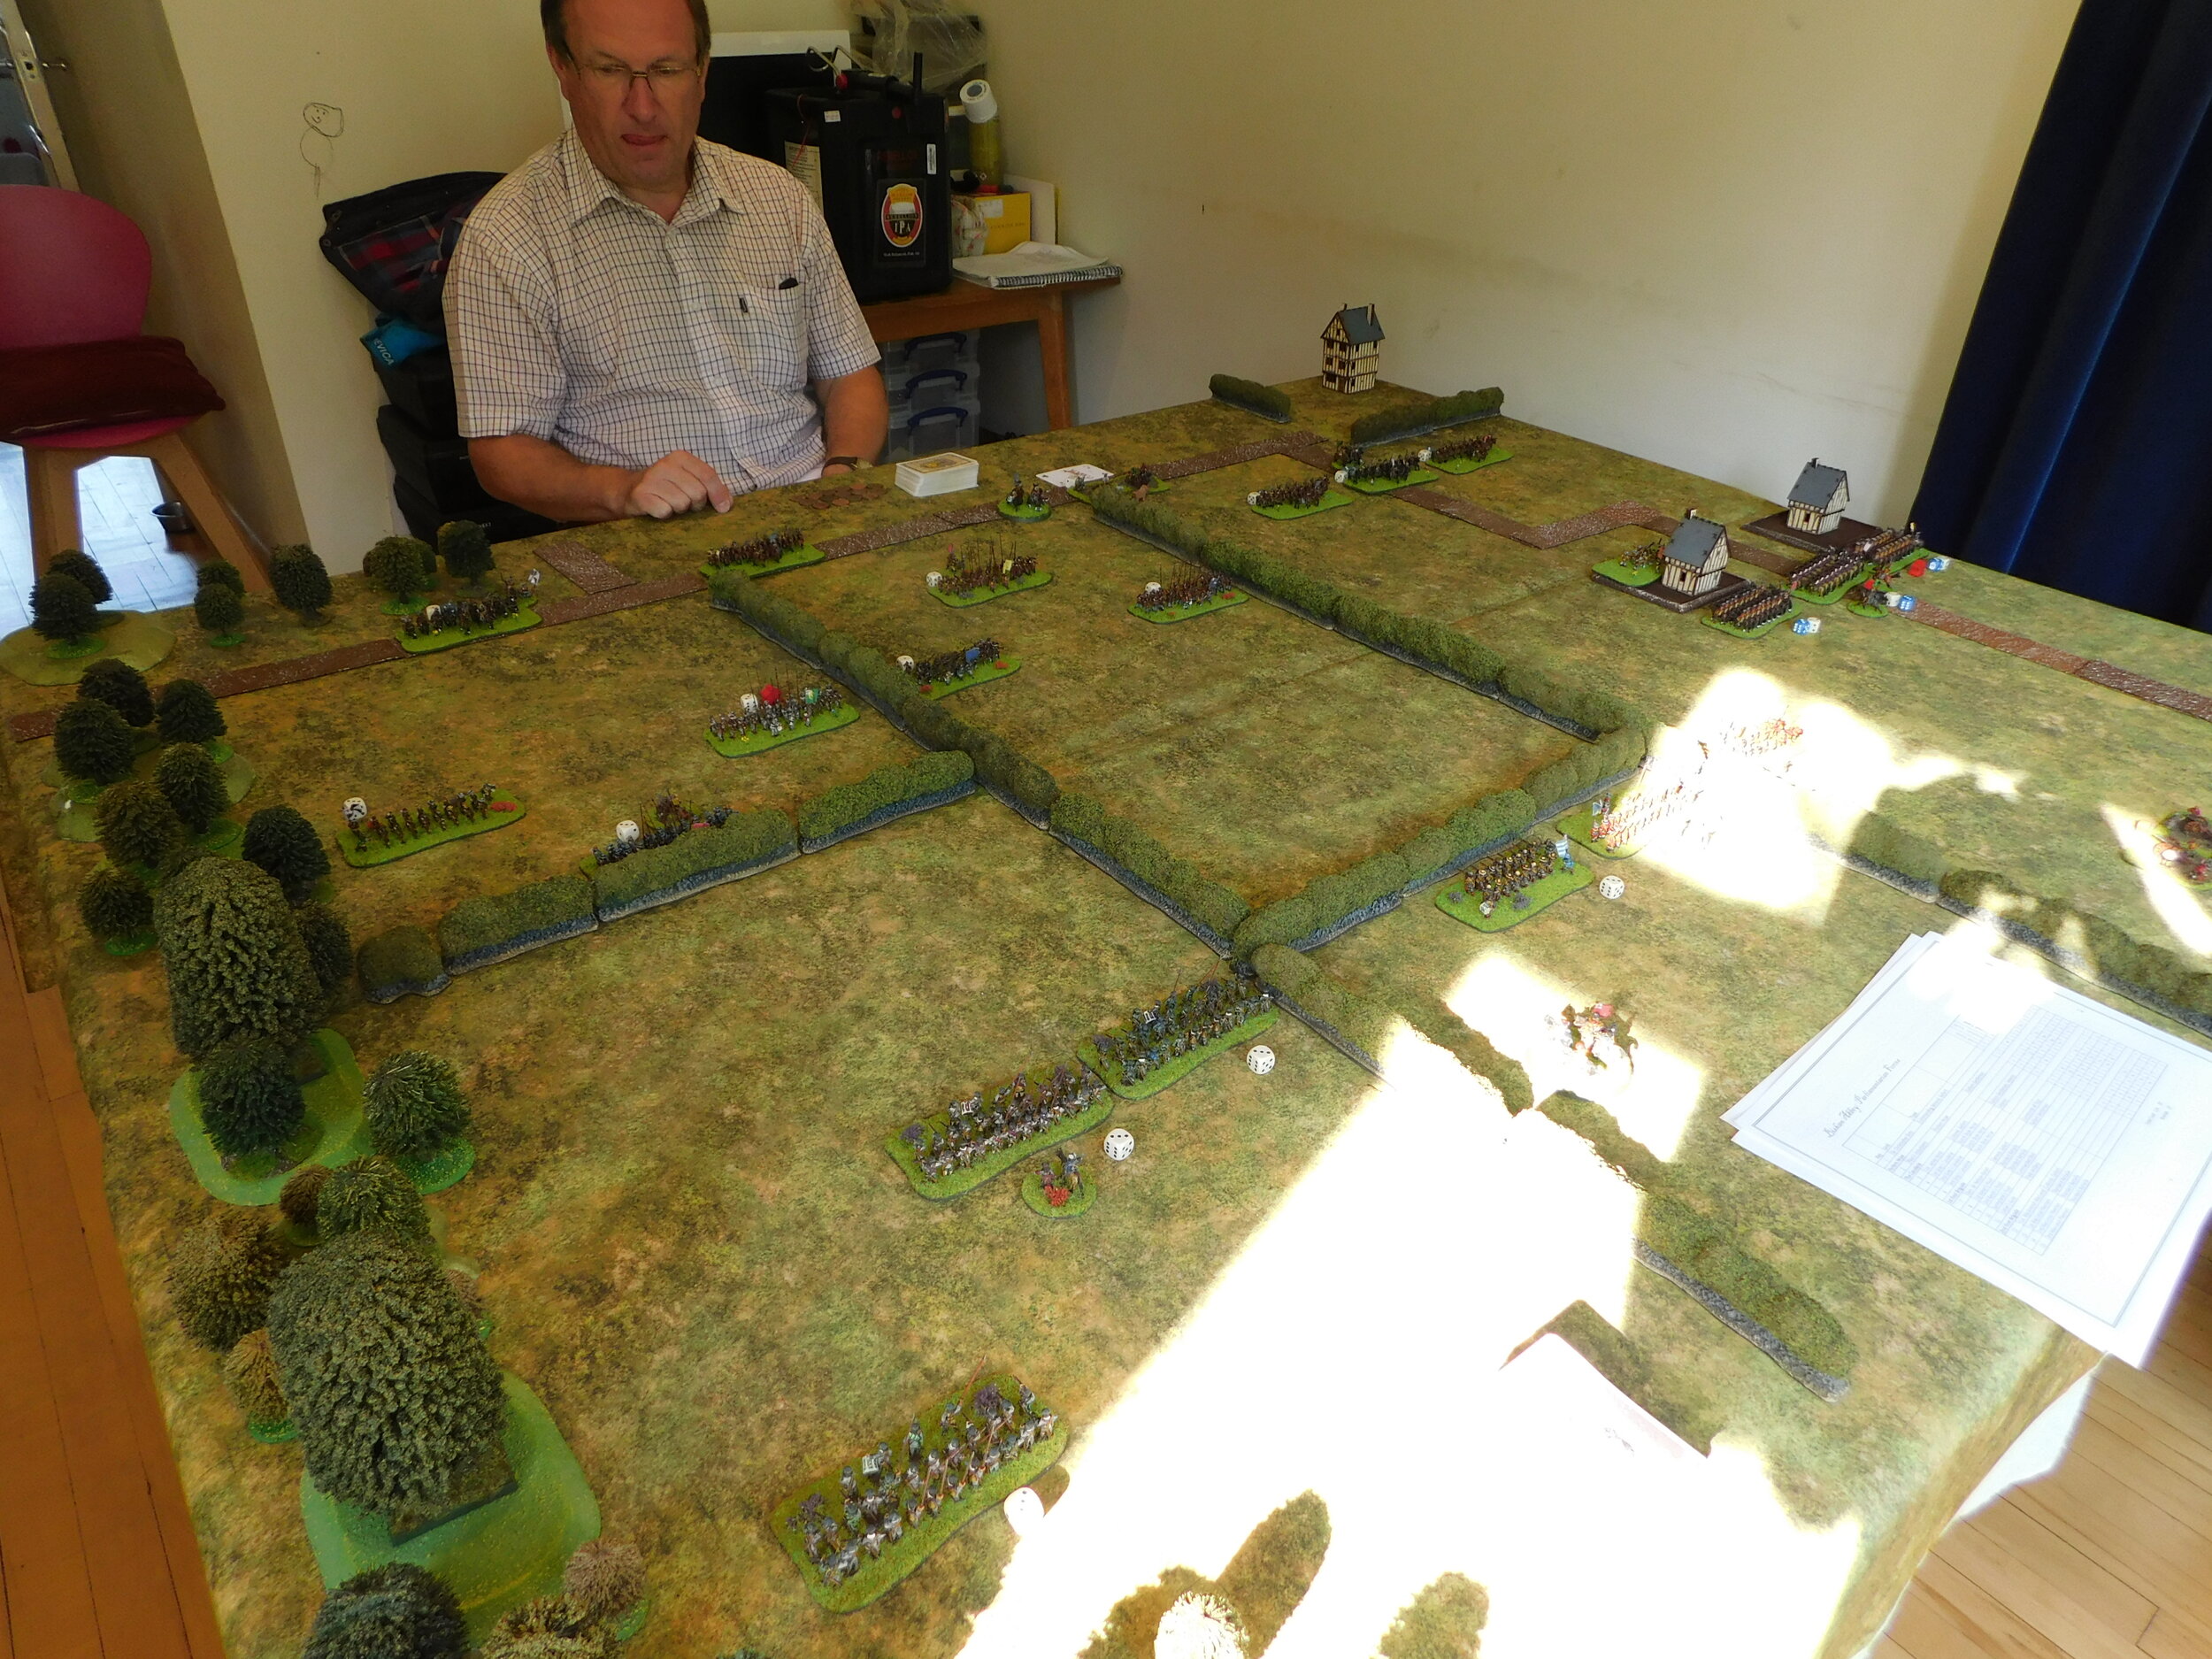
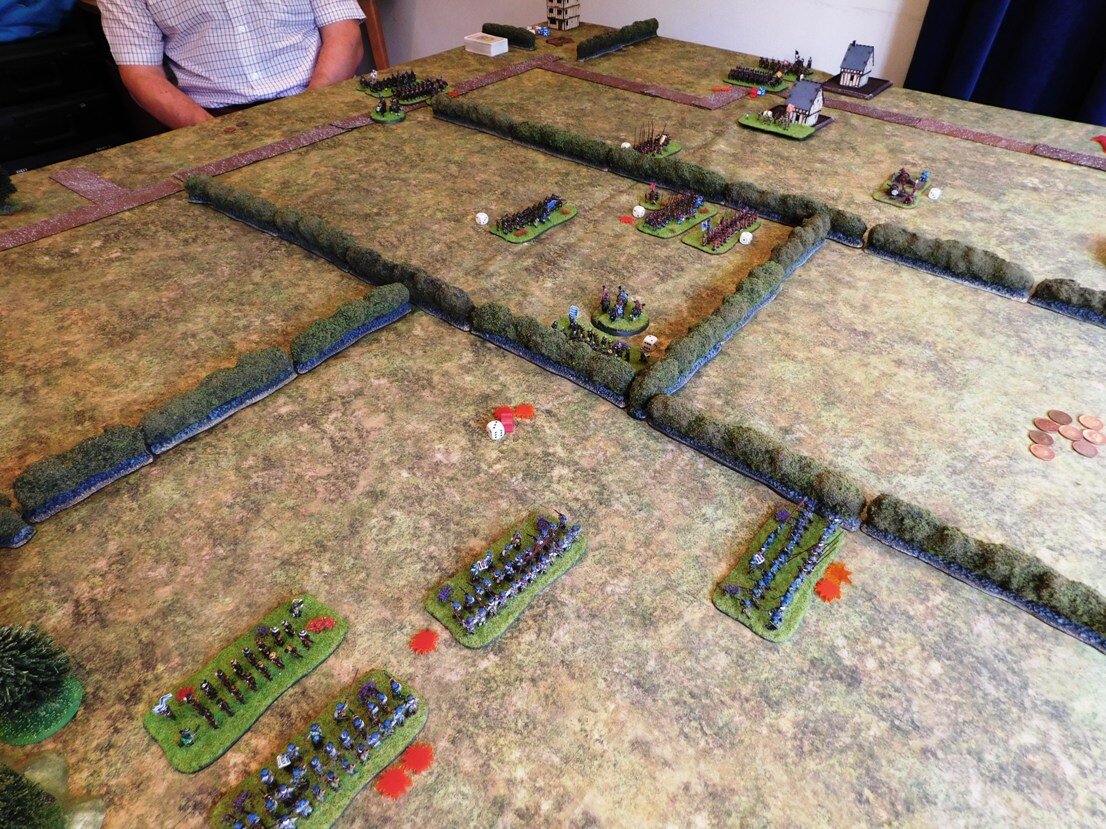
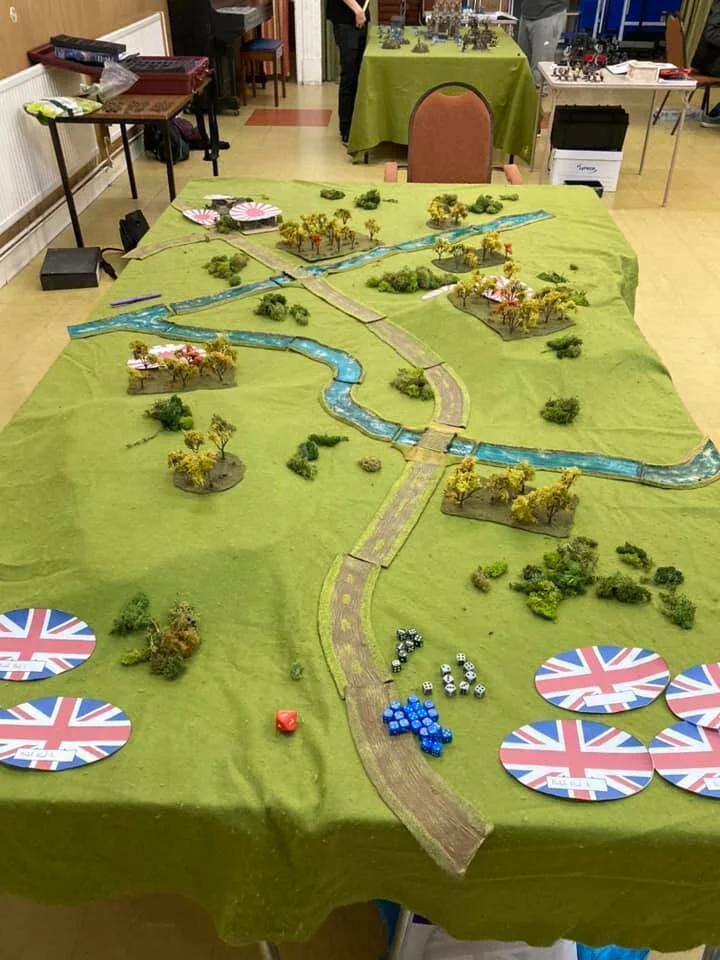
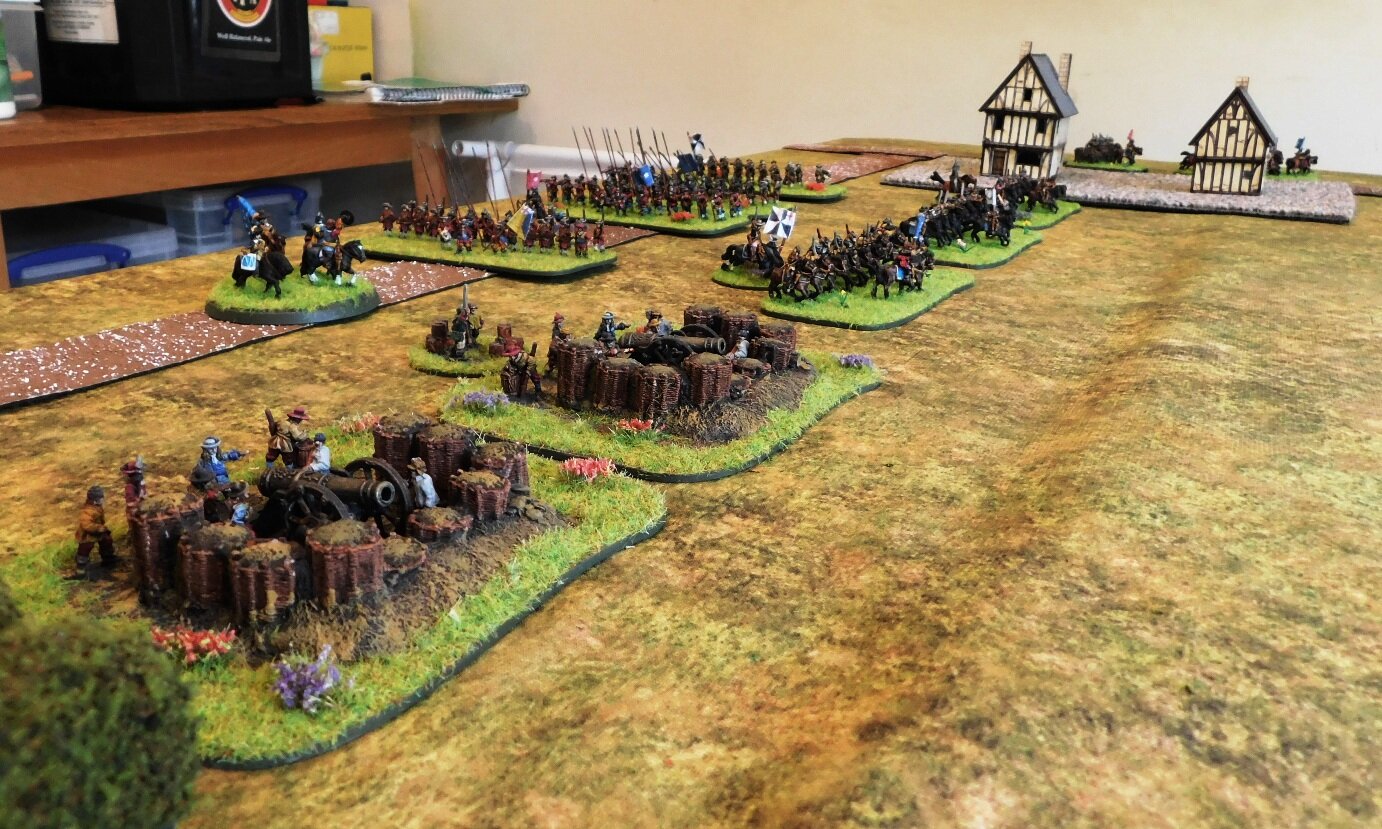
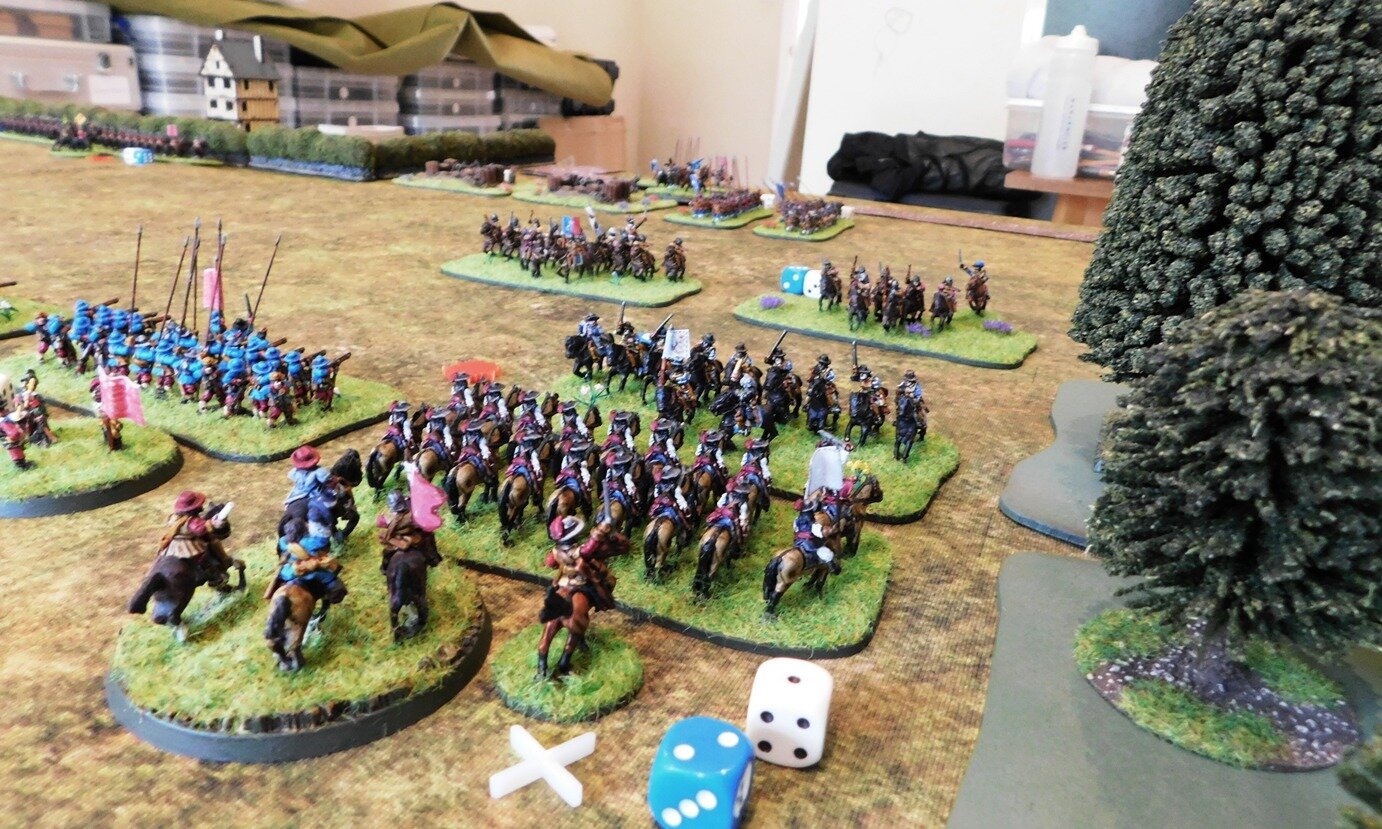
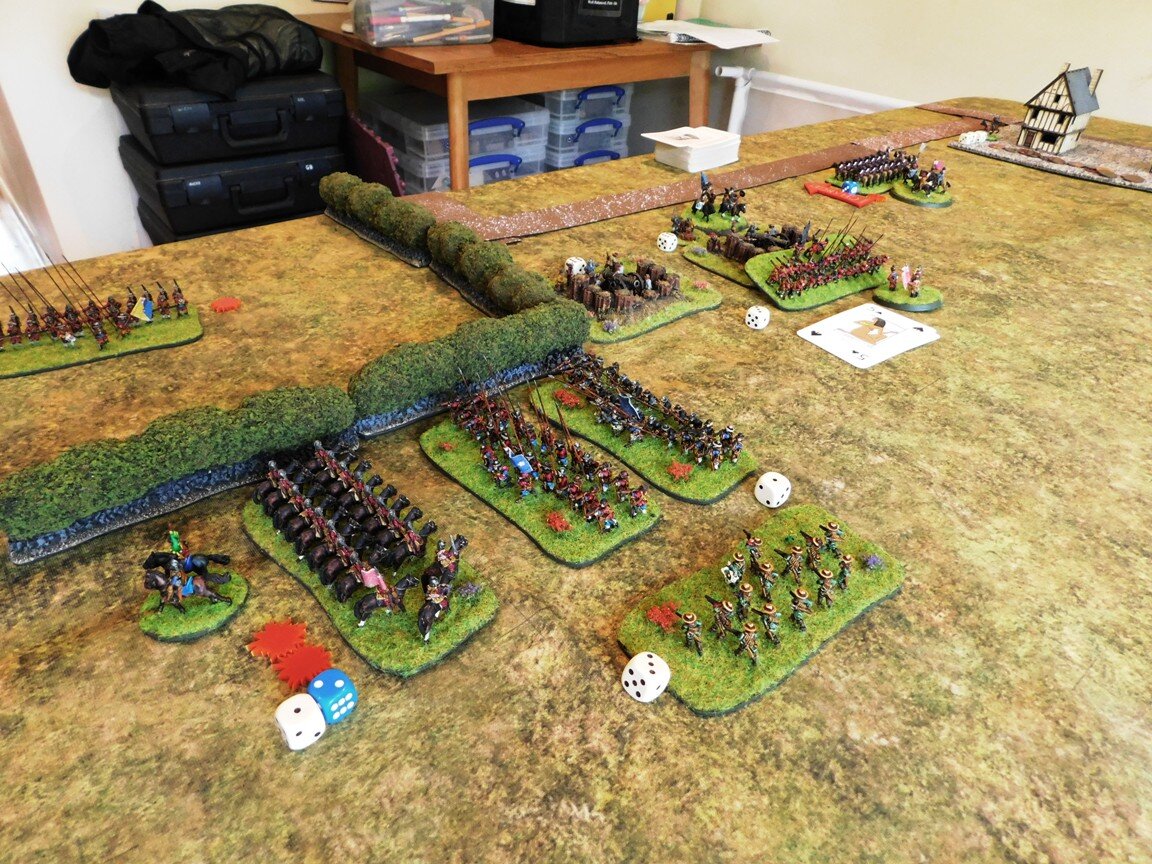
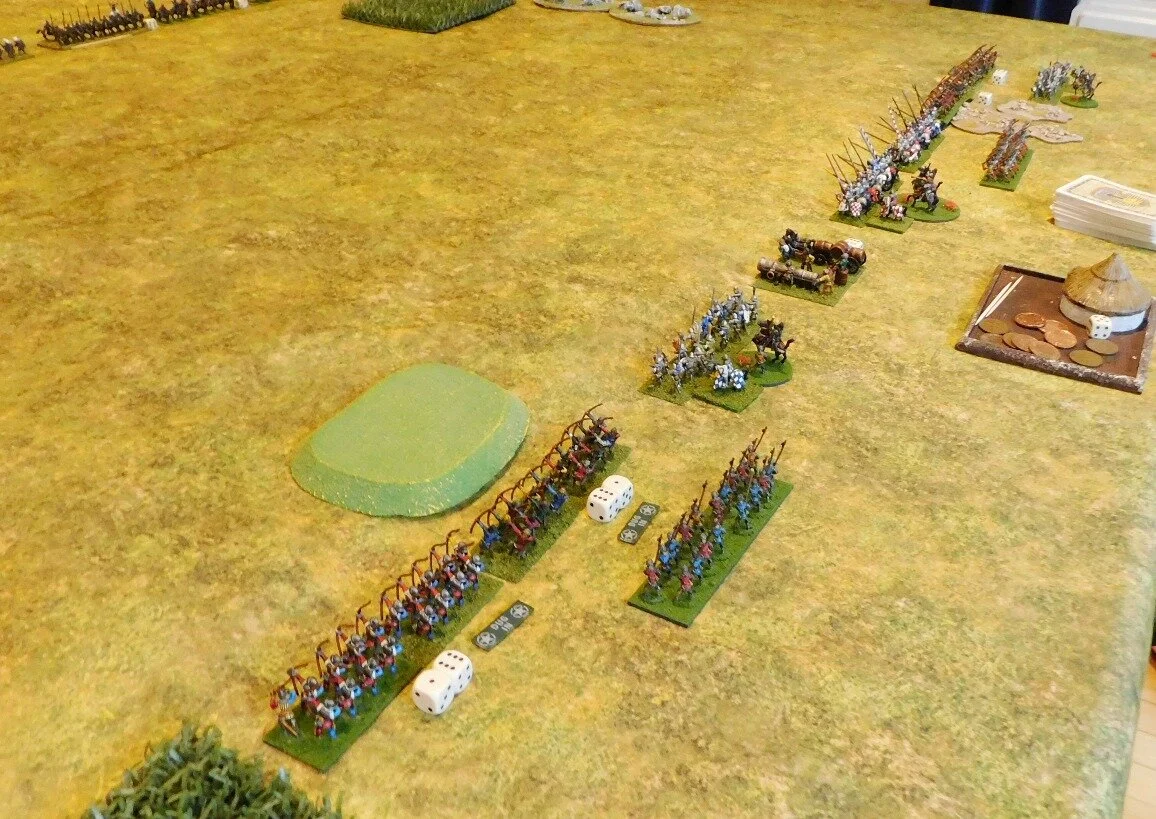
Initial Deployment

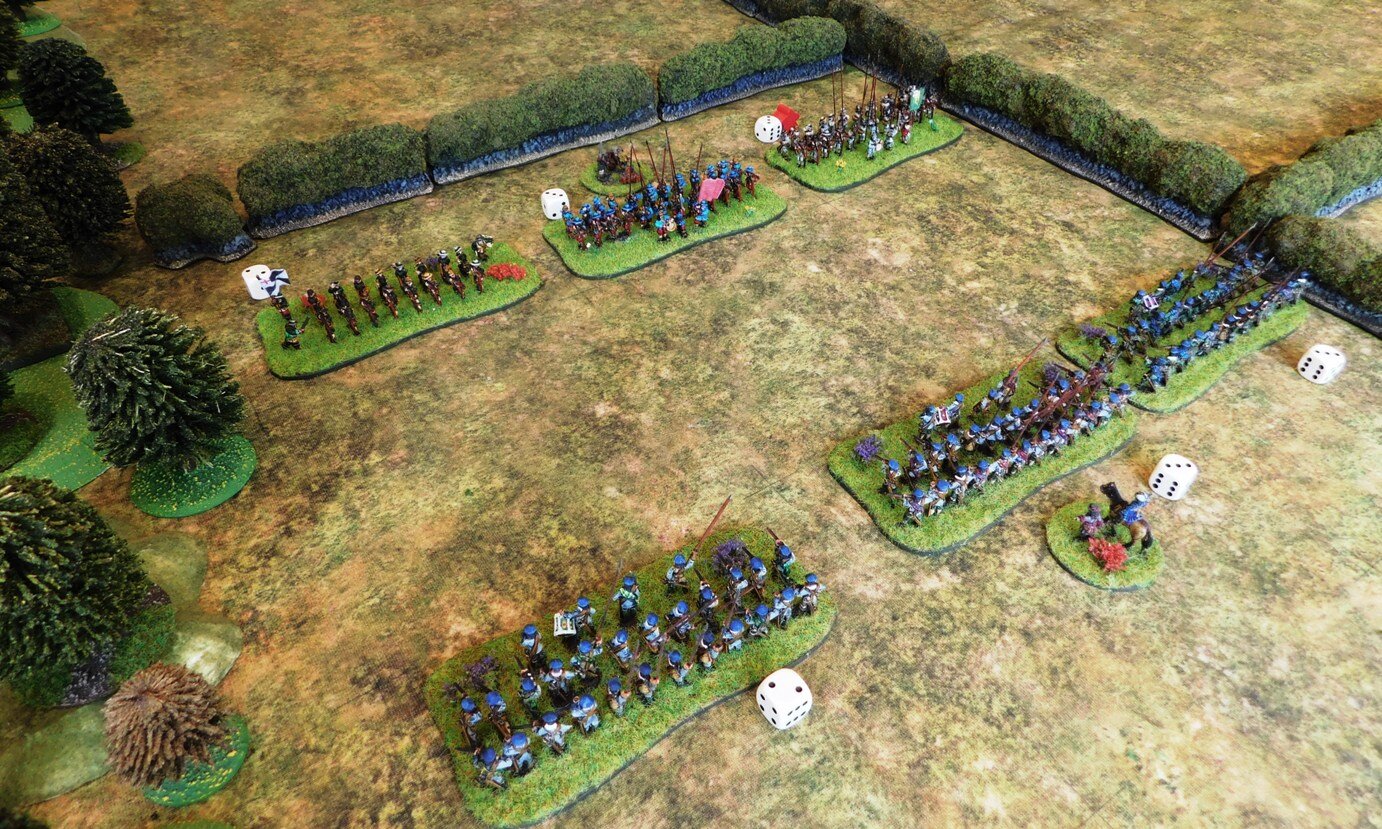
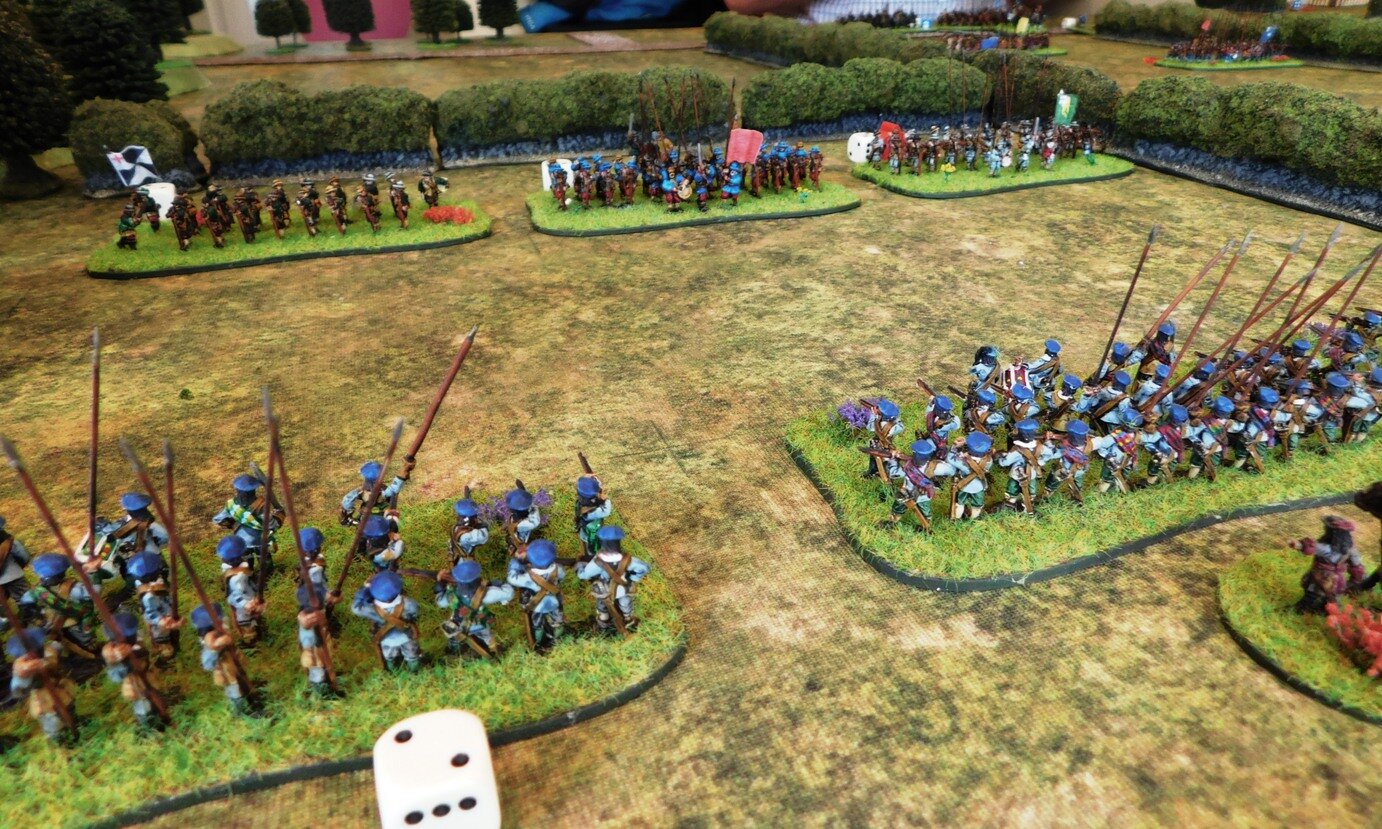
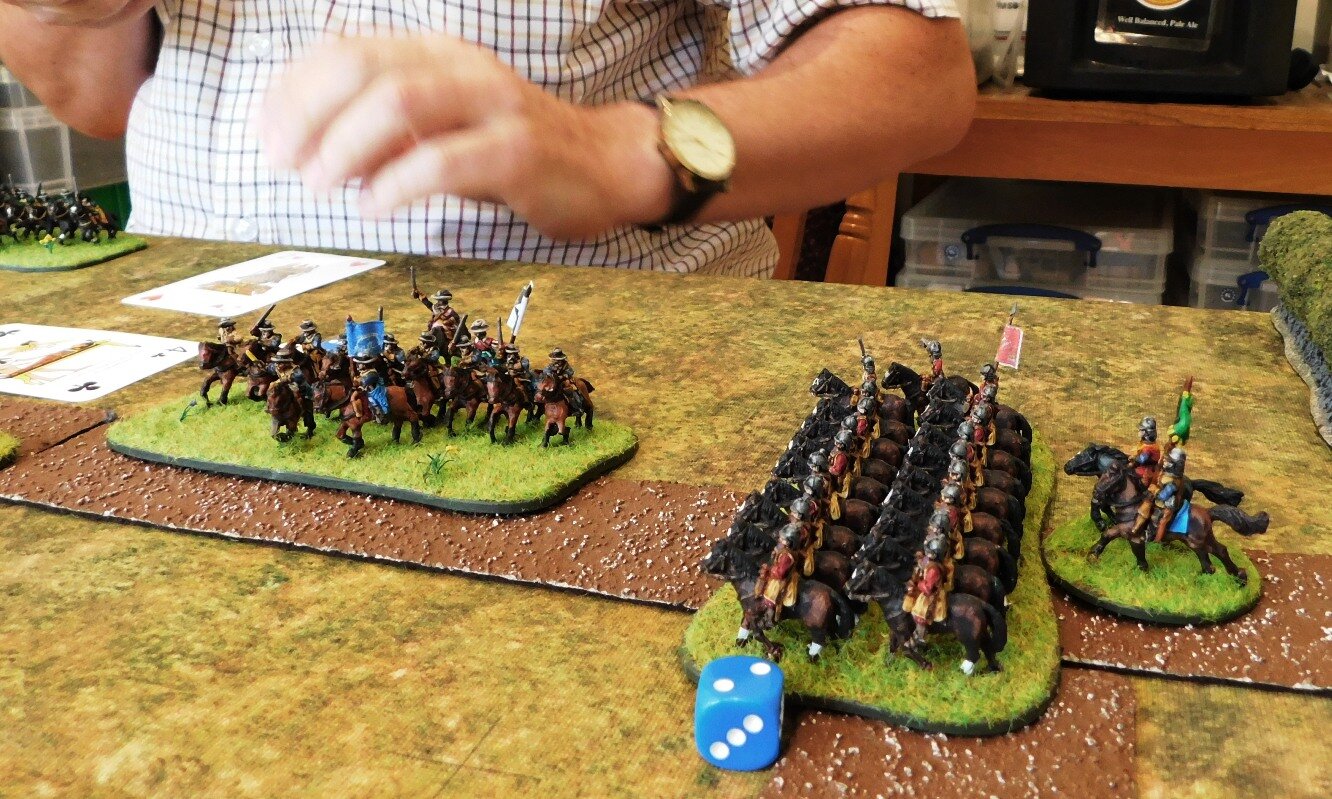
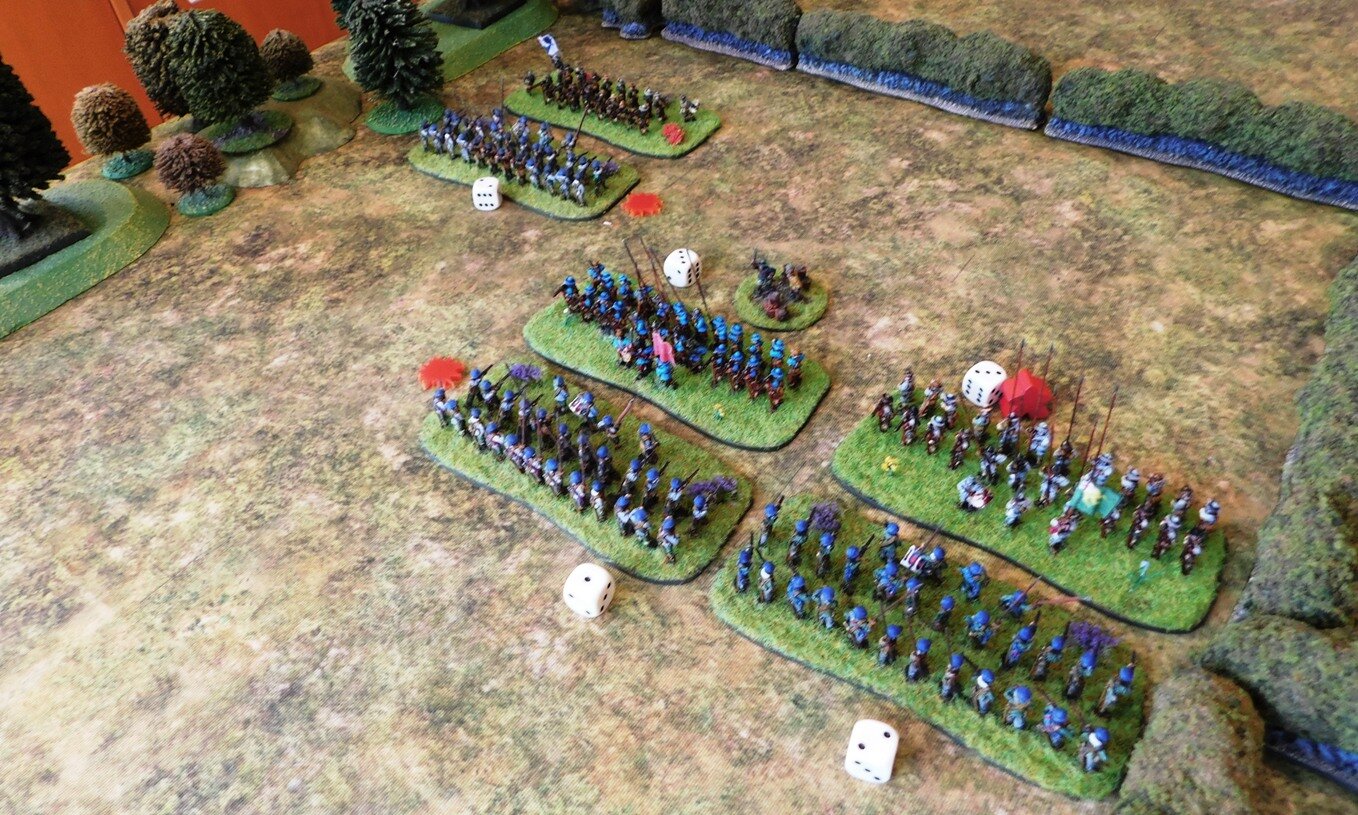
I deployed the Romans in a long line of Legionary bases, with the Gauls on the left wing.

The Roman Battle Line

A friend had warned me that being very much an infantry army, my flanks were very vulnerable, so although I felt my left was covered by the Gallic cavalry, I was very much aware that my right was somewhat ‘floating’, so just after the picture above was taken, I moved the legionary artillery onto the small hill behind the 9th/10th Cohorts.

Kavan also deployed in a long line but, obviously reading my mind, heavily weighted each flank i.e. his Gallic mercenaries were in the centre along with the bodyguard hoplites, but he had two hoplite units on his far right and one on his far left.

That’s an awful lot of syracusans

Battle is Joined

I opened proceedings by advancing slowly forward, holding my line. The Syracusan centre, on the other hand positively leapt forward. My Gallic cavalry annoyingly hung back, but this was countered by the fact thatb his right-flank hoplites were also slow to get going.

syracusan centre advances forward speedily

syracusan centre advances forward speedily

As the two centres approached each other, the action actually began on my right wing where, as predicted, the Syracusan cavalry attempted an outflanking manouevre, backed up by a unit of hoplites and some light infantry. The 9th/10th Cohorts turned to face them and the artillery opened fire.

The Syracusan cavalry were disposed of by the artillery (superb shooting!) and, for the rest of the game, the 9th/10th Cohorts would hold off the hoplites despite being attacked in their rear by more Syracusan light infantry. At one stage, the legionaries survived four consecutive rear attacks whilst disordering the hoplites in front of them. Plaudits and rewards all round!

cohorts IX and X hold the right flank against all comers

On the left wing, my Gallic cavalry were keeping the two enemy Hoplite units occupied, using their superior mobility to avoid a head-on clash and occasionally managing to threaten their flanks even if contact couldn’t be made. Two veteran cavalry units for two Hoplite units seemed a fair exchange to me, so it looked as if the action was going to be decided in the centre.

the two centres are about to clash

the two centres are about to clash

The legionaries and enemy Gallic mercenaries clashed first. I was expecting my pila to make a difference, but they didn’t really have much effect at all. The clash became a grinding melee where the quality of my legionaries was perfectly balanced by the size (and therefore extra hits) of the Gauls.

Slightly to the left of the above, my 1st/2nd and 3rd/4th Cohort unit were faced by two units of Syracusan light infantry. I just couldn’t get rid of these: every time I charged forward, they evaded, and I soon found my troops well in front of the rest of the centre. Kavan had done to me what I had done to his two Hoplite units on the far left!

cohorts I to IV distracted by light infantry

cohorts I to IV distracted by light infantry

Eventually, however, one of his light units were caught and disposed of, leaving my legionary unit to turn either for the enemy camp or back towards the centre to drive into the back of the enemy who were, bu now, hard pressing my men there.

the centres have now clashed!

I decided that the Roman thing to do was to go to the aid of the legion, so two cohorts of fresh Roman infantry drove into the back of the Celtic mercenaries, smashing them from the table.

This proved too much for the Syracusans, who had by now lost enough troops to force a retreat. It had been a narrow victory for the Marian Romans.

Aftermath

Lots of lessons learnt about the capabilities of the Marians. I was very pleasantly surprised by the effectiveness of the Roman artillery, although I do feel that that was down to the cards they turned rather than any innate ability. On the other hand, I was disappointed with the Roman pila: the extra attack card was useful, but not decisive.

What was without doubt the key to victory, however, was the manouevrability of the Roman cohorts along with their staying power, particularly the three veteran units. I foresee interesting times ahead, particularly as the next fight will be with the Sassanids.

IABSM AAR: Where's Wailley

Two of my regular wargaming opponents, Bevan and Dave, turned their guns on each other: playing a game based on the famous British counter-attack near Arras on 21st May 1940.

The British attack had already broken through the main road west from Arras – the N25 - and this was an attempt to close the other viable road west that Rommel would have to use to supply his over stretched tanks.  This road (the D3) runs through the village of Wailley just west of Arras, so the British mission was to take the village and block the road. The German brief was to keep the road open at all costs.

Unfortunately, Dave’s photographs of the game disappeared into the technological ether, so here’s a shot from one of Michael Curtis’ excellent Arras games. Click on it to read Dave’s report on his battle…

IABNM Moderns AAR: Breakthrough

Over the years, various people have adapted the TooFatLardies' company-level rules I Ain't Been Shot, Mum (WW2) and Charlie Don't Surf (Vietnam) for other, more modern periods.

One such adaptation, never officially published, was I Ain’t Been Nuked Mum. Here’s a battle report from 2015 taken from the now unfortunately moribund Maxim to Milan blog imagining action from the Cold War of the 1970’s.

The scenario sees a hastily assembled US force of a mechanised platoon, an anti-tank section and an armored cavalry section on a mission to stop a breakthrough by a Soviet company of T62s with a motor rifle platoon in BMPs attached. 

Click on the pic below to see all.

IABSM AAR: Take the Hills

Another great I Ain’t Been Shot, Mum battle report from the keyboard of Chris Lane, and taken from the IABSM Facebook Group.

Their game this time saw part two of what has now become their fall of Singapore campaign. In this battle, a full strength British company was tasked of taking two strategic hills while the Japanese (briefly) rested. The Japanese commander was tasked with holding the hills but with the option of taking a junction for a major victory.

Click on the picture below to see all…

FK&P AAR: Burchett's Green

I had a chance to get my new English Civil War siege gun bases onto the tabletop as I played out the latest scenario in my North Wessex campaign using the For King & Parliament campaign.

Both sides have withdrawn from the field of their last encounter at Pinkney’s Court, with the Royalists now looping round to try and outflank the Parliamentarians. As a desperate excuse to justify the use of siege artillery, the Royalists receive a couple of huge cannon as a gift from the King. Keen to try them out, they set them up across open fields and prepare to fire off a coupe of shots. As they do so, the Roundheads appear on the other side of the field and battle is joined.

Here’s what happened:

This was a tricky battle for the Royalists as they start the game in a very awkward position. In addition, their siege guns just couldn’t hit anything and, when they did, my units saved time and time again.

A workmanlike Parliamentarian victory.

IABSM AAR: Anzio #14: North of Carroceto

Lovely little battle report from Dan Albrecht and buddies, taken from the I Ain’t Been Shot, Mum Facebook page.

They used Scenario #14 from the Anzio: Wildcat to Whale scenario pack, North of Carroceto. The scenario focuses on the German attack on the Right Flank Company of the Scots Guards holding the area of Carroceto railway station during the late evening and night of 9th/10th February 1944.

What is particularly interesting about this game is that it features the use of a sand table, something that you rarely see these days. Click on the picture below to see all.

IABSM AAR: A Canadian VC Luther-Style!

Here’s another great battle report from Mark Luther, this time using the A Canadian VC scenario from the main I Ain’t Been Shot, Mum v3 rulebook. Mark played this game remotely with four players scattered around Atlanta area and in Florida.

The game is based on the August 19, 1944 Canadian advance into St Lambert where the Allies are trying to plug the Falaise Gap.

Click on the picture below to see all:

TTS AAR: Three Games One Sunday

Three great games of To The Strongest this Sunday, all Sassanid Persians versus 100YW English. I took the Sassanids for Game One, Kavan for Game Two, and then it was back to me playing the Sassanids in Game Three.

Henry V versus the Persians!

Henry V versus the Persians!

The results? I think it fair to say that the Sassanids did very well indeed, winning all three games! Those of you who are paying attention will have worked out that that meant that the day was two-one to me.

The first game was a glorious victory for both me and the Sassanids, but one largely caused by Kavan’s terrible cards! I used standard tactics: horse archers on the wings keeping his men there occupied whilst the heavy horse and elephants punched their way through the middle.

The escorted elephants punch a hole

The second game was a similar affair, but this time it was me on the receiving end. I knew what was coming, so managed to deal with the initial horse archer advance on my right wing with mass longbow fire. In the centre, I had massed my heavies opposite his, but lost two of my three generals in the first round of combat. This effectively stuffed me command-wise, and I got overlapped on the left by those gosh-darned light horsemen as I just couldn’t get the units I needed to activate into action regularly enough. As my left began to crumble, Kavan punched a hole in my centre which he then flooded with the rest of his heavies: the coup de grace coming as he took my camp.

The English camp falls…again!

With both of us now very familiar with the strengths and weaknesses of both friendly and enemy troops, the third game was a neck-and-neck affair which either of us could have won. Each side had one camp each, and both fell: mine to mounted men-at-arms that three units of horse archers just couldn’t stop in time; his to another heavy cavalry punch through the middle. I won in the end, but it was a very close run thing.

All in all, an excellent afternoon’s gaming.

The Sassanid Heavies roll forward


FK&P AAR: Pinkney's Court Again

I’ve now had a chance to play the Pinkney’s Court scenario another three times.

The first game, versus Bevan, was a complete disaster. The more nimble Swedish-style Royalist cavalry sliced and diced their Parliamentarian opponents, destroying all three units for the loss of only one of their own. That meant that I had to divert troops to shore up the position, leaving me short of infantry (and victory coins!) for the clash on the other flank. A crushing defeat!

The other two games, against Kavan, however, went much better. The first was a close run thing, but I eventually prevailed. The second was a glorious, overwhelming victory caused, I hasten to add, by the most amazing run of luck at the cards. In each of the initial three clashes, I hit three times out of five: not bad when you’re needing an 8+ on a 1-10 evens chance. Much like my men in the game described above, Kavan’s troops never really recovered.

Here are some pictures of the game I lost:

IABSM AAR: Virtual Lard 2

One of the things that has been going on during lockdown is a series of virtual Lardy Days where people who are not lucky enough to be able to push lead with a member of their “bubble” can game remotely.

Mike Whitaker ran a game of I Ain’t Been Shot, Mum at the recent Virtual Lard 2. Here’s a quick AAR of the action taken from his excellent blog Trouble At T’Mill. Click on the picture below to see all:

FK&P AAR: The Battle for Pinkney's Court

With Sir John Boulters seriously wounded as he led his Cuirassier bodyguard in a desperate, but ultimately futile, attempt to shore up his left flank at the battle of Widbrooke Common, his son, “Little John” Boulters, has taken command of Royalist forces around Maidenhythe.

This is not a moment too soon, as the Parliamentarians seek to take advantage of Sir John’s injury by striking for Pinkney’s Court, the manor house that sits on the edge of Pinkney’s Green, north-east of the town itself. Taking the manor will give them a fitting place from which to plan and direct the rest of their campaign.

The two sides will therefore fight it out at the Battle for Pinkney’s Court.

The Royalists (on the far side of the field, above) have positioned themselves around the court: infantry and gun in the centre and on the left, and most of their cavalry on the right.

The Roundheads have placed their strong Dutch horse contingent on the left, aiming to sweep across the open ground of the Green. Their infantry are on the right, and will need to cross fields in order to get at the opposition.

Both sides must defend their building. The Royalists lose three victory coins if the Court falls; the Parliamentarians have their train in the yards of the Golden Ball tavern, so will also lose three victory coins if the building top right is taken by the enemy.

Opening Moves

The action began with the cavalry on the Parliamentarian left wing. As the Roundhead Horse swept forward, one Squadron of Royalist horse headed left thinking to move up the road and take the enemy guns.

The Royalist commander (me!) had, however, misjudged things, and the right-hand unit of enemy Horse managed to get forward and charge them in the rear, smashing the Cavaliers from the field.

This success drove the Roundhead cavalry into a frenzy and, without thinking, they charged after the retreating Royalists, heading straight for the hedge behind which one of the Cookham Militia battalia waited.

This proved a foolish thing to do, and they were sent crashing backwards, and would spend the rest of the game lurking in the woods trying desperately to rally.

In the meantime, the rest of the Royalist horse would take advantage of their superior number of units and defeat the rest of the Parliamentarian cavalry. This wasn’t enough to break the whole Roundhead army so, as the Royalist horse promptly disappeared off table in pursuit, the game would be decided by the infantry.

The Other Side of the Field

The Roundheads advanced smartly up the field, but let one of their battalia get too far forward and become an isolated target for what little Royalist cavalry had been put on this flank.

I was sure that my two units of horse could take the Parliamentarian battalia: one to pin from the front, the other to hit if from the side.

Unfortunately, the rebels were made of stronger stuff than I had expected, and I ended up losing both units of horse to fire and melee. In particular, the Roundhead Gallant Gentleman (in blue on the front of the pike unit’s base) intervened at a crucial moment: the extra hit being just enough to finish me off.

Not a good start!

The main lines then clashed, but it was going to take something fairly miraculous to save the day now: I was outnumbered five battalia to two!

Miracles were in short supply on the Royalist side, so although my lone pike block lasted far longer than anyone expected, the Oxfordshire commanded shot were soon sent flying backwards, which was enough to finish the game in the Roundhead’s favour.

Aftermath

This was the narrowest of defeats. For about two turns, whoever lost the next unit would lose the game: my outnumbered infantry balanced by the lost Roundhead cavalry.

Another great game of For King & Parliament

Robert Avery

TTS AAR: Assyrians and Egyptians Clash Twice

With lockdown restrictions easing, I was able to get in a couple of games of To The Strongest, with the width of the wargames table operating as an automatic social distancing device.

Friend Bevan and I decided to use the Egyptians and Assyrians: we’d have two games, keeping the terrain constant, swapping sides for the second game.

We opened with me commanding the Assyrians.

The Assyrian cavalry was massed on the right wing

I deployed in very much a traditional way: infantry in the centre, mounted troops on the wings. Wary of all the Egyptian light chariot units, my plan was to keep my line very much together and advance just into bowshot as one entity, aiming to concentrate fire from several units on any Egyptian lights that came into range and relying on the fact that one kill would knock one out.

The Egyptians massed all their chariots on their left wing, spreading their infantry across the battlefield from there. One thing I did immediately notice was that there were an awful lot of Egyptians on the table: a consequence of my smaller numbers of heavier, more veteran troops.

As the game began, the Egyptian chariots in front of my left wing faltered: apparently refusing to move until some bizarre religious rite had been fulfilled. This allowed me to advance forward so the flank of my line was protected by a piece of impassable ground.

The Egyptian chariots say “no”!

Eventually they did start to move forward. Well, some of them did. Bevan’s Guard Chariots turned smartly to their left and attempted the old switcheroo: heading for the other side of the battlefield. Although sometimes a successful ploy, this time it wasn’t. All that happened was that his elite troops spent the entire game shifting from right to left and never saw any action at all!

“Why not?” I hear you cry, “It can’t have taken that long to traverse the field!”. Correct, but in the meantime his other chariots had moved forward piecemeal and, as I had hoped, I was able to wipe them out with bowfire one by one. This left the Egyptian right wing hanging, with my veteran heavy chariots ready to pounce like the wolf upon the fold, to use an apt analogy. Bevan ordered a general retreat before this could happen!

The situation just before the end. Imagine the Egyptian chariots you can see at the top of the picture are no more, and my heavy chariots have swung round to flank the Egyptian line. The other Egyptian chariots are out of shot off to the right somewhere.

Game Two

For game two, I took the Egyptians. I deployed my chariots in a long line across the centre of the battlefield with my infantry in columns on either side. My plan was to advance together, shoot the enemy with my bows, and then have the infantry curl in from either side as he chased my evading light chariots.

Lure them into the centre, curl in from the sides.

What can I say except for the fact that it almost worked!

This was a terrific game that went on right to the point where both sides had only three victory coins left each. Both sides lost their camps, and both sides had many chances to finally polish the enemy off. In the end, Bevan gained the advantage, finishing me off by killing my last chariot unit with general attached.

My deployment was good, but I didn’t quite manage the infantry-curl-rounds correctly, being a little late on both sides i.e. I’d use this tactic again, but get the infantry into action a bit sooner.

Brilliant game, though!

Pharoah and the Shardana Royal Guard go into action

Robert Avery

FK&P AAR: Widbrooke Common Replayed

I had a chance to re-play the Widbrooke Common ECW scenario using For King & Parliament. I posted a long AAR from the first game so will limit myself to describing a couple of highlights this time.

wid1.JPG

For those who haven’t read the first report, the battle involves a Parliamentarian force emerging from a road through hedges to engage a Royalist force waiting for them on the other side of the eponymous common.

The game played in quite a similar way to last time, with both sides’ cavalry on the Parliamentarian right flank (i.e. right side in the picture above) coming together a few turns before the infantry met in the centre.

Once again, the Parliamentarian Dutch horse won the encounter overall, but lost a unit to pursuit. The other, however, crashed in to the left side of the Royalist infantry line in what turned out to be the coup de grace.

One unit of Royalist cavalry did break through, and went on to wipe out the Parliamentarian dragoons despite the fact that the latter were in cover behind a sizeable hedge. The Cavaliers then also disappeared off the battlefield: again showing how effective cavalry are in FK&P…but only once!

Another interesting incident was the way that the Royalist cavalry managed to bottle up the Parliamentarian reinforcements in a field. Ultimately, it didn’t have any effect on the result of the battle, but interesting anyway.

So another Parliamentarian victory, and it’s on to the battle for Pinkney’s Court next time.

IABSM AAR: Ost Front 1944

Another great little game from Julian Whippy and friends, taken from the IABSM Facebook Group.

Its the Eastern Front in 1944. The Bagramyans drive to the coast of Lithuania with 5th Guards Tank Army, colliding with Gross Deutschland and 551 Volksgrenadiers. The Russians had to clear the railway station and blow up the railway line with engineers before a train arrived in Turn 10.

Click on the pic below to see all.